
Using the UPS Labels plugin you can easily add the UPS shipments for all the orders in your shop, even the ones placed before the plugin installation, no matter what kind of shipping method was originally selected during the purchase.
Adding UPS shipping to the order
Once you reach the Order details page you want to create the UPS shipment for, spot the Add shipping box located in the right sidebar:
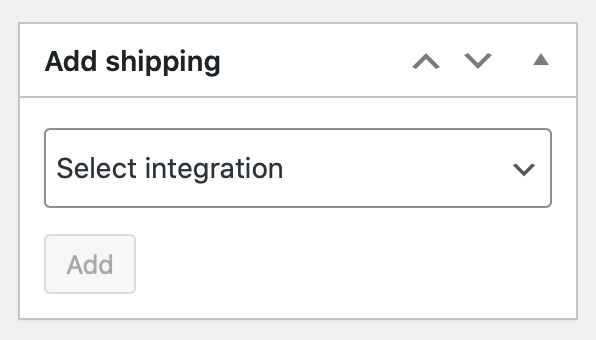
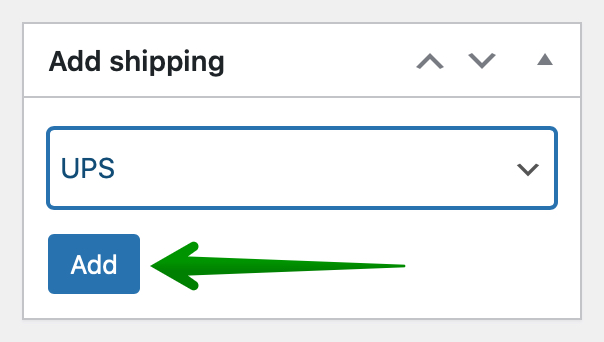
From the Select integration dropdown list pick the UPS option and hit the Add button:
The following UPS metabox will appear below:
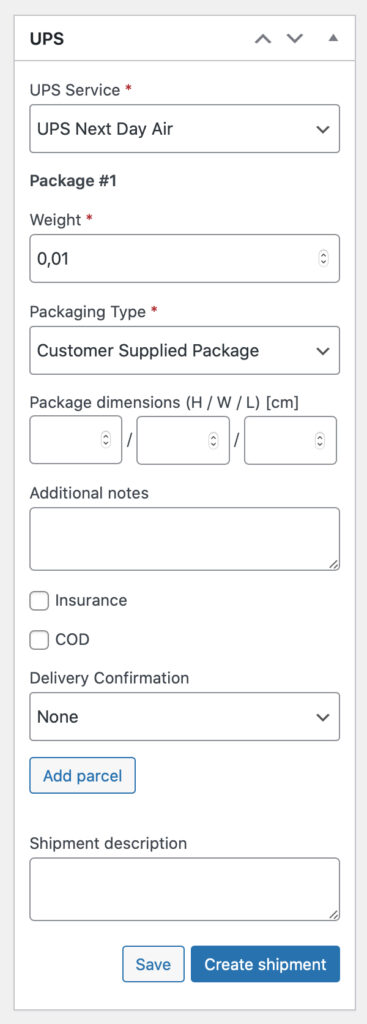
UPS Service
– select the service to be used for shipping the ordered products from the available UPS services below:
- UPS Next Day Air
- UPS 2nd Day Air
- UPS Ground
- UPS Worldwide Express
- UPS Worldwide Expedited
- UPS Standard
- UPS 3 Day Select
- UPS Next Day Air Saver
- UPS Next Day Air Early
- UPS Worldwide Express Plus
- UPS Second Day Air AM
- UPS Saver
- UPS Worldwide Express Freight Midday
- UPS Express 12:00
- UPS Today Standard
- UPS Today Dedicated Courrier
- UPS Today Express
- UPS Today Express Saver
- UPS Wordlwide Express Freight
- UPS Sure Post
Please mind that not all of the UPS services listed above may be available for selected areas. Their availability between the sender’s and recipient’s addresses is verified the same time the Create shipment button is hit.
If the selected UPS service is unavailable for the entered delivery destination, the proper notice will appear at the bottom of the metabox after using the Create shipment button. In such case, please select another available UPS service from the dropdown list instead.
Weight
– enter the package weight.
Packaging Type
– select the packaging you wish to be used for shipping from the available below:
- Customer Supplied Package
- UPS Letter
- Tube
- Express Box
- 25KG Box
- 10KG Box
Package dimensions (H / W / L)
– fill in the Height / Width / Length fields with the package dimensions. These fields are visible only if the Customer Supplied Package was previously selected as the used Packaging Type.
Additional notes
– fill it in with the additional information to be printed on the shipping label, e.g. extra instructions for delivery man.
Insurance
– use this option to add an insurance for the shipped parcel. If selected, the following Insurance Amount field will appear below:
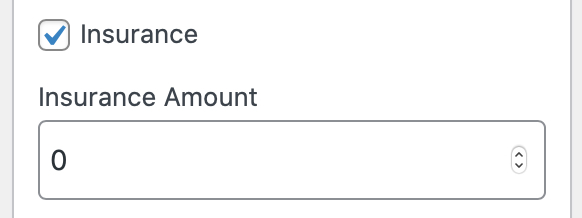
Please mind that in order to create the shipment the Insurance Amount has to be at least equal to Order total or higher.
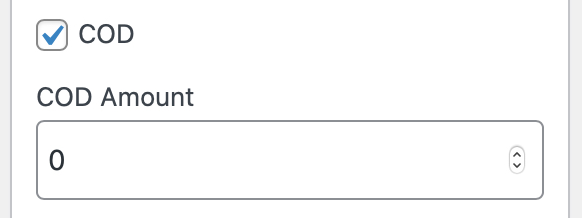
COD
– tick this checkbox to enable the Cash on Delivery additional service for the shipped parcel. If selected, the following COD Amount field will appear below:
Delivery Confirmation
– select the apropiate option below if you want to use the additional UPS Delivery Confirmation service for this parcel:
- None
- Signature Required
- Adult Signature Required
Add parcel
– use this button to create an additional parcel for the order.
Shipment description
– enter an individual shipment description for a quick, at-a-glance reference e.g. fill it in with the information about what the parcel or parcels contain.
EU import customs data and product identifiers
rom version 3.4.0, UPS Labels supports product customs data and product identifiers (PIDs) for shipments entering the European Union from outside the EU. An OAuth — REST API connection is required.
The EU import customs data section appears in the order’s UPS shipment box when your store’s base country is outside the EU and the order’s shipping destination is in the EU.
When product identifiers are required
According to the UPS Product Identifier Requirements Guide, PID requirements apply to B2C sales entering the EU, regardless of shipment value. UPS specifies 25 October 2026 for the Ship API requirements and 1 November 2026 for EU enforcement.
In UPS Labels, Merchant PID and Manufacturer PID are required for each non-exempt product when all of the following apply:
- The shipment is sent from outside the EU to an EU destination.
- Sender type is Business.
- Receiver type is Private individual.
- Reason for export is Sale.
Provide the Standardised PID, such as EAN, UPC or GTIN, whenever the product has one. It does not replace the Manufacturer PID.
Business-to-business shipments and shipments with other export reasons do not trigger mandatory PID validation. Other required customs data must still be completed for shipments entering the EU.
UPS Labels 3.4.0 checks required data whenever you create a shipment, whether manually or automatically. Missing data blocks label creation immediately.
Check the customs data before creating a label
- Open the order and find its UPS shipment box.
- Open EU import customs data.
- Check Sender type, Receiver type and Reason for export. The default export reason is Sale. Other available reasons are Gift, Sample, Return, Repair and Intercompany transfer.
- Expand each product and check the fields described below.
- Correct any missing or inaccurate values and check which quantities belong to this shipment.
- Use Save to save the shipment data. When the data is complete, use Create shipment to create the label.
| Field | What to enter or check |
|---|---|
| Customs description | A clear description of the goods, up to 105 characters. The initial value is the order item name. |
| Quantity in this shipment (0 to exclude) | The number of units included in this shipment. Use a whole number no greater than the quantity of that order item. Set it to 0 to exclude the item. |
| Unit value in the order currency | A positive value per unit, in the order’s currency. Use a decimal point. The initial value is the order item’s total after discounts, excluding tax, divided by its ordered quantity. Check that it is correct for your customs declaration. |
| HS code | The applicable tariff code, containing 6–15 digits without spaces or punctuation. |
| Country of origin (two-letter code) | A valid two-letter country code, such as CN or GB. |
| Merchant PID (SKU) | The seller’s product identifier, initially taken from the product or variation SKU. |
| Manufacturer PID (MPN) | The manufacturer’s product identifier, initially taken from the selected MPN attribute. |
| Standardised PID (EAN/UPC/GTIN) | The product’s standard identifier, if one exists, initially taken from its native WooCommerce global unique identifier field. |
Each PID value can contain up to 100 characters.
Changes made in this section apply to the individual shipment. They do not update your product catalogue. Update the product data and customs settings separately if you want to change the defaults for future shipments.
If an order has several shipments, check the products and quantities in each one. Setting a quantity to 0 excludes that item from the current shipment. A shipment must contain between 1 and 100 active customs product lines.
Product-level PID exemptions
The This product qualifies for a UPS PID exemption checkbox applies to one product line and is unchecked by default.
UPS lists eligible categories including unprocessed agricultural and perishable goods, handmade and artisan goods, and antiques, collectibles, art, stamps and coins. Eligibility depends on the goods and their tariff classification. Check the UPS guide, page 5, before selecting this option.
For a product marked as exempt, the plugin does not require Merchant PID or Manufacturer PID. The other required customs fields must still be completed.
A shipment can contain both exempt and non-exempt products. Select the checkbox only for each eligible product; one exempt product does not exempt the rest of the shipment.
Save
– hit this button to save the entered shipment data but without sending it to UPS.
Create shipment
– use this button to create the shipment and send its data to UPS shipping systems.
For shipments entering the EU from outside the EU, the plugin checks the customs data before sending the shipment creation request to UPS. If required data is missing or invalid, the label is not created. Correct the fields listed in the message and try again. See Customs data and PID validation errors below for details.
Please mind that if your customer picked the dedicated UPS Flat Rate shipping method, a Flexible Shipping shipping method with the UPS integration selected or a shipping method coming from our UPS Live Rates and Access Points PRO or free plugin while placing an order, the UPS shipment metabox will be added automatically and its fields described above will be auto-filled with the proper data.
Once the Create shipment button was used and shipment was created the UPS metabox will be grayed out, the tracking link will appear at the bottom and you will be able to download the shipping label:
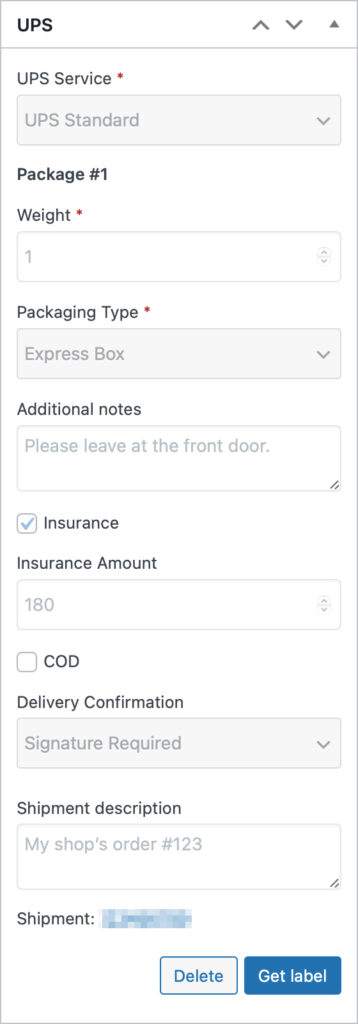
The shipment data will be sent to the UPS systems and the shipment you’ve just created will be visible at ups.com Shipping tab after logging in to your account.
Please mind that by using the Add shipping box or by hitting the Add parcel button in the existing UPS metabox you can add as many UPS packages to the order as you need.
Customs data and PID validation errors
If customs data is missing or invalid, UPS Labels stops label creation before sending the shipment creation request to UPS. This applies to both manual and automatic creation.
For product-related errors, the message identifies the product name, the order item ID and the fields to correct. The order item ID identifies the line in the order, rather than the product ID in your catalogue.
| Field or message | How to resolve it |
|---|---|
| Merchant PID | Enter the SKU on the correct product or variation, or enter the Merchant PID directly in the shipment. |
| Manufacturer PID | Complete the selected MPN attribute, or enter the Manufacturer PID directly in the shipment. An EAN, UPC or GTIN does not replace a missing MPN. |
| Merchant PID, Manufacturer PID or Standardised PID is too long | Shorten the value to no more than 100 characters. The limit applies separately to each identifier. |
| description | Enter a non-empty customs description of up to 105 characters. |
| quantity | Enter a positive whole number no greater than the order item’s quantity. Use 0 to exclude the item from this shipment. |
| unit value | Enter a positive value using a decimal point. An included customs product line cannot have a value of 0. |
| HS code | Enter 6–15 digits without spaces or punctuation. |
| country of origin | Enter a valid two-letter country code, such as CN or GB. |
| Select whether the sender and receiver are businesses or private individuals. | Choose the correct Sender type and Receiver type in the shipment. |
| Select a reason for export. | Choose the appropriate Reason for export. |
| Select between 1 and 100 customs product lines. | Include at least one and no more than 100 product lines. Set the quantity to 0 for items not included in this shipment. |
| EU import customs data requires the UPS REST API connection. | Configure an OAuth — REST API connection in the UPS Labels settings. |
Open EU import customs data in the order’s UPS shipment box, correct the listed fields, save the data and try creating the shipment again.
If you have already saved customs values in the shipment, check and correct them there. Updating the product catalogue alone does not overwrite the values already saved in that shipment.
For repeated errors during automatic creation, also review the default receiver type and product attributes in WooCommerce → Settings → Shipping → UPS Labels.