Get the plugin
Plugin general settings
You can reach the plugin General settings by choosing the WooCommerce → Settings → Shipping → UPS Labels from the sidebar.
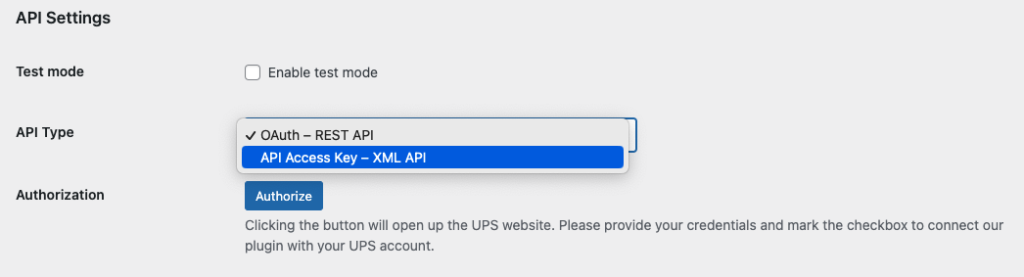
API Settings
Our plugin allows connecting via OAuth – REST API, Client Credentials – REST API or API Access Key – XML API. Regardless of which method you’ll choose, you need to register a UPS account to use the UPS shipping services.
You can switch between the API Type by selecting one in the dropdown list.
OAuth – REST API
Client Credentials
We encourage using this type of connection to the UPS API:

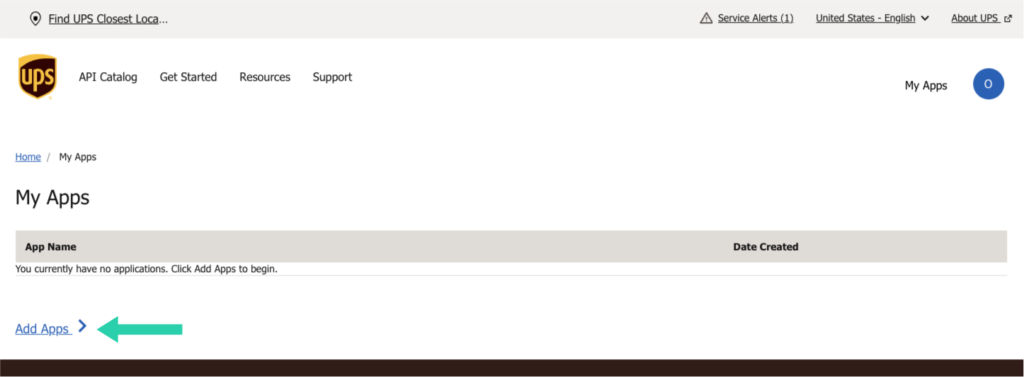
Go to https://developer.ups.com/apps and click Add Apps.
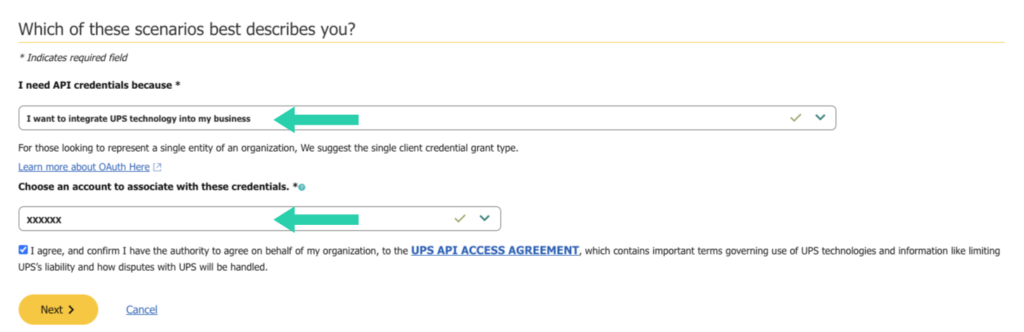
Select „I want to integrate UPS technology into my business” from „I need API credentials because” field. Below, select your account number from the dropdown. If you don’t have one, you need to add it or create new one by choosing the appropriate option. Hit Next.
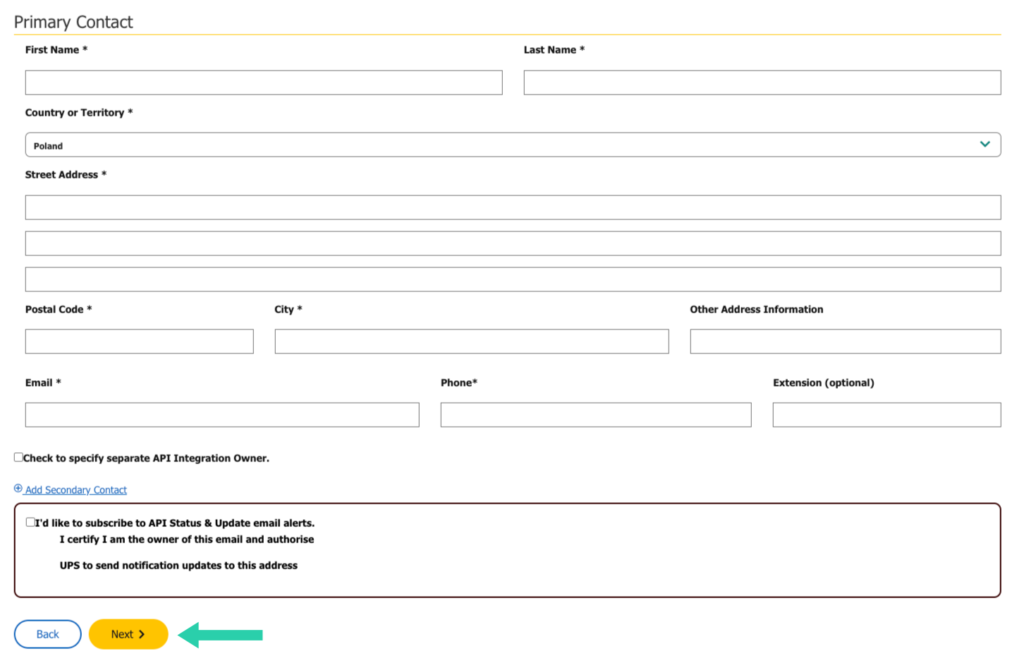
Next, you will see Primary Contact form. Fill-in required fields and proceed by clicking Next just below the form.
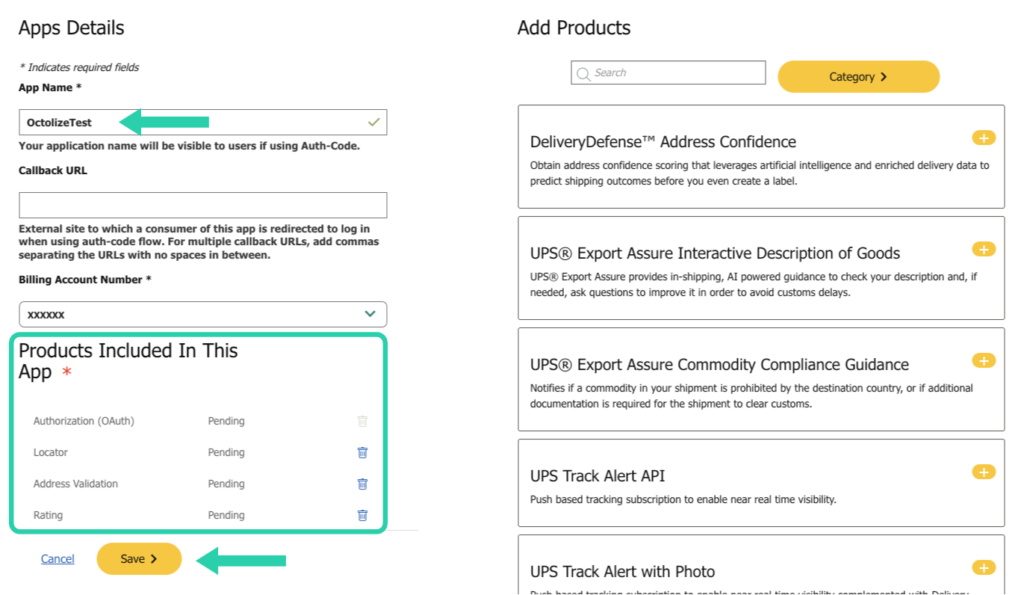
This step is very important. You need to define your App Name and select APIs (Add Products section) that your App will get access to. Select:
– Authorization (OAuth),
– Locator,
– Address Validation,
– Rating*.
*Important: If the ‘Products Included In This App’ section does not display certain options (e.g., Rating) during app creation, proceed by creating the app. Afterward, edit the created app to manually add the missing products.
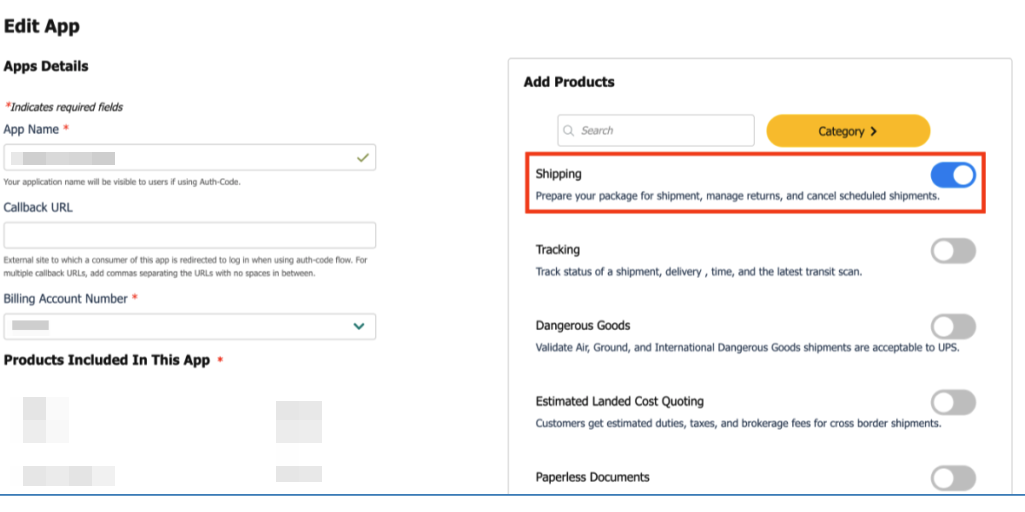
CAUTION
Please, bear in mind, that additionally in a case of usage of UPS Labels plugin, you would need to mark the Shipping API:
To proceed click Save.
Congratulations! Your App has been created. Now, copy Client ID and Client Secret.
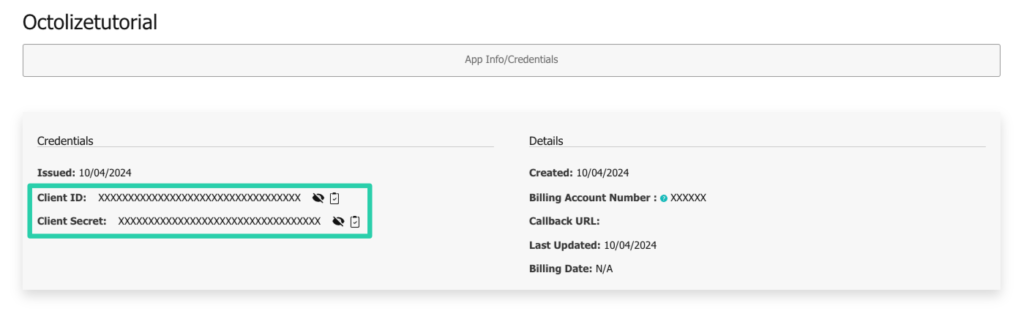
Go to UPS Labels plugin settings page, select REST API for API Type and Client Credentials for Authorization Type. Fill in Client ID, Client Secret and UPS Account Number.
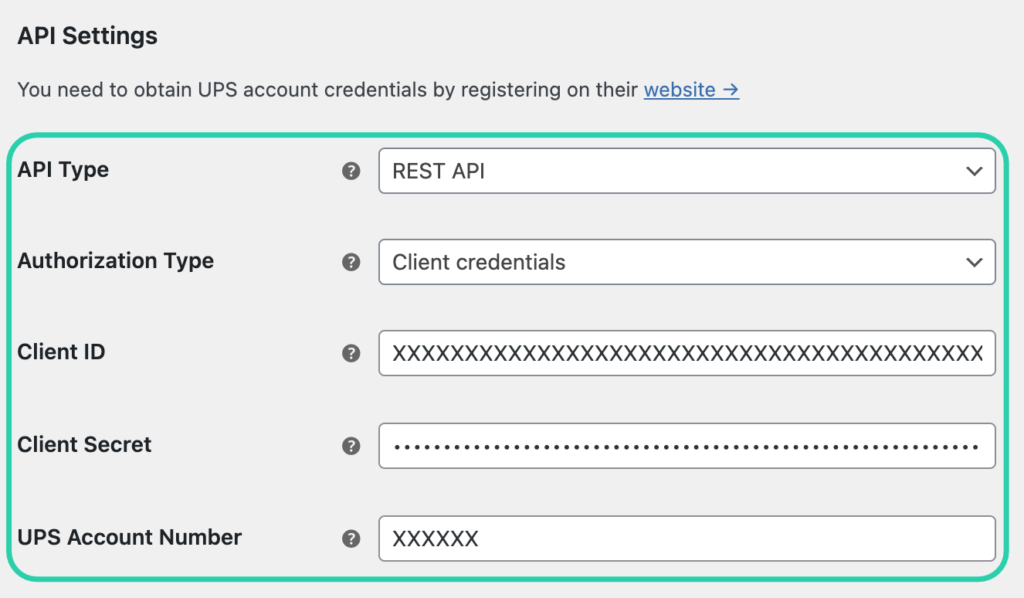
Save changes and wait for Connection status to say OK. When it does, you’re good to go!
Auth Code
For this method, you only need to own a UPS Account.
Please bear in mind that AuthCode is only recommended for testing.
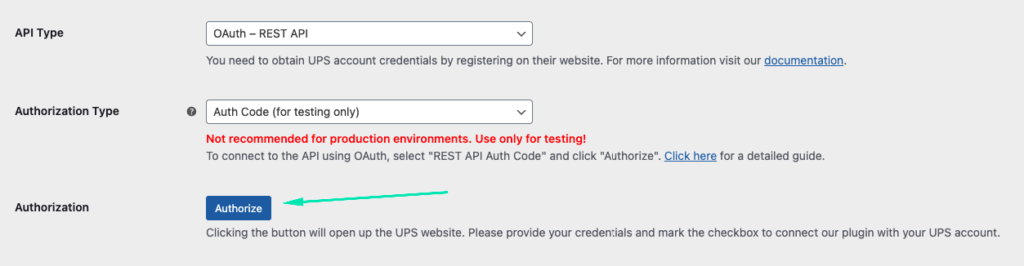
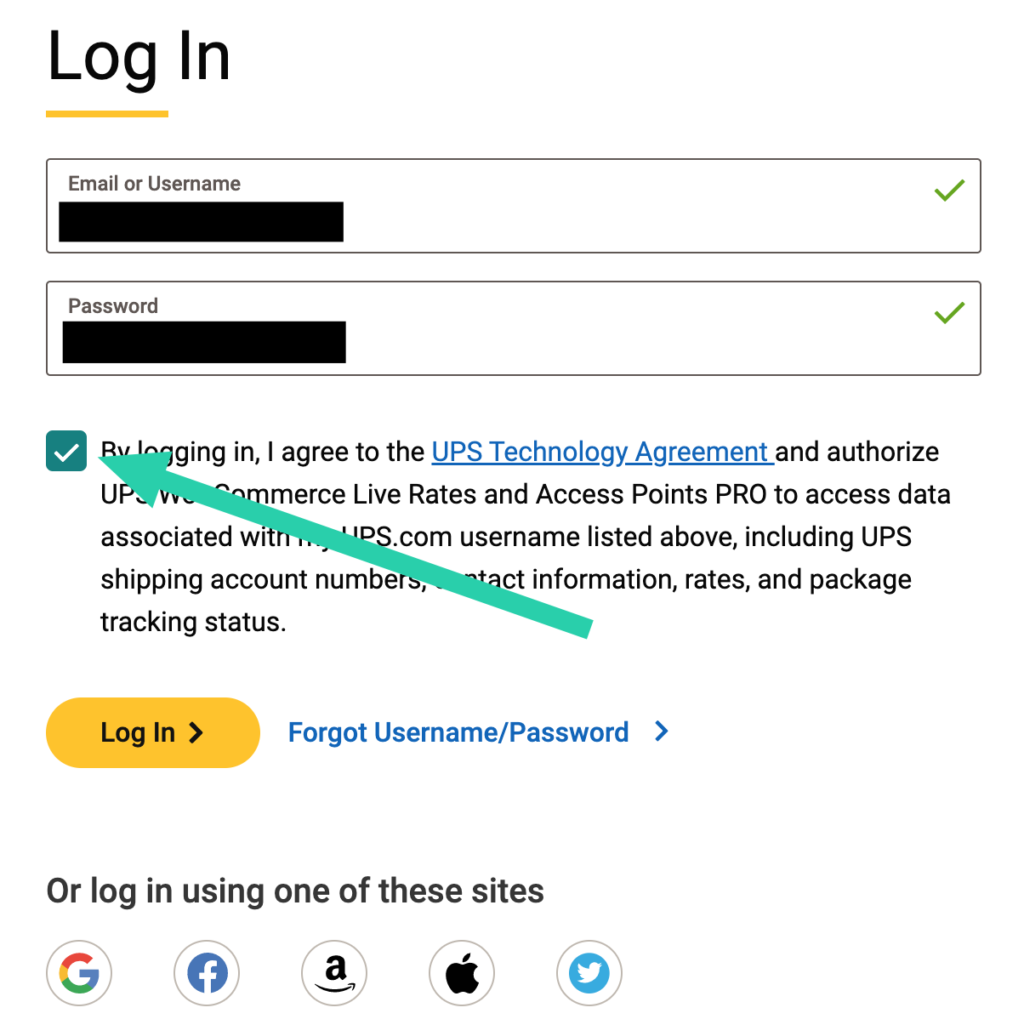
Press Authorize to be redirected to UPS.com site. Then please type your UPS email or username, password and agree to connect our plugin with your account by checking the checkbox. Then click Log In.
Once the OAuth connection is established, then you’ll see a Revoke button and the API Connection Status as a green OK.
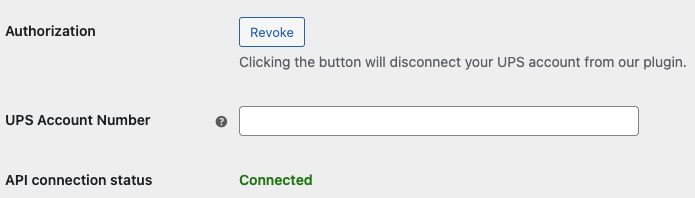
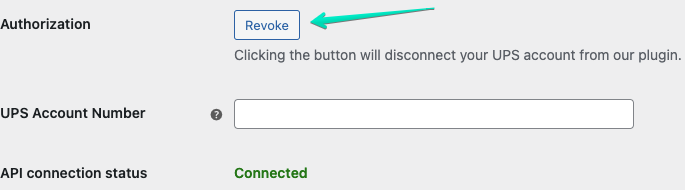
To disconnect your UPS account from our plugin, press Revoke.
Optionally, if you use UPS SurePost shipping service, please fill in the UPS Account Number. If you don’t use UPS SurePost, leave this field empty.

API Access Key – XML API
For this method, you need to own a UPS account with access to the API. If you haven’t gained the API access, please check our guide on how to get the UPS API Access Key →. This method is a deprecated one, we do not encourage to use this method. We strongly support the Client Credentials one.
Enter your credentials (User ID, Password, Access Key and Account Number) in the plugin’s API Settings section fields below:
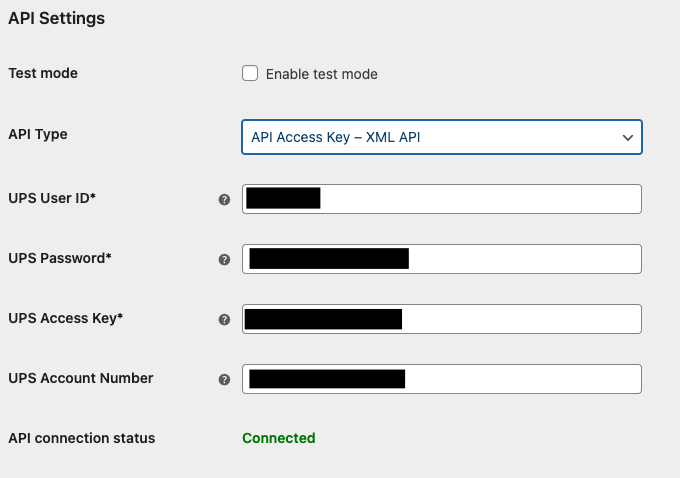
Test mode
– check this option to run the plugin in the test mode.
UPS User ID / UPS Password / UPS Access Key / UPS Account Number
– fill in these fields with the credentials you acquired during the UPS account registration process.
API connection status
– once your login credentials were entered and Save changes button hit, the API connection status should change to Connected and turn green.
If for some reason the plugin is not able to establish the connection with the UPS API, you will see the error message coming from the API with the detailed information on the cause of the problem, e.g.:
