Once the USPS Live Rates shipping method was added within the shipping zone for which its services should be displayed, use its configuration screen to manage its settings and adjust them to your needs.
Please, bear in mind that the plugin doesn’t offer generating shipping labels and allowing for the creation of shipments. Additionally, you are responsible for checking whether the rates retrieved by the plugin match those actually paid for shipping.
Watch our step-by-step video tutorial
Method Settings
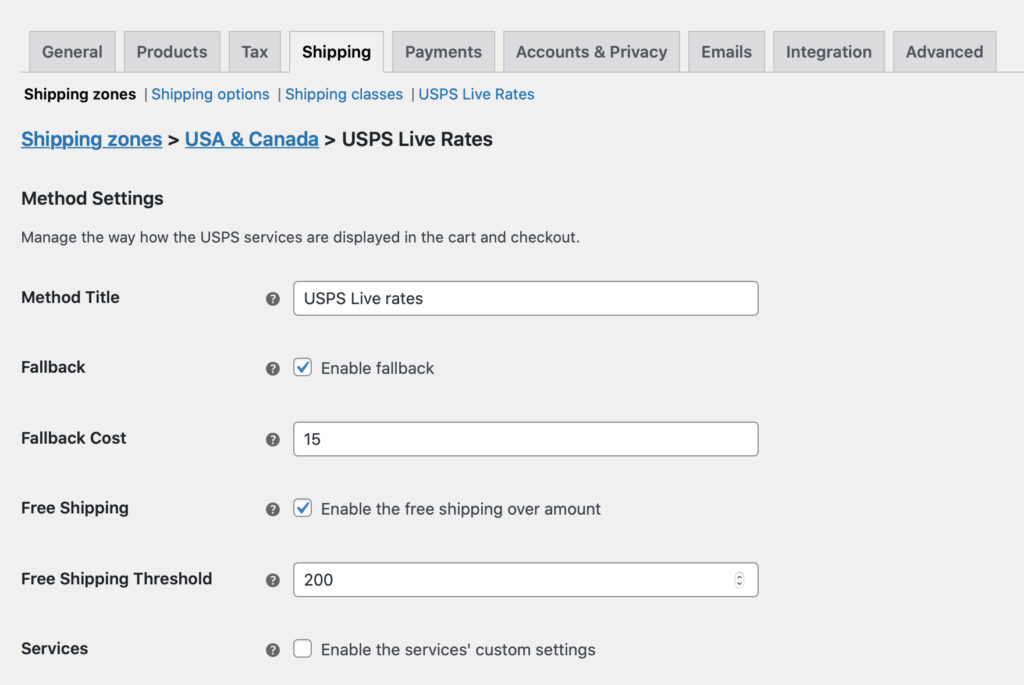
Method Title
– define the USPS shipping method title which should be used in the cart/checkout when the Fallback option was triggered.
Fallback
– enable to offer a flat rate cost for shipping so that the user can still checkout, if the API, for some reason, returns no matching rates. If selected, the additional Fallback Cost field will appear below:

Free Shipping
– tick the Enable the free shipping over amount checkbox in order to offer your customers the free shipping once the defined order total value threshold is reached. If selected, the additional Free Shipping Threshold field will appear below:

Services (checkbox)
– This checkbox is visible only when Web Tools API is selected as API Type in plugin settings. Tick this checkbox to manage which USPS services should be available for your customers to choose from. You may also change their names here and set the order of how they are displayed in the cart and checkout.
If the checkbox is not selected all the services will be available by default.
Please mind that the Services Table may be divided into two sections – Domestic Services Table and International Services Table depending on the way how the shipping zone was configured.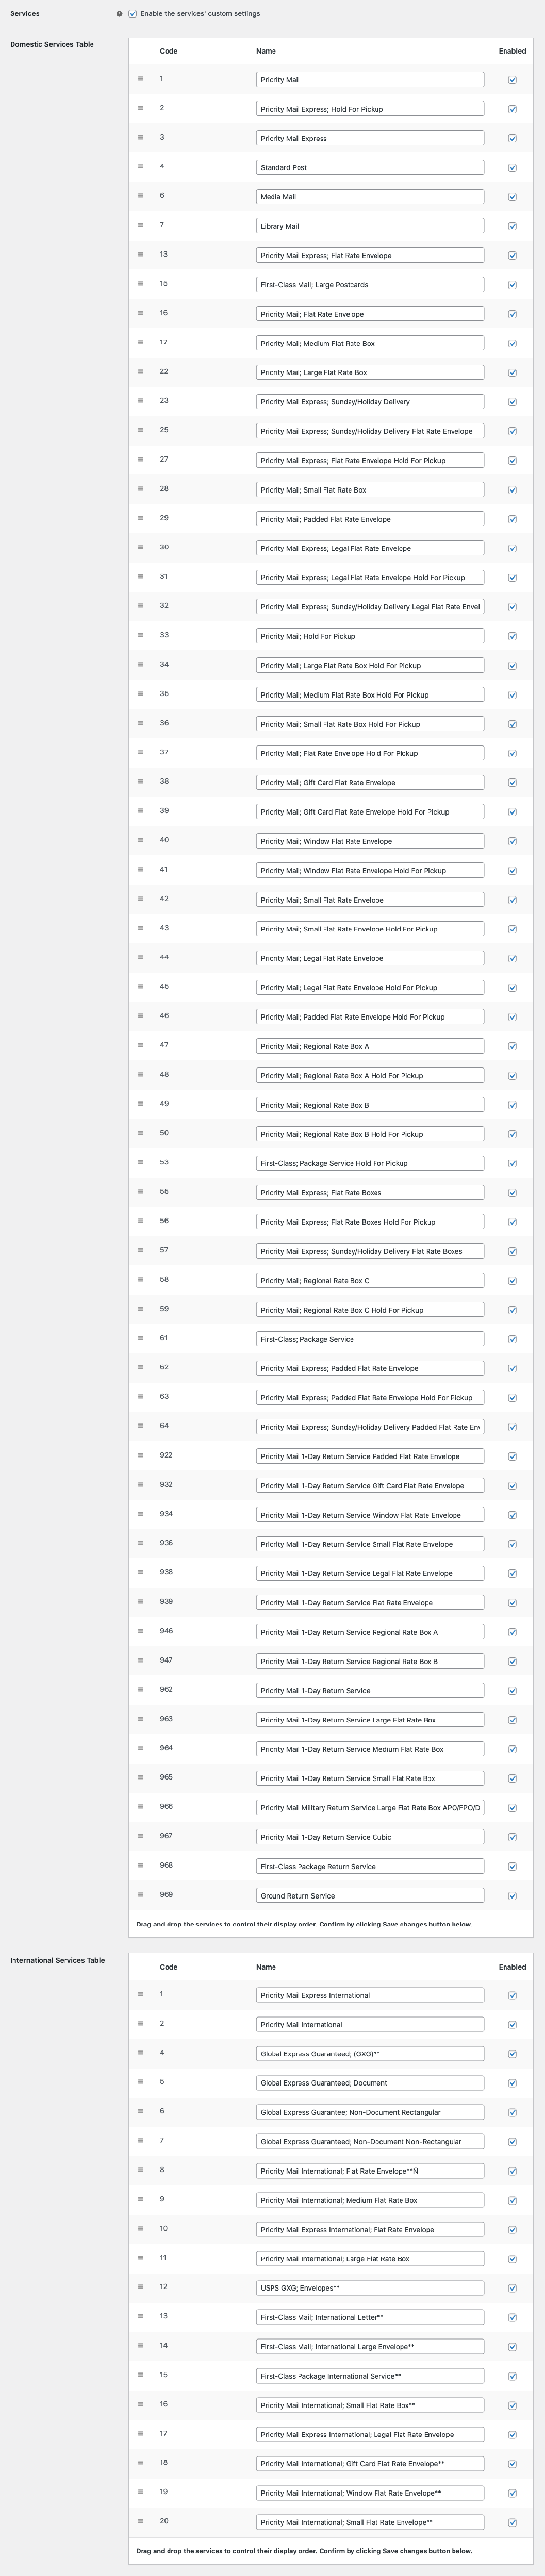
Services
This section is visible only when REST API is selected as API Type in plugin settings.
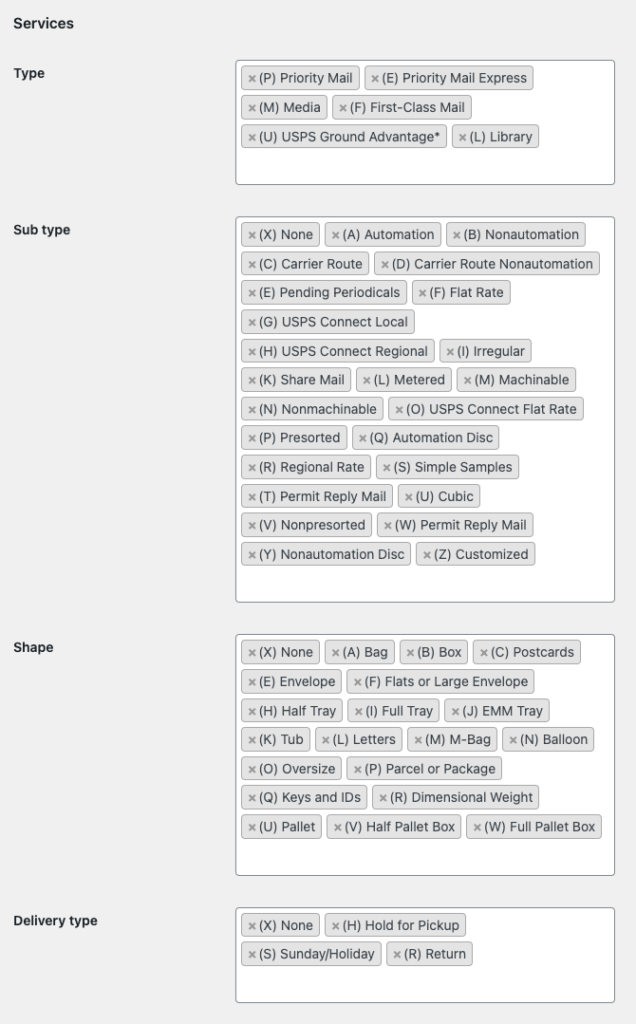
You can find more details about services from REST API here.
Changing the name of services is not supported when using the REST API, which is the only recommended integration method.
While it is technically possible to change service names through Web Tools, we do not recommend using this connection type, as it is no longer supported by USPS.
At this time, manual sorting of USPS services is unavailable.
Package Settings
This section is visible only when REST API is selected as API Type in plugin settings.
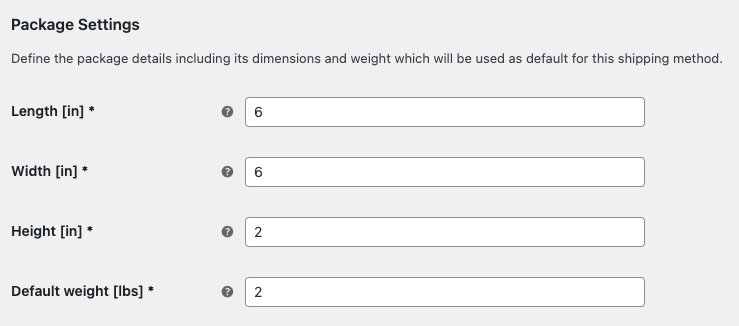
Fill in length, width, height and default weight. Those values will be used for shipping cost calculation. Please note, that default weight will only be used if products in cart don’t have defined weight.
Rates Adjustments
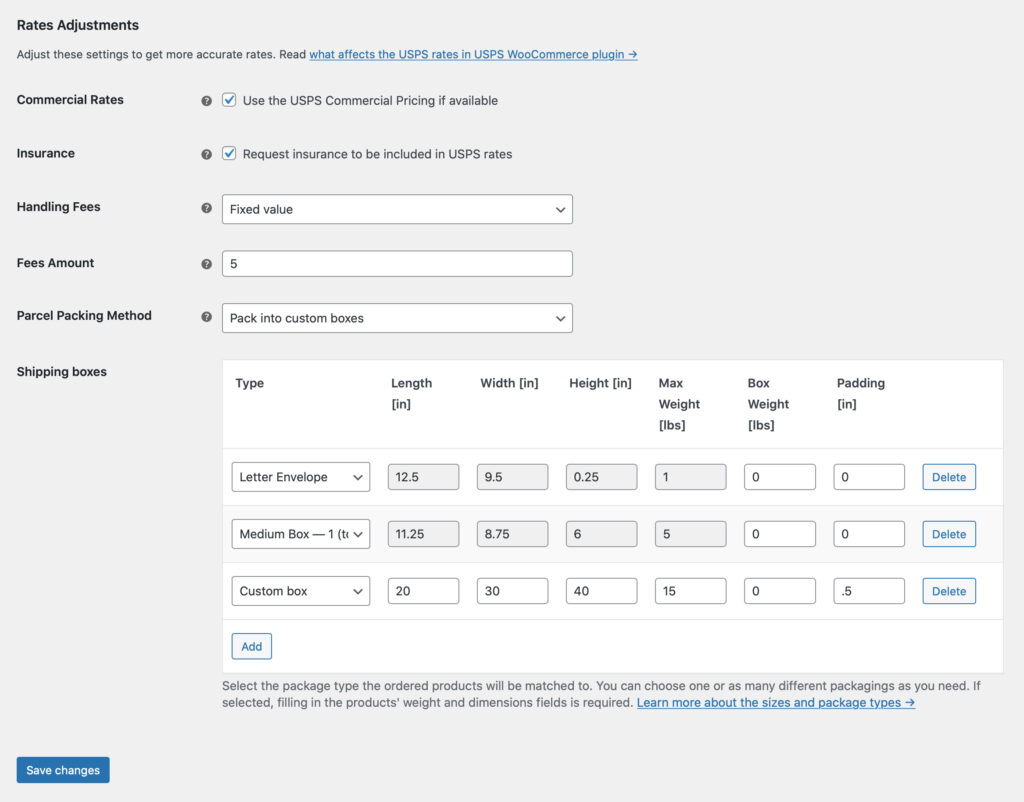
Commercial Rates
– tick this checkbox if you want to use and display the Commercial Pricing shipping rates to your customers instead of the standard ones.
Value of contents
The Value of contents is crucial, when the package is carried abroad with the service of Envelope size. For this type of packages, the value needs to be set to 0. The screenshot can be seen below:

Insurance
– tick it if you want the insurance to be included in the USPS rates. The insurance will be included only for services which it is available for.
PRO Handling Fees
– use this option if you want to charge your customers with the handling fees automatically added to the USPS rates:
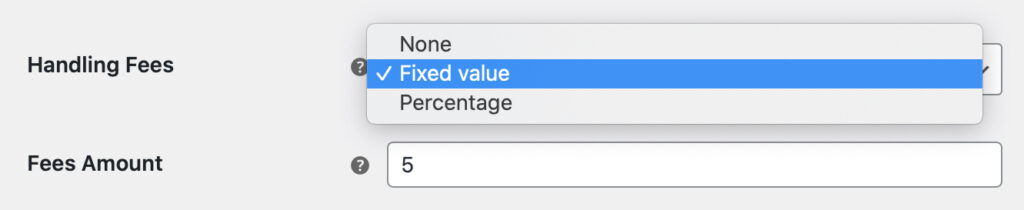
You can choose if the handling fee should have the Fixed or the Percentage value. Once one of these options is selected the additional Fee Amount field will appear below.
Please mind that you can also use the Handling Fees option to offer your customers the discounted USPS live rates by entering the negative value, e.g. -10 in the Fee Amount field.
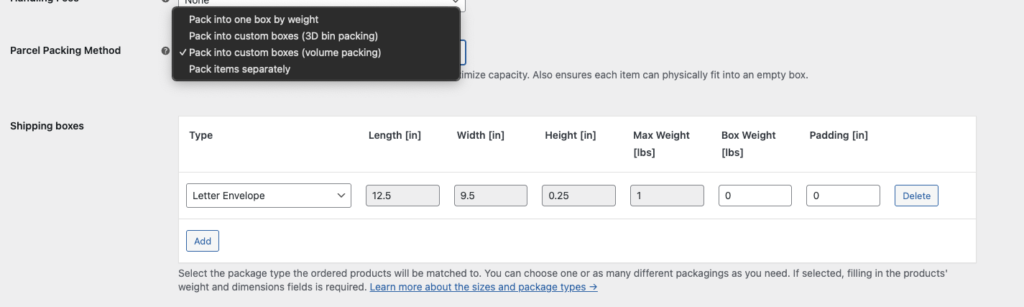
PRO Parcel Packing Method
– define the way how the products should be packed:

- PRO Pack into one box by weight – a default live rates calculation method. Weight of all the ordered products is summed up and they are considered as shipped together in the one package.
- PRO Pack items separately – each product is considered as if it was shipped in a separate box. If selected the plugin uses the products’ weight and dimensions to calculate their volume and return the shipping rates.
PRO Pack into custom boxes – this option gives you a choice which packages to use. You can choose from the standard USPS packaging or precisely define your own custom boxes:
It allows not only to set the box dimensions (Length x Width x Height) and maximum weight but also the packaging’s (e.g. cardbox’) weight and padding which will be substracted from the package max weight and dimensions. If any product exceeds the defined maximum package size the plugin will return the fallback if set.
Some USPS services might have a maximum size and weight limit for the shipped packages. You can find more information about the USPS Weight & Dimensions restrictions here.
Volume packing – How the fitting algorithm works(PRO)
If you chose the Parcel Packing Method: Pack into custom boxes option our USPS PRO plugin will automatically optimize the packing method using the most accurate boxes setup to offer the lowest shipping cost.
Here’s an example for better understanding on how the fitting algorithm works. We defined 3 custom boxes’ types:
- 1x1x1
- 2x2x2
- 5x5x5
The fitting algorithm in such case will look like this:
[ 1, 1, 1, '1' ], // 1 items 1 square = best fit is 1x1x1
[ 2, 1, 1, '2' ], // 1 items 2 square = best fit is 2x2x2
[ 4, 1, 1, '5' ], // 1 items 4 square = best fit is 5x5x5
[ 5, 1, 1, '5' ], // 1 items 5 square = best fit is 5x5x5
[ 0.5, 8, 1, '1' ], // 8 items 0.125 square = best fit is 1x1x1
[ 0.5, 9, 1, '2' ], // 9 items 0.125 square = best fit is 2x2x2
[ 1, 8, 1, '2' ], // 8 items 1 square = best fit is 2x2x2
[ 1, 9, 1, '5' ], // 9 items 1 square = best fit is 5x5x5 (other algorithm could get 2x2x2 + 1x1x1)
[ 1, 125, 1, '5' ], // 125 items 1 square = best fit is 5x5x5
[ 1, 126, 2, '5' ], // 126 items 1 square = best fit is 5x5x5 + 1x1x1 (two packages, exactly one is 5x5x5)
[ 1, 133, 2, '5' ], // 133 items 1 square = best fit is 5x5x5 + 2x2x2 (two packages, exactly one is 5x5x5)
So it will match the best setup to fit as much products as possible into one box based on the products dimensions.
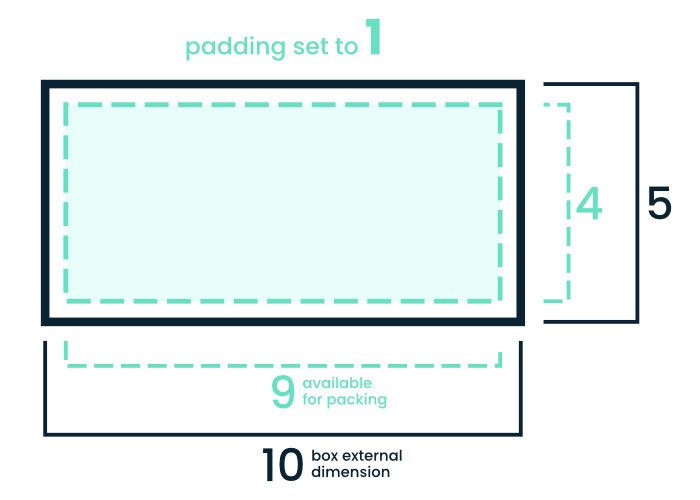
Besides providing external dimension of a box you can also set padding value to accomodate thickness of a box and protective filling. Padding value is subtracted from the external dimensions. Let’s assume that we have a 10x5x5 box and padding set to 1. The algorithm will use 9x4x4 as space available to fill. For more clarity get familiar with below graphic.
3D bin packing – How the fitting algorithm works(PRO)
As per the Box Packing algorithm documentation:
Bin packing is an NP-hard problem and there is no way to always achieve an optimum solution without running through every single permutation. But that’s OK because this implementation is designed to simulate a naive human approach to the problem rather than search for the “perfect” solution.
This is for 2 reasons:
- It’s quicker
- It doesn’t require the person actually packing the box to be given a 3D diagram explaining just how the items are supposed to fit.
At a high level, the algorithm works like this:
- Pack largest (by volume) items first
- Pack vertically up the side of the box
- Pack side-by-side where item under consideration fits alongside the previous item
- If more than 1 box is needed to accommodate all of the items, then aim for boxes of roughly equal weight (e.g. 3 medium size/weight boxes are better than 1 small light box and 2 that are large and heavy)
Origin Settings for this Shipping Method
The USPS plugin uses the shop’s origin entered in the WooCommerce settings WooCommerce → Settings → General → Store Address by default. However, you can define a different shipper’s address for each Shipping Method – resulting in multiple custom origins.
For example, if you have one warehouses for each shipping region, you can assign the Custom Origin using the fields below:
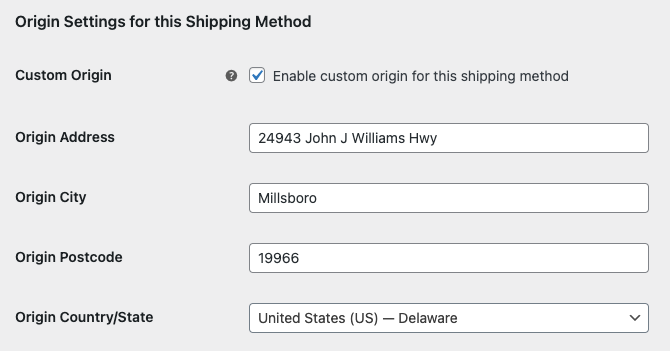
Please remember that you can also assign the Custom Origin on the USPS configuration screen. When using this feature the following priority order is used:
- Custom Origin for this Shipping Method.
- Custom Origin in the USPS configuration screen.
- Default WooCommerce Store Address.