- Zones & Rates screen
- Adding shipping rates
- Configuring a shipping rate
- Status
- Name and description
- Free shipping
- Shipping cost calculation rules
- WHEN conditions → THEN actions - How it works
- WHEN conditions
- How to combine WHEN conditions
- THEN actions
- How to add more shipping cost calculation rules
- How to edit shipping cost calculation rules
- How to duplicate shipping cost calculation rules
- How to delete shipping cost calculation rules
- How to reorder shipping cost calculation rules
- How to hide a shipping method in a specific situation
- How to add a custom shipping notice or request a shipping quote in Shopify checkout
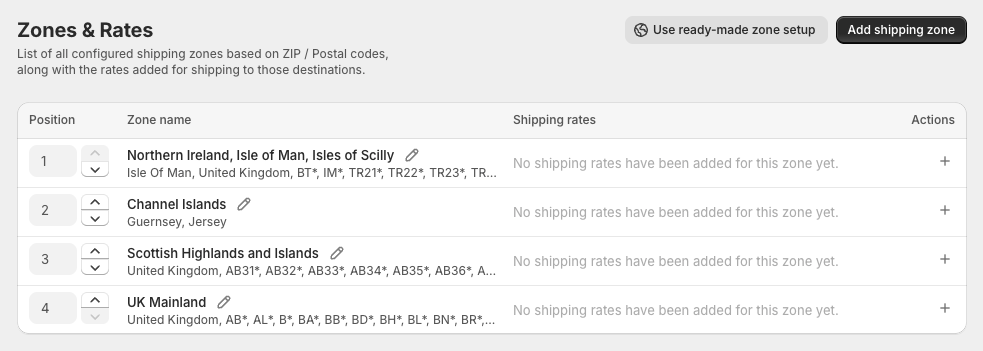
Zones & Rates screen
Once your custom shipping zones have been configured, your Zones & Rates screen should look similar to what you see here — with your shipping zones listed in the Zone name column on the left, and no shipping rates added yet on the right side of the table:
Adding shipping rates
To add your first shipping rate for an existing custom shipping zone, click the plus button + in the Actions column:

Later on, you’ll be able to add more rates to the zone anytime if needed, using the ‘More actions’ … button on the right and selecting Add shipping rates from the dropdown menu:
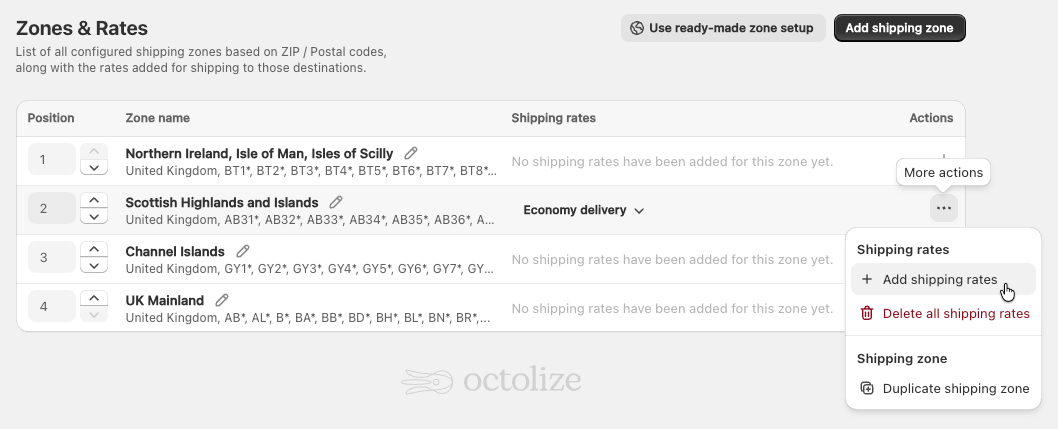
Once clicked, you’ll be redirected to the shipping rate configuration screen.
Configuring a shipping rate
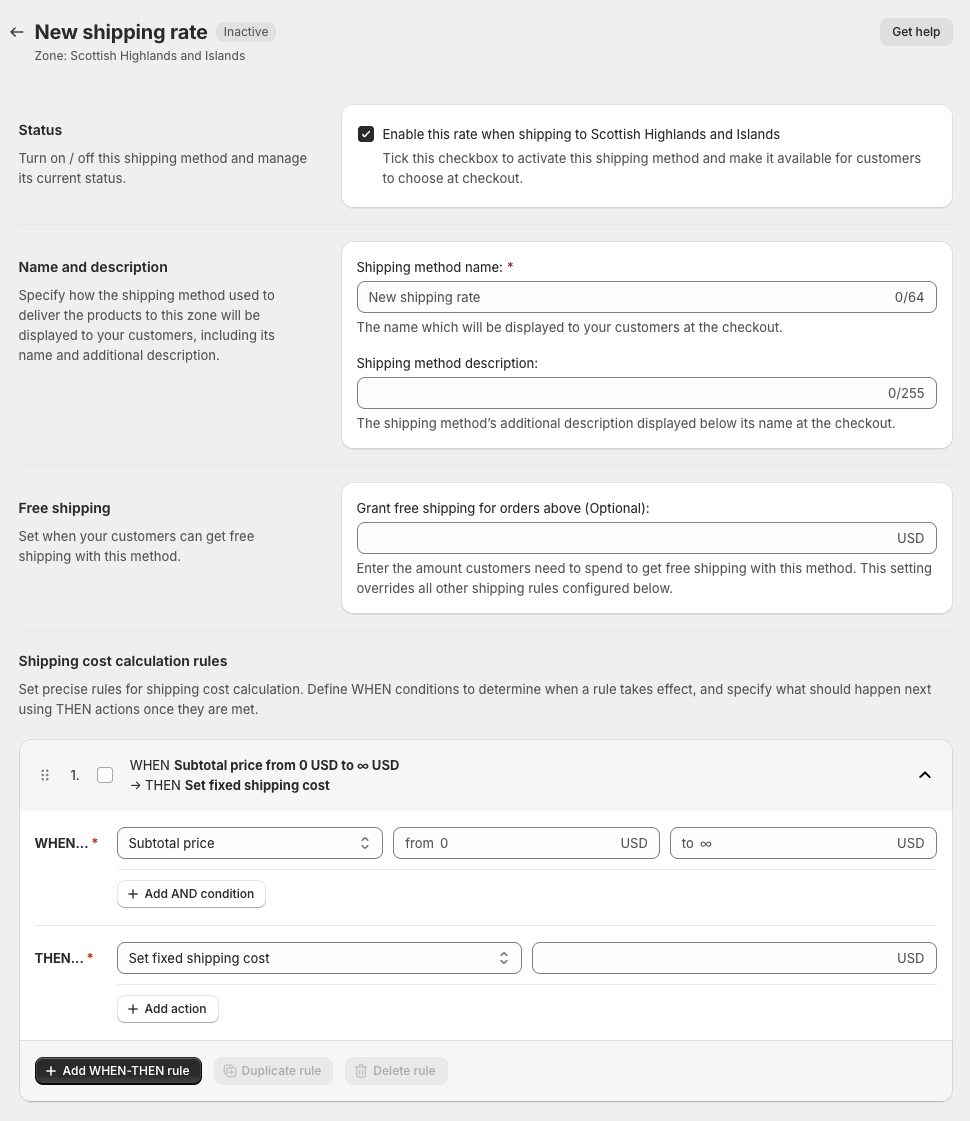
Status

Enable this rate when shipping to {zone_name} – check this option to activate this shipping rate and make it available for customers to choose at checkout when shipping to {zone_name}.
If this option is left unchecked, this shipping method will not be displayed at checkout. You can use this feature to temporarily disable the shipping method when necessary without deleting it.
Name and description
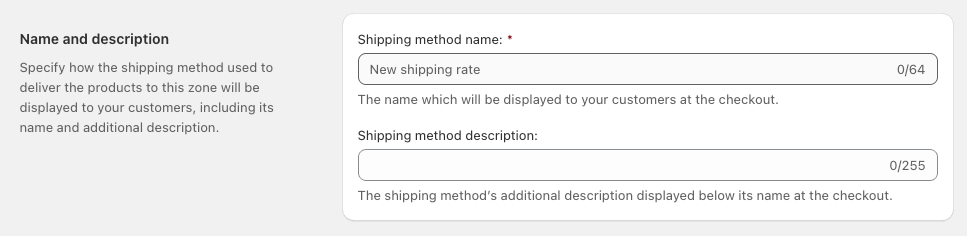
Shipping method name – enter the name for this shipping method which will be displayed to customers at the checkout.
Shipping method description – enter an optional description your customers will see below the shipping method name at checkout. You can use it to include details like the average delivery time, e.g. 24-48 h.
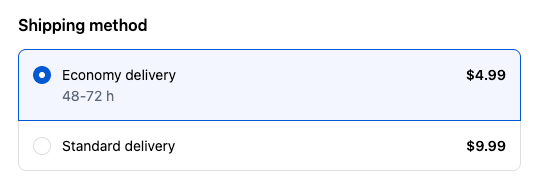
For instance, if the Shipping method name and Shipping method description fields are filled out as shown below:

they will appear at checkout as follows:
Free shipping

Grant free shipping for orders above – enter the minimum order value threshold that grants your customers free shipping once exceeded.
Shipping cost calculation rules
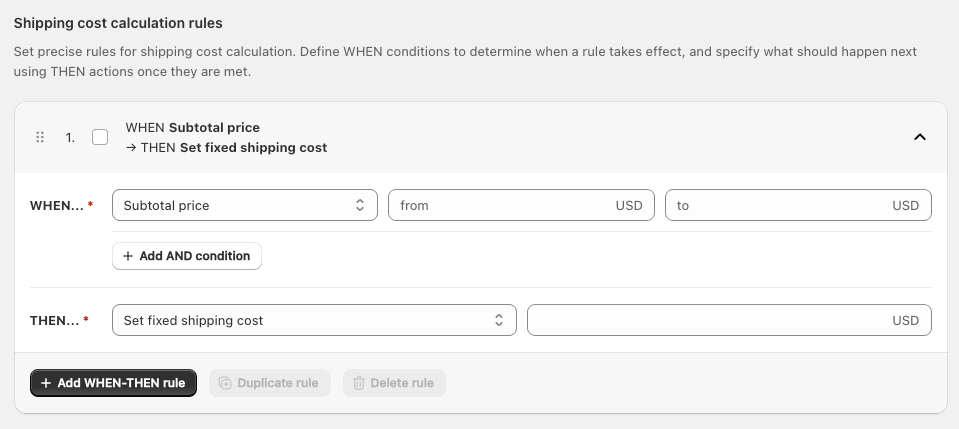
WHEN conditions → THEN actions – How it works
In the Octolize Shipping Rates Rules & Shipping Zones app, shipping cost calculation rules are built around two parts — the WHEN conditions and the THEN actions.
They follow a cause-and-effect logic, so you can think of them as a WHEN → THEN statement: WHEN something happens → THEN do this. You start by setting up the WHEN condition (what needs to happen), and then choose the THEN action (what should occur as a result).
For example:
- WHEN the Subtotal price is from $0.00 to $999,999.99 → THEN Set fixed shipping cost $9.99
- WHEN the Weight is from 75 kg to 999999 kg → THEN Hide this shipping method
- etc.
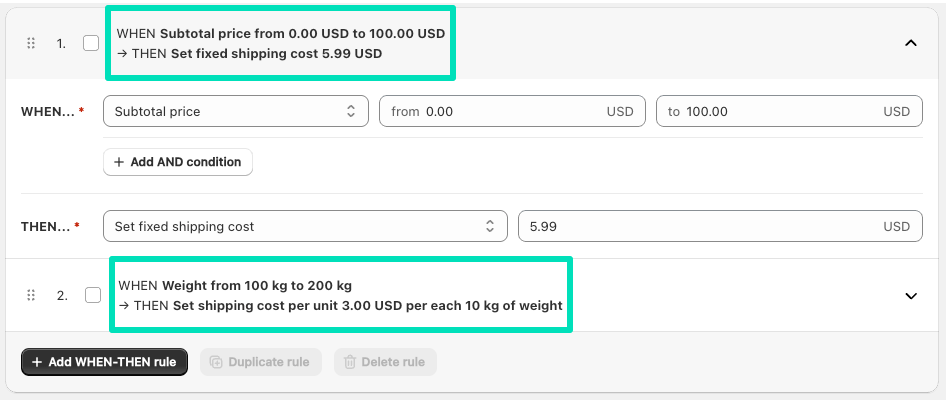
Please note that depending on the options you select for both the WHEN condition and the THEN action, the rule label will dynamically update to reflect your choices and form a statement summarizing your rule:
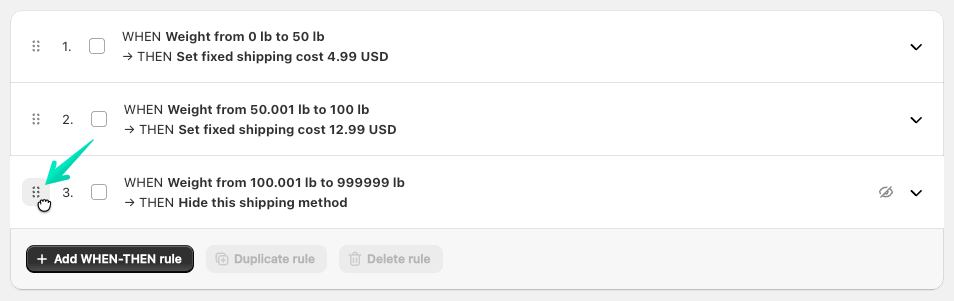
The shipping cost is calculated according to the order of the WHEN-THEN rules in the table — from top to bottom.
WHEN conditions
From the WHEN… dropdown list, select the preferred condition the shipping cost calculation rule will be based on. Choose its operator (if applicable), and fill in the additional fields to define the exact circumstances that must be met to trigger further THEN action.
You can choose from the following available WHEN conditions:
Weight

If selected, shipping rates will be calculated based on the weight of the products in the cart, using your store’s default weight unit from Store defaults.
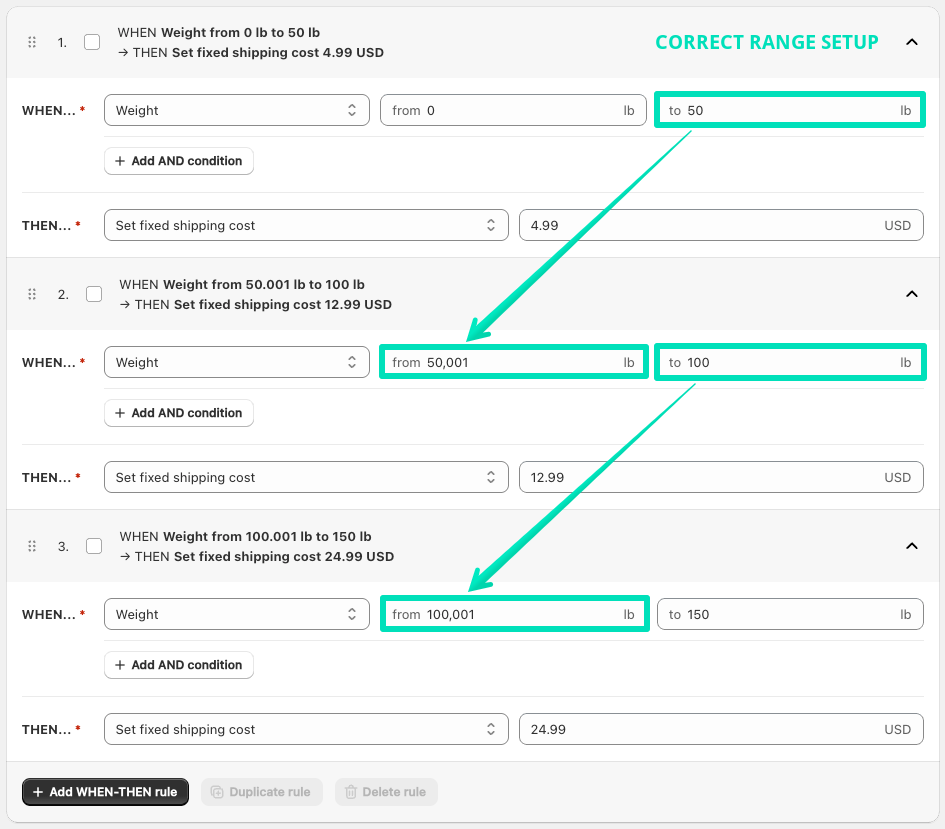
To make your rules as precise as possible and avoid edge cases, we highly advise to enter WHEN: Weight condition values with 3 decimal places, such as:
- 0 – 149.999 lb
- 150 – 299.999 lb
- 300 – ∞ lb
just like the weight in your store.
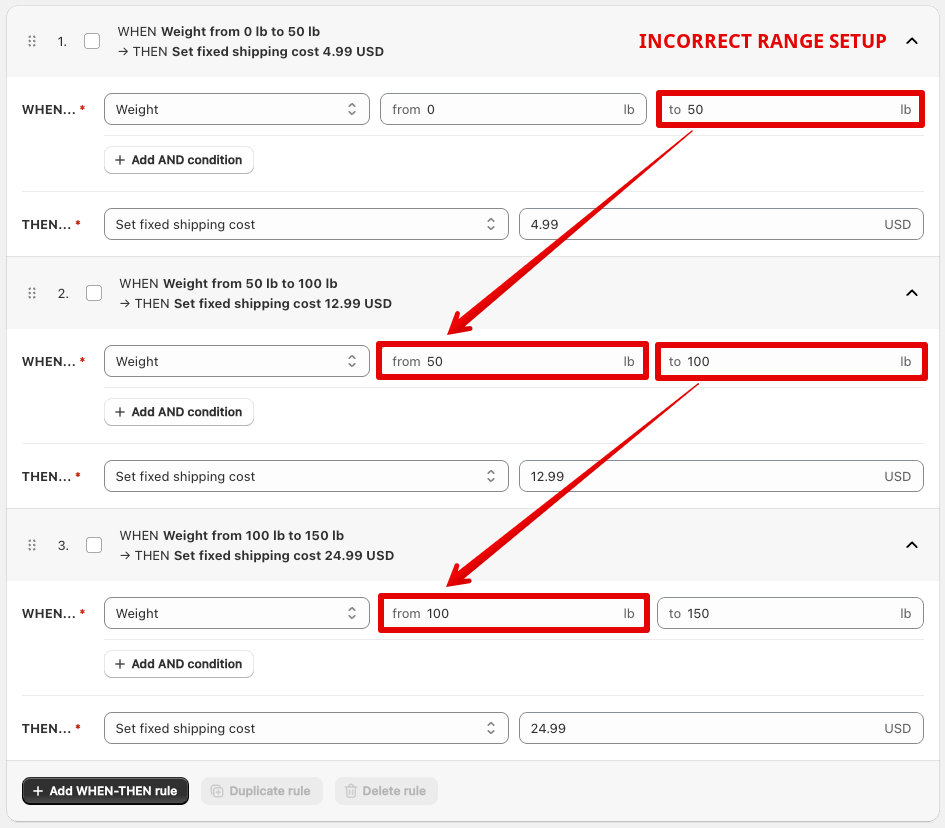
Please note that when configuring weight, price, or other ranges, they should not overlap. This means that the previous range cannot end at the same value where the next one begins, e.g.:
Subtotal price

If selected, shipping rates will be calculated based on the value of the products in the cart before taxes and discounts, using your store’s default currency from Store defaults.
To make your rules as precise as possible and avoid edge cases, we highly advise to enter WHEN: Subtotal price condition values with 2 decimal places, such as:
- 0 – 199.99 USD
- 200 – 499.99 USD
- 300 – ∞ USD
just like the prices in your store.
SKU

If selected, shipping rates will be calculated based on the specific SKU of the product or the product variant.
Available operators:
- is one of
- is not one of
- contains
- does not contain
Type in or paste the product SKUs into the text area field at the bottom to target the right products or their variants you want the shipping cost to apply to.
For is one of / is not one of operator, enter the SKUs, one per line.
For contains / does not contain operator, enter the part of SKU to be matched.
Product tag

If selected, shipping rates will be calculated based on the specific tags assigned to the product.
Available operators:
- matches one of
- matches all of
- does not match one of
- does not match all of
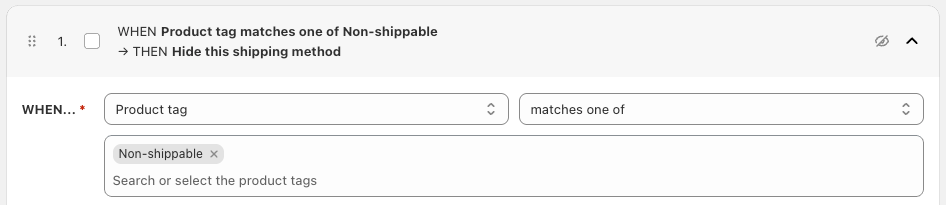
Click or start typing in the Search or select the product tags field to choose the product tags you want this condition to be based on:

Please note that before using the Product tag condition for the first time, it’s necessary to sync the product tags used in your store. This is why the product tag selection field will be temporarily disabled, and you’ll see the following banner below:
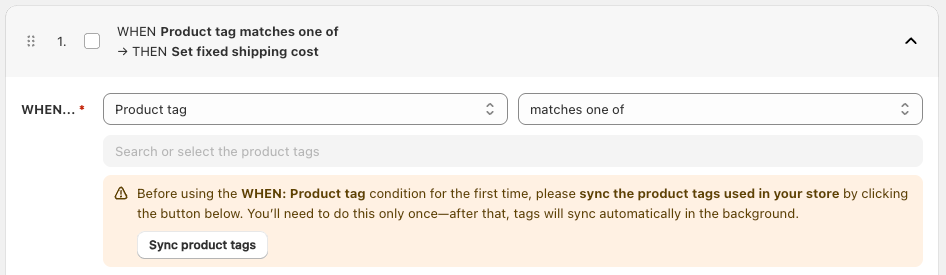
Click the Sync product tags button to start the synchronization process. This may take a moment, depending on how many product tags are used in your store. You’ll only need to do this once—after that, tags will sync automatically in the background.
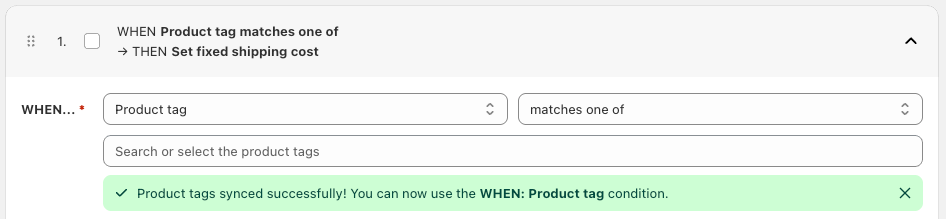
Once the sync is complete, you’ll see a success banner, and the product tag selection field will become available and ready to use.
Item quantity

If selected, shipping rates will be calculated based on the total quantity of the products in the cart.
Customer tag

If selected, shipping rates will be calculated based on the specific tags assigned to the customer.
Available operators:
- matches one of
- matches all of
- does not match one of
- does not match all of
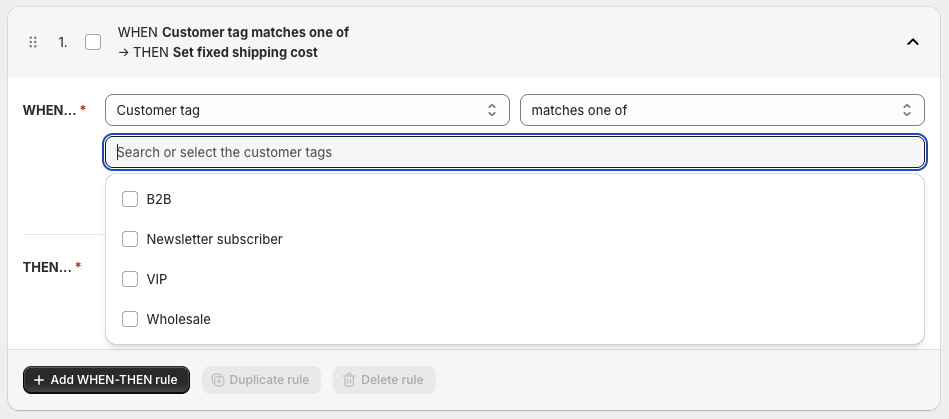
Click or start typing in the Search or select the customer tags field to choose the customer tags you want this condition to be based on:
Time of the day

If selected, shipping rates will be calculated based on the specific time frames, using your store’s time zone from Store defaults.
Available operators:
- is
- is not
Day of the week
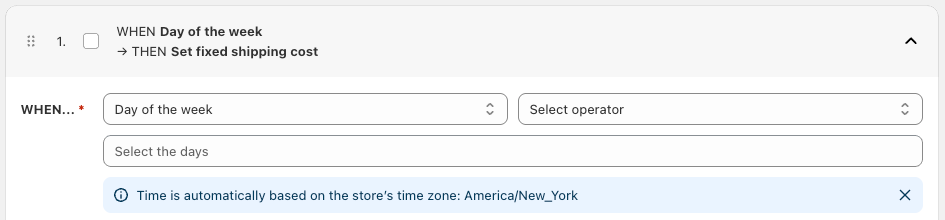
If selected, shipping rates will be calculated based on the day of the week the order is placed, using your store’s time zone from Store defaults.
Available operators:
- is one of
- is not one of
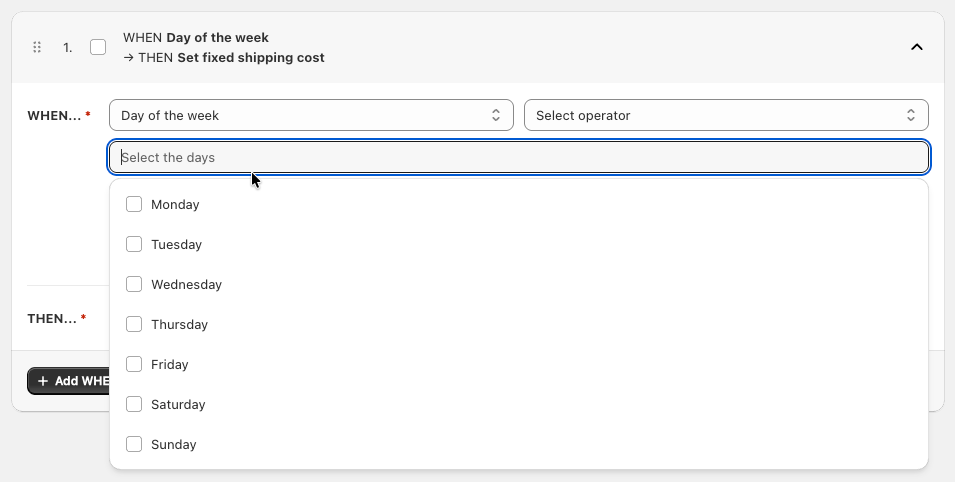
Click or start typing in the Select the days field to choose the days you want this condition to be based on:
How to combine WHEN conditions
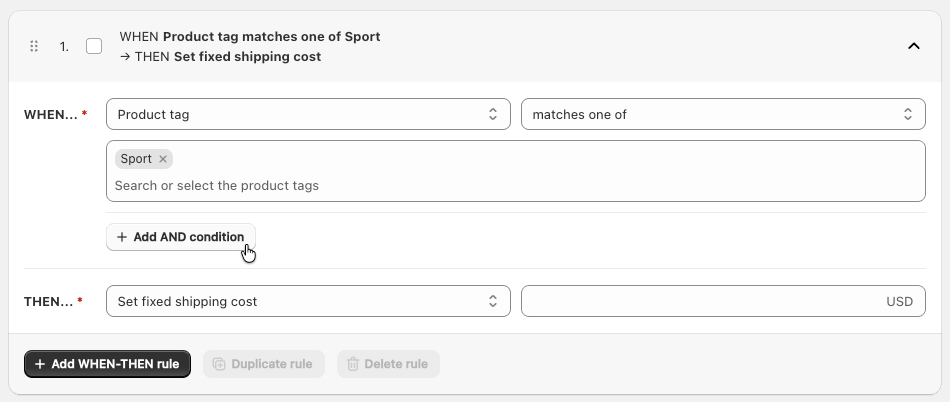
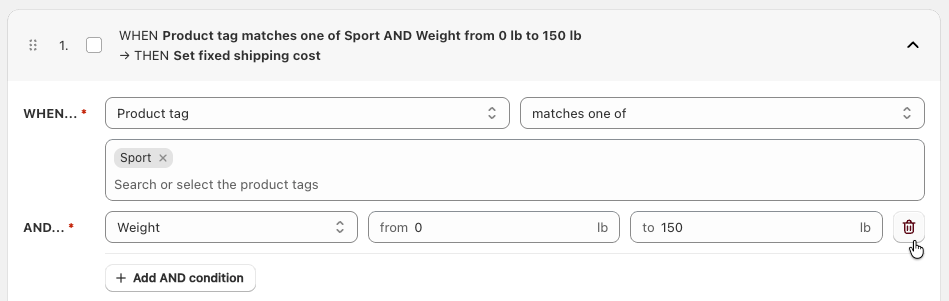
You can freely combine multiple WHEN conditions and link them together to create more advanced and precise shipping cost calculation rules tailored to your exact needs. To do this, use the + Add AND condition button:
and select the condition you’d like to combine with the one above from the AND… dropdown list:
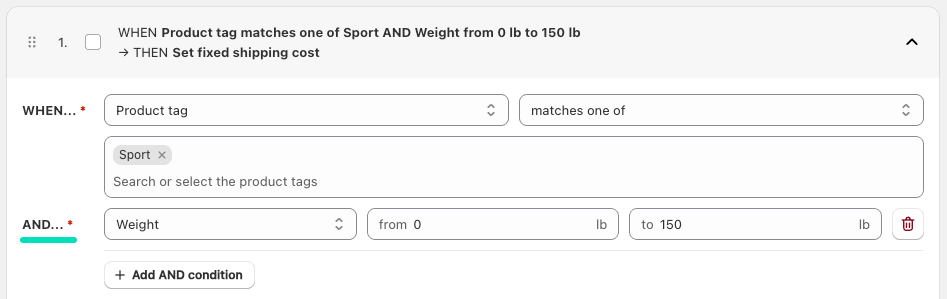
You can combine this way as many condition as you need. If, in turn, you’d like to remove the combined AND condition, simply click the Trash icon button located to the right of it:
THEN actions
From the THEN… dropdown list, select the preferred action that will be triggered once the previously defined WHEN conditions are met, and fill in its additional fields.
You can choose from the following available THEN actions:
Set fixed shipping cost

If the configured WHEN condition is met, the defined fixed shipping rate will be applied.
Set shipping cost per unit

If the configured WHEN condition is met, the shipping cost will be calculated based on the set rate per item or unit, e.g.:
- $3 each 1 item in the cart,
- $5 per each 20 lbs of weight,
- etc.
Available operators:
- item / items
- {unit} of weight (according to your store’s default weight unit from Store defaults)
Set shipping cost as % of the cart’s product value

If the configured WHEN condition is met, the shipping rate will be calculated as a defined percentage of the cart items’ subtotal, e.g.:
- If the cart subtotal is $50 and the shipping cost is set to 10% of it, the shipping will be $5,
- If the cart subtotal is $120 and the shipping cost is set to 20% of it, the shipping will be $24,
- etc.
Hide this shipping method

If the configured WHEN condition is met, this shipping method will be hidden and will not be displayed to customers at checkout.
Please note that if you select the THEN: Hide this shipping method action, a strikethrough eye icon will appear next to the rule label. It visually marks that the shipping method will be hidden once this rule’s conditions are met, helping you read and organize your rules:
How to add more shipping cost calculation rules
You can add as many shipping cost calculation rules for a given shipping method as you need. To do this, simply click the + Add WHEN-THEN rule button at the bottom of the table:
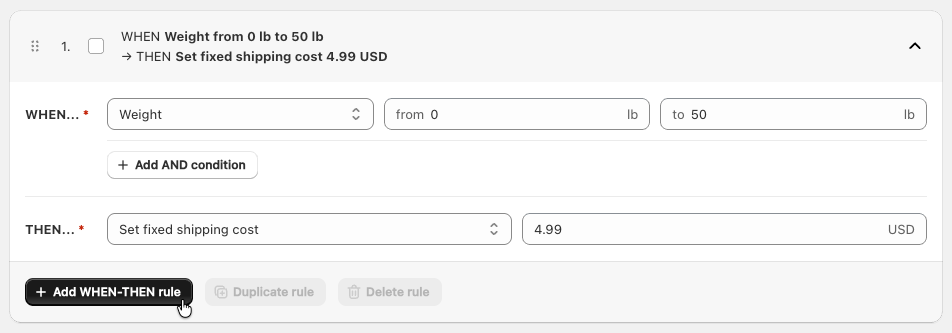
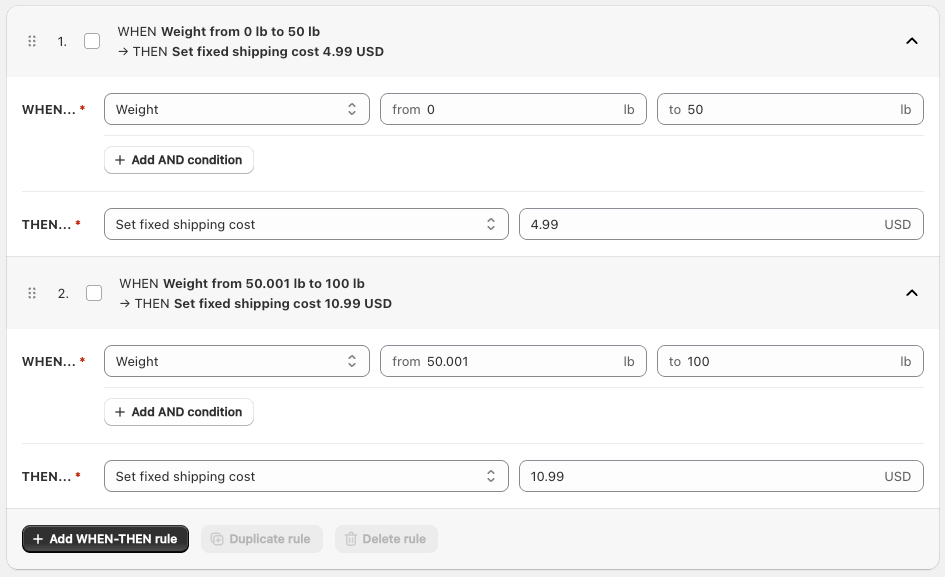
Next, select the WHEN condition and the THEN action for the new rule the same way you did before, fill in their additional fields, and Save your changes using the button at the top of the screen.
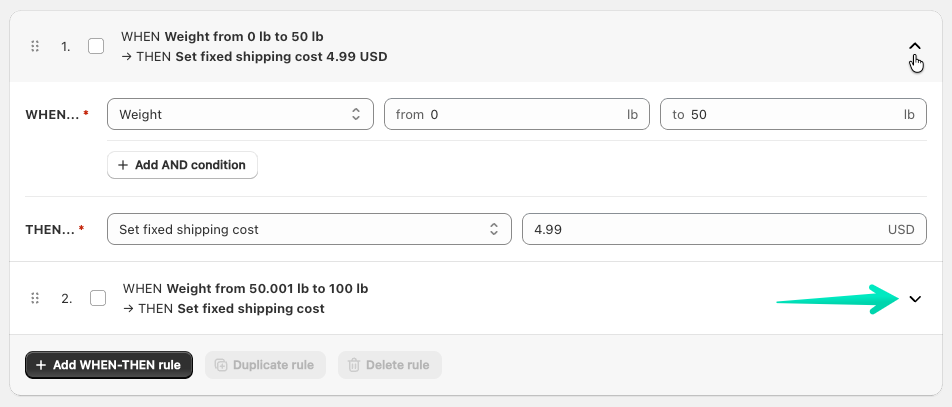
Please note that you can use the arrow icon buttons on the right to expand or collapse each rule’s configuration fields, making it easier to review and navigate through the rules table:
How to edit shipping cost calculation rules
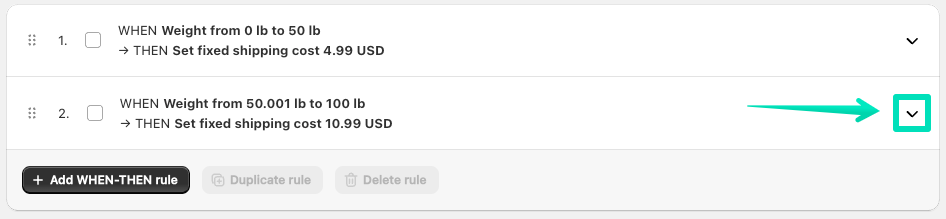
To edit an existing shipping cost calculation rule, click the arrow icon button on the right side of the rule label to expand its configuration fields:
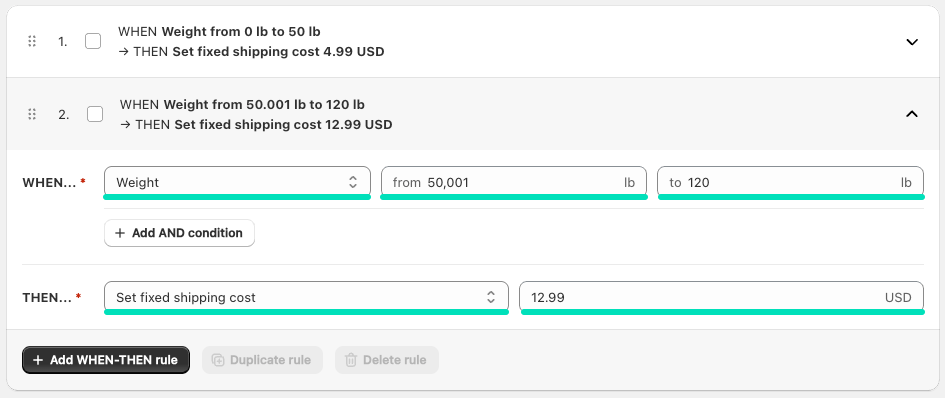
Then make the necessary changes – adjust the WHEN condition, THEN action, operators, or values as needed:
When you’re done, click the Save button at the top of the screen to apply your changes.
How to duplicate shipping cost calculation rules
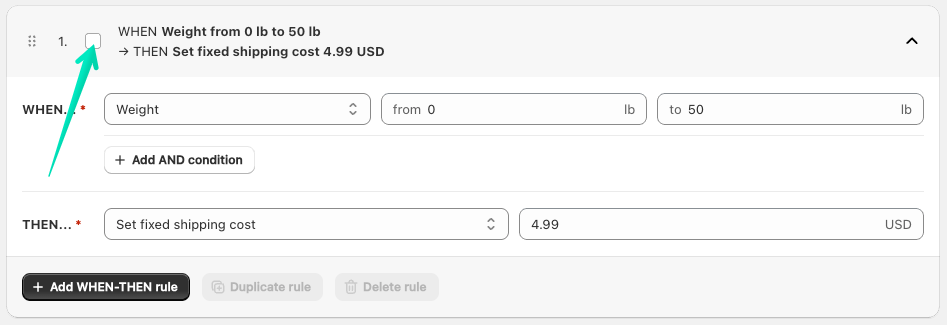
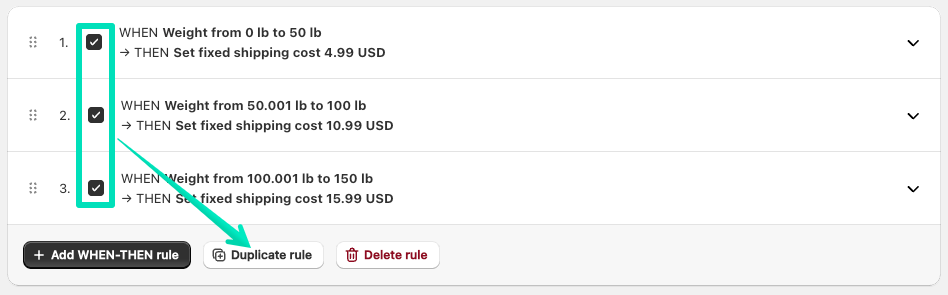
To duplicate an existing shipping cost calculation rule, select it first by checking the box next to its label:
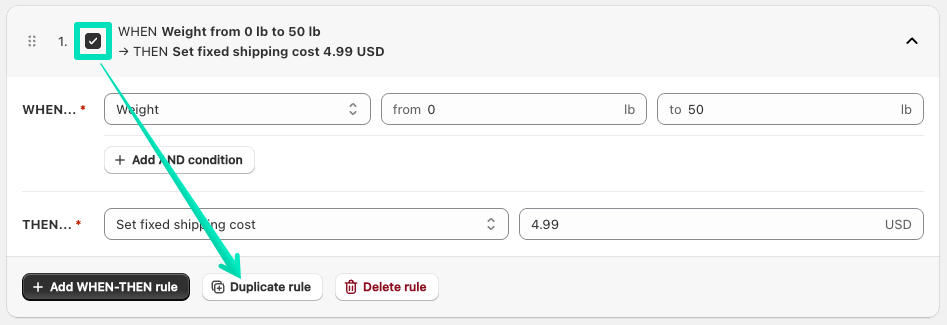
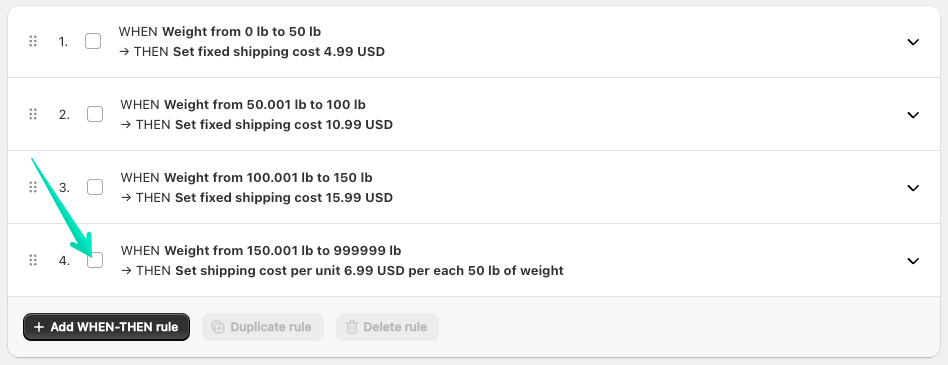
Once selected, the options at the bottom of the table will become active. Click the Duplicate rule button — the duplicated rule will appear as the last one at the bottom of your rules list.
You can also duplicate multiple rules at once in the same way — just tick the checkboxes next to the ones you want to copy:
How to delete shipping cost calculation rules
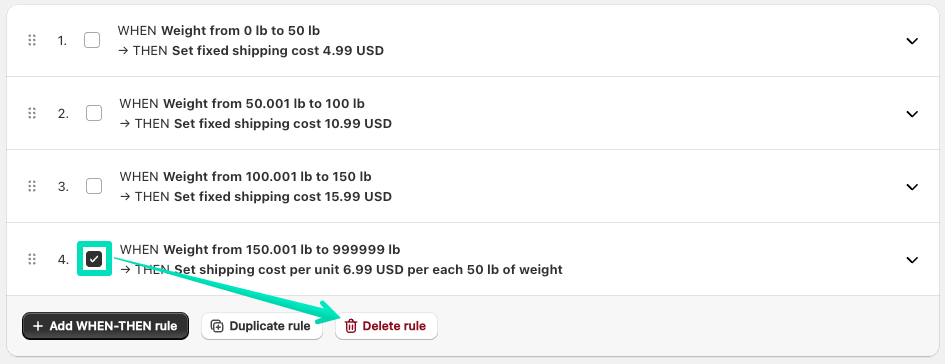
To delete an existing shipping cost calculation rule, select it first by checking the box next to its label:
Once selected, the options at the bottom of the table will become active. Click the Delete rule button to permanently remove it.
Please note that deleting a shipping cost calculation rule is irreversible. Once a rule is deleted, it cannot be restored and will need to be recreated the same way it was originally added.
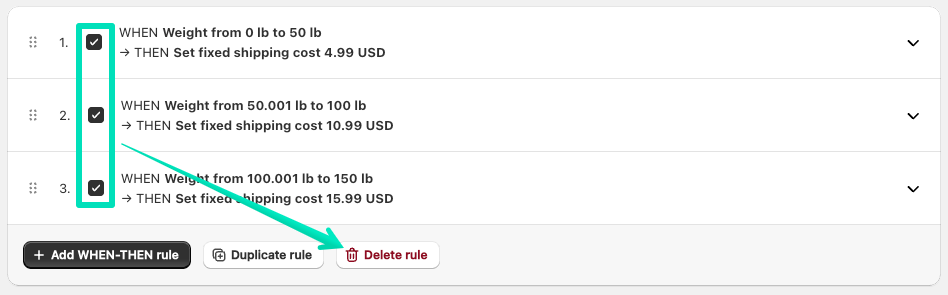
You can also delete multiple rules at once in the same way — just tick the checkboxes next to the ones you want to remove:
How to reorder shipping cost calculation rules
Since the shipping cost is calculated according to the order of the WHEN-THEN rules in the table — from top to bottom — the correct order of these rules might be crucial in certain configurations.
To reorder the shipping cost calculation rules, simply drag and drop them using the handle icon on the left, then click the Save button at the top of the screen to apply your changes.
How to hide a shipping method in a specific situation
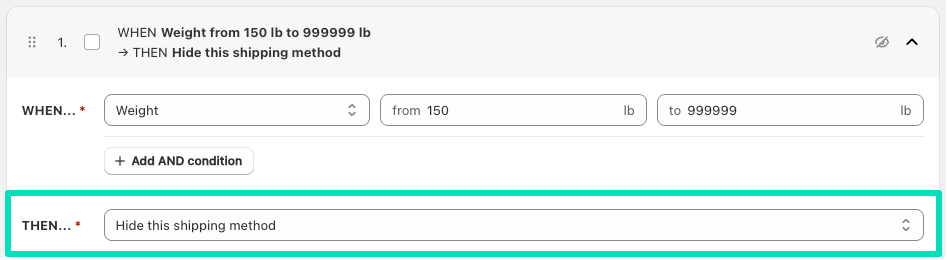
If you need a particular shipping method to be unavailable or remain hidden under specific circumstances — for example, when the total order weight exceeds 150 lbs, when an order contains a certain product, when the item quantity goes beyond a defined limit, etc. — you can easily set this up using the THEN: Hide this shipping method action.
To do so, first define the WHEN condition that determines when this shipping method should be hidden, e.g.:
when total order weight is over 150 lbs:

when an order includes a product with Non-shippable product tag:
or when total quantity of ordered items exceeds 200:

Next, select the THEN: Hide this shipping method action:
If configured this way, it will result in hiding this shipping method at checkout whenever the defined condition is met.
How to add a custom shipping notice or request a shipping quote in Shopify checkout
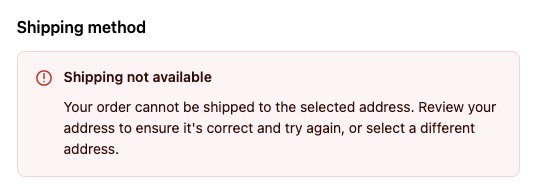
If you’d like to show a custom message in your Shopify checkout when no shipping methods are available (for example, when a customer enters an address you don’t ship to by default or adds products for which shipping must be calculated manually), you can easily do this using Shopify’s built-in features. Simply edit the existing Shopify ‘Shipping not available‘ checkout notice and replace its content with your own custom information:
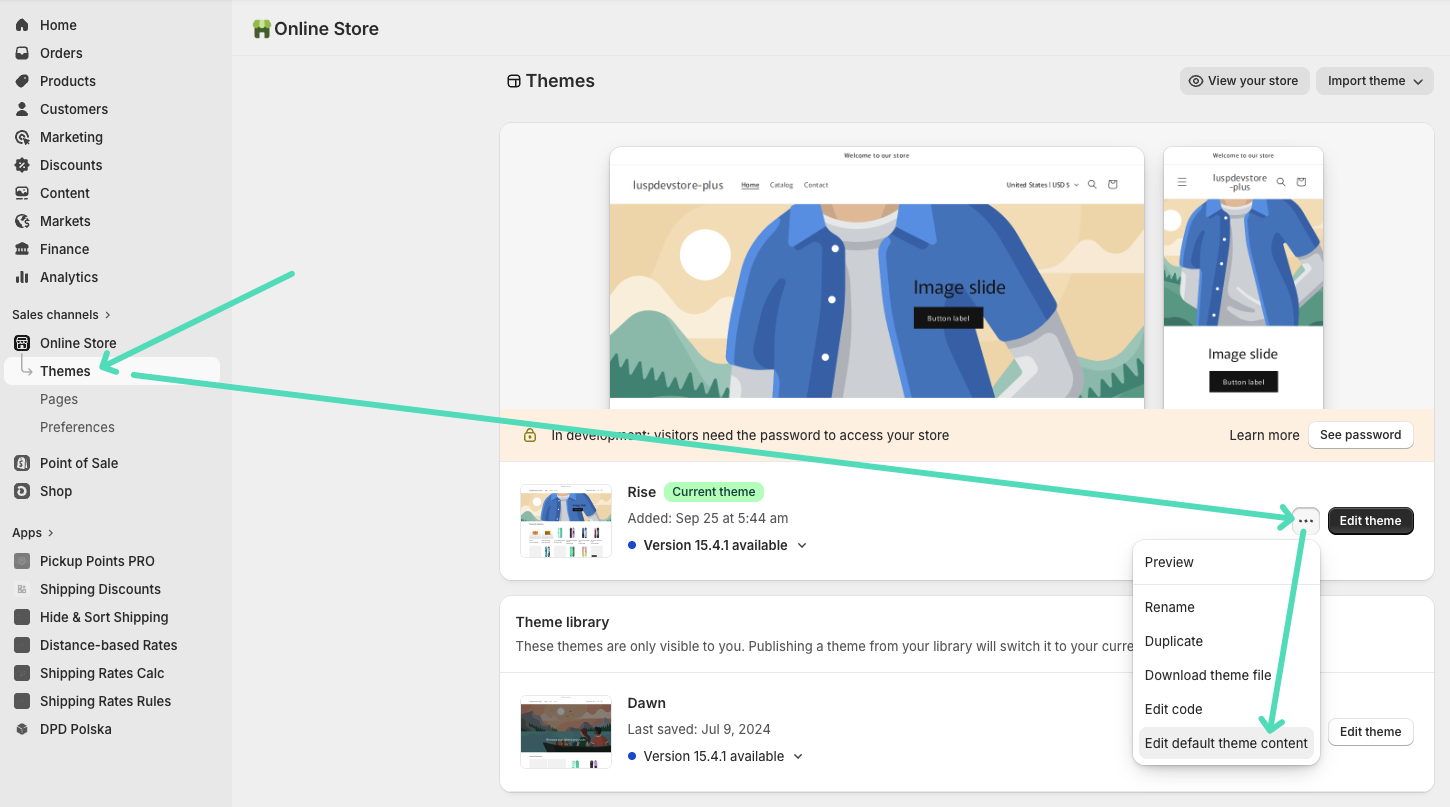
To do so, use the sidebar menu and go to Sales channels → Online Store → Themes to reach Shopify theme editor. Then, click the … ‘More’ button next to the theme your store is currently using (marked as Current theme), and choose Edit default theme content from the dropdown list:
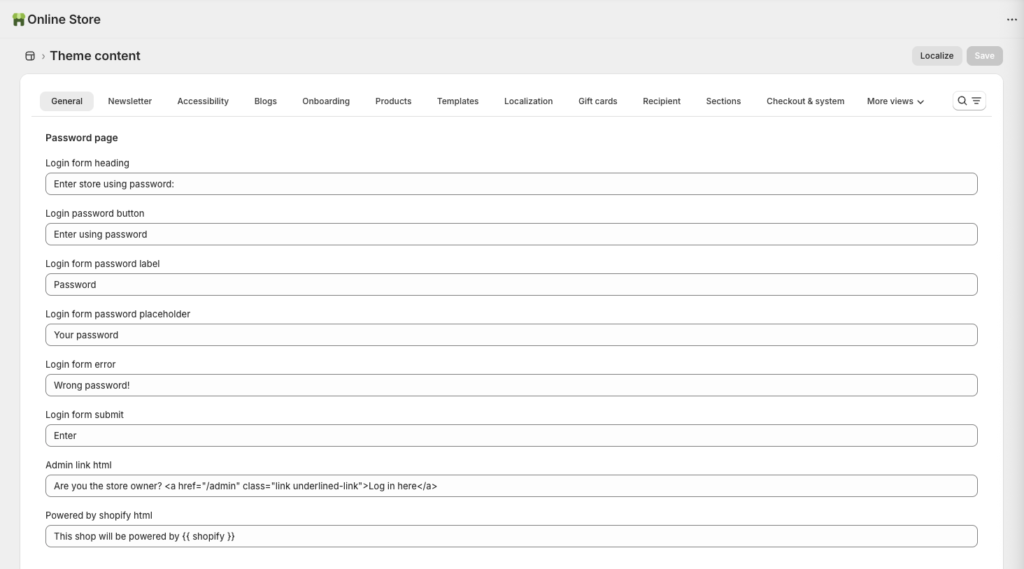
You will be redirected to the Theme content management screen:
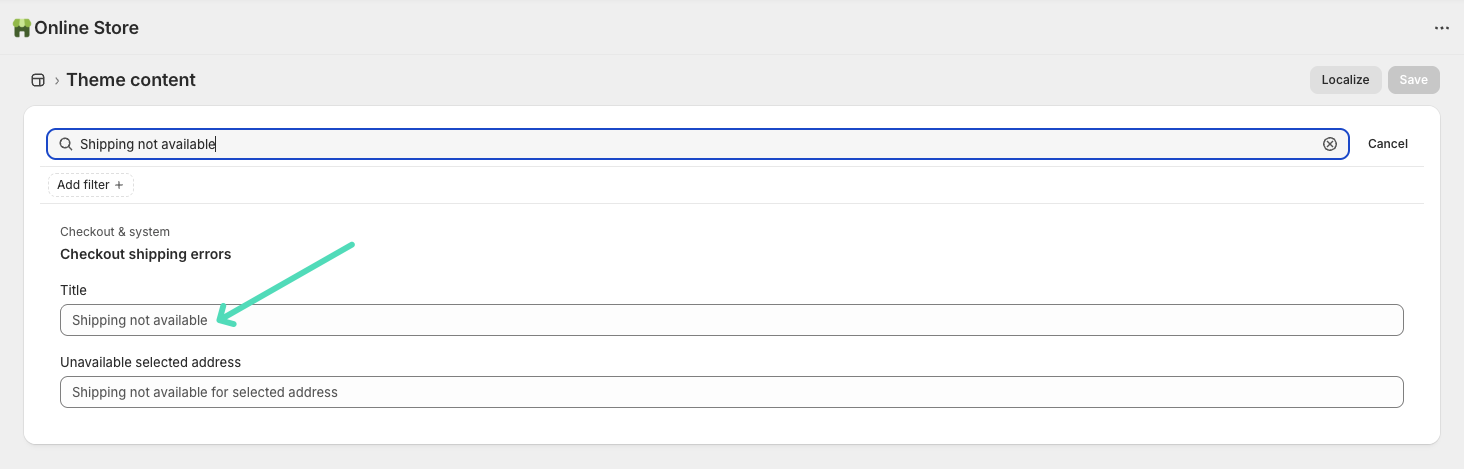
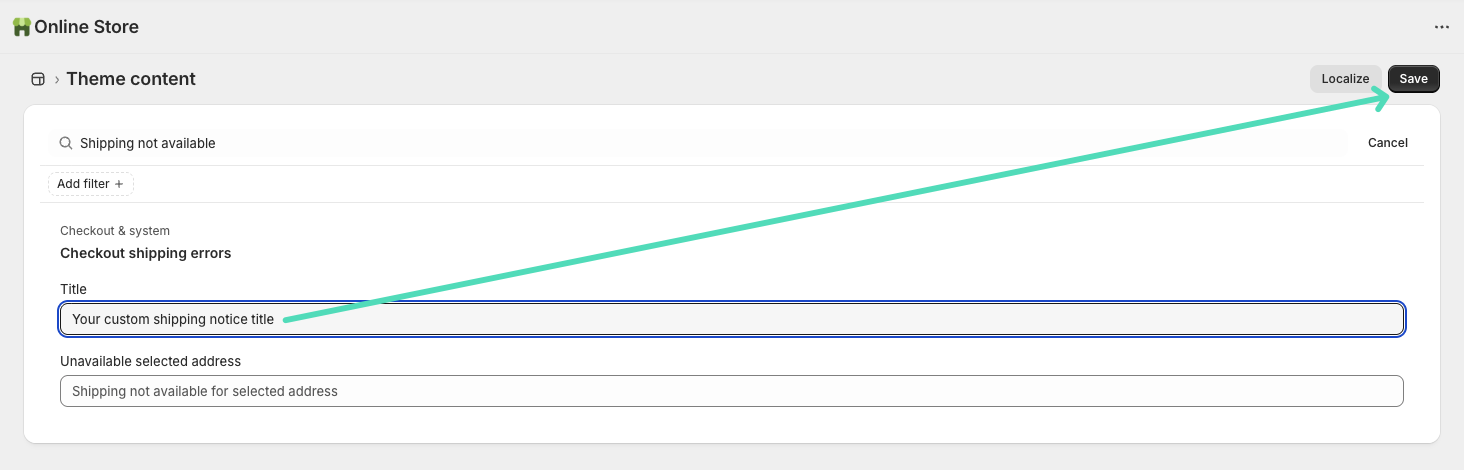
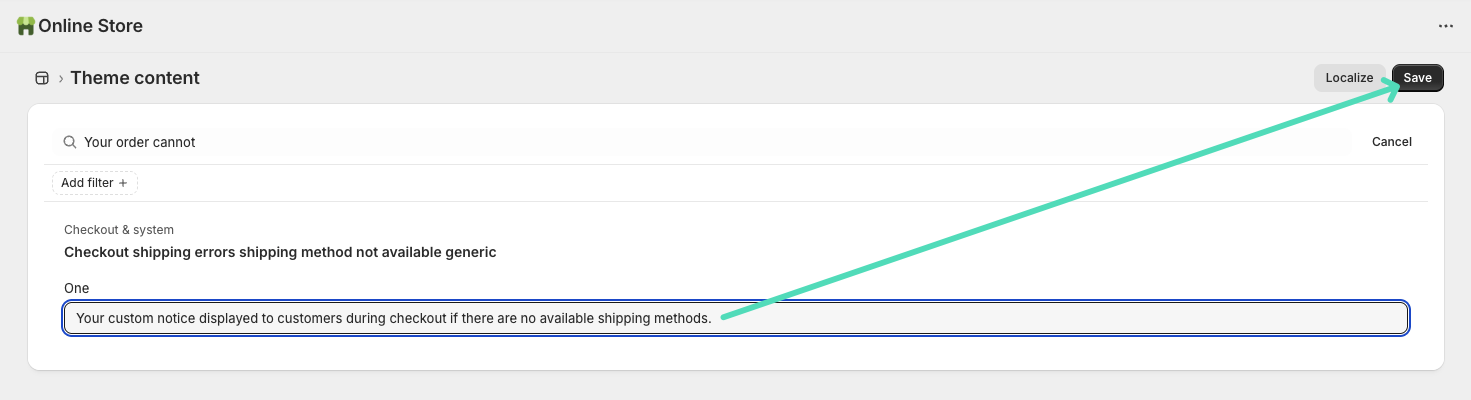
Use the search button on the right to find the phrases shown in Shopify’s default ‘Shipping not available’ notice:
Shipping not available notice title:
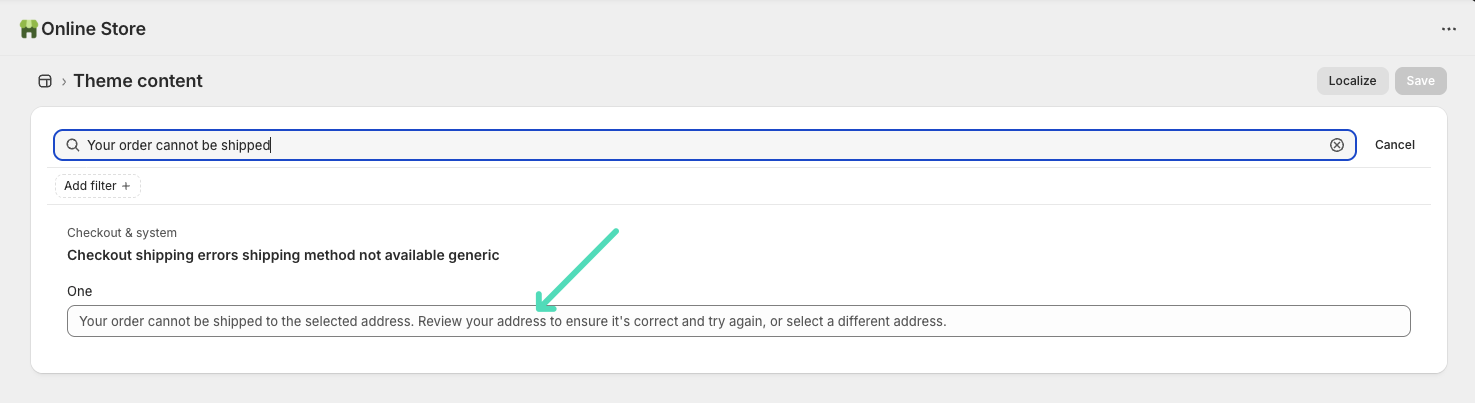
Your order cannot be shipped… notice content:
Type your text into the right fields to replace the default content and confirm the changes made here by clicking the Save button:
The default Shopify’s Shipping not available notice shown at checkout will be updated according to the changes you’ve made:
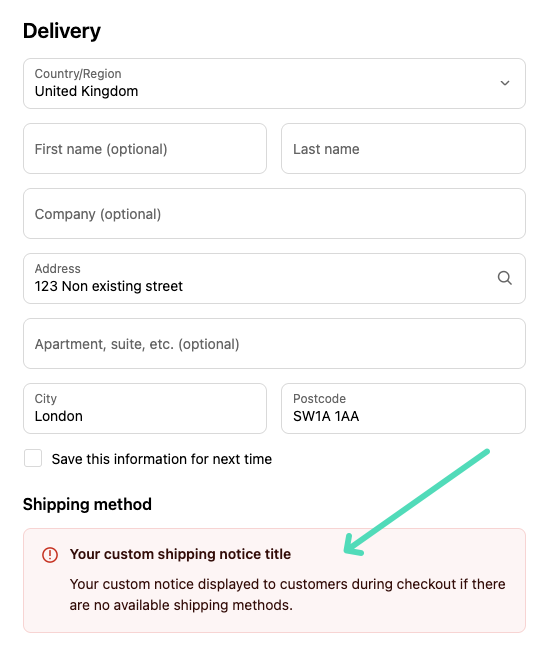
By modifying the default Shopify’s Shipping not available notice this way, you can add your own information, for example, explaining why shipping isn’t possible or inviting customers to request a custom shipping quote.
Please note that Shopify does not currently allow links in this notice, so any HTML tags you include here will be displayed as plain text.