Before using the UPS Ground Saver (formerly SurePost) shipping method, ensure that your API Type is correctly configured, as described in our dedicated articles:
- For Client Credentials – REST API you need to type your UPS Account Number
- For API Access Key – XML API you need to fill all credentials
UPS Ground Saver Important Information and Requirements
Apart from the standard UPS Live Rates shipping method described here our UPS plugin supports also the UPS Ground Saver services. Due to their specifics they need to be handled by the separate shipping method – UPS Ground Saver Live Rates.
Please mind that the UPS Ground Saver services are not available for UPS accounts by default and probably wouldn’t be available to new / low volume shippers (not until enough volume is determined by UPS). Each of the UPS Ground Saver services needs to be activated first, what can be achieved by contacting UPS and filling out additional applications.
What’s more, the UPS Ground Saver services are available only for U. S. territories and they don’t extend to international destinations. It means that both – the shop’s origin as well as the shipping destination address entered by the customer in the cart or checkout need to be located in United States in order for UPS Ground Saver services to be available.
Once the UPS Ground Saver Live Rates shipping method has been added within a proper shipping zone following the previous instructions, let’s now move on to its configuration screen and learn how to set it up.
Additionally, you are responsible for checking whether the rates retrieved by the plugin match those actually paid for shipping.
Method Settings
You can change the order of the displayed services in the cart by dragging and dropping them in the method settings.
Method Title
– define the UPS Ground Saver Live Rates shipping method title which should be used in the cart/checkout when the Fallback option was triggered.
Fallback
– enable to offer a flat rate cost for shipping so that the user can still checkout, if the API, for some reason, returns no matching rates. If selected, the additional Fallback Cost field will appear below:

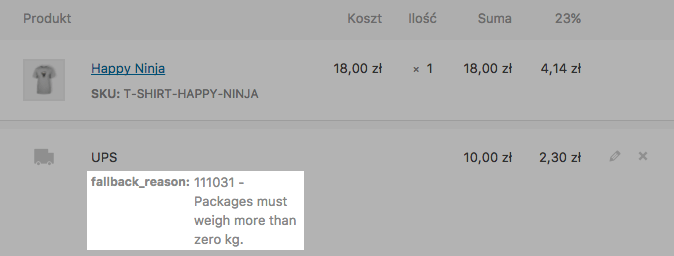
The UPS Ground Saver services may be unavailable for the order parameters: weight, shipping address, etc. but also due to incorrect data entered or no UPS API connection.
If the Fallback option was applied to the placed WooCommerce order, the reason of the application will be displayed here:
Free shipping
– tick the Enable the free shipping over amount checkbox in order to offer your customers the free shipping once the defined order total value threshold is reached. If selected, the additional Free Shipping Threshold field will appear below:

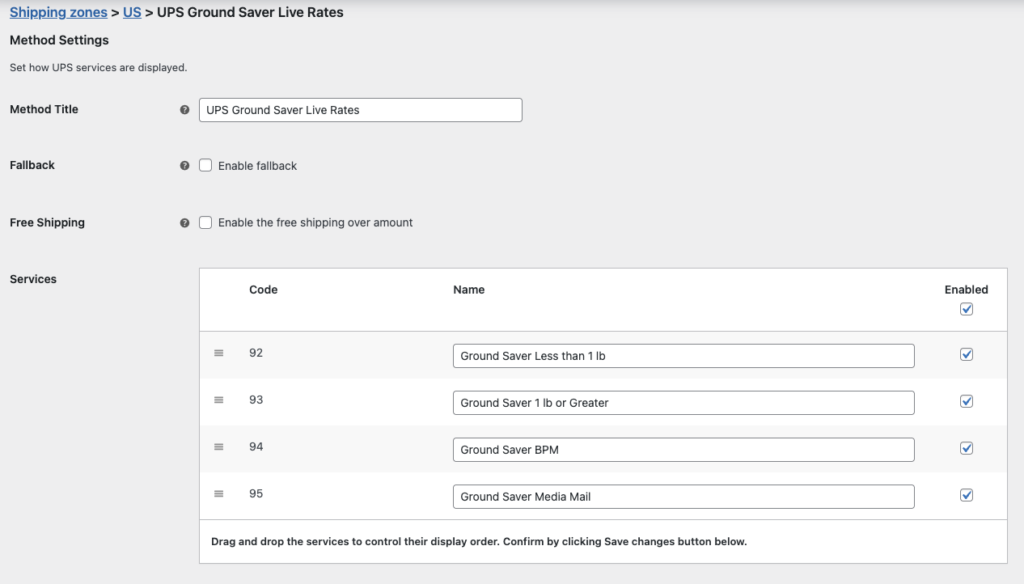
Services
– tick the right checkboxes to manage which UPS Ground Saver services should be available for your customers to choose from. You may also change their names here and set the order of how they are displayed in the cart and checkout.
Please mind that the Services table content may vary depending on which UPS Ground Saver services were activated on your UPS account.
Rates Adjustments
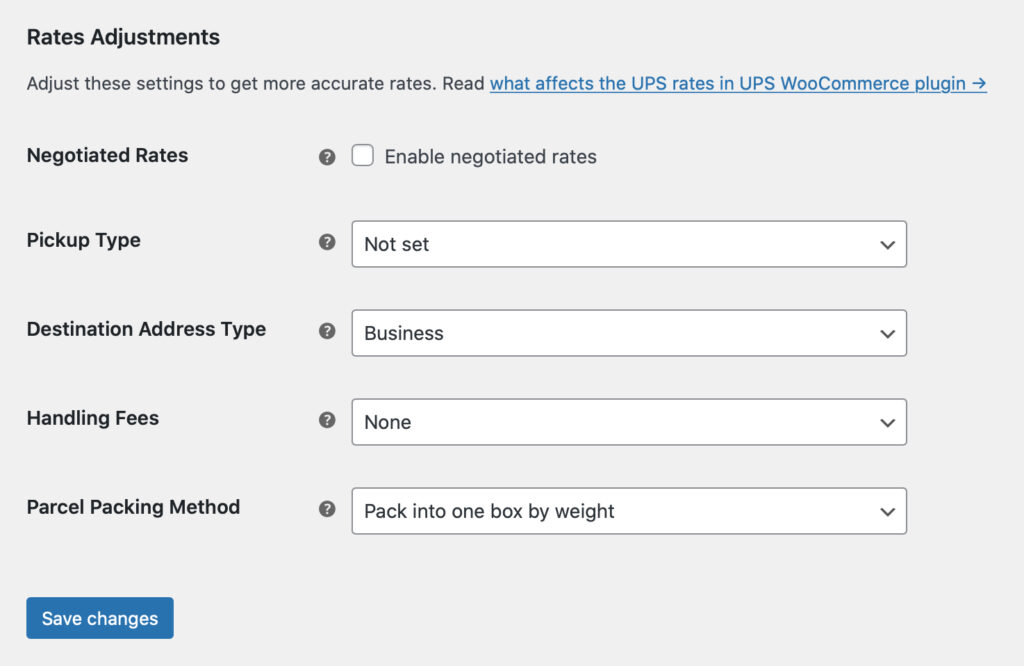
Negotiated Rates
– enable this option if you want to use the Negotiated Rates assigned to your account. If not selected or your UPS agreement doesn’t include assigning the discounted rates to your account, the standard rates will be used by default.
Pickup Type
– this option allows to set the pickup type of your shipping. It may affect the live rates. You can choose the Pickup Type which suits your needs best from the following:
- Not set,
- Daily Pickup.
In most cases selecting the Daily Pickup grants the most accurate rates.
If the Not set option has been chosen, the PickupType value will not be sent in the UPS API request, which might also result in getting the more accurate rates returned in some cases.
PRO Destination Address Type
– if UPS API won’t be able to validate recipient’s address, you can select the type of address for which the rate will be calculated:

PRO Handling Fees
– use this option if you want to charge your customers with the handling fees automatically added to the UPS Ground Saver live rates:
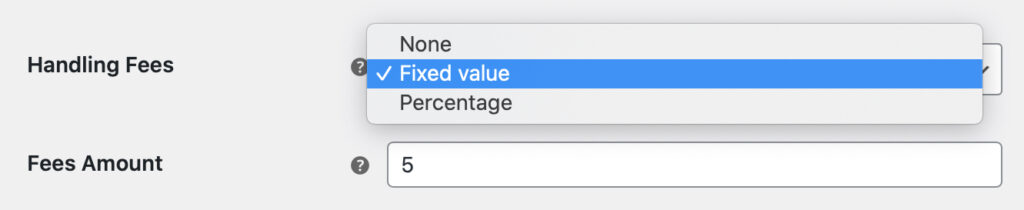
You can choose if the handling fee should have the Fixed or the Percentage value. Once one of these options is selected the additional Fee Amount field will appear below.
Please mind that you can also use the Handling Fees option to offer your customers the discounted UPS Ground Saver live rates by entering the negative value, e.g. -10 in the Fee Amount field.
The Handling Fees setting you configure here will apply the defined fee or discount to all the rates for the ticked UPS Ground Save services displayed in the cart or checkout.
PRO Parcel Packing Method
– define the way how the products should be packed:
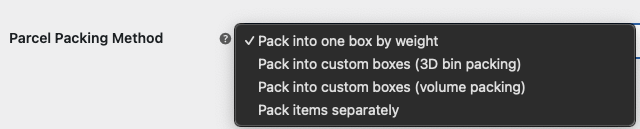
- Pack into one box by weight – a default live rates calculation method. Weight of all the ordered products is summed up and they are considered as shipped together in the one package.
- Pack items separately – each product is considered as if it was shipped in a separate box.
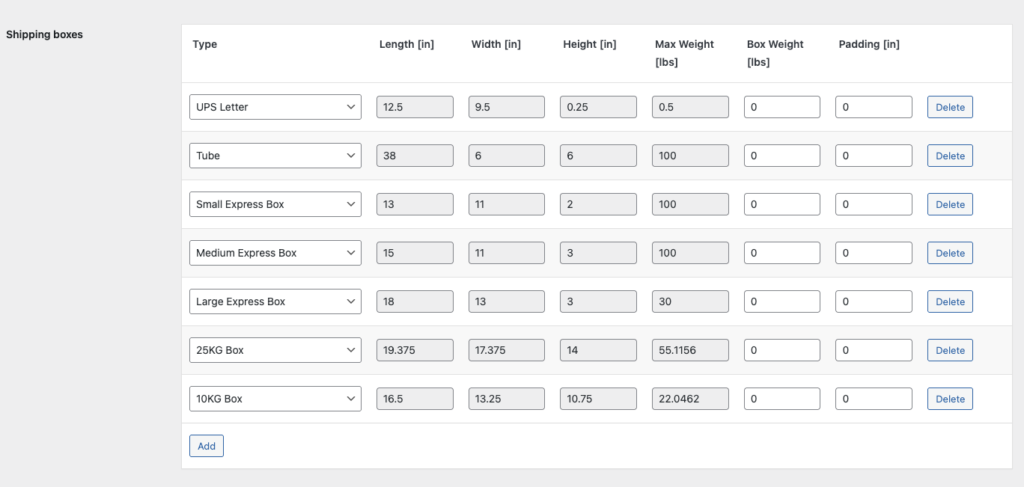
- Pack into custom boxes – this option gives you a choice which packages to use. You can choose from the standard UPS packagings or precisely define your own custom boxes and their size, including the Box weight and Padding (which will be deducted from the Max Weight and Length / Width / Height dimensions of the package). If some product exceeds the size of the used custom boxes / UPS default packagings and cannot be fit in, the plugin will return the Fallback if set.
Parcel Packing Method – volume packing – how the fitting algorithm works?
If you chose the Parcel Packing Method: Pack into custom boxes option our UPS PRO plugin will automatically optimize the packing method using the most accurate boxes setup to offer the lowest shipping cost. To make it clear let’s have a look how the fitting algorithm works. Let’s assume you have defined 3 custom boxes’ types:
- 1x1x1
- 2x2x2
- 5x5x5
The fitting algorithm in such case will look like this:
[ 1, 1, 1, '1' ], // 1 items 1 square = best fit is 1x1x1
[ 2, 1, 1, '2' ], // 1 items 2 square = best fit is 2x2x2
[ 4, 1, 1, '5' ], // 1 items 4 square = best fit is 5x5x5
[ 5, 1, 1, '5' ], // 1 items 5 square = best fit is 5x5x5
[ 0.5, 8, 1, '1' ], // 8 items 0.125 square = best fit is 1x1x1
[ 0.5, 9, 1, '2' ], // 9 items 0.125 square = best fit is 2x2x2
[ 1, 8, 1, '2' ], // 8 items 1 square = best fit is 2x2x2
[ 1, 9, 1, '5' ], // 9 items 1 square = best fit is 5x5x5 (other algorithm could get 2x2x2 + 1x1x1)
[ 1, 125, 1, '5' ], // 125 items 1 square = best fit is 5x5x5
[ 1, 126, 2, '5' ], // 126 items 1 square = best fit is 5x5x5 + 1x1x1 (two packages, exactly one is 5x5x5)
[ 1, 133, 2, '5' ], // 133 items 1 square = best fit is 5x5x5 + 2x2x2 (two packages, exactly one is 5x5x5)
So it will match the best setup to fit as much products as possible into one box based on the products dimensions.
If you want to learn more how the particular settings from Rates Adjustments section described above influence the displayed live rates, please check our article What affects the UPS rates in UPS WooCommerce plugin? →
While comparing the rates coming from the UPS API and displayed by the plugin with the ones from the UPS online calculator, please ensure that:
- You are checking the rates in the UPS online calculator while being logged in to your UPS user account,
- The default payment method has been defined for your UPS user account at Profile > Accounts and Payment Options.
Otherwise, you may encounter some discrepancies between the prices displayed in the online calculator and the ones returned by the plugin, as a result of the discounts assigned to your account haven’t been applied by the online calculator.
Parcel Packing Method – 3D bin packing – how the fitting algorithm works?
As per the Box Packing algorithm documentation:
Bin packing is an NP-hard problem and there is no way to always achieve an optimum solution without running through every single permutation. But that’s OK because this implementation is designed to simulate a naive human approach to the problem rather than search for the “perfect” solution.
This is for 2 reasons:
- It’s quicker
- It doesn’t require the person actually packing the box to be given a 3D diagram explaining just how the items are supposed to fit.
At a high level, the algorithm works like this:
- Pack largest (by volume) items first
- Pack vertically up the side of the box
- Pack side-by-side where item under consideration fits alongside the previous item
- If more than 1 box is needed to accommodate all of the items, then aim for boxes of roughly equal weight (e.g. 3 medium size/weight boxes are better than 1 small light box and 2 that are large and heavy)
PRO Dates and Time
UPS GroundSaver is a contract-only service that uses the UPS Ground network, with final delivery typically provided by the U.S. Postal Service. Therefore, unlike the UPS Live Rates, the Dates & Time settings section, including the Estimated Delivery option, is not available for the UPS Ground Saver Live Rates shipping method.
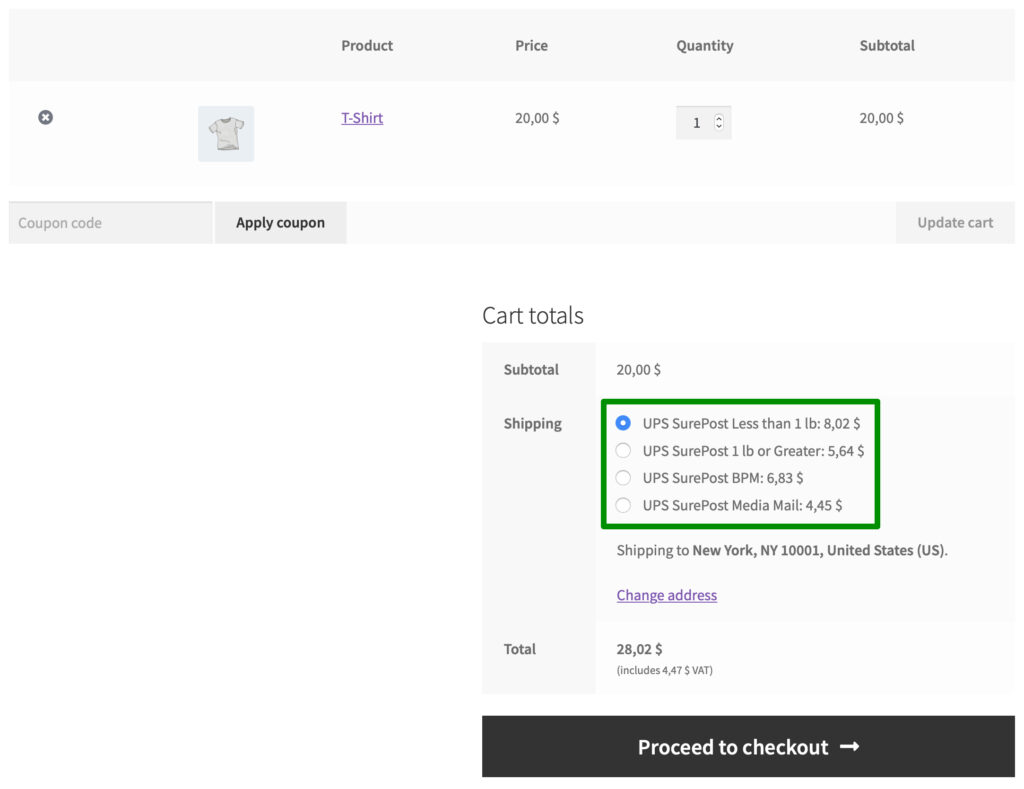
Once the UPS account credentials has been entered in the plugin settings and UPS GroundSaver Live Rates shipping method added and properly configured, the selected UPS GroundSaver services with their dynamically calculated rates will be automatically displayed in the cart and checkout: