- Differences between the standard and 'No Carrier Service API access' app version
- Configuring the shipping rates for pickup points
- Adding the Pickup points map cart widget block to the Cart page
- Octolize Pickup Points PRO Global settings
- Carriers and Countries
- Adding carrier pickup points for selected country
- Saving the information about the customer's selected pickup point to the order details
- Passing the selected pickup point to the 3rd party integrations
- Pickup points map cart widget appearance customization
If your store is running on a Shopify plan which does not include the Carrier Service API access (e.g., the default Basic plan) and you see the following banner right after the app is installed:
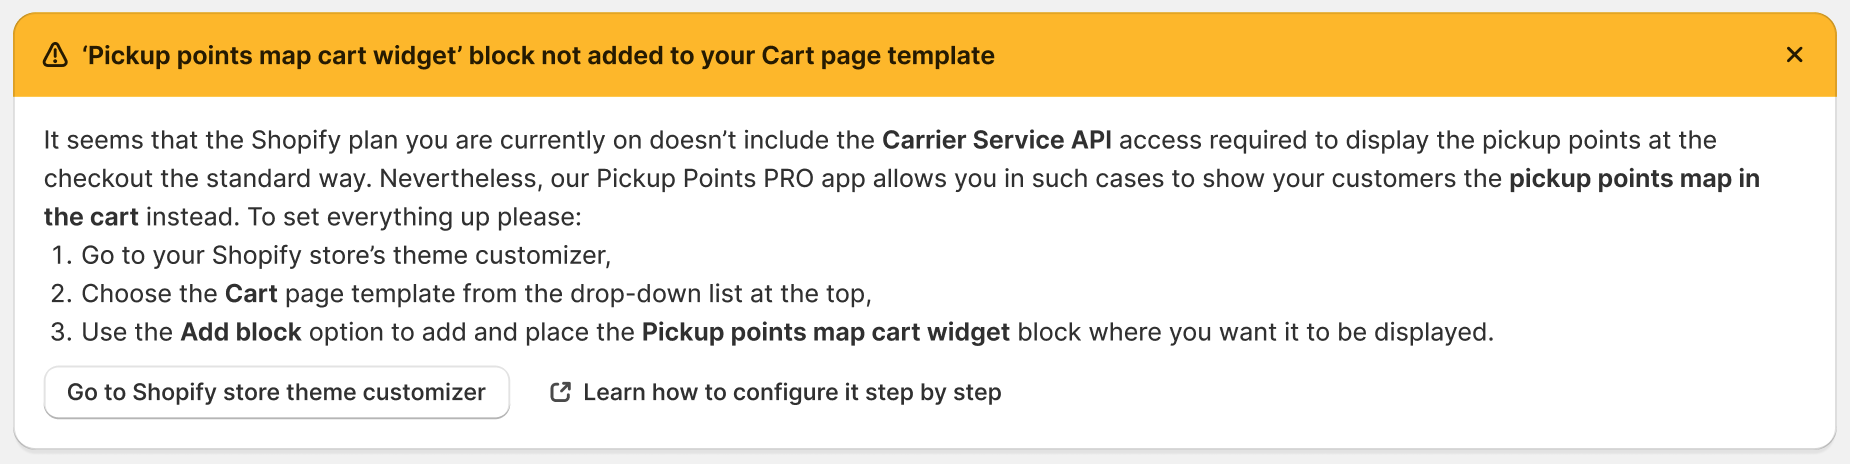
it means that this guide is for you and simply proceed with the further instructions below.
If, in turn, you are currently on the plan which provides the Carrier Service API access (e.g., Shopify, Advanced Shopify or higher), please refer to the dedicated guide for standard app version →
Differences between the standard and ‘No Carrier Service API access’ app version
Standard app version for Shopify plans with Carrier Service API access
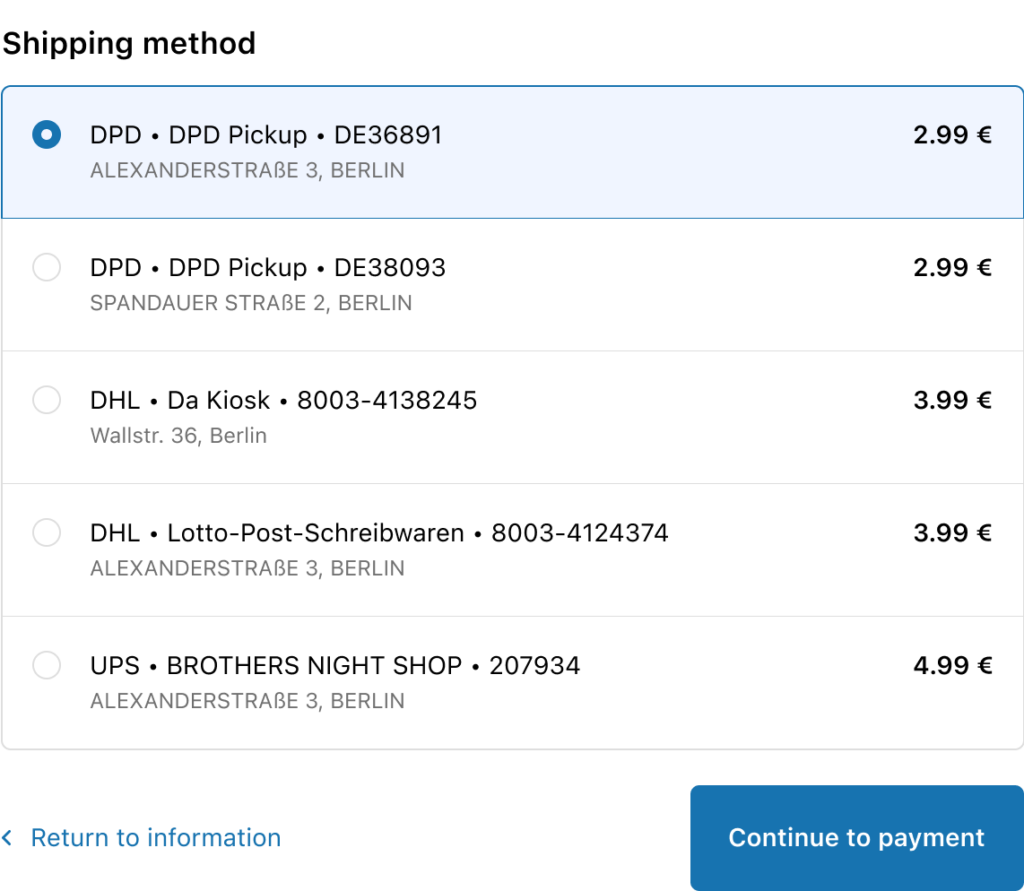
The standard app version running in the stores with Carrier Service API access displays the nearest pickup points of the selected carriers at the checkout and allows your customers to choose their preferred one from the list the way below:
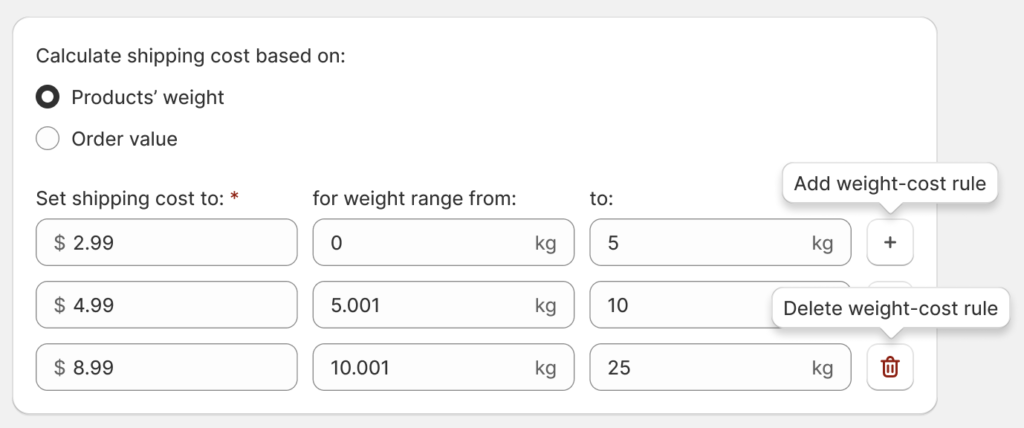
It also gives you a possibility to configure the way how the shipping cost should be calculated by defining the weight- or price-based rules directly from the app settings:
App version for plans without Carrier Service API access
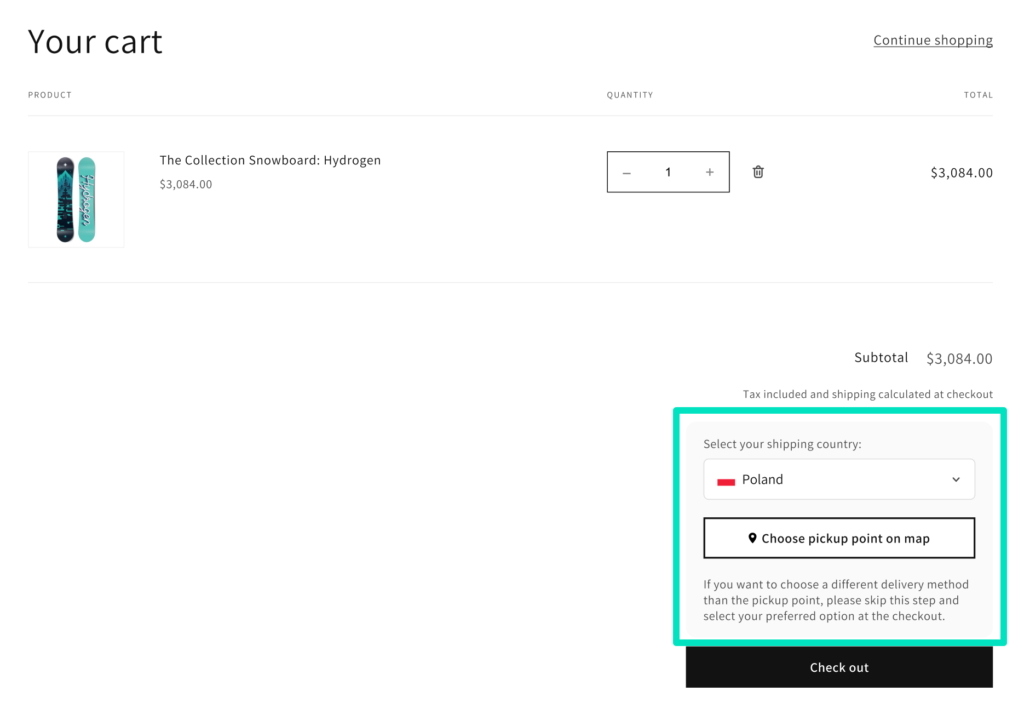
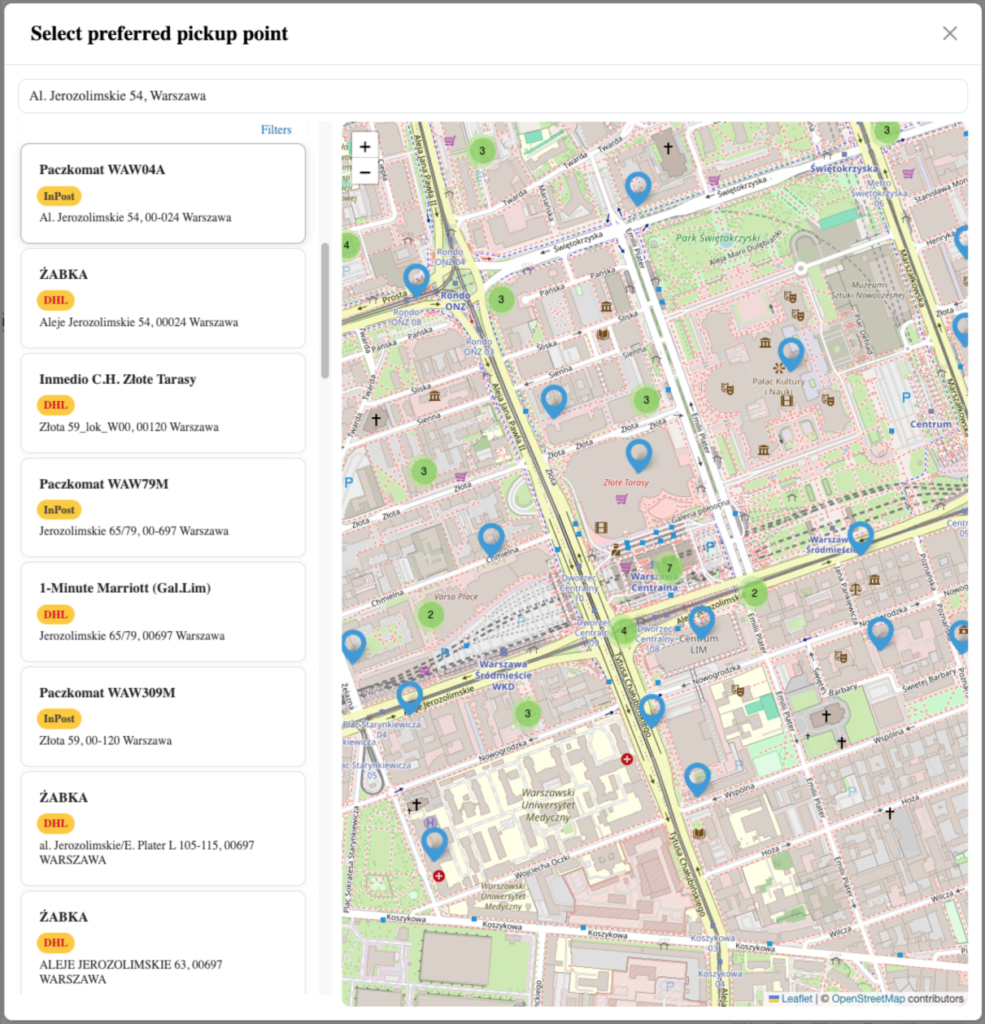
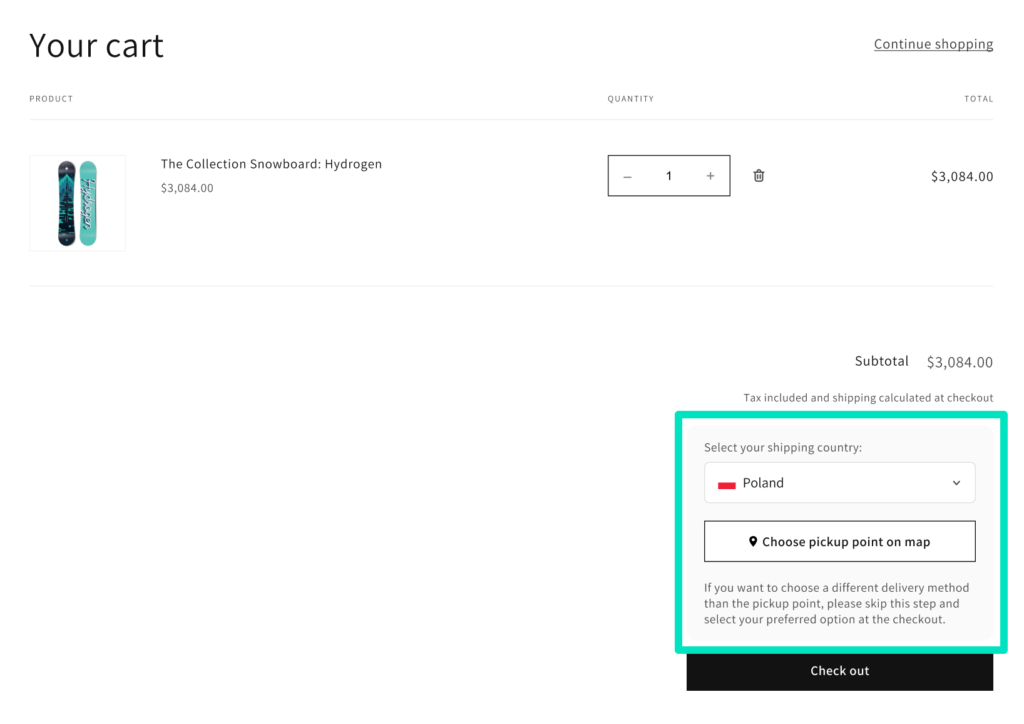
The ‘No Carrier Service API’ app version, due to the current in-built Shopify limitations requires a slightly different approach, since the pickup points selector cannot be added directly to the checkout. This is why, as a kind of work-around, this version of the app gives you a possibility to add the pickup points selection widget in the cart instead and allows your customers to choose their preferred one from the map:
The second major difference in the version of the app dedicated for stores without Carrier Service API access is that instead of defining the shipping cost calculation rules for pickup points directly on their configuration screen, it is necessary to add the dedicated shipping rates in the Shopify Shipping and delivery settings and then assign them to the relevant pickup points they should be used for.
At first glance, this may sound a bit complicated, but there is nothing to worry about. We will walk you through the entire configuration step by step. Let’s get going then and begin with…
Configuring the shipping rates for pickup points
Despite that the shipping rates will be used in the one of the further configuration steps, let’s have them prepared first, so they are ready to use later.
To configure the shipping cost your customers will be charged when they choose delivery to pickup points, go to the Shopify Shipping and delivery settings and use the Add rate button to add dedicated rates for pickup points in the relevant Shipping zones: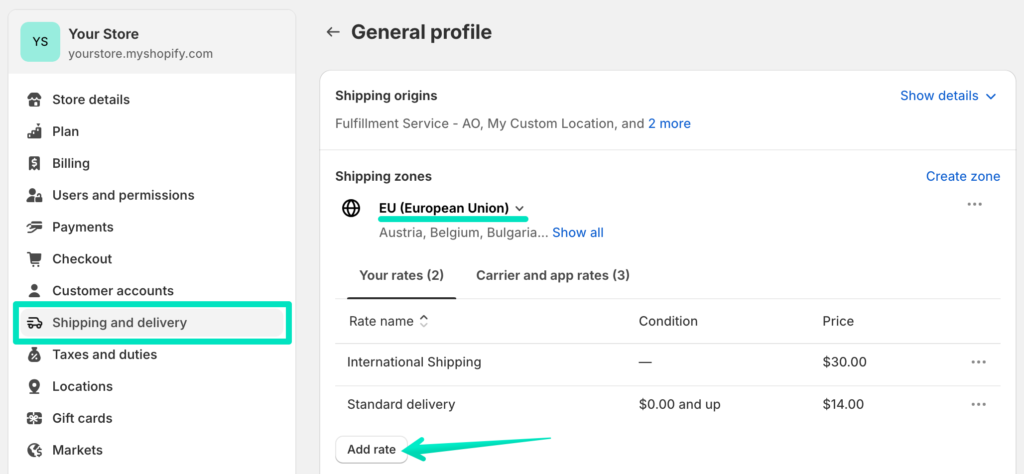
You can add multiple rates for specific carrier’s pickup points, e.g., if you want the shipping cost to be different, depending on the products’ weight or the order value.
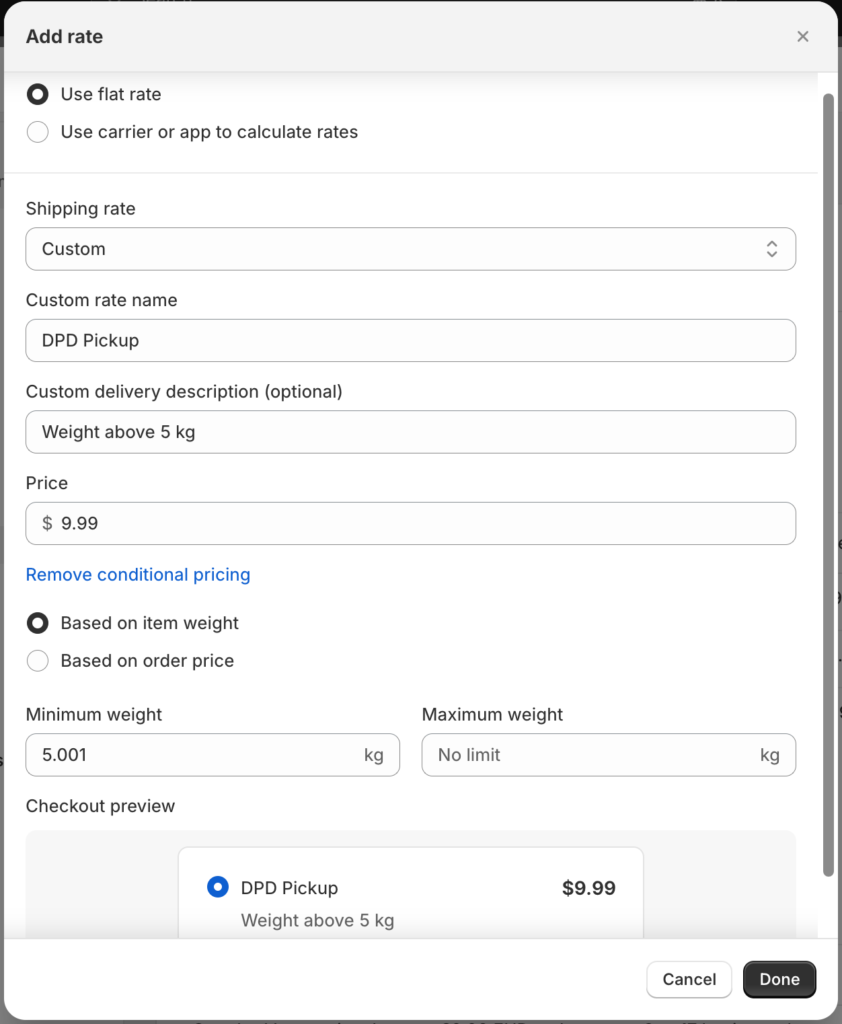
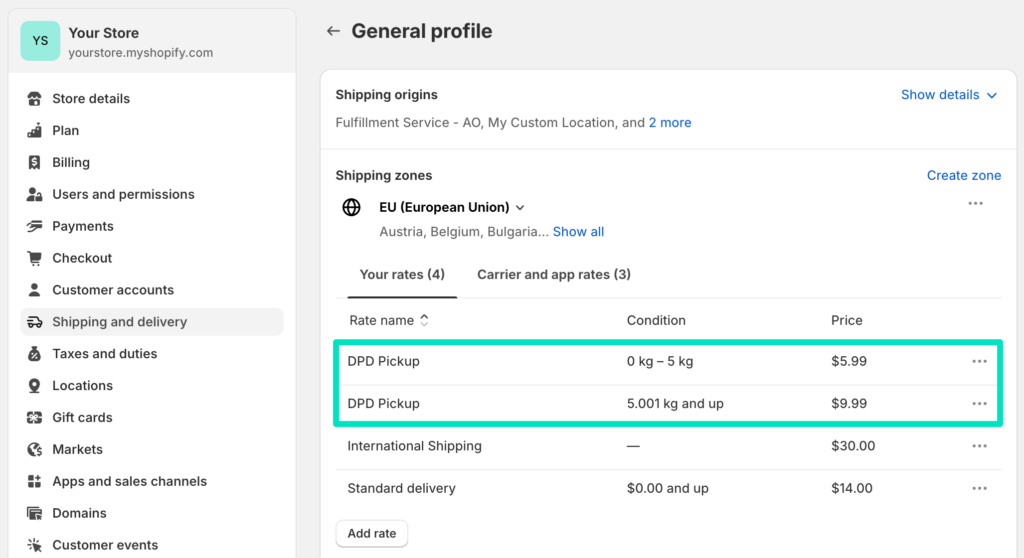
For the purposes of this guide, I will add 2 shipping rates based on weight for the shipments sent to DPD pickup points and configure them the way below:
The next step is…
Adding the Pickup points map cart widget block to the Cart page
In order to display the button allowing your customers to open the pickup points map in the cart of your store, you need to add the dedicated Pickup points map cart widget block to the Cart page template first. If you haven’t done it yet, the following info banner will be displayed at the very top of the screen once the app is installed:

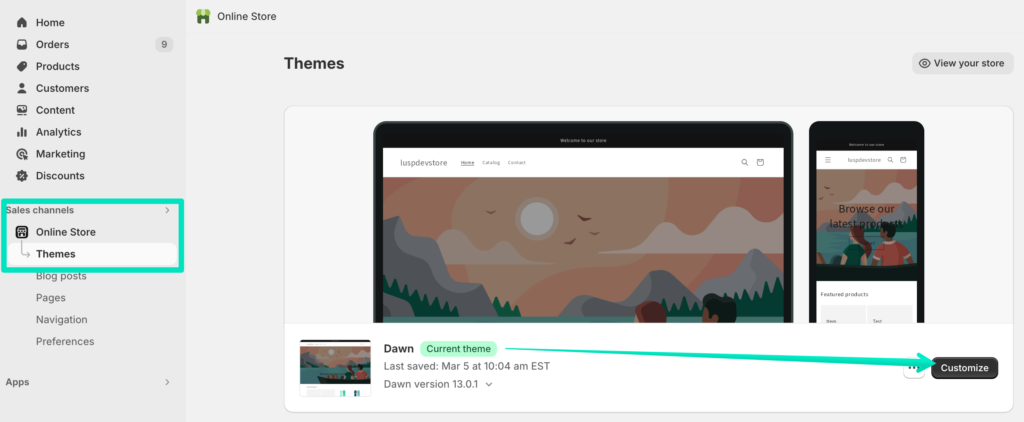
Click the Go to Shopify store theme customizer button or reach the theme customizer by choosing the Sales channels → Online store → Themes in the Shopify sidebar menu and using the Customize button next to the currently used theme in your store:
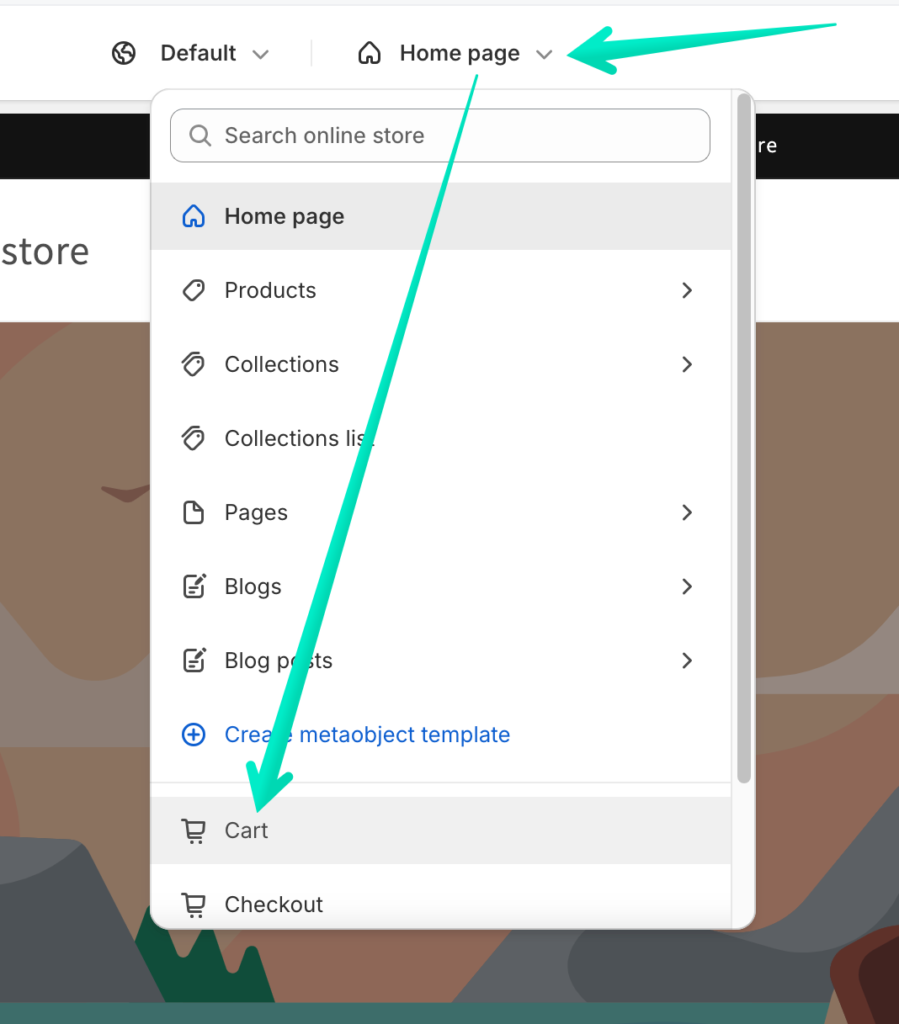
If you hit the Go to Shopify store theme customizer button you should be automatically redirected to the Cart page template editing screen. If for some reason it did not happen, click the drop-down list at the top and choose the Cart page template there:
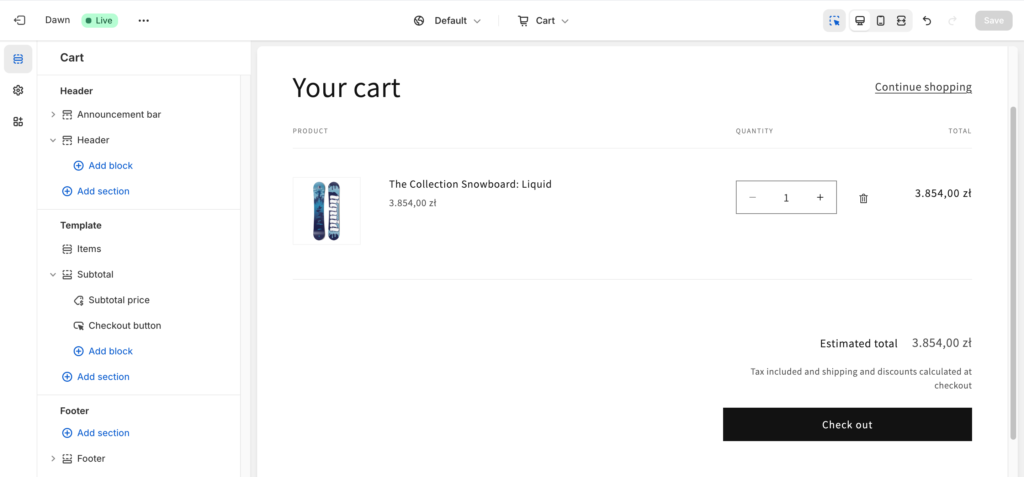
You should reach the following Cart page template editing screen:
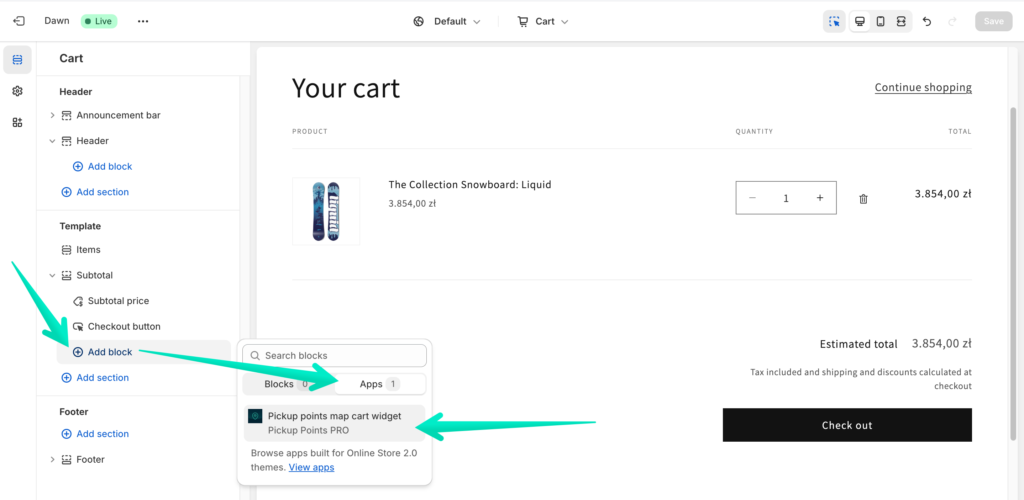
The Pickup points map cart widget block will be added to the Cart page template and the widget will appear in the preview panel according to the block’s placement:
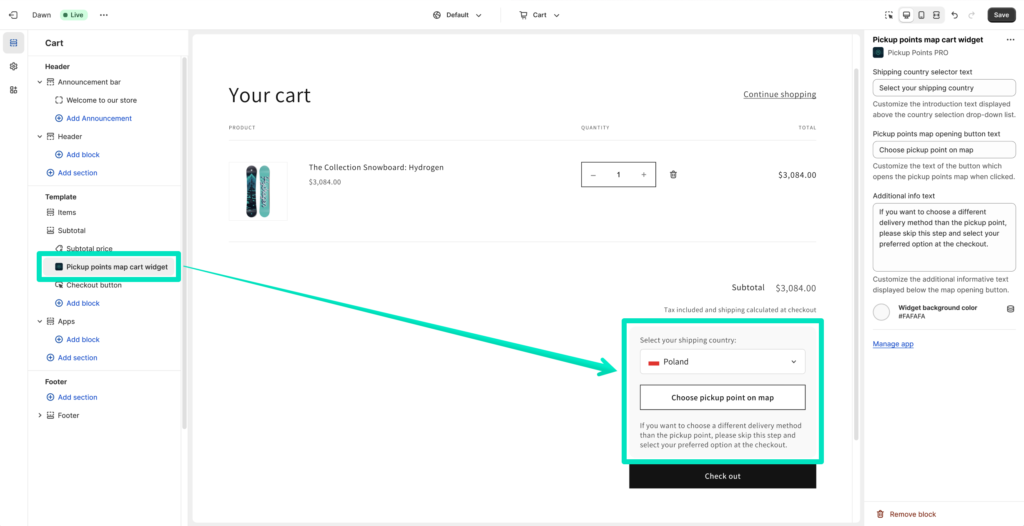
You can freely modify the Pickup points map cart widget block’s placement according to your preferences. To do that, simply drag & drop it to reorder the blocks in the Template tree and move it elsewhere.
Please mind that the available sections where you can place the block may vary depending on the theme the store is currently using, and your theme may not support placing the block in the locations visible in the screenshots above as well as may offer alternative available placement options.
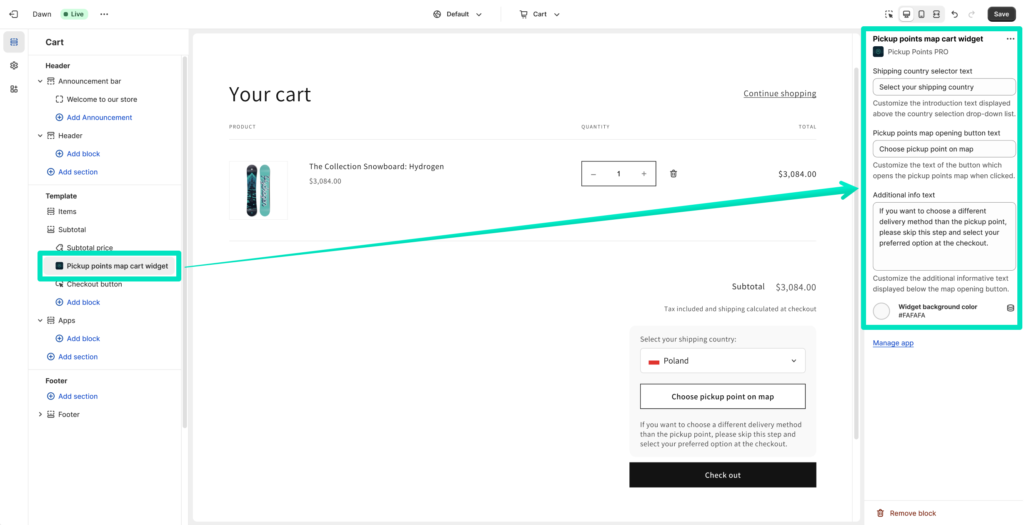
It is worth mentioning at this point that the Pickup points map cart widget block also provides the additional widget appearance customization options visible in the right panel, which will be described further in more detail in the Pickup points map cart widget appearance customization section:
Having it done, the only thing left now is to add the carrier pickup points to the specific countries in the Carriers and Countries table. But before we proceed with that, click the Global settings option in the app menu in the left sidebar. Let’s take a moment first to take a closer look at…
Octolize Pickup Points PRO Global settings
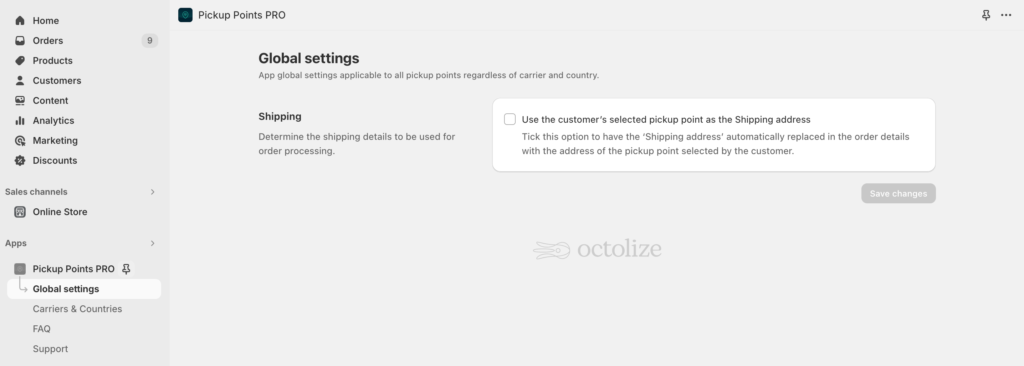
Shipping

Use the customer’s selected pickup point as the Shipping address – tick this checkbox to have the ‘Shipping address’ automatically replaced in the order details with the address of the pickup point selected by the customer.

Carriers and Countries
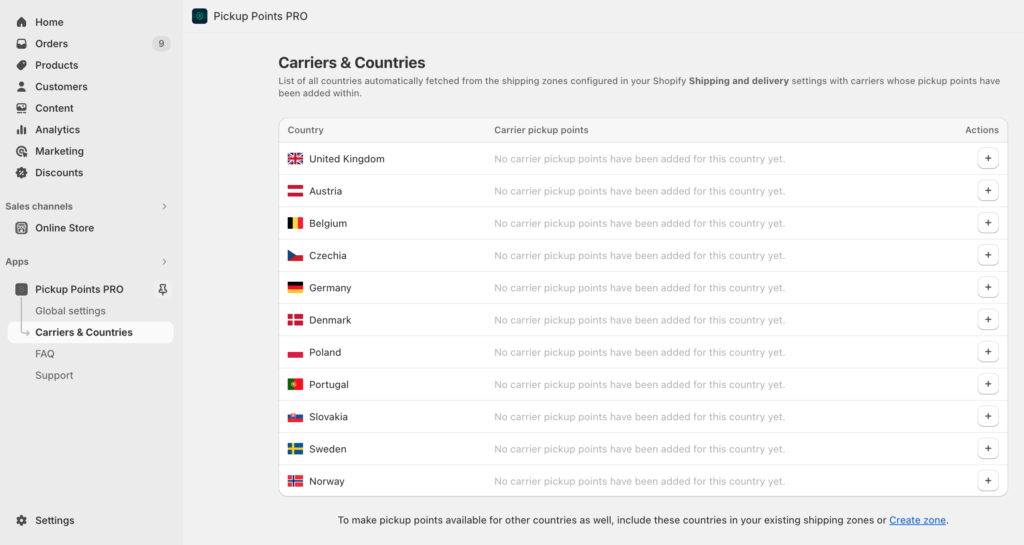
This page contains a table with all countries you are shipping to, automatically fetched from the shipping zones configured in your Shopify Shipping and delivery settings. It is also a place from where you will be able to manage what carrier pickup points should be available for shipping to each listed country.
If a country which you want to make pickup points also available for is not currently listed in the Carriers & Countries table, add it to an existing shipping zone in your Shopify Shipping and delivery settings or create a new zone including this country. Once it is added this way, it will also appear in the table.
Adding carrier pickup points for selected country
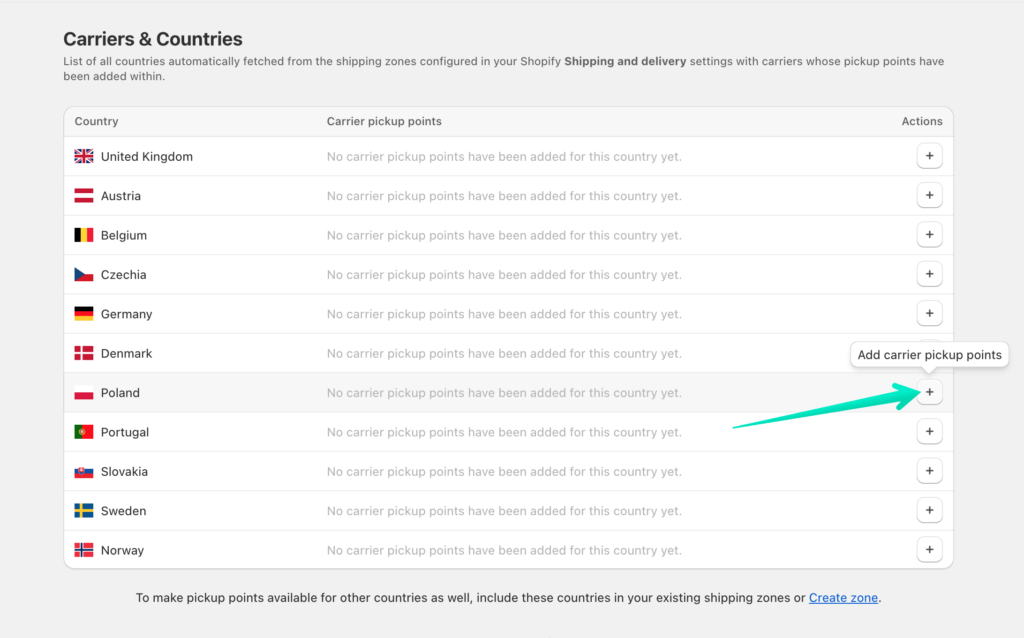
To add the specific carrier’s pickup points for shipping to the country where you want them to be available for, click the + plus button in the Actions column next to this respective country:

Carrier pickup points available in the app
The Octolize Pickup Points PRO app currently provides the pickup points of the following carriers:
- Česká pošta
- DHL
- DPD
- DPD Relais France
- Econt
- FAN
- FedEx
- GLS
- Hermes
- InPost
- Magyar Posta
- Orlen Paczka
- Poczta Polska
- PPL
- Sameday
- Slovak Parcel Service
- Slovenská pošta
- UPS
- Venipak
- WEDO
Please mind that the availability of specific carriers’ pickup points may vary depending on the country you are shipping to.
If the app is currently missing the specific carrier’s pickup points which you would like to use to ship your products to certain country, please let us know about it by clicking the Request new carrier button at the bottom, providing the name of the carrier you’d like to be added and sending the new carrier’s request.
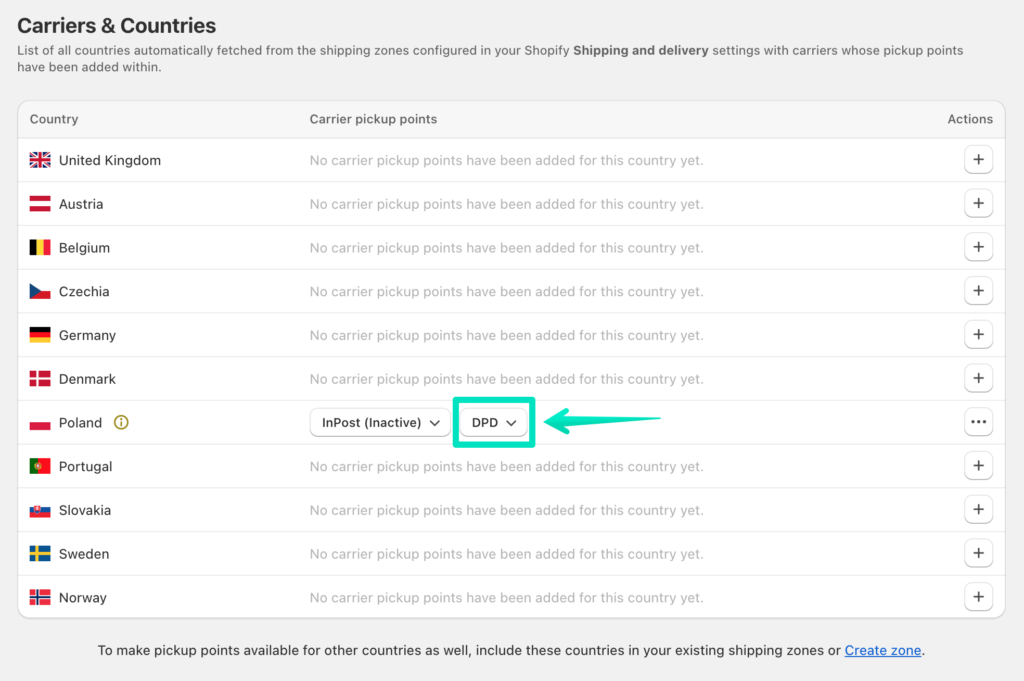
The selected carriers’ pickup points will be added to the respective country:
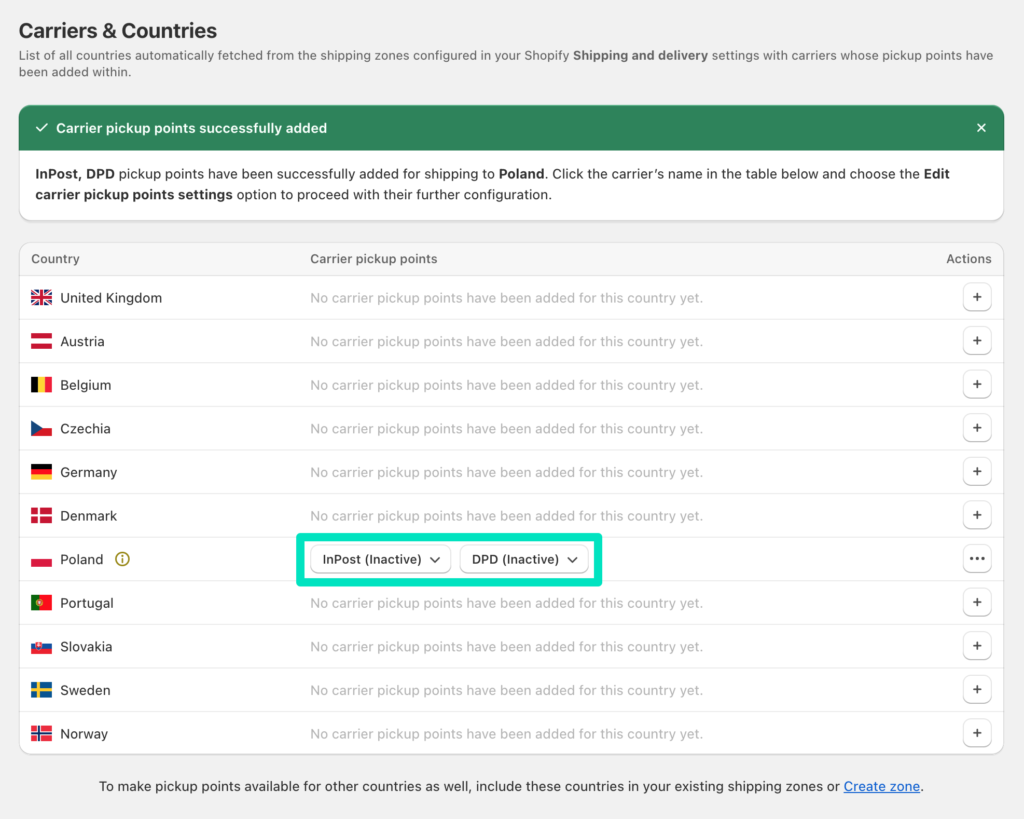
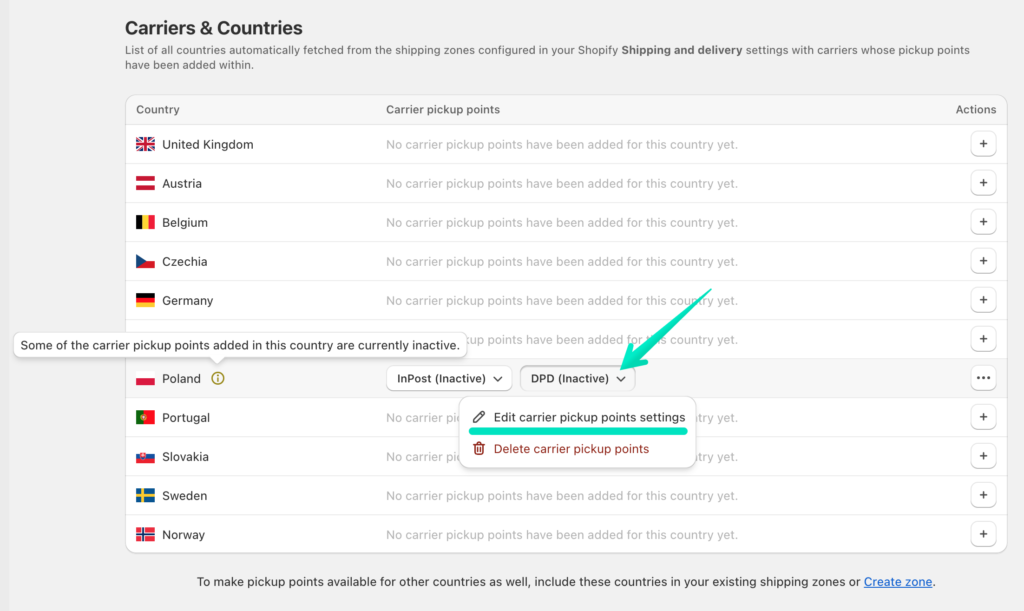
However, as you can see above, despite being added, they have (Inactive) status and they are not enabled yet. Click the carrier’s name to open the drop-down menu and choose the Edit carrier pickup points settings to proceed with its further configuration:
You will be redirected to…
Carrier pickup points configuration screen
…with the individual shipping settings for the pickup points of a specific carrier in that country:
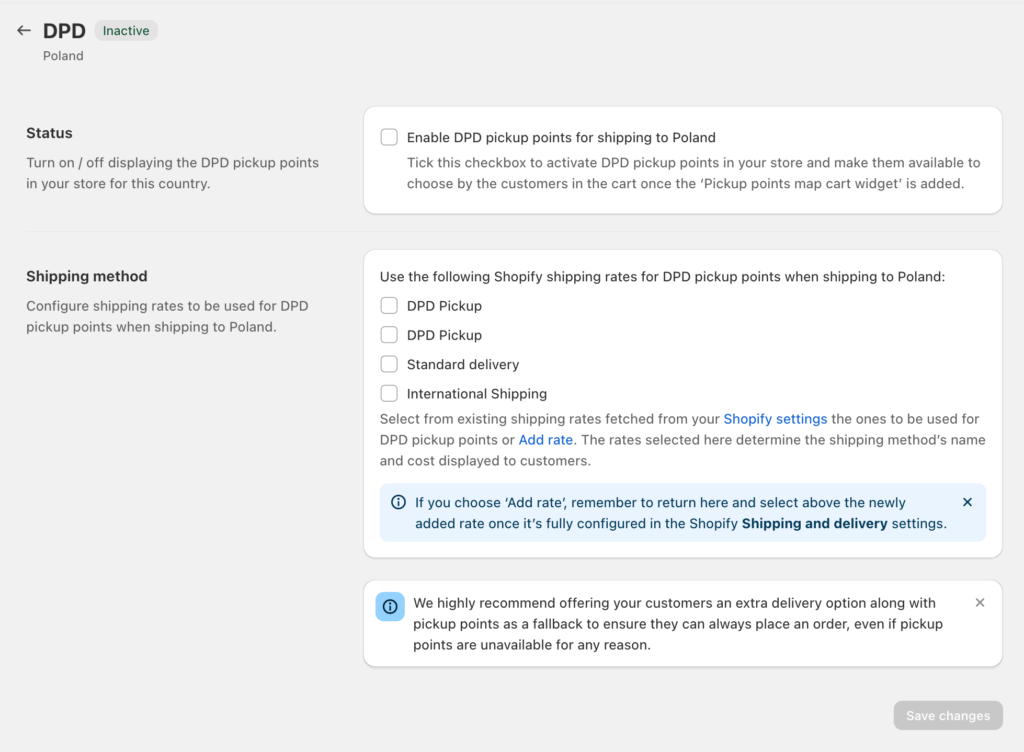
Status

Enable {carrier name} pickup points for shipping to {country} – tick this checkbox to activate the carrier’s pickup points in your store and make them available to choose by the customers in the cart once the ‘Pickup points map cart widget’ has been added to the Cart page template.
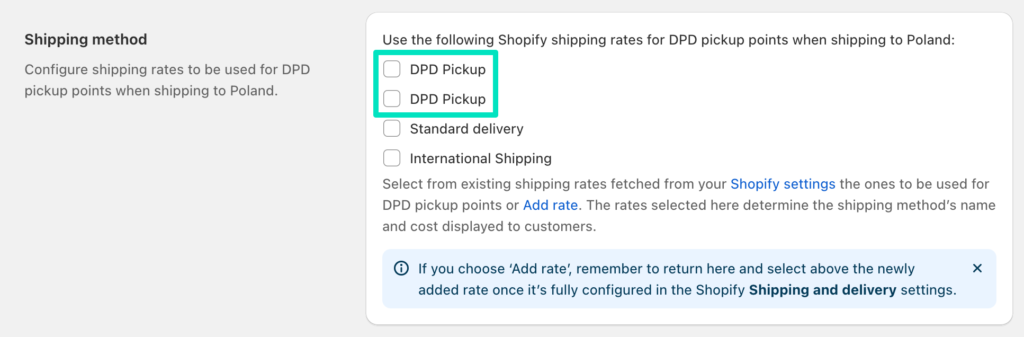
Shipping method
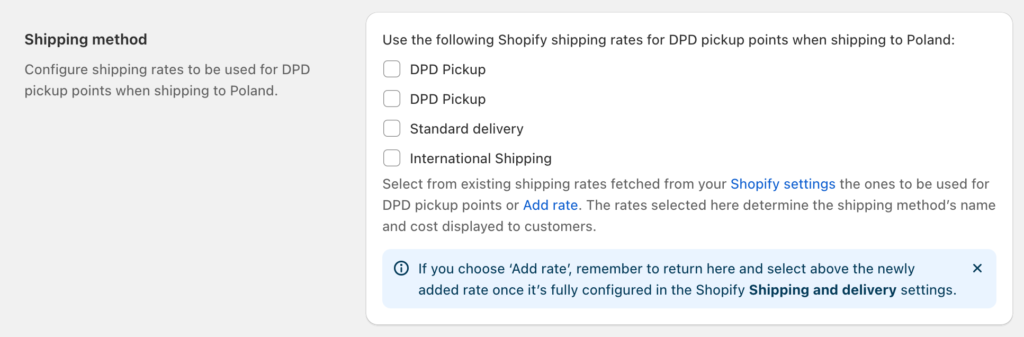
Use the following Shopify shipping rates for {carrier name} pickup points when shipping to {country} – select from existing shipping rates fetched from your Shopify Shipping and delivery settings the ones to be used for this carrier’s pickup points. The rates selected here determine the shipping method’s name and cost displayed to your customers.
If you followed the previous instructions, added and configured the dedicated shipping rates for the pickup points, this is the moment to select them here. If you haven’t done it yet, please go back to the section linked above and follow the steps described there.
Please make sure the Enable {carrier name} pickup points for shipping to {country} checkbox at the top of the screen has been ticked to make pickup points available to choose by your customers in the cart.

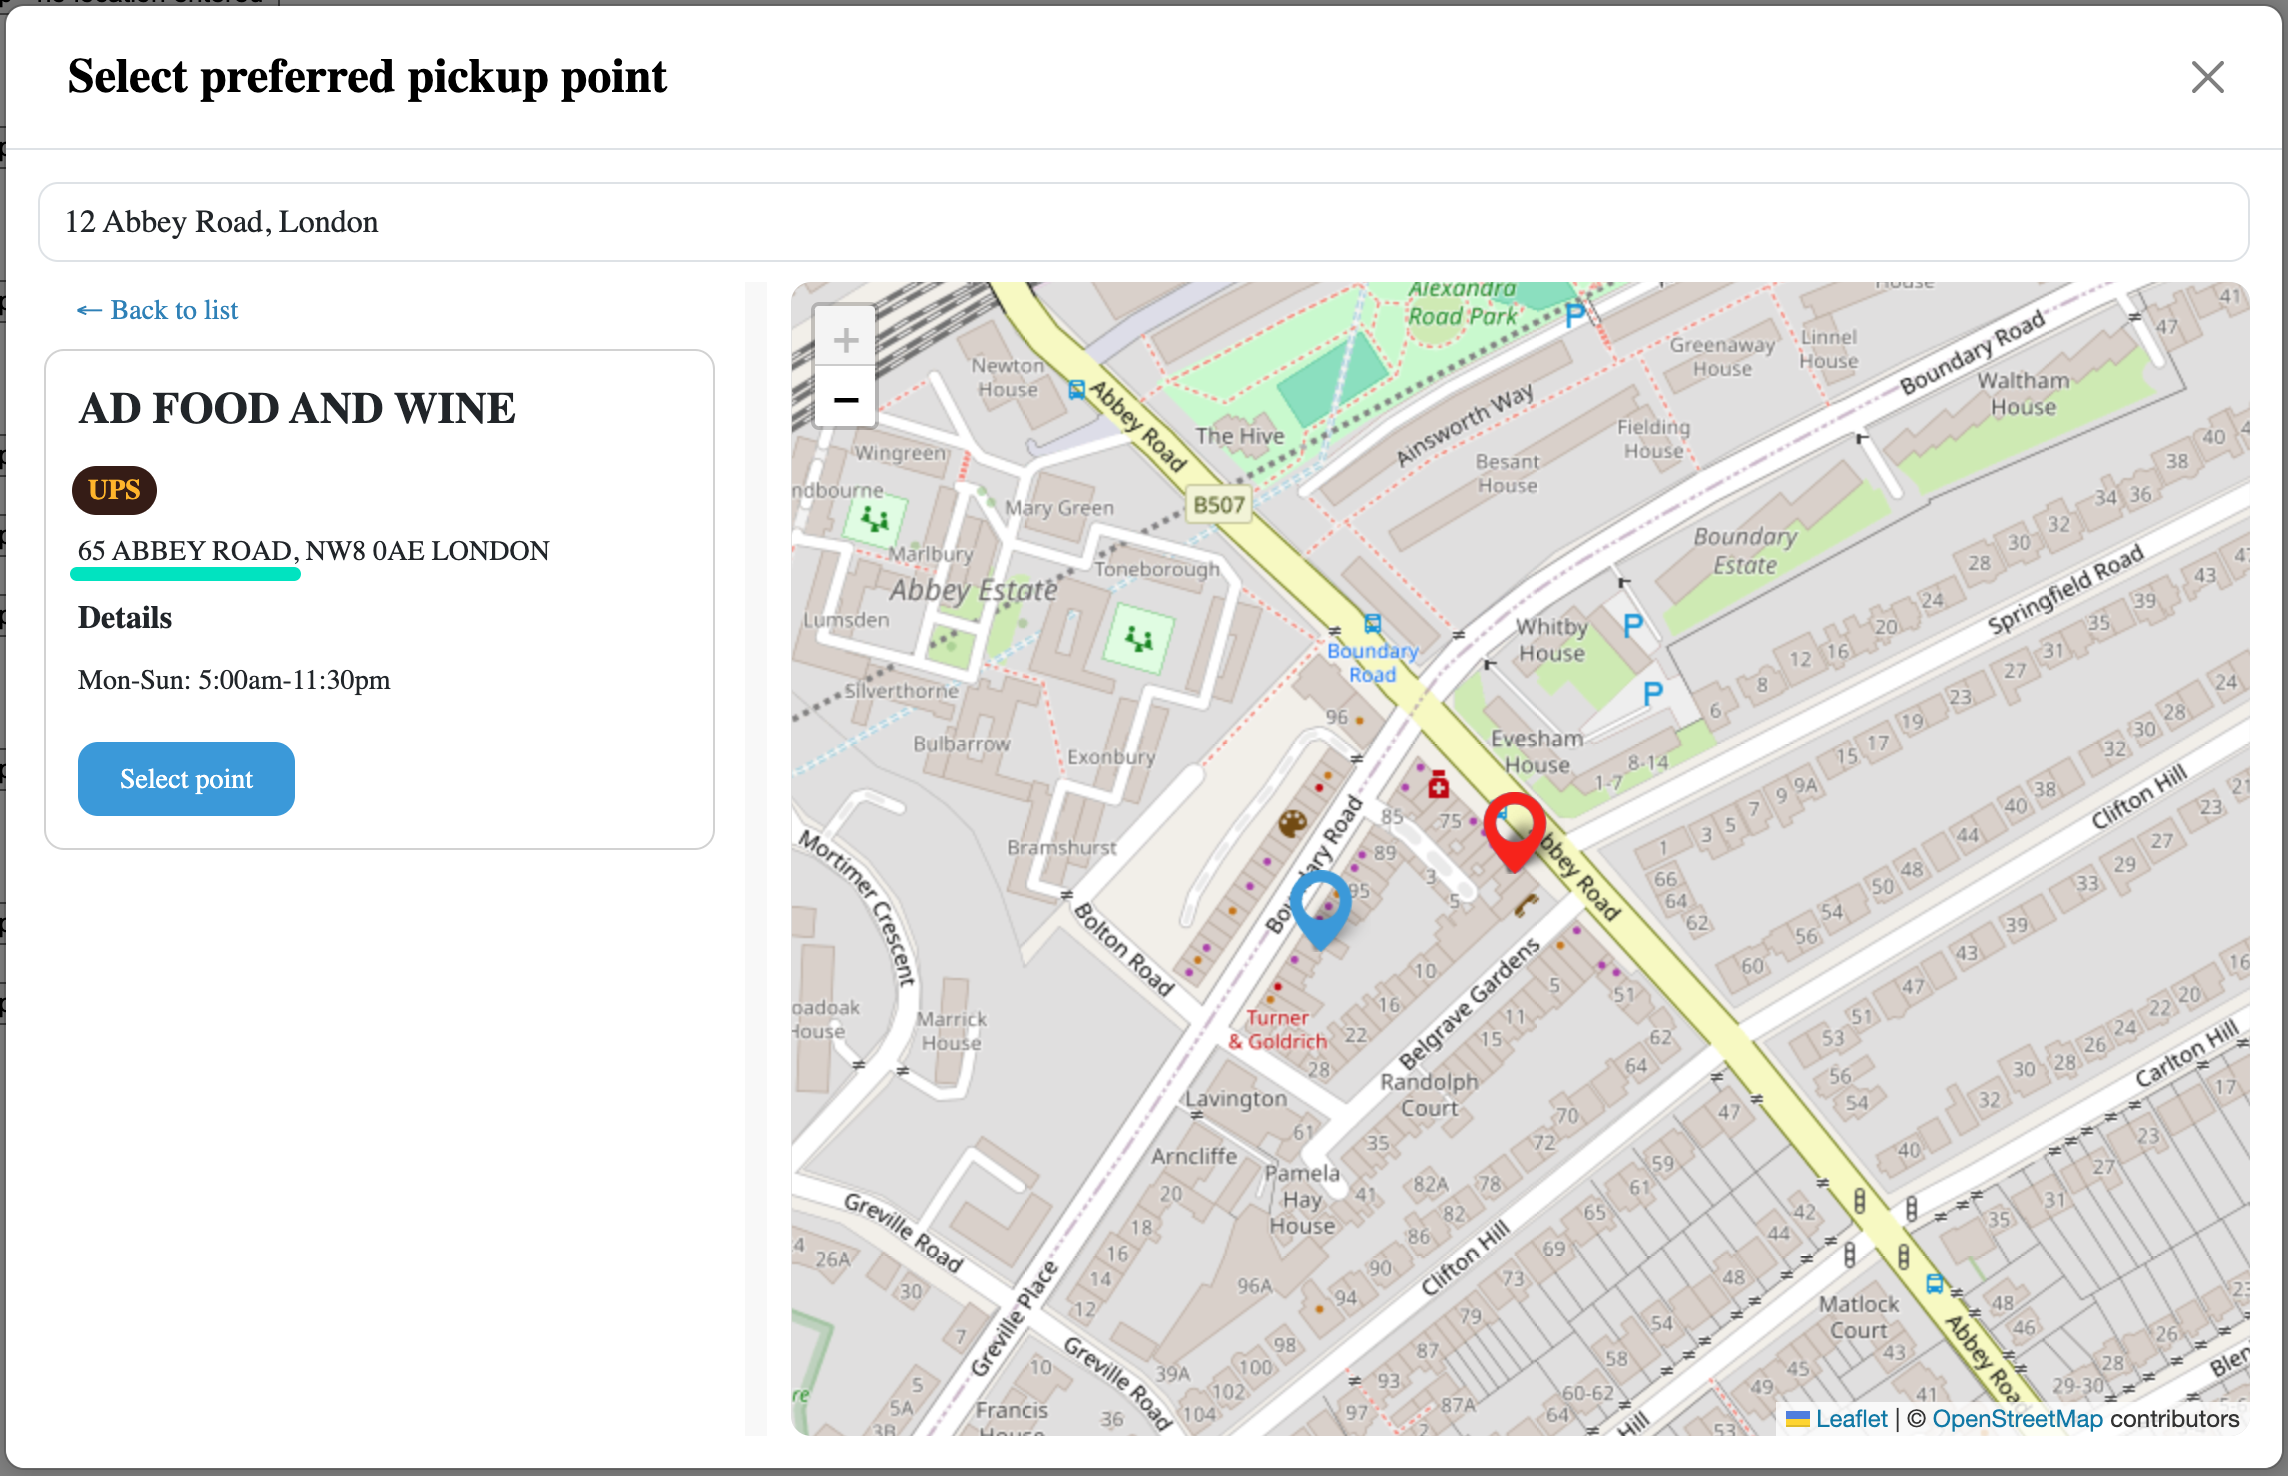
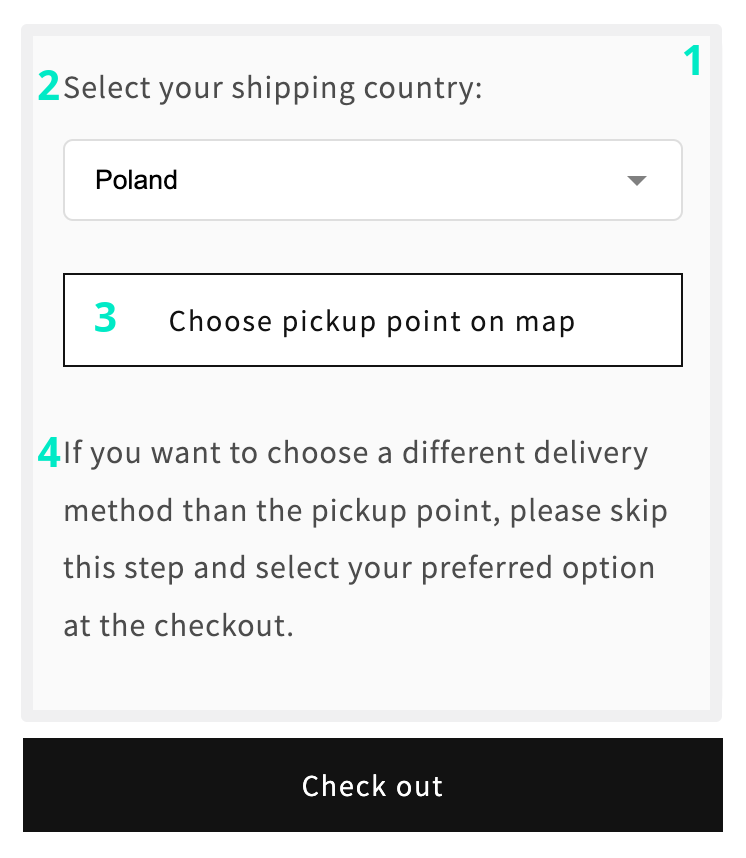
The pickup points should be available from now on to choose by your customers in the cart and should be displayed the way similar to this below depending on the Pickup points map cart widget placement in your theme:

If you added multiple carrier pickup points to a country, e.g., DPD and InPost, DHL and UPS, etc., please simply repeat for them all the configuration steps described above the same way.
Due to the use of the pickup points map widget in the cart, we recommend avoiding various types of direct checkouts in the store that may result in skipping by the customers the step of selecting a pickup point in the cart.
Saving the information about the customer’s selected pickup point to the order details
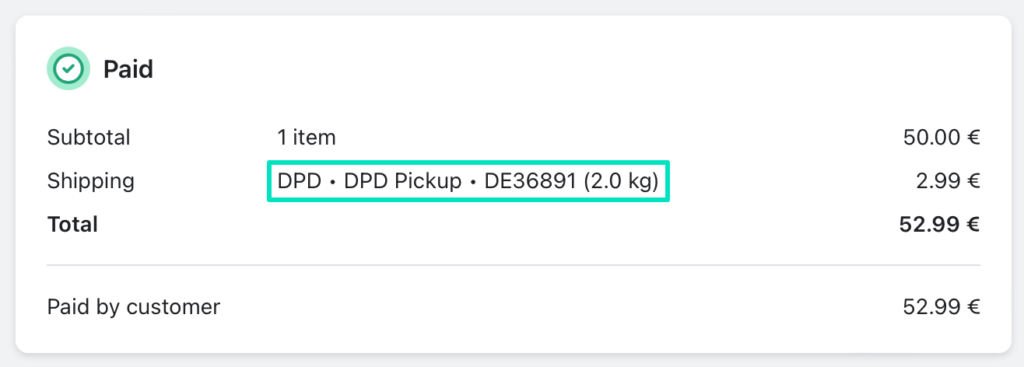
When the customer places an order and selects the pickup point as preferred shipping method, the information about their choice will be saved to the order details:
Passing the selected pickup point to the 3rd party integrations
The Octolize Pickup Points PRO app allows you not only to save the information about the pickup point the customer selected to the order details, but also to pass it further to the external shipping integrations, such as BaseLinker, etc.
If you use such 3rd party integrations in your store, the information about the selected pickup point along with its ID and other details can be passed from the order details to the target integration.
Pickup points map cart widget appearance customization
In-built Pickup points map cart widget block’s appearance customization options
Pickup points map cart widget provides you with some in-built options allowing to customize it to fit your needs. You can easily reach them by clicking the Pickup points map cart widget block in the Shopify Theme customizer and they should appear in the right panel:
Using them, you can modify all the texts displayed by the widget, as well as change the widget background color. Here is what each option is responsible for:

If you need some more adjustments to make the Pickup points map cart widget better suit the theme your store is currently using, the solution would be…
Styling the Pickup points map cart widget with CSS rules
All the Pickup points map cart widget elements can be targeted and styled according to your needs the standard way with CSS rules. Here is a list of CSS classes along with all the elements they target:
- .oct-map-cart-widget – general Pickup points map cart widget container,
- .oct-map-cart-widget .pp-country-selector-label – country selection drop-down list label,
- .oct-choose-point-button – button opening the pickup points map popup,
- .oct-map-cart-widget .pp-additional-info – additional informational text displayed under the button,
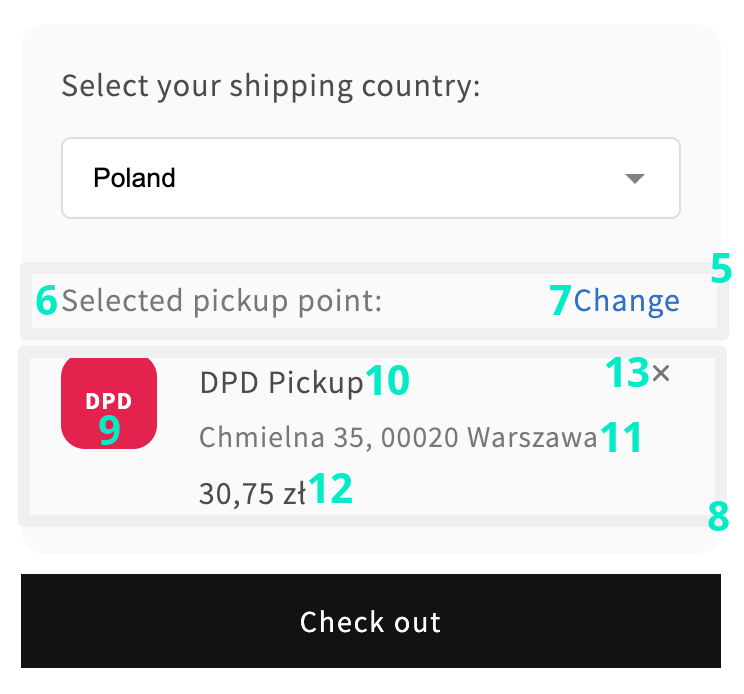
- .oct-map-cart-widget .selected-pp-label-button – container with ‘Selected pickup point:’ section label and Change selected pickup point link,
- .oct-map-cart-widget .selected-pp-label – ‘Selected pickup point:’ section label,
- .oct-map-cart-widget .change-selected-pp-button – Change selected pickup point link,
- .oct-map-cart-widget .selected-pp-details – container with carrier’s icon, selected pickup point’s details and x icon clearing the customer’s choice,
- .oct-map-cart-widget .pp-carrier-icon – shipping company icon used in combination with additional class, e.g., .dpd adding the specific carrier’s brand colors,
- .oct-map-cart-widget .selected-pp-details .pp-name – the name / ID of selected pickup point,
- .oct-map-cart-widget .selected-pp-details .pp-address – address details with the pickup point’s localization,
- .oct-map-cart-widget .selected-pp-details .pp-price – pickup point’s shipping cost,
- .oct-map-cart-widget .selected-pp-details .pp-delete-button – x icon clearing the customer’s pickup point choice
If you’re unsure how to add custom CSS to your theme, please refer to the Shopify’s dedicated guide on this matter.