- Home
- WooCommerce
- What are you looking for?
- Shopify
- About us
- Blog
- Docs
- Contact us

Subscribe to our newsletter

Setting up an online store is an exciting accomplishment, but for many business owners, the journey gets hard the moment they open the “Shipping” tab. With various terms like Shipping Zones, Methods, and Classes flying around, it’s easy to feel overwhelmed.
However, mastering your WooCommerce shipping options is one of the most impactful things you can do for your business. In this guide, we will break down the WooCommerce shipping ecosystem into five manageable levels. This hub will help you find the fundamental native settings or learn more about global configurations.
The 5 Pillars of WooCommerce Shipping
To build a functional checkout, you need to understand how these five elements work together:
By the end of this article, you’ll have a clear roadmap of which settings to toggle and when it’s time to expand your store’s capabilities with advanced tools.
Before you can decide how much to charge for delivery, you must define your reach. In the world of WooCommerce logistics, this is done through Shipping Zones. Think of a them as a geographical boundaries that dictates which services and prices are available to a customer based on their location. What’s more, they allow you to group countries, states, or even specific zip codes together to apply a unique set of rules. For instance, you might offer “Next Day Delivery” for a domestic zone and restrict an international zone to “Standard Courier” only.
To begin configuring your regions, go to your WordPress dashboard and follow this path: WooCommerce > Settings > Shipping > Shipping zones. 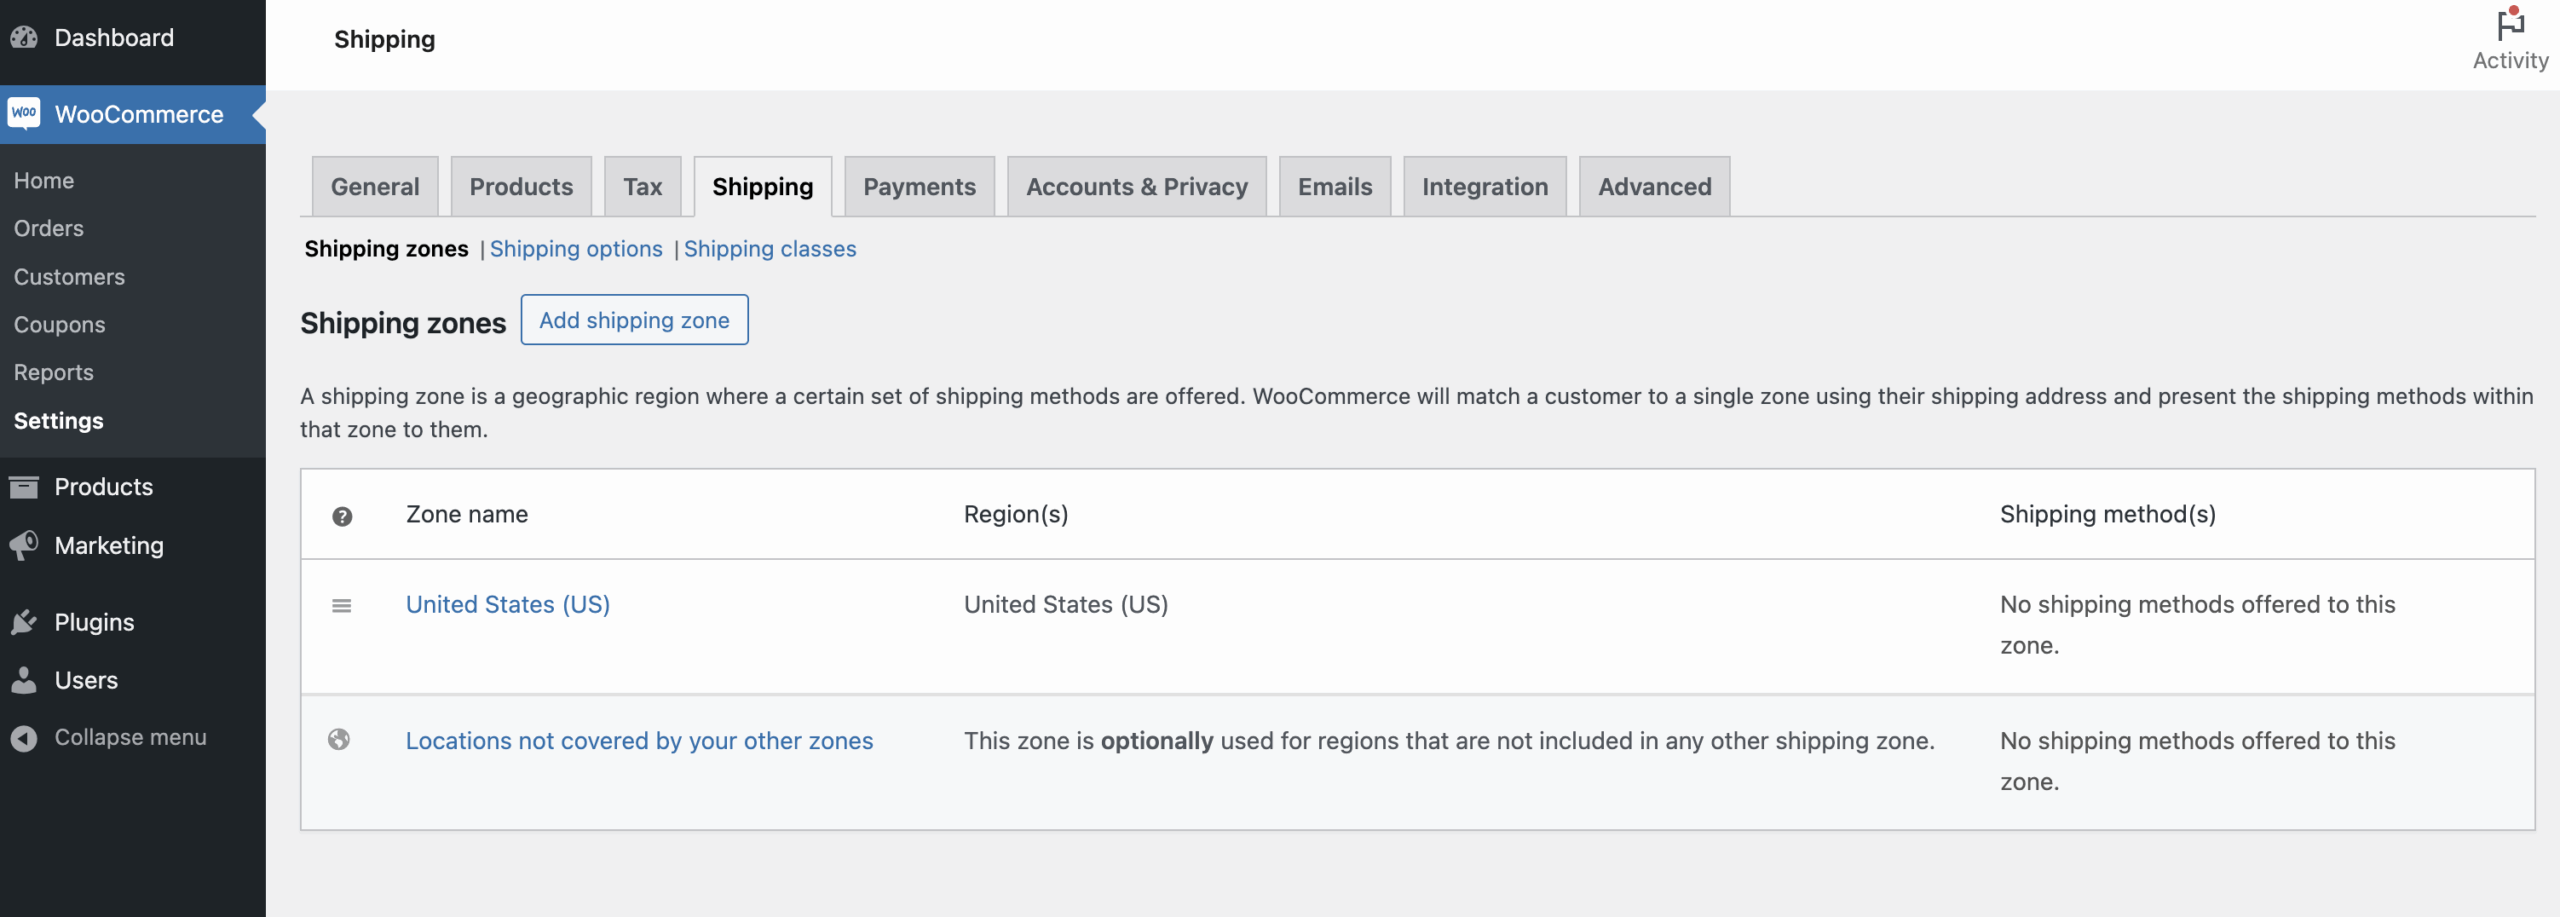
To avoid common checkout errors, there are several technical behaviors that you need to keep in mind:
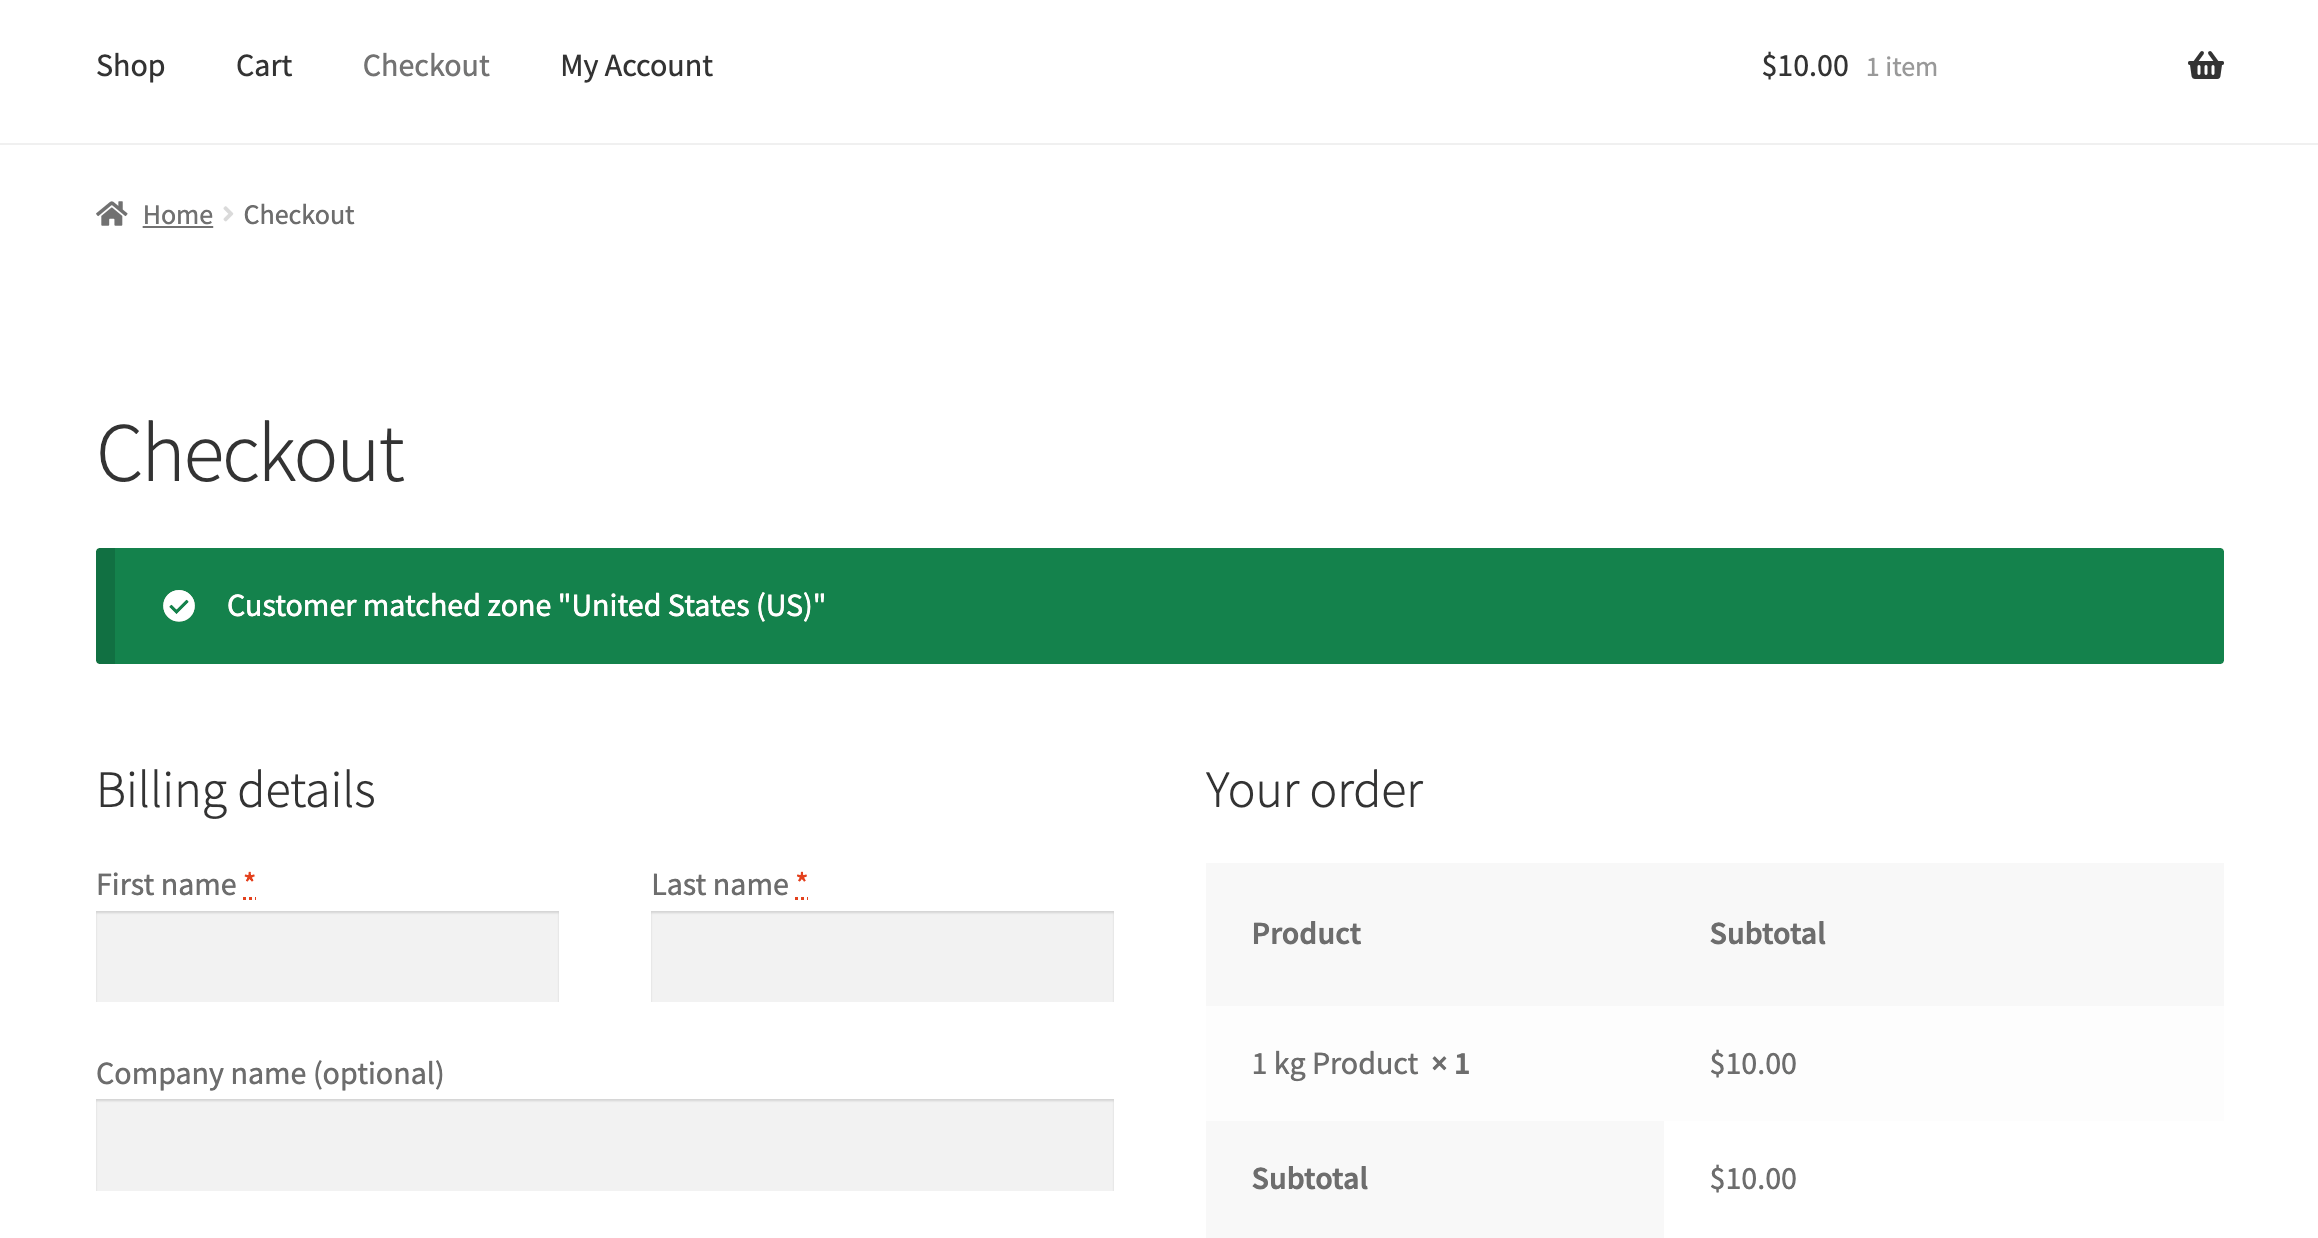
Setting up your geographical boundaries correctly is the most effective way to prevent the “No shipping methods available” error at checkout and lose customers. If you are ready to build your first zone or need help with advanced configuration, we have prepared a comprehensive, step-by-step guide: WooCommerce Shipping Zones Explained.
After defining your geographical reach, the next step is to decide how you will deliver products to your customers within those areas. In WooCommerce, this is handled through Shipping Methods. While Shipping Zones represent the “where,” Shipping Methods are the actual services and price points the customer sees in their cart.
By default, WooCommerce provides three shipping solutions. You can add multiple methods to a single zone, giving your customers the choice between different service levels.
Native Shipping Methods in WooCommerce:
Native WooCommerce methods are great for starters, but they often fall short when your logistics become more complex. If you want to calculate shipping costs based on the weight of the products, their dimensions, or the total value of the cart, you need a Table Rate Shipping solution.
The most popular way to introduce this functionality is through the free version of the Flexible Shipping plugin. It allows you to create advanced delivery cost calculation rules that aren’t found in standard WooCommerce. For example, you can set a lower shipping price for light packages and a higher one for bulky items, ensuring your margins stay protected as you scale.
The best Table Rate Shipping for WooCommerce. Period. Create shipping rules based on weight, order totals, or item count.
Go to WordPress.org or Download for freeSelecting the right combination of methods ensures that your customers feel in control of their delivery costs. If you need help configuring each one in detail, check out our full guide: Mastering WooCommerce Shipping Methods.
While Zones and Methods handle specific regions, the Shipping options tab acts as the central command center for your store’s logistics. These settings are global, meaning they dictate the behavior of the cart and checkout pages regardless of where the customer is located.
Getting these settings right is essential for a smooth user experience. If your shipping costs are appearing too early-or not appearing at all-the solution is usually found right here.
To access these settings, navigate to: WooCommerce > Settings > Shipping > Shipping options.
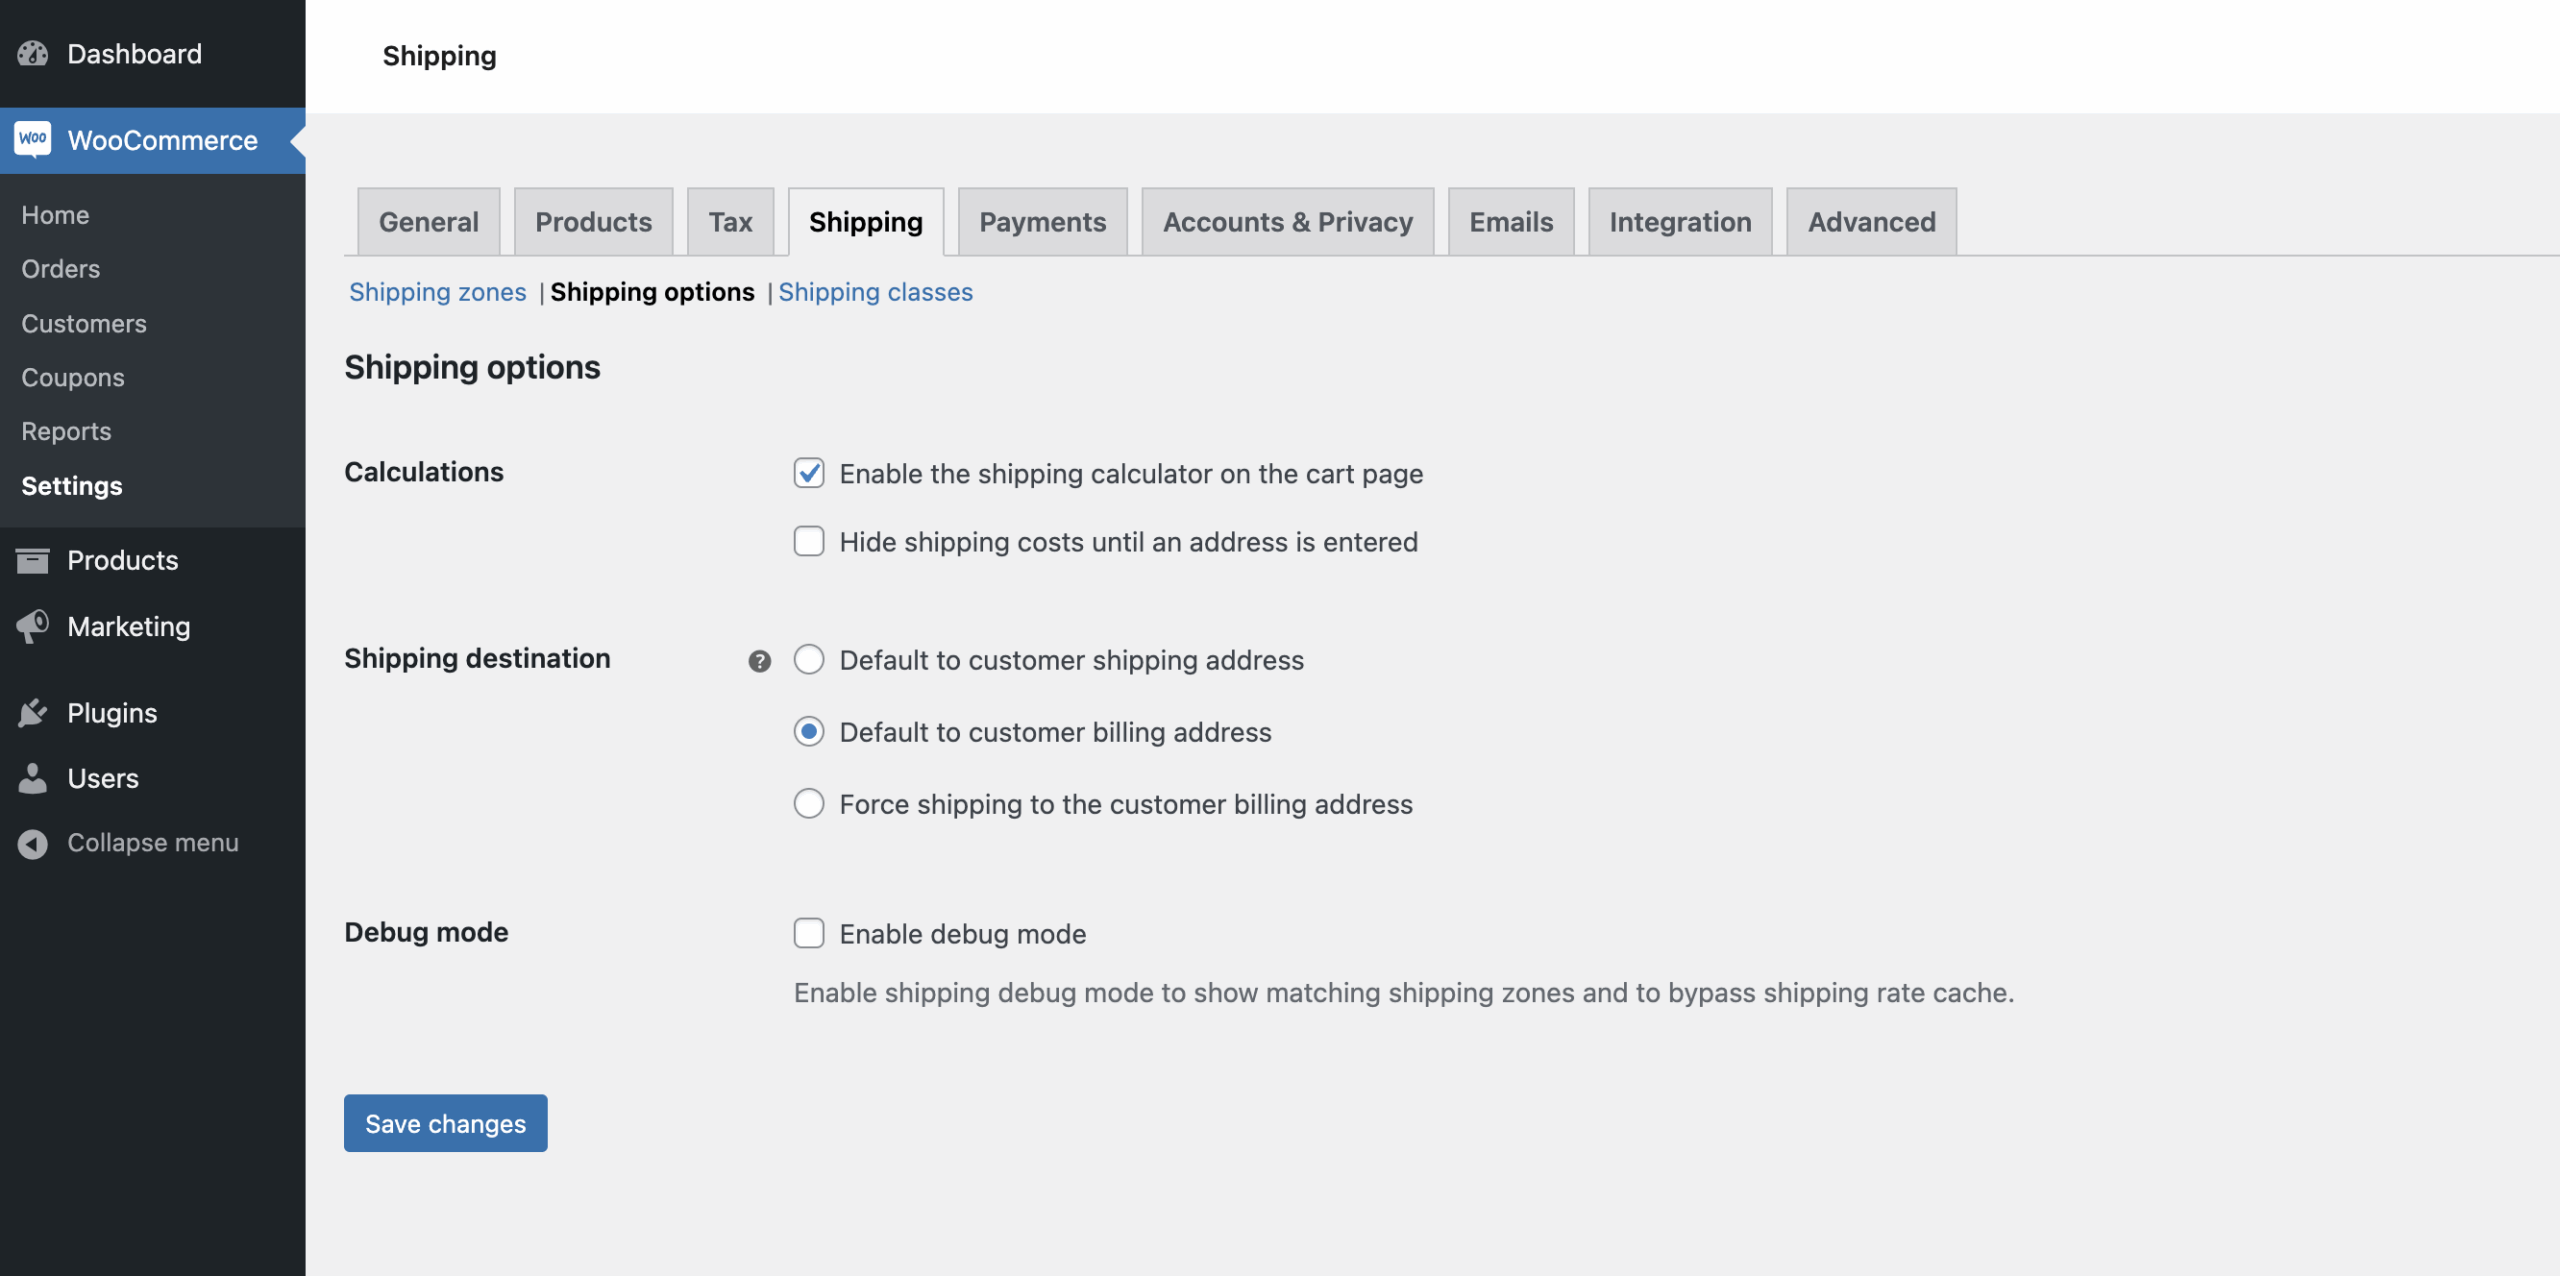
The settings in this tab are divided into three main categories: Calculations, Destination, and Debugging. Here is how to configure them for maximum conversion:
Unlike the other sections, these global options don’t require a separate plugin. They are built directly into the core of WooCommerce to give you total control over the customer’s journey from cart to completion.
Not every product in your catalog is the same size, weight, or fragility. Shipping a small sticker in an envelope is vastly different from shipping a heavy oak table. To handle these variations without creating a separate shipping zone for every item, WooCommerce uses Shipping Classes.
Shipping Classes are essentially “tags” you apply to your products to categorize them based on their shipping requirements. You don’t set the prices within the class itself; instead, you assign a class to a product and then tell your Shipping Methods how much extra to charge for that specific group.
To create your categories, navigate to: WooCommerce > Settings > Shipping > Shipping classes.
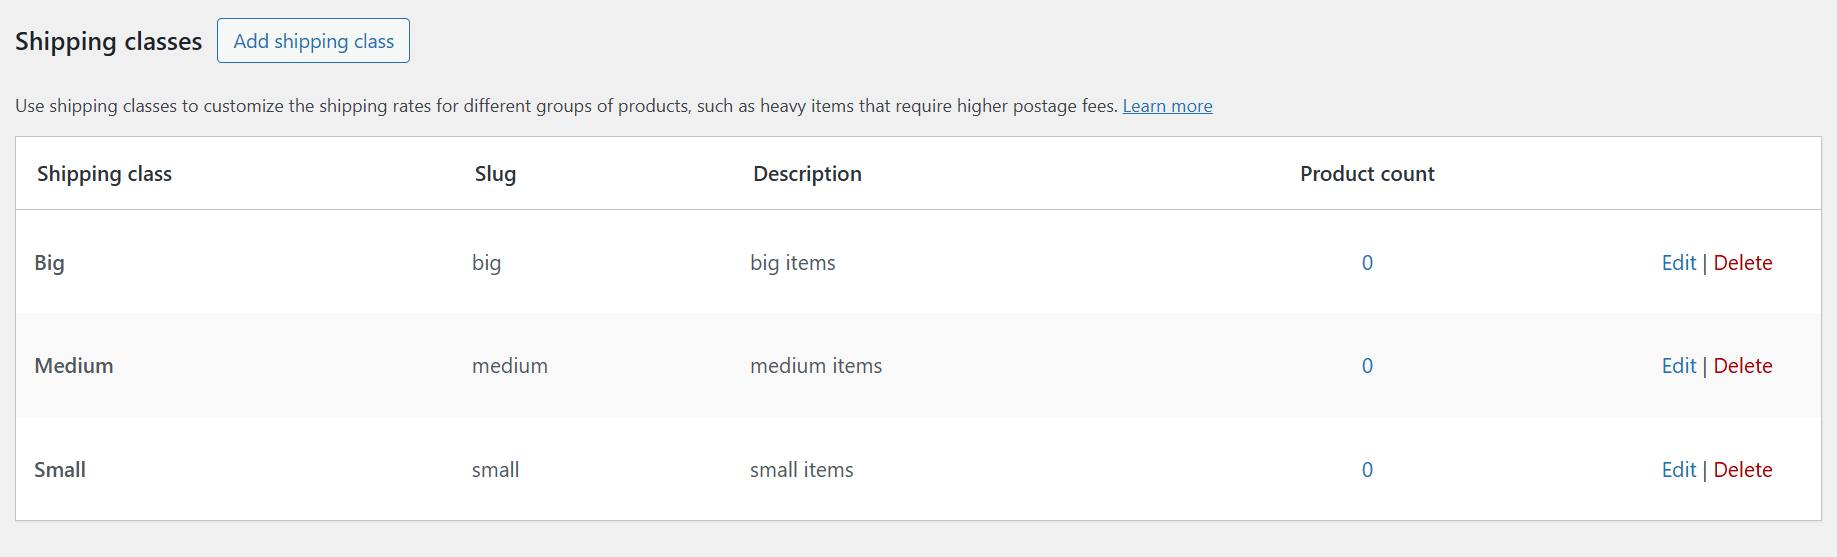
Using classes effectively allows you to protect your shipping margins while keeping the customer experience simple. Here is the logic you need to master:
Managing your product categories correctly ensures that you never undercharge for heavy freight or overcharge for small parcels. If you want to see exactly how to link these classes to your rates, check out our complete guide: A Guide to WooCommerce Shipping Classes.
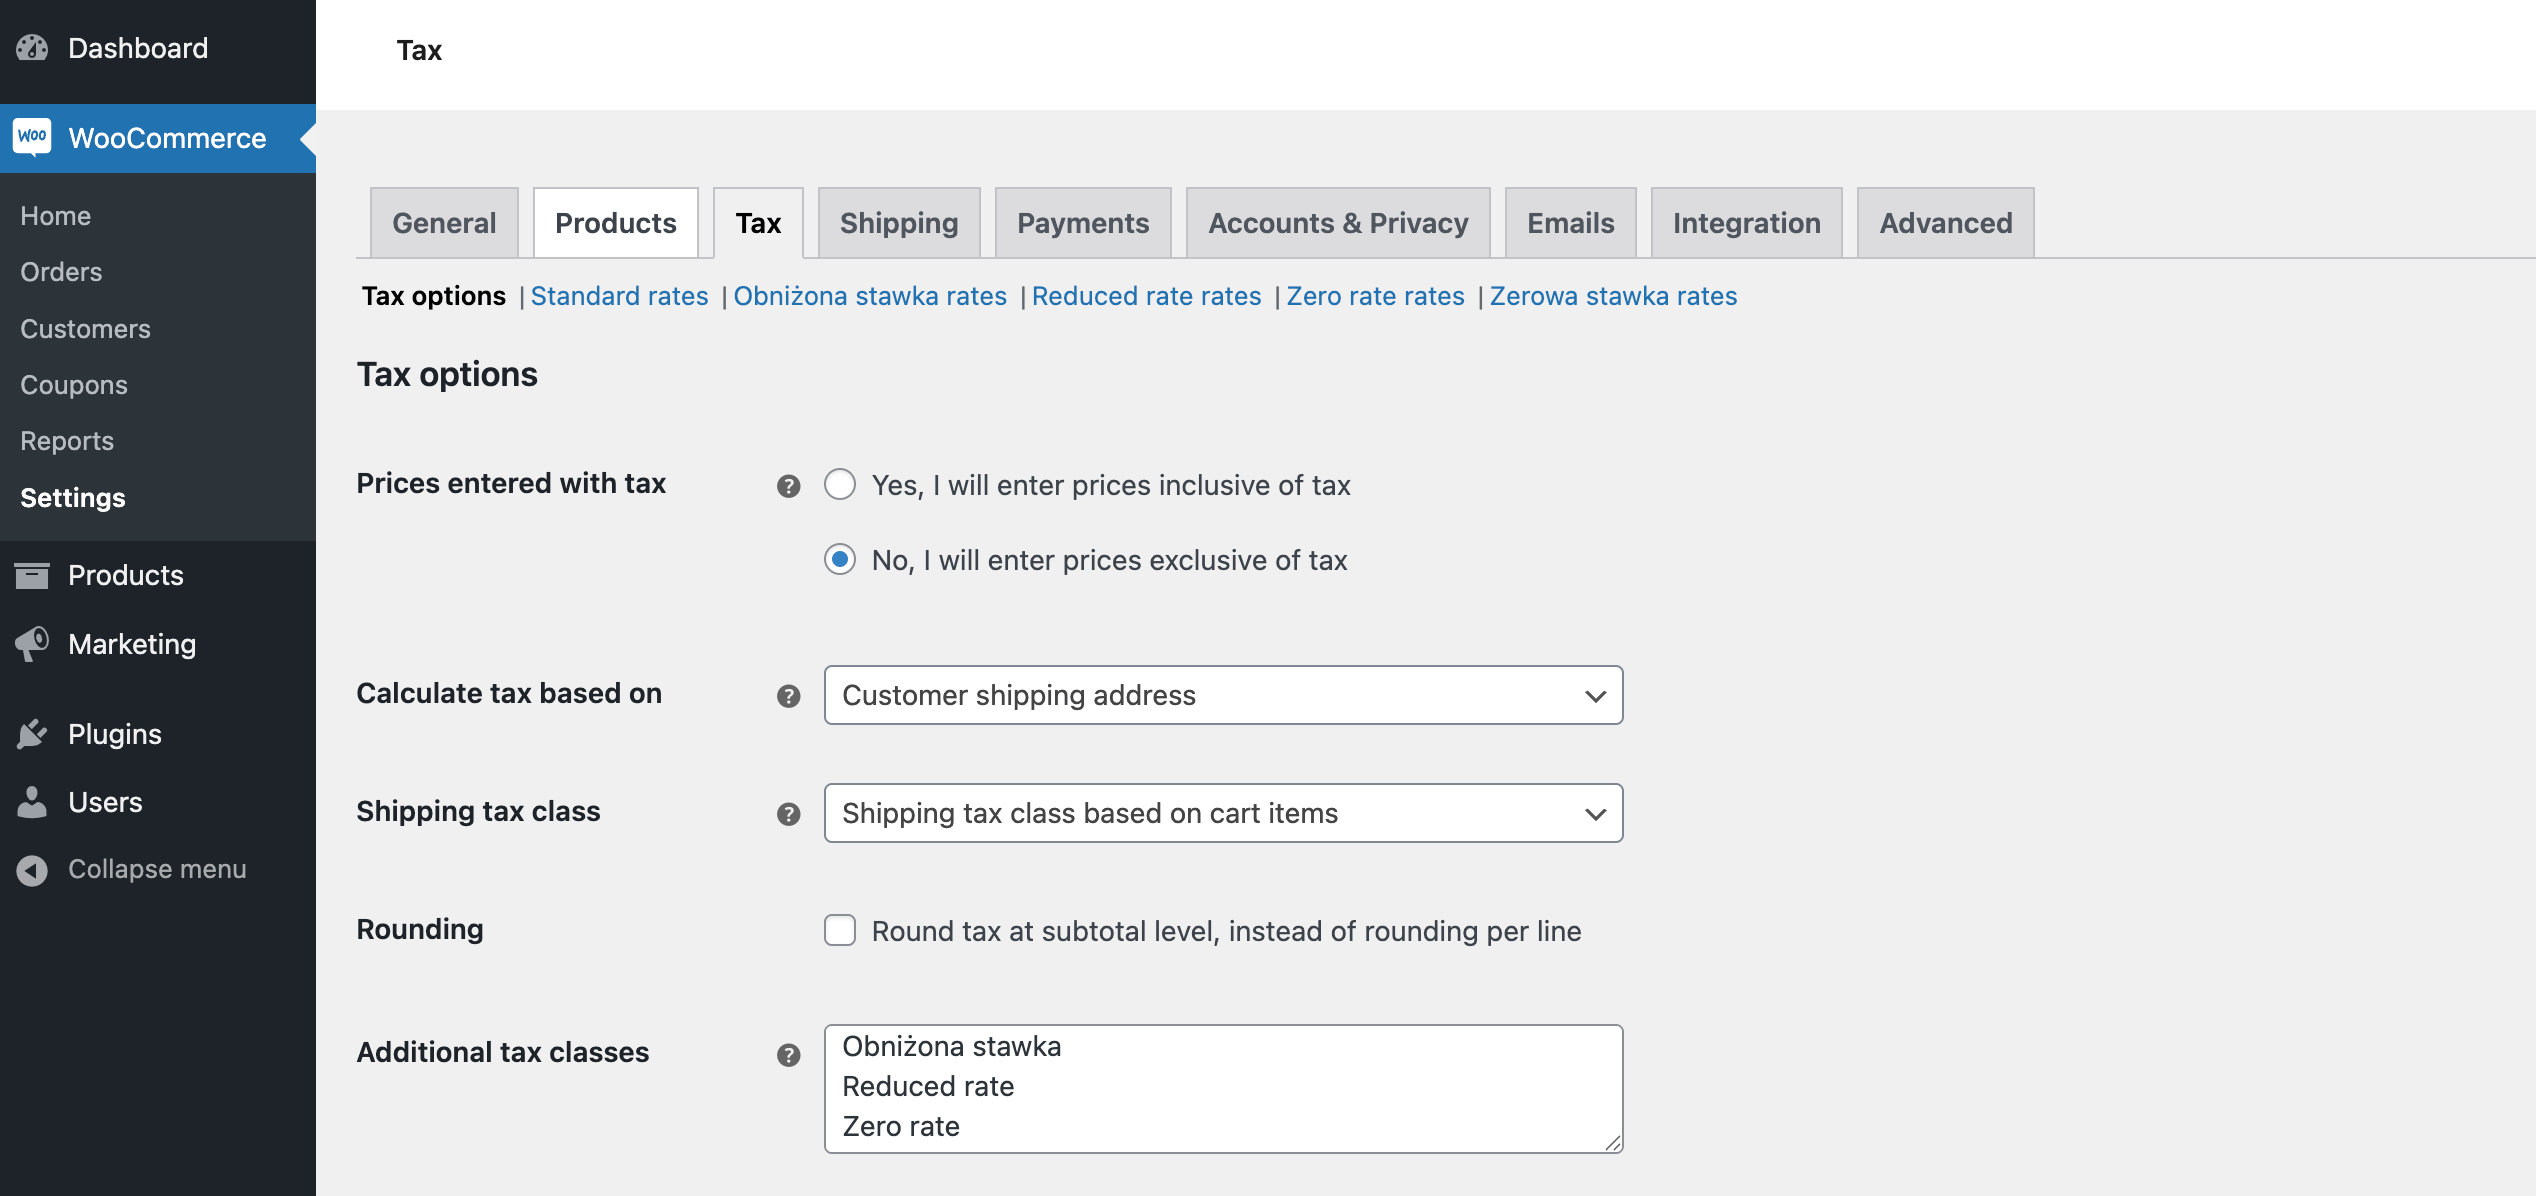
The final piece of the puzzle is the most technical: Shipping Taxes. In many countries and states, shipping is considered a taxable service. If you are charging the customer for delivery, you may be legally required to collect tax on that amount.
WooCommerce integrates shipping tax directly into your standard tax calculation engine. Whether a shipping method is taxable depends on the “Tax Status” you select within the specific method’s settings.
Shipping tax status is managed within each individual method, but global tax rules are found at: WooCommerce > Settings > Tax > Tax options.
Compliance varies by region, so keep these factors in mind when toggling your settings:
Understanding how taxes affect your final price is crucial for both legal compliance and price transparency. For a full breakdown of how to set up these rates without the headache, see our guide: How to Configure WooCommerce Shipping Tax.
Shipping Zones are the geographical areas where you ship (e.g., USA, Europe, or a specific set of postcodes). Shipping Methods are the actual services you offer within those zones, such as Flat Rate, Free Shipping, or Local Pickup. You must create a zone before you can add any methods to it.
You can do this in the WooCommerce > Settings > Shipping > Shipping options tab. Simply check the box that says “Hide shipping costs until an address is entered.” This is a great way to avoid showing incorrect rates to customers before their location is known.
No, native WooCommerce shipping options only support basic Flat Rates or Shipping Classes. If you need to calculate shipping based on weight, cart total, or item dimensions, you will need a “Table Rate Shipping” plugin like Flexible Shipping.
Shipping Debug Mode (found under Shipping options) bypasses the shipping rate cache. Normally, WooCommerce saves shipping calculations to keep your site fast. When you are testing new rates or renaming labels, enabling this mode ensures you see the changes immediately on the frontend. Remember to turn it off once you’ve finished testing.
Setting up your WooCommerce shipping options doesn’t have to be complicated. By following the five levels I’ve covered, you can move from a basic store to a professional checkout experience.

Content Writer at Octolize
Bartosz Gajewski is a content and marketing specialist with a solid background in SEO, WordPress content strategy, and technical documentation for digital products. With years of hands-on experience in both in-house and freelance roles, he supports tech companies – especially in the SaaS and e-commerce space – by creating content that informs, engages, and drives results.
His approach blends storytelling with data-driven SEO, and he’s been involved in projects ranging from rebranding and product marketing to growth experiments and copywriting for complex software tools. On the blog, he shares actionable insights from his work across marketing teams, product documentation, and online store optimization.


The Neurodivergence Project uses the ocean and the natural world to empower neurodivergent people to build confidence, lasting friendships and help them achieve their goals.

Dominican Liturgical Center is based in Cracow and focused on promoting the learning of traditional music and singing. They also run a smaller publishing house and a webshop that is focused on selling mainly books and CDs.

Established in 2017. SGL is focused on selling gas bottles and non-gas products. Formerly, the company offered payment by card on delivery. For now, the SGL started online payments and they launched a webstore.