- Home
- WooCommerce
- What plugin are you looking for?
- Shopify
- About us
- Blog
- Docs
- Contact us
- What can we help you with?

Subscribe to our newsletter

Many WooCommerce store owners use the External Order Management System. It’s useful, especially when you have more than one store. But in some cases, it can be problematic. In this article, I’ll explain how to send UPS Access Points Choice from WooCommerce.
In this article, you will learn:
UPS Access Points are convenient local pick-up and drop-off locations where customers can collect or return their UPS parcels. They are usually located in shops, supermarkets, petrol stations, or other easily accessible businesses. Instead of waiting at home for a delivery, a customer can choose a nearby Access Point, pick up the package at a time that suits them, and often enjoy extended opening hours compared to standard courier delivery.
Sending the customer’s Access Point choice from WooCommerce to your Order Management System (OMS) or shipping software is essential for smooth order fulfillment. If the Access Point details (ID, address, service code) are not transferred correctly, the shipping label may be generated with the wrong delivery option, causing delays or failed deliveries.
By automating the transfer of this data:
We are aware that it can be problematic, so we developed a simple but effective solution. Now, if you are using the UPS plugin for WooCommerce, you can easily get details of UPS Access Point that your clients choose. All the necessary data is now saved in a special table and can be passed through the WooCommerce REST API.
Display automatically calculated UPS live rates and offer UPS Access Points support for your customers.
View Details or Add to cartll shipment data is attached to the order details in the shiping_lines field in meta_data.
The plugin allows to get the following data:
So, how does it work?
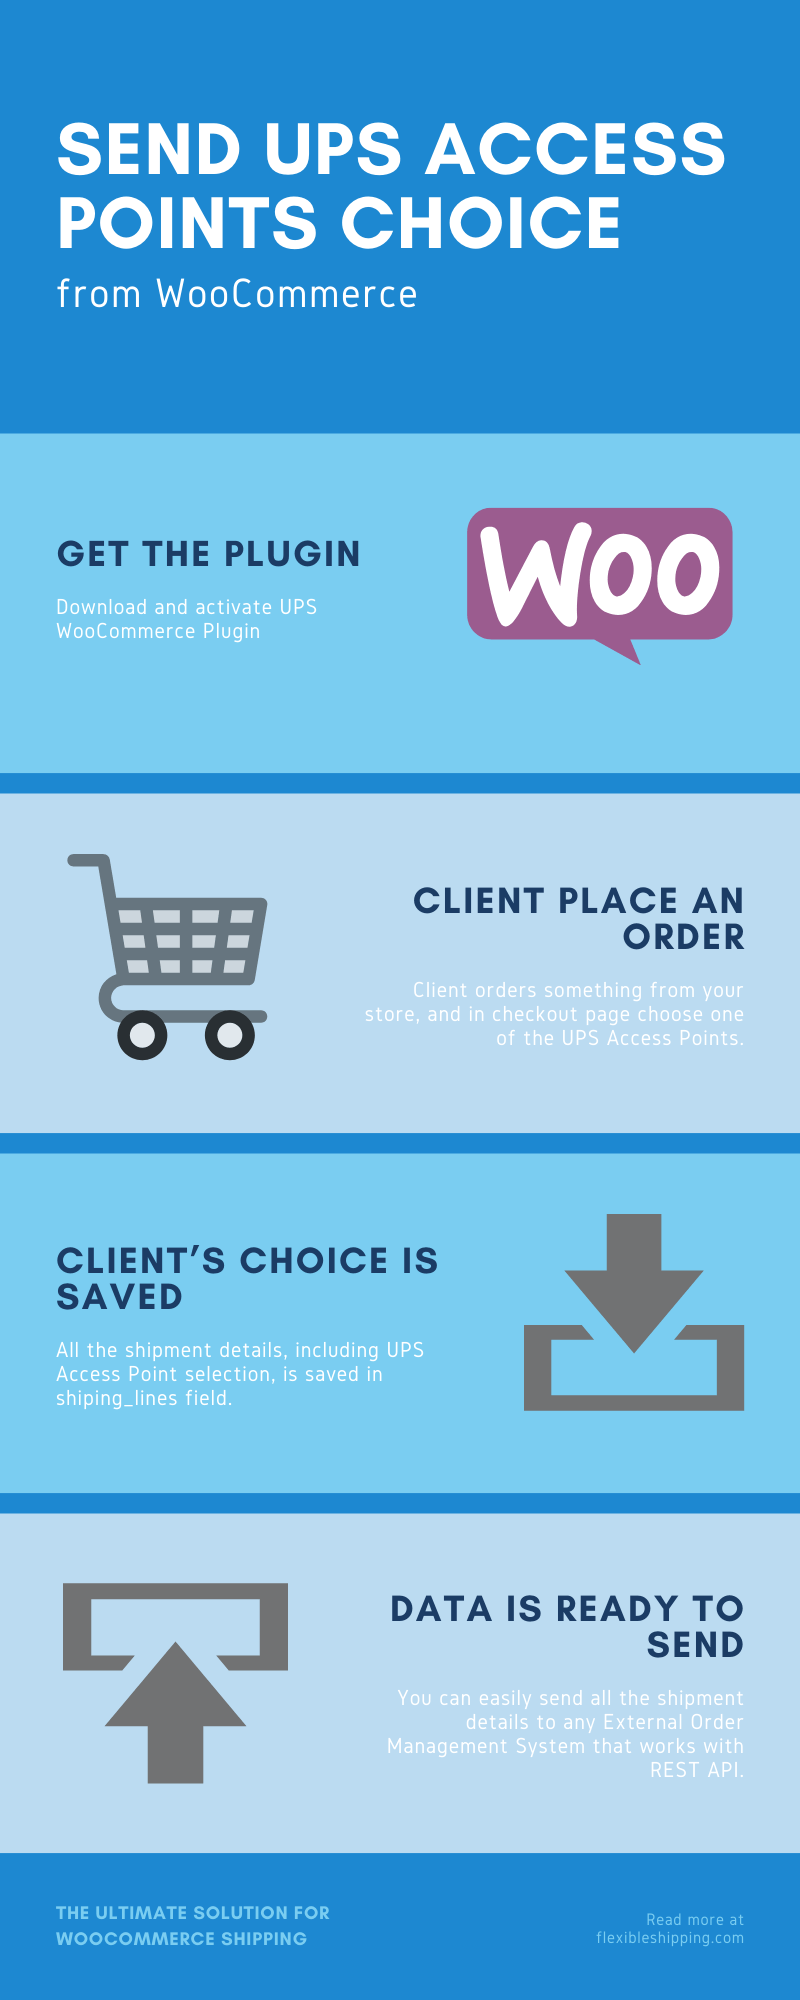
First, you have to get the right plugin. Download and activate the UPS plugin for WooCommerce that allows to simply send the data. Then you just have to wait until one of your clients places an order and choose UPS Access Points as a shipping option. All the shipment details, including UPS Access Point selection, are saved in shiping_lines field and are ready to send. Now you can easily send all the shipment details to any External Order Management System that works with REST API.
And now, something for the developers.
"shipping_lines": [

{

"id": 109,

"method_title": "UPS Express Saver (Access Point)",

"method_id": "flexible_shipping_ups",

"instance_id": "4",

"total": "57.03",

"total_tax": "13.12",

"taxes": [

{

"id": 1,

"total": "13.1169",

"subtotal": ""

}

],

"meta_data": [

{

"id": 807,

"key": "ups_access_point",

"value": "U47159400"

},

{

"id": 808,

"key": "ups_access_point_address",

"value": "DELIKATESY PREMIUM, ARMII KRAJOWEJ 19, 41800 ZABRZE"

},

{

"id": 809,

"key": "ups_service_code",

"value": "65"

}

]

}

],
We allowed to send UPS Access Points Choice from WooCommerce, but we also added a similar solution to most of our shipping plugins. In the DPD UK plugin, you can also get data, this time from fs_shipping_lines field. but the core of this feature is the same. It’s all made to make using WooCommerce easy. We really hope that it will be helpful.
Ship your DPD orders faster. Automatically collect shipping details, download printable shipping labels, and track parcels.
View Details or Add to cartYou need the UPS for WooCommerce — Live Rates and Access Points plugin from Octolize. It integrates UPS Access Point selection directly into your WooCommerce checkout.
The selected UPS Access Point details—such as the Access Point ID, address, and UPS service code—you can find in the order’s shipping_lines → meta_data field.
Within the meta_data, the plugin stores:
Yes! You can find a similar mechanism in other plugins—such as DPD UK & DPD Local for WooCommerce plugin—where shipment details are saved in a field called fs_shipping_lines, but the principle remains the same.
Yes. Octolize provides tutorials and documentation, and how to configure API keys—which can guide you through setup.

Content Writer at Octolize
Bartosz Gajewski is a content and marketing specialist with a solid background in SEO, WordPress content strategy, and technical documentation for digital products. With years of hands-on experience in both in-house and freelance roles, he supports tech companies – especially in the SaaS and e-commerce space – by creating content that informs, engages, and drives results.
His approach blends storytelling with data-driven SEO, and he’s been involved in projects ranging from rebranding and product marketing to growth experiments and copywriting for complex software tools. On the blog, he shares actionable insights from his work across marketing teams, product documentation, and online store optimization.


Metuchen Mower is focused on selling premium power equipment and snow removal solutions. Their service include Yard Tool Repair, Lawn Mower Store, Riding Mowers, Standing Mowers, and more.

The Neurodivergence Project uses the ocean and the natural world to empower neurodivergent people to build confidence, lasting friendships and help them achieve their goals.

Dominican Liturgical Center is based in Cracow and focused on promoting the learning of traditional music and singing. They also run a smaller publishing house and a webshop that is focused on selling mainly books and CDs.
کارگزاری
How to send UPS Access Points Choice from WooCommerce?
Hi, integrating your WooCommerce shop the way described above with an external order management system via REST API requires some custom coding, however, the details how it should be done depend on the system you want to integrate it with and it is undoubtedly a very complex matter.