- Home
- WooCommerce
- What plugin are you looking for?
- Shopify
- What Do I Need?
- About us
- Blog
- Docs
- Contact us
- What can we help you with?

One of the essential parts of the order fulfilment process is to create and print shipping labels. For most couriers, including UPS mentioned in this article, you can manually enter the order details in the UPS system to generate a UPS shipping label. Definitely, a better and more efficient option is to complete the whole process directly in your WooCommerce store. Learn how to save time when handling WooCommerce UPS shipping.
If you are reading this article and a WooCommerce store owner, you are probably using UPS shipping services to deliver products to your customers. So I don’t need to convince you how significant it is to save time when handling your online store and how shipping is an essential part of the entire process. So let’s get straight to the point and dive into how to create and print UPS shipping labels in WooCommerce.
As usual with WordPress, the solution is the right UPS shipping plugin for WooCommerce. It’s the easiest and fastest solution. In most cases, you need to install it, connect it to courier services and voilà, everything works. And you can start label printing right from your WooCommerce store. This is precisely the case with the UPS Labels and Tracking plugin for WooCommerce.
This plugin does exactly what its name implies – it allows you to create UPS shipping labels directly from the WooCommerce admin panel and UPS shipment tracking by the store admin and their customers.
Create the shipments, generate the printable UPS shipping labels for the placed orders and track the parcels directly from your WooCommerce shop.
View DetailsorAdd to cartThe plugin is fully compatible with other popular plugins from the Flexible Shipping company – Flexible Shipping and UPS Live Rates and Access Points PRO for WooCommerce. This allows you to use advanced condition-based shipping costs or take advantage of live ups shipping rates directly from your UPS account. Especially the combination with live rates gives the most complete UPS shipping integration for WooCommerce. It’s much more than just the live ups shipping rates. It also supports UPS box packing and UPS Access Point service.
This allows you to customize the plugin to meet your needs fully. Of course, you can use the UPS Flat Rate shipping method included in the plugin and also add shipping to orders with other shipping methods.
Before getting into the process of generating a UPS Shipping Label, let’s get a quick look at one.
Of course, this is just a sample, but it contains all the information that a regular UPS shipping label. It’s worth mentioning that it’s very similar in the case of FedEx or USPS labels.
As seen above, shipping label generally includes the following information:
The above information allows couriers to deliver your customers’ orders where they need to go as quickly as they’re supposed to get there.
If you have the UPS Labels and Tracking plugin for WooCommerce installed and active, let’s move on. I will try to walk you through the process step by step.
Before you can create UPS shipping labels, you must properly configure the plugin. In the case of UPS Labels and Tracking plugin for WooCommerce, it is effortless. You have to provide your UPS API credentials. To reach the plugin General settings, go to WooCommerce → Settings → Shipping → UPS Labels. To connect your WooCommerce store with the UPS API, you have to enter Client ID, Client Secret, and UPS Account Number in the appropriate fields.
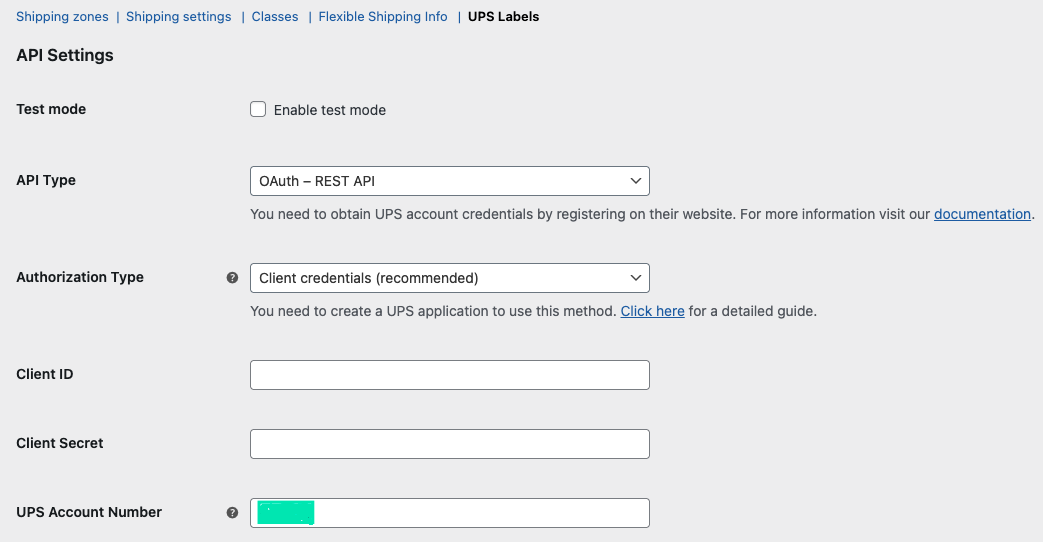
Once you have completed all fields, save your changes. If all the entered data is correct, you will get the message Connected in the API connection status field, as shown in the image above.
Once the plugin is configured, we can proceed to create UPS shipping labels. You can do this in two ways: add shipping manually to orders with flat rate shipping, or use the actual UPS flat rate shipping method, which will automatically create shipping for each order with that method. I’ll discuss both ways in detail, and as a bonus, I’ll give you a way to integrate UPS shipping with the Flexible Shipping plugin. This last method allows you to set the shipping cost based on many factors such as weight or the number of products in your cart.
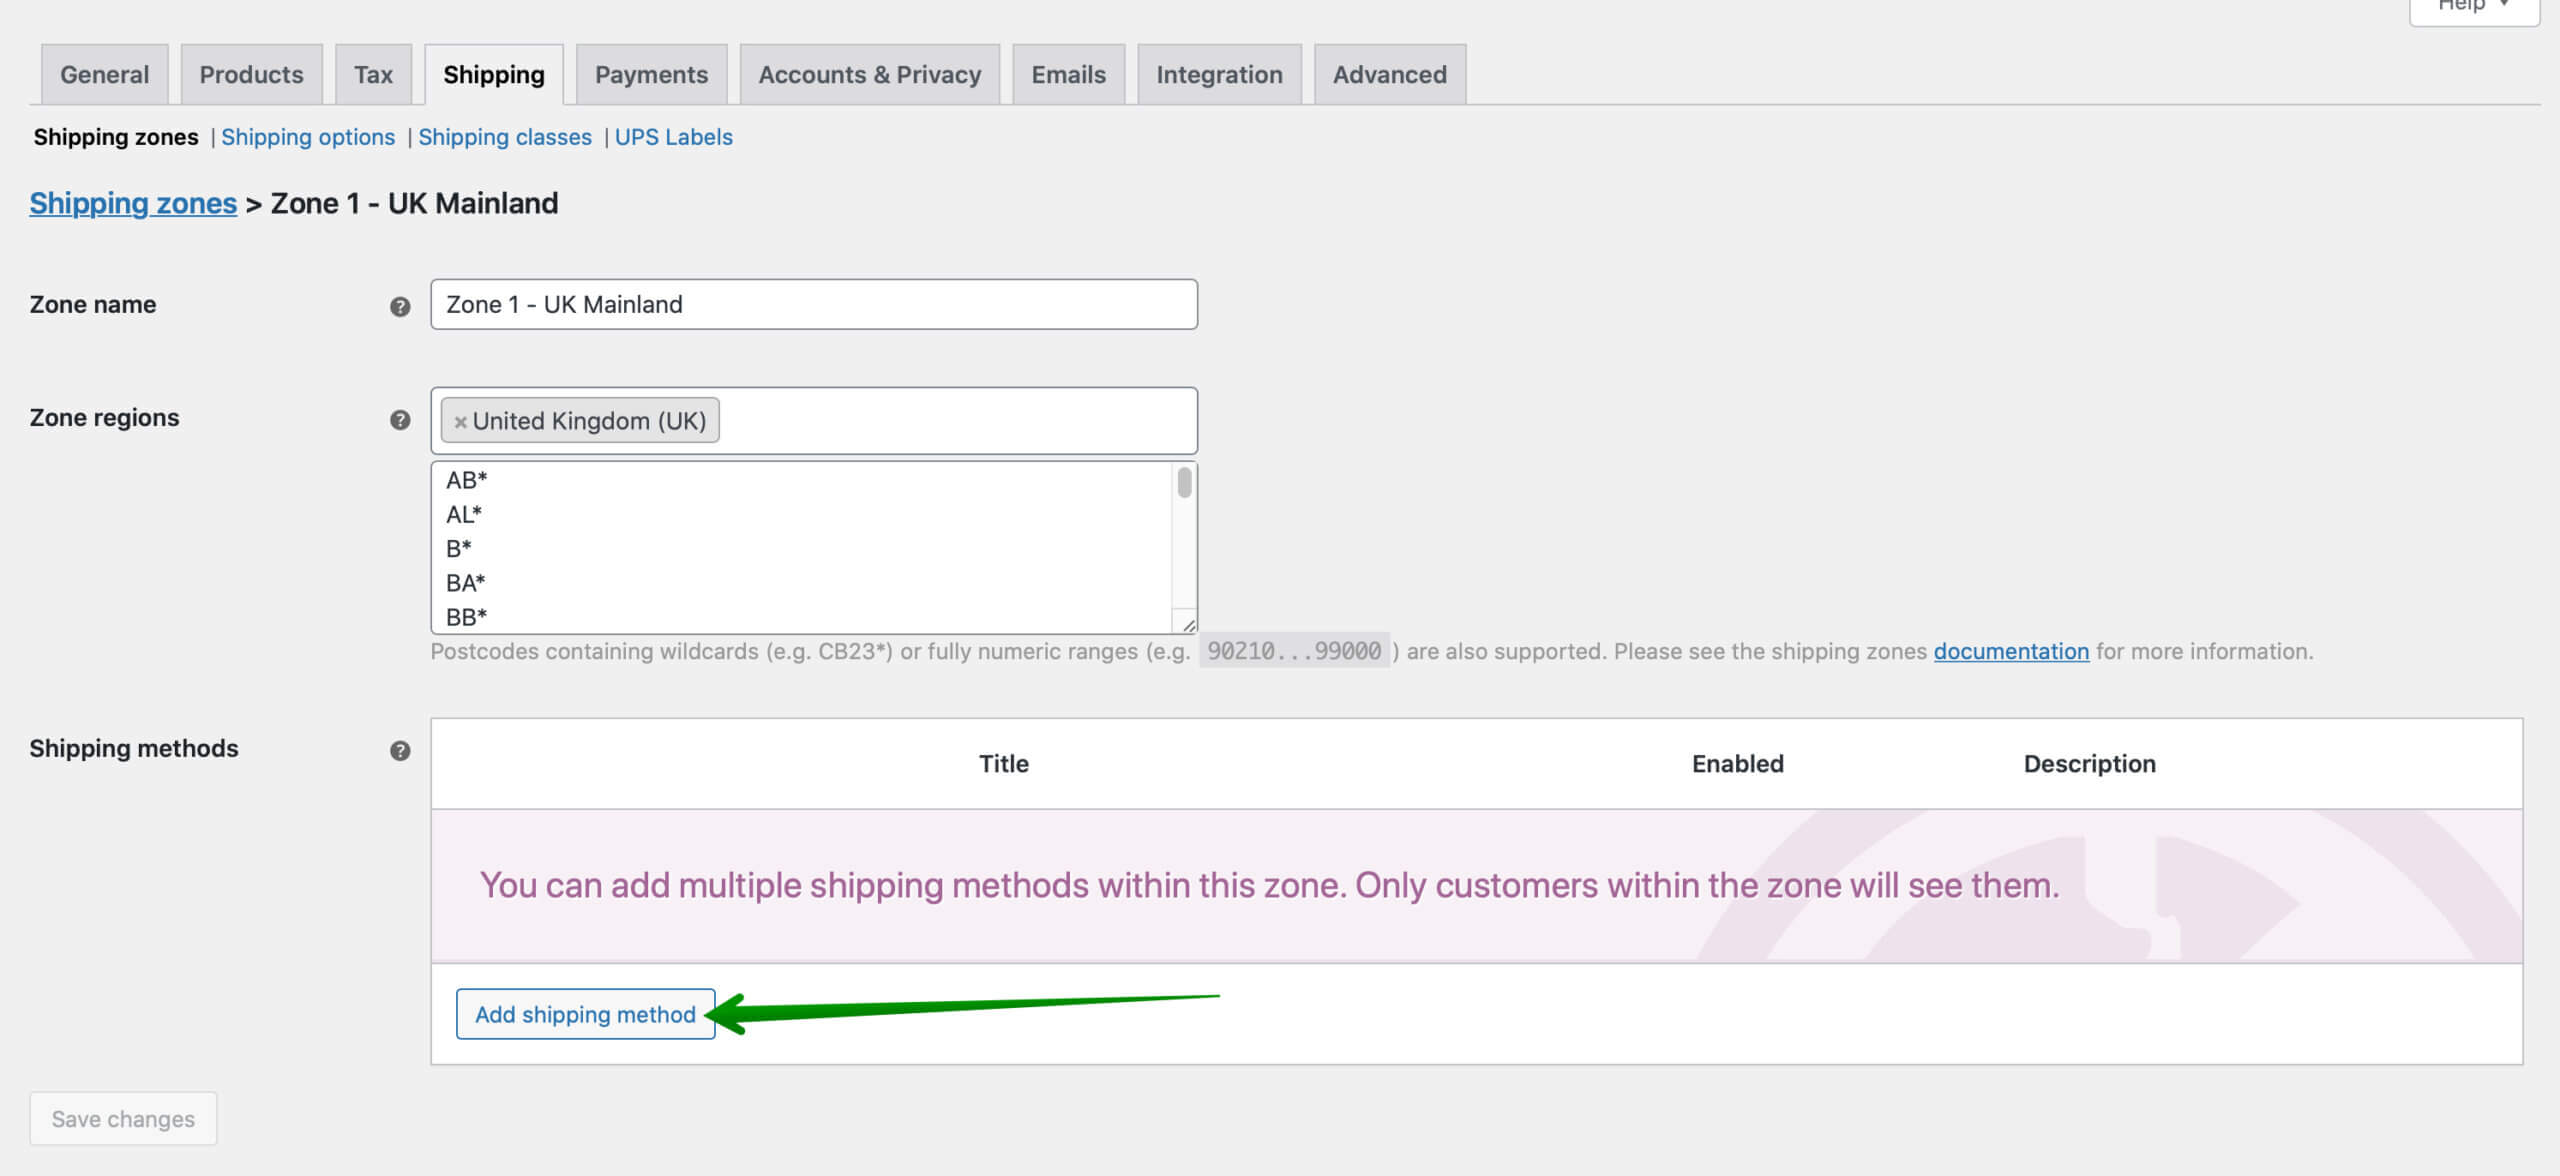
UPS Labels and Tracking plugin for WooCommerce has its own in-built and dedicated shipping method called UPS Flat Rate. The UPS Flat Rate shipping method uses similar mechanics as the WooCommerce default Flat Rate and can be easily added the same way. To create a new UPS Flat Rate shipping method, go to WooCommerce → Settings → Shipping and select the shipping zone for your UPS shipping service.
Once you are in, use the Add shipping method button at the bottom of the shipping methods table:
In the popup window, select the UPS Flat Rate from the dropdown list and confirm your choice with Add shipping method button once again:
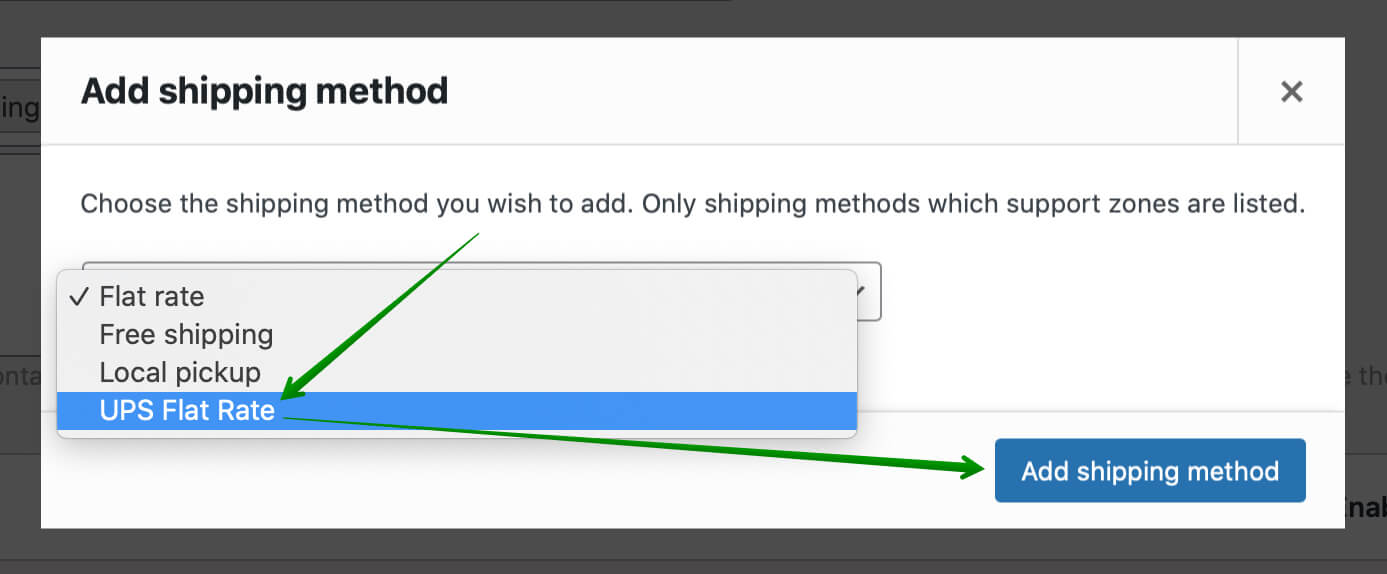
Now, you have your own UPS Flat Rate shipping method. But it’s not over. Click on it to customize the UPS shipping method to your needs.
The UPS Flat Rate mechanics is pretty much similar to the WooCommerce default one. It also allows defining the fixed shipping cost and its tax status. There are also unique UPS settings. You can select UPS Service, Packing Type and even add Insurance. If you use UPS shipping methods in your store daily, you probably know exactly how to set everything up to match your own UPS shipping preferences.
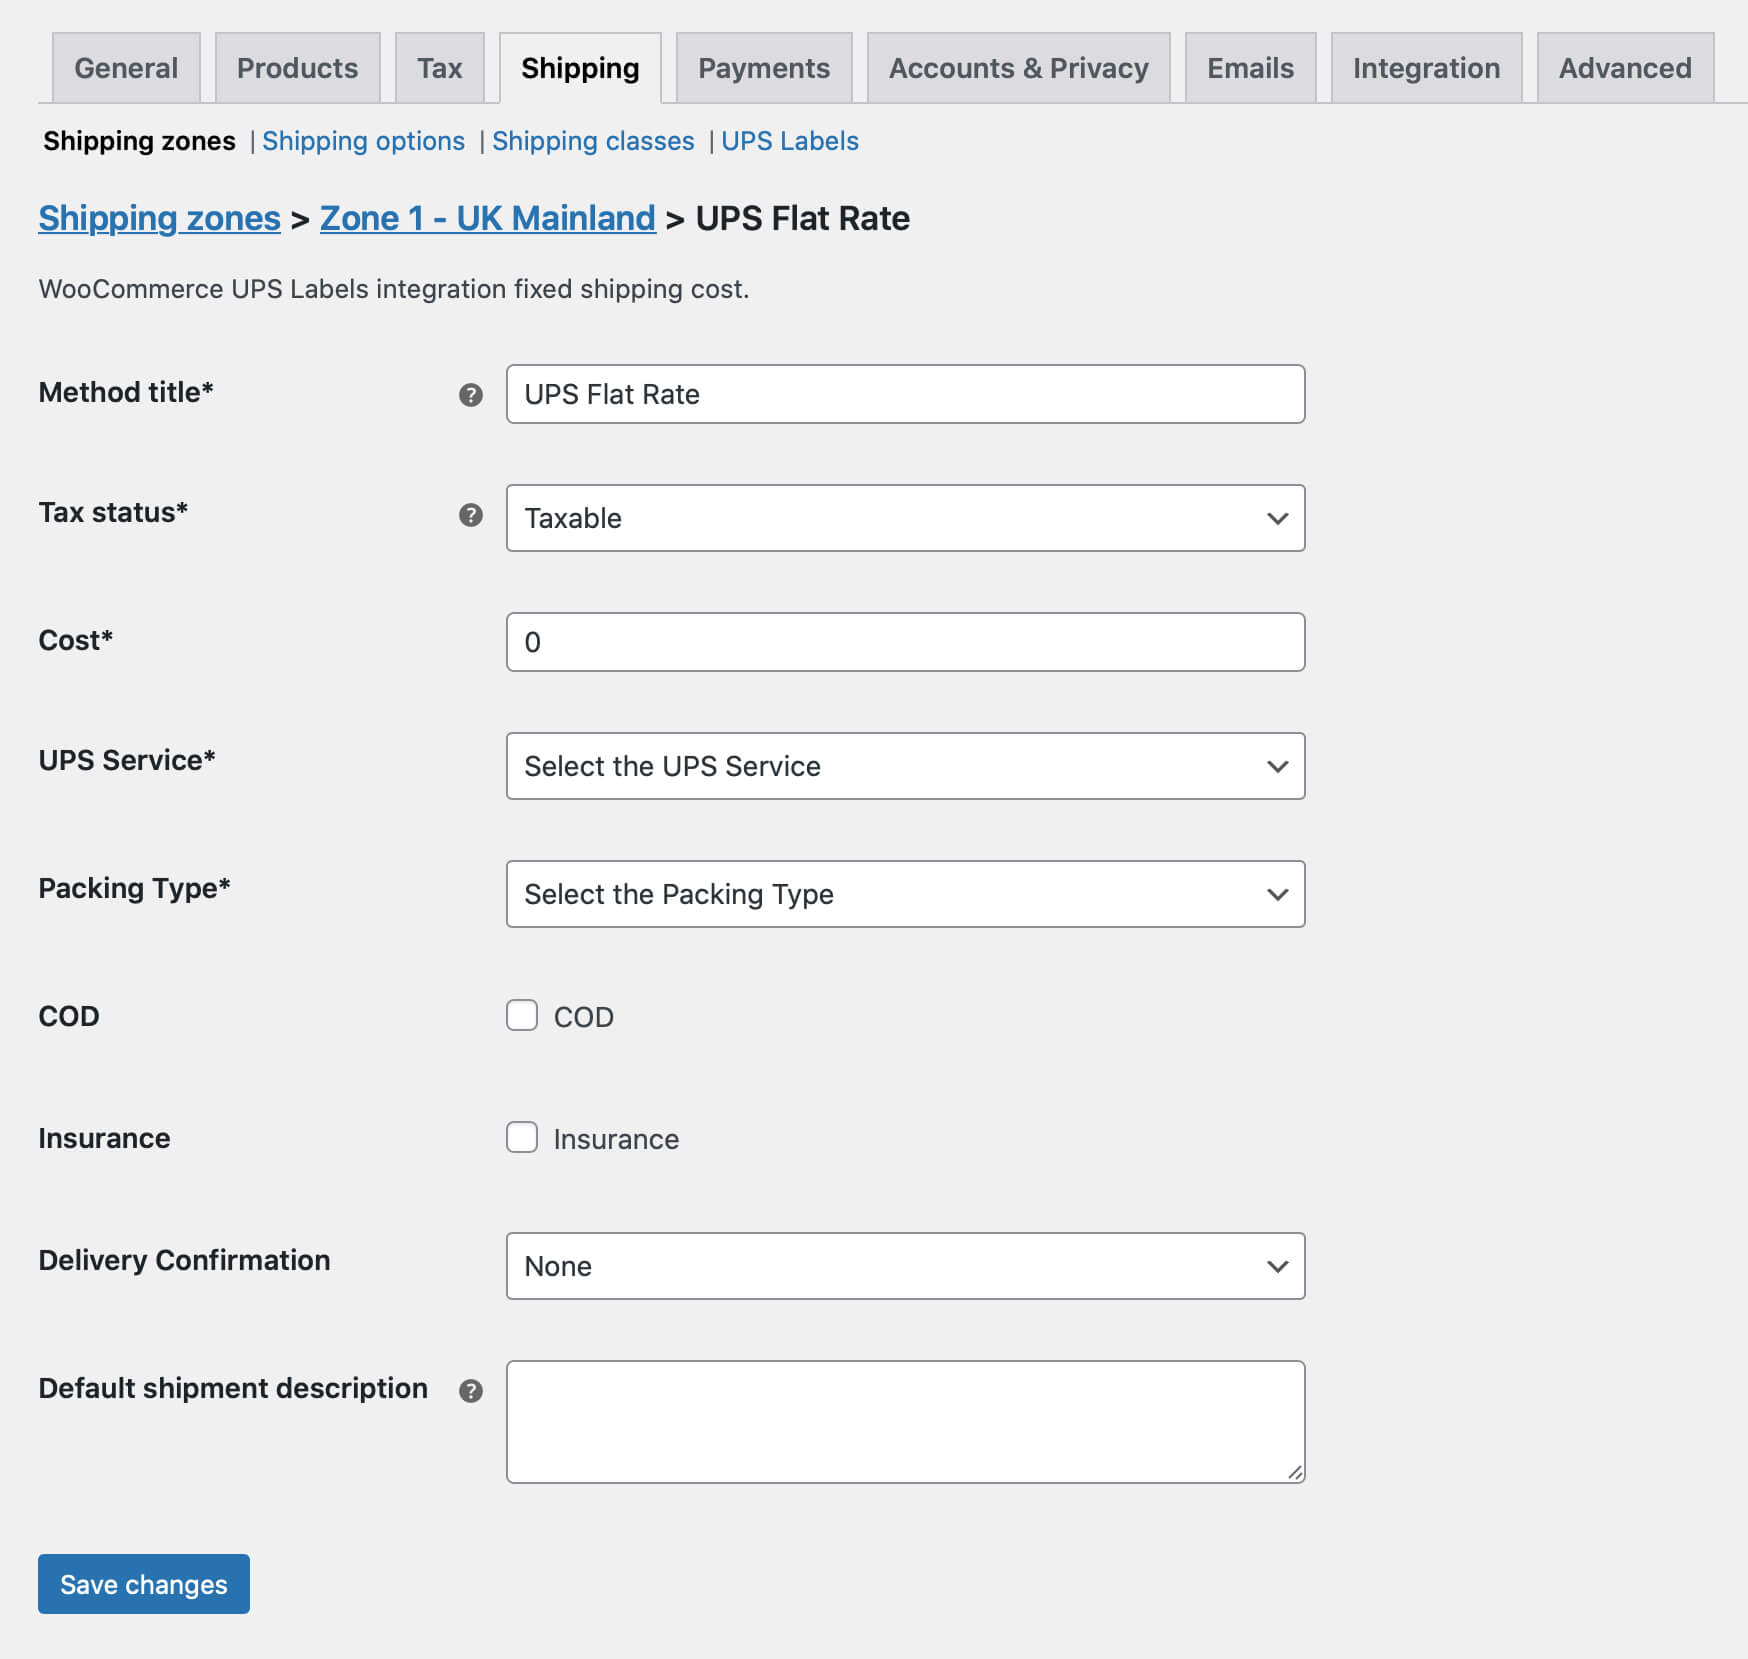
Remember to save your changes, and you are all set. Now you can move on to creating UPS shipping labels in your WooCommerce store.
After setting up the shipping method, you have to wait for the order in which the customer selects that shipping method. In that case, go to the order details. You will see the UPS shipping details window on the right side of the page. It would look like this:
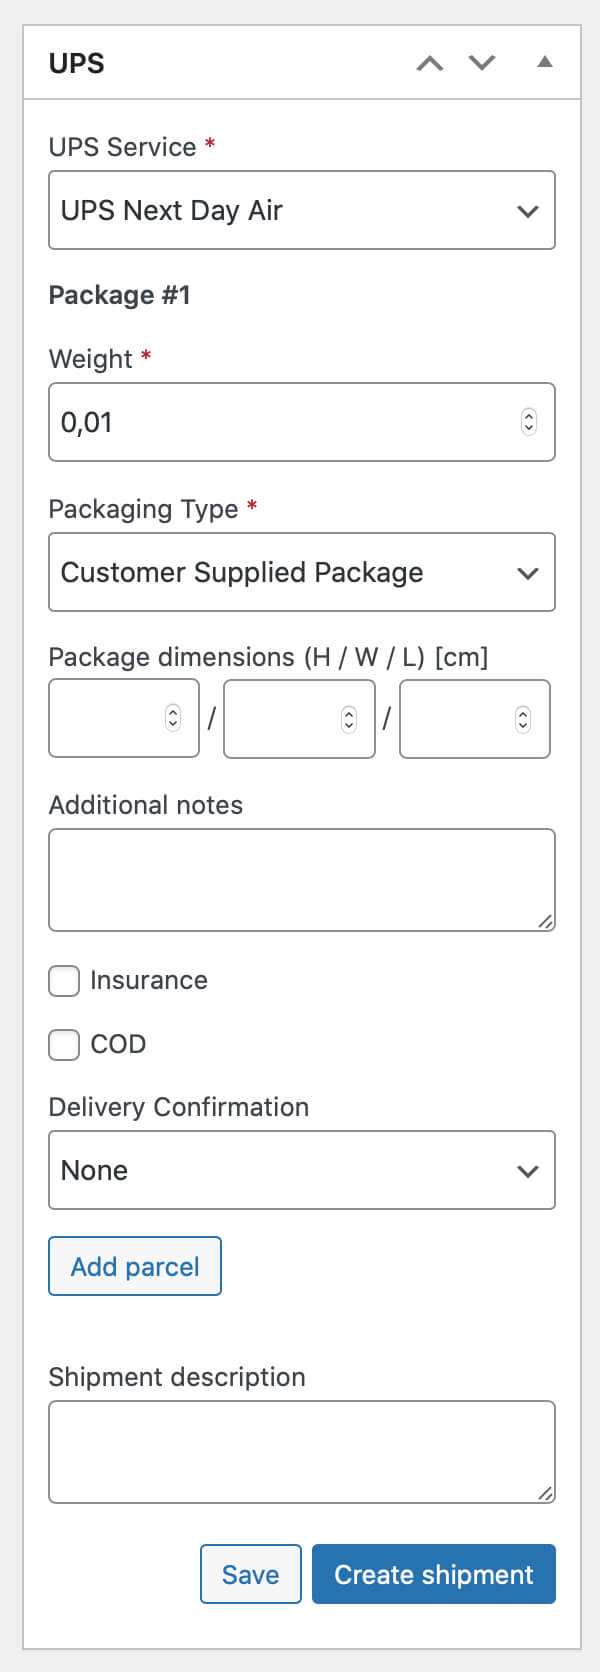
Of course, the UPS shipping plugin for WooCommerce will fill all fields with the data you have chosen in your shipping method. The package’s weight will also be automatically set based on the total weight of the products in your order. In this case, check the data, and if everything is correct, use the Create shipment button.
Once you use the Create shipment button, the shipment will be created. The shipment data will be sent to the UPS systems, and the shipment you’ve just made will be visible at ups.com Shipping tab after logging in to your account.
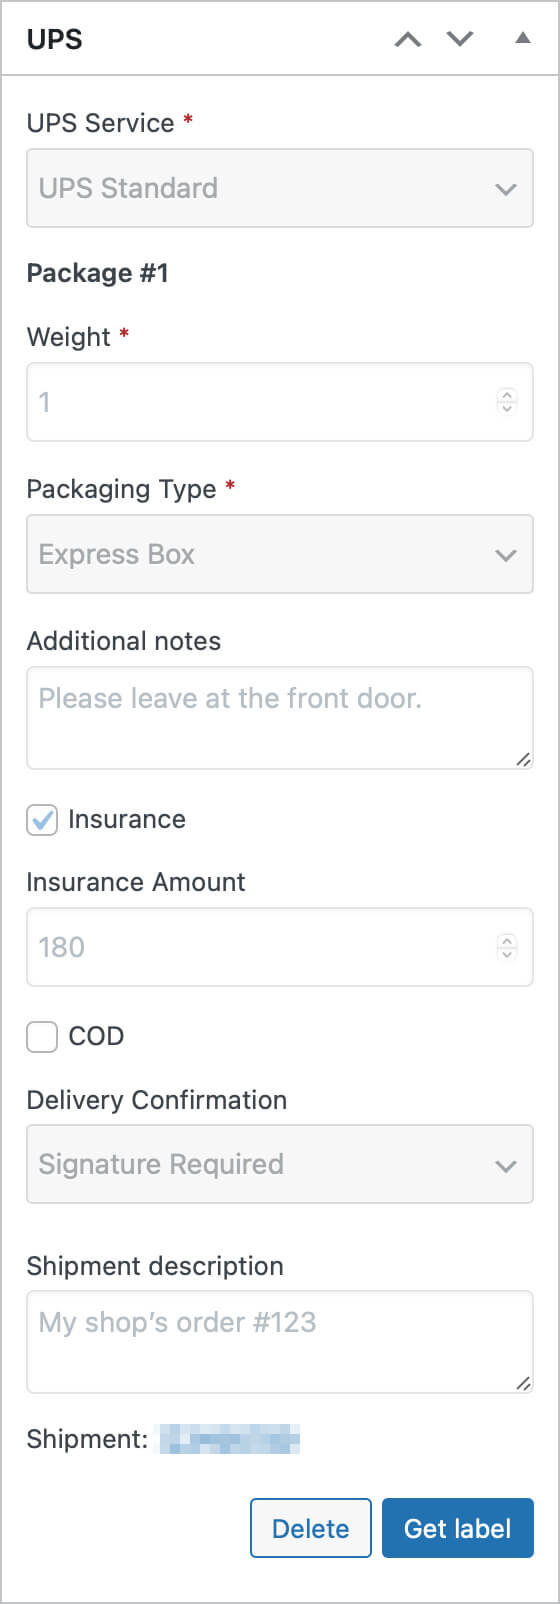
After that, the UPS metabox will be greyed out, the tracking link will appear at the bottom, and you will be able to download the shipping label with Get label button. Now you can print label and use UPS shipping without any hassles.
What if your customer chose other shipping methods, or you didn’t configure the UPS Flat Rate? Fortunately, the UPS Labels and Tracking plugin for WooCommerce allows you to create the UPS shipments for all the orders in your shop, no matter what kind of shipping method was selected during the purchase.
To do that, once you reach the Order details page you want to create the UPS shipment for, spot the Add shipping box located in the right sidebar. From the Select integration dropdown, choose the UPS option and use the Add button:
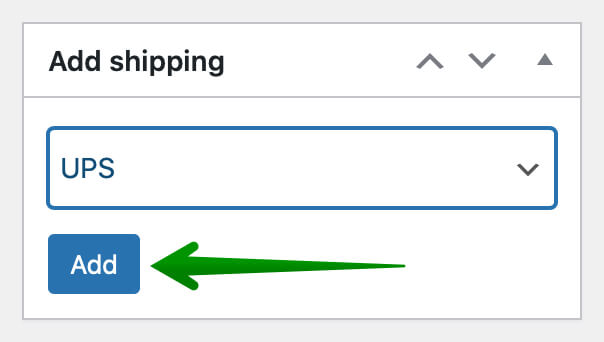
This will add a UPS shipping metabox to your order, similar to the UPS Flat Rate method. In this case, however, all data will have to be filled in manually.
After filling in all the necessary fields, you can create an order and retrieve the label just as I showed before.
As a bonus, I can hint that it’s not just UPS Flat Rate that makes it easy and fast to create UPS shipping in WooCommerce. If you want to use more advanced delivery cost calculation, you can use dedicated plugins for that:
Our team usually replies within a few hours. Ask away — we'll help you find the right solution for your store.

Content Writer at Octolize
Bartosz Gajewski is a content and marketing specialist with a solid background in SEO, WordPress content strategy, and technical documentation for digital products. With years of hands-on experience in both in-house and freelance roles, he supports tech companies – especially in the SaaS and e-commerce space – by creating content that informs, engages, and drives results.
His approach blends storytelling with data-driven SEO, and he’s been involved in projects ranging from rebranding and product marketing to growth experiments and copywriting for complex software tools. On the blog, he shares actionable insights from his work across marketing teams, product documentation, and online store optimization.


Learn how Octolize helped Kurzgesagt, the online shop behind one of YouTube’s most popular science channels, set up conditional courier rules using the Shopify Shipping Rates Rules & Zones app.
Learn how Octolize solutions helped WooCommerce store based in the United Kingdom set up shipping scenarios.
Learn how Octolize helped Shopify store based in the USA set up distance based rates with a usage of Octolize Distance Based Rates.