- Home
- WooCommerce
- What plugin are you looking for?
- Shopify
- What Do I Need?
- About us
- Blog
- Docs
- Contact us
- What can we help you with?

Shipping rates are one of the most important parts of your Shopify setup: they directly affect conversion rate, reduce cart abandonment, and influence whether you’re actually charging enough to cover delivery costs.
In this guide, you will learn:
In Shopify, shipping rates are the delivery options and prices your customers see in checkout (e.g., “Standard shipping $9.99”, “Express shipping $19.99”).
Shopify shows the right rates based mainly on:
To avoid “no shipping options” problems later, make sure you have:
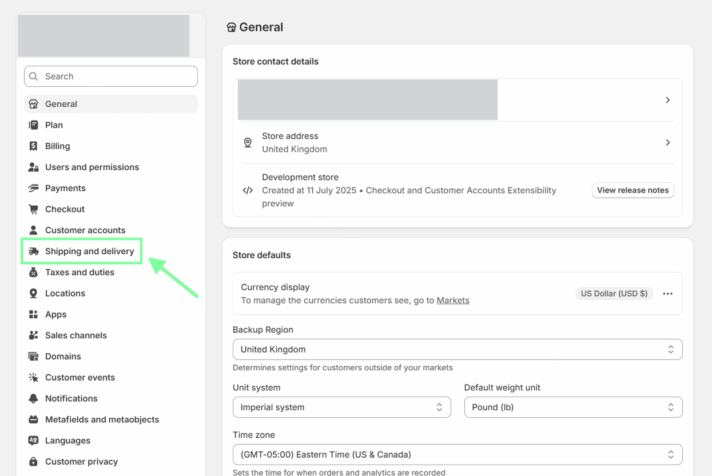
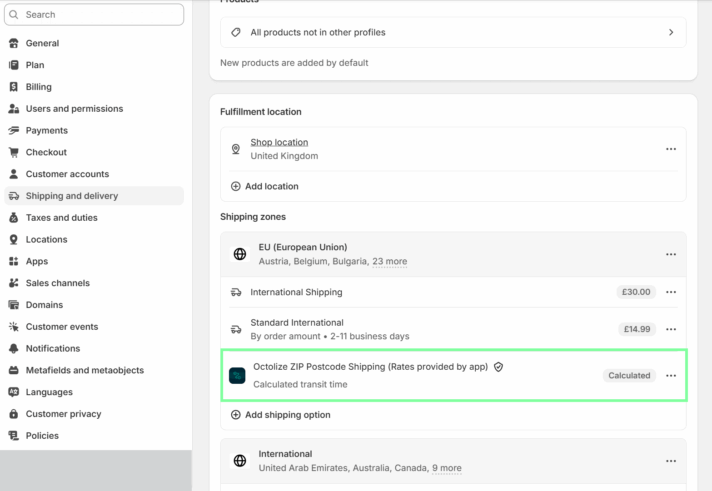
In Shopify admin, go to Settings → Shipping and delivery:
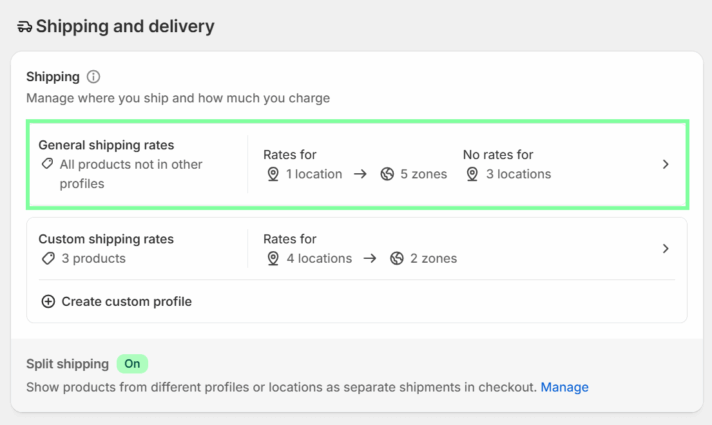
In the Shipping section, select the relevant profile (or create a new one if you need different rules for a specific product group):
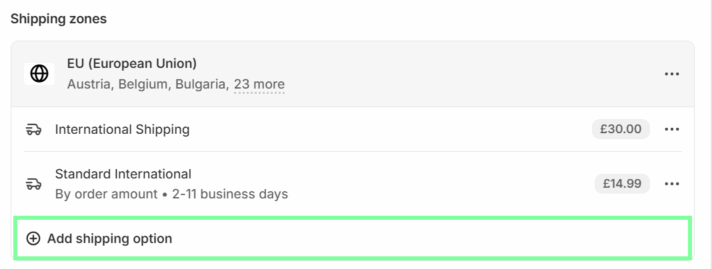
Pick the zone where you want your new rate to apply and click Add shipping option:
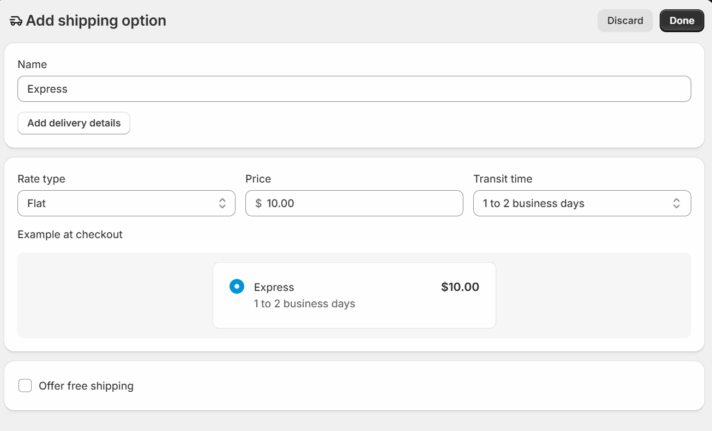
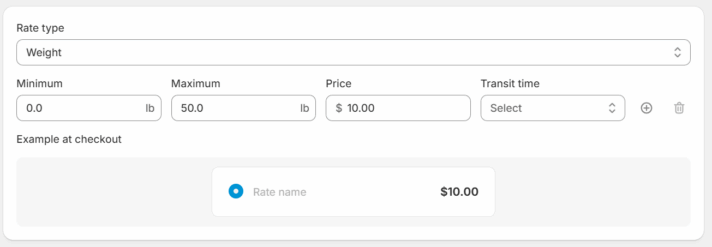
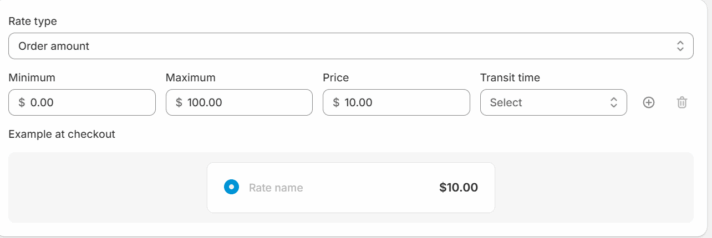
In Shopify’s built-in settings, you can set:
– a simple flat rate (one price),
– or use Add conditional pricing based on:
Example 1: Weight-based conditional pricing
Example 2: Order amount-based conditional pricing
Click Done and Save.
Shopify’s native settings are great for:
But as soon as your shipping logic gets more specific (for example, certain postcodes, city-level pricing, distance-based delivery, or a true WHEN → THEN rules engine), you’ll want a more advanced approach.
Luckily, there are ways to configure much more complex rate conditions. Here are 3 paid and free tools that grant you full control over your shipping rates on Shopify.
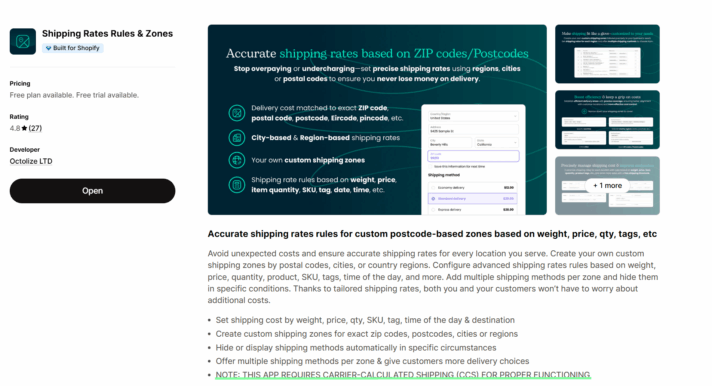
Shopify’s default zones can’t be narrowed down precisely to city lists or postcode patterns in a flexible way. The areas you can set with default settings are often too broad, resulting in inaccurate shipping rates.
That’s where Octolize Shipping Rates Rules & Zones comes in. It becomes the “control center” for advanced shipping and makes sure you’re not losing money on every delivery or overcharging your customers.
This app displays its own shipping methods in checkout, so your store must have Carrier-Calculated Shipping (CCS) enabled.
In short, CCS (Carrier-Calculated Shipping) is a Shopify feature that allows you to display third-party shipping rates at checkout in your store. For logistical reasons, it is impossible for the Octolize Shipping Rates Rules & Zones, or any other similar third-party tool or app, to work without CCS enabled.
CCS availability depends on your Shopify plan (e.g., included in Plus/Advanced; not available in Basic). It is available in Grow after fulfilling certain requirements and/or at an extra charge.
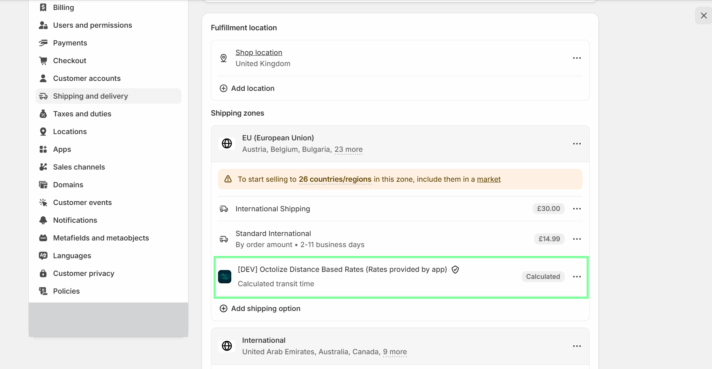
After installation, the app’s rates are typically added automatically in Shopify shipping zones under Carrier and app rates:
If needed, you can add it manually via Add rate.
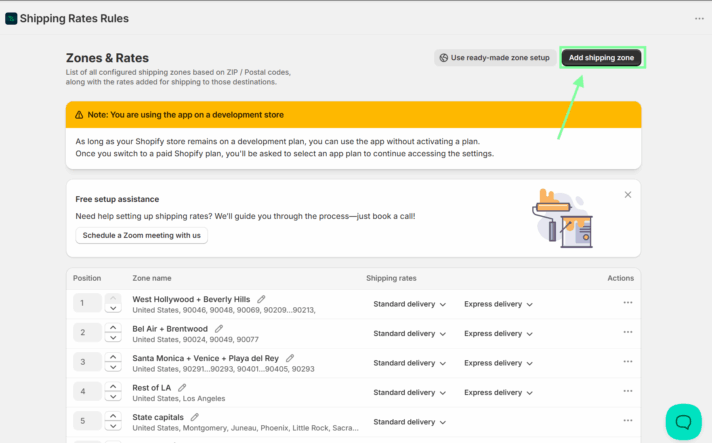
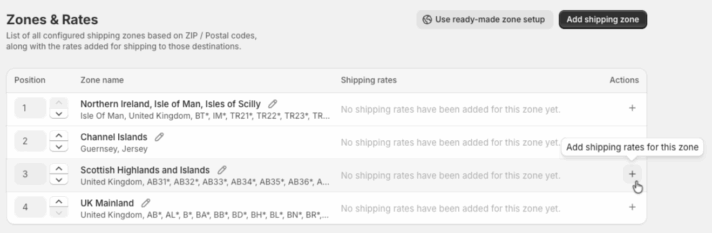
In the app, go to Zones & Rates and click Add shipping zone:
If you haven’t got any shipping zones configured yet, the Zone & Rates screen will look like this:
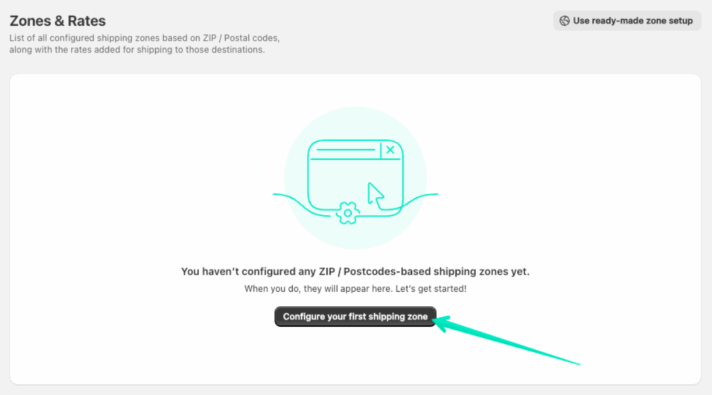
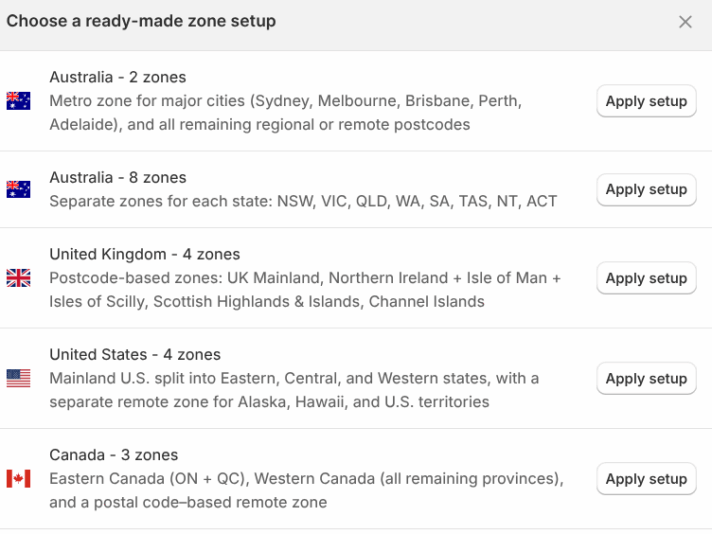
Don’t hesitate to use the “ready-made zone setup”. You can choose from previously configured options, considerably speeding up the configuration time.
Zone configuration screen:
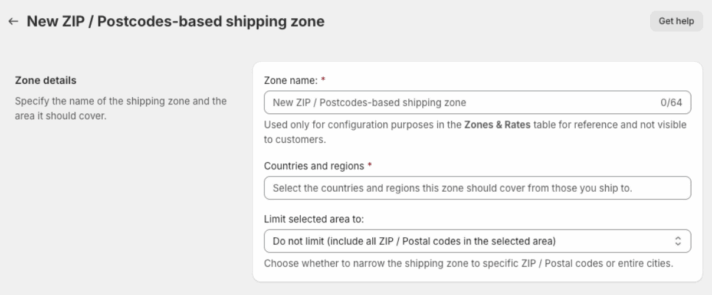
You can limit the selected area to:
– full codes (one per line or comma-separated),
– ranges with ellipsis (e.g., `2619…2898`),
– wildcards (e.g., `SW1*`, `42*`, `574*`),
Click the + action:
Shipping rate configuration screen:
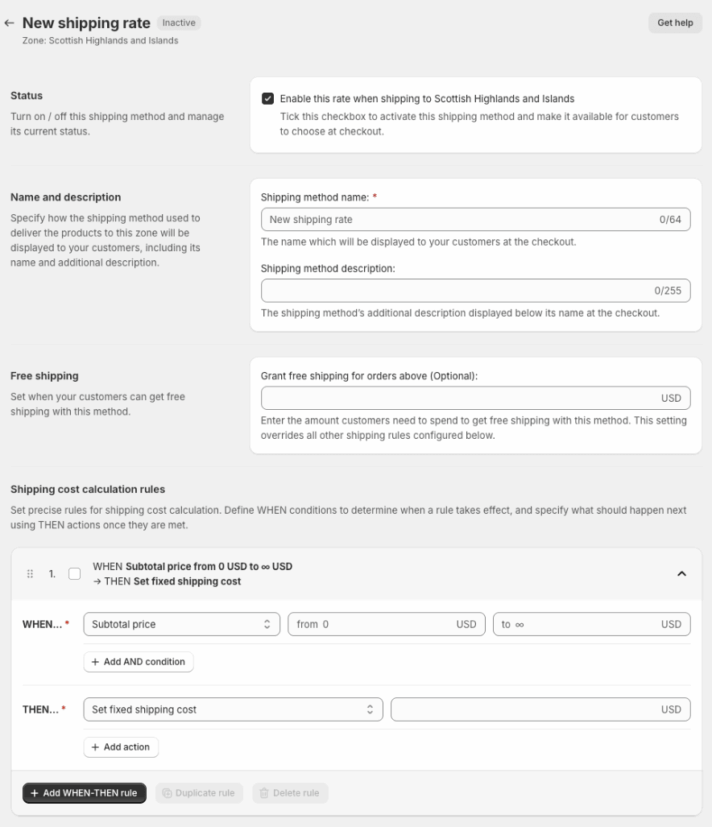
Rules table:
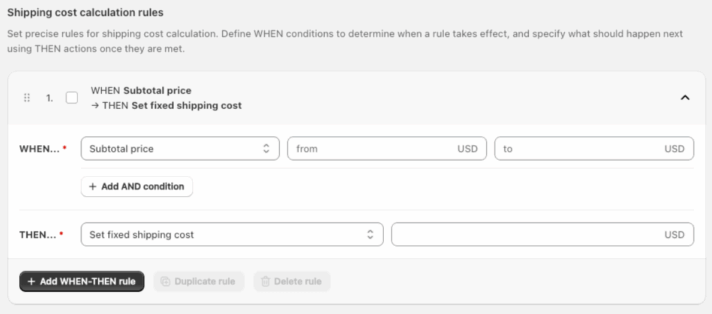
You can calculate costs using rules like:
– fixed cost,
– cost per unit (per item / per weight unit),
– percentage of subtotal,
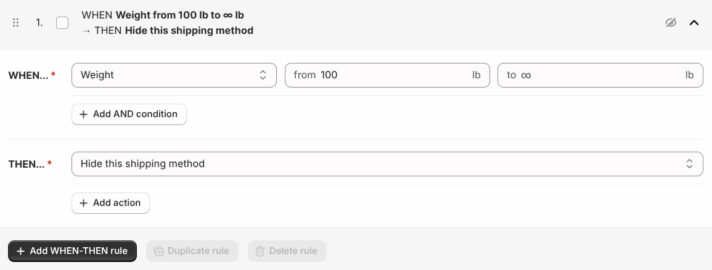
– or **hide the method** when conditions are met.
Example: hide method conditionally:
Zones are matched top to bottom. The first matching zone wins:
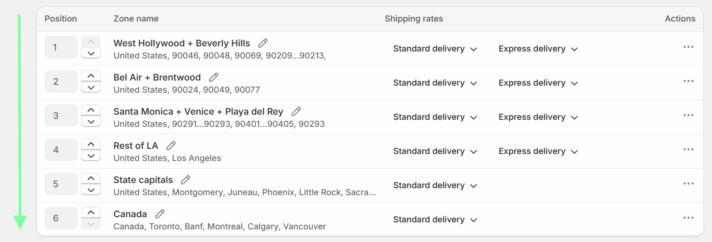
Best practice: Put the most specific zones (exact postcodes/cities) above broad zones.
If you offer local delivery, a flat rate often becomes unfair fast:
Octolize Distance Based Rates calculates shipping cost based on the distance between your Shopify Locations and the customer’s address using Google Maps API.
For the app to calculate and display rates at checkout, your store needs:
After installation, the app’s rates are typically added automatically in Shopify shipping zones under Carrier and app rates:
If needed, you can add it manually via Add rate.
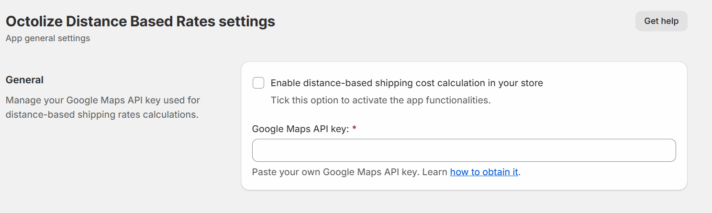
In the app General settings:
The app uses your Shopify Settings → Locations data and lets you configure each location’s delivery cost.
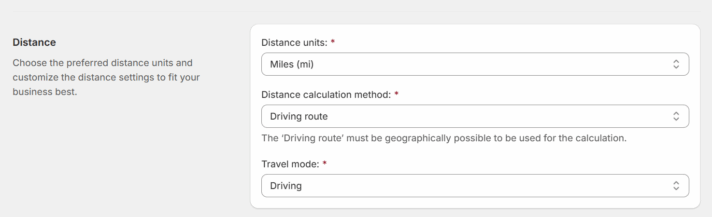
You can set:
– Straight line
– Driving route
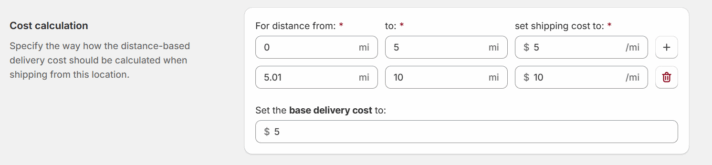
– Rate per distance unit
– Base delivery cost + additional rate per unit
Location configuration screen:

Distance settings:
Cost calculation methods:
Practical tip: If you ship from multiple locations, use the same shipping method name for each location so Shopify can display it as a single method and sum the cost properly.
Troubleshooting tip: If you use Driving route, the route must be geographically possible. If Google Maps can’t calculate a drivable route (e.g., overseas), the method may not show. Switch to Straight line in that case.
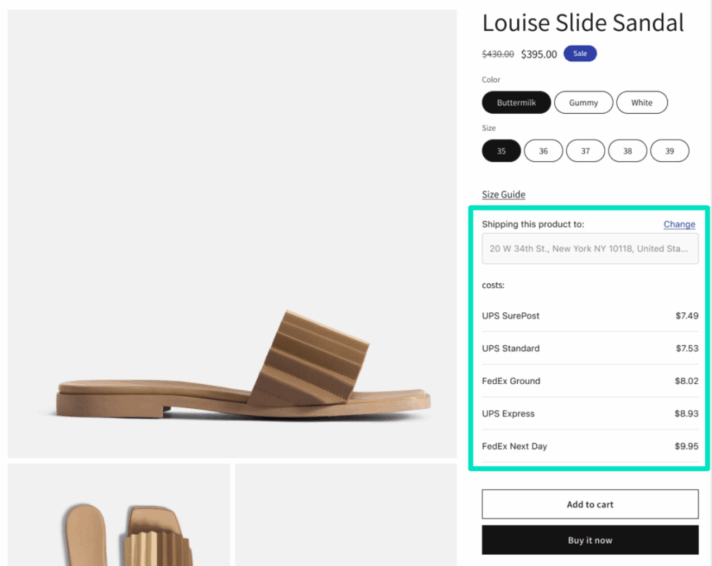
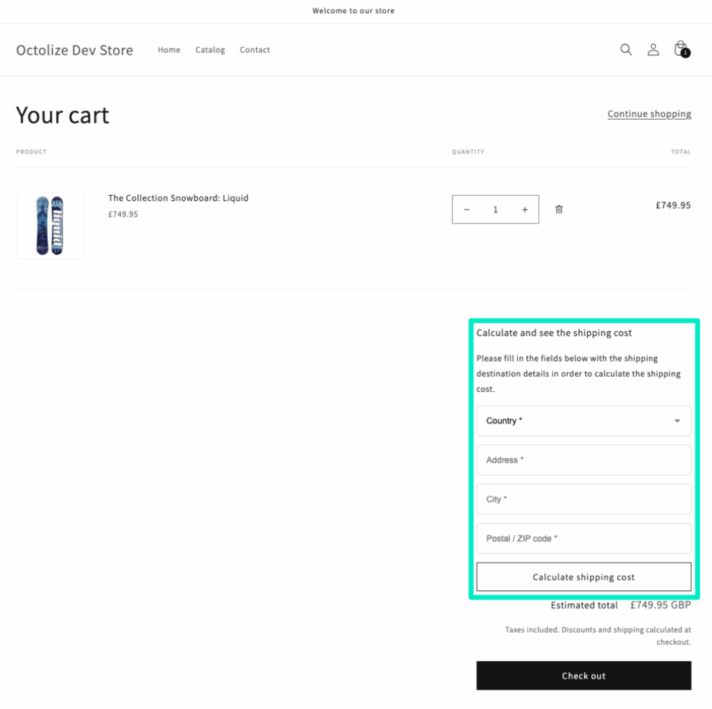
Many customers abandon carts when shipping costs feel like a surprise. The Octolize Shipping Rates Calculator solves this by showing shipping methods and costs:
It mirrors Shopify’s checkout shipping calculation: customers enter the destination in a form, and the app displays the available methods + costs.
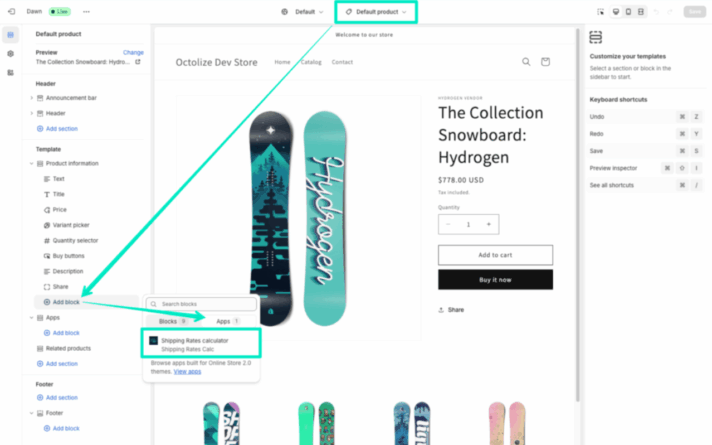
After saving, customers will see a “calculate shipping” link:
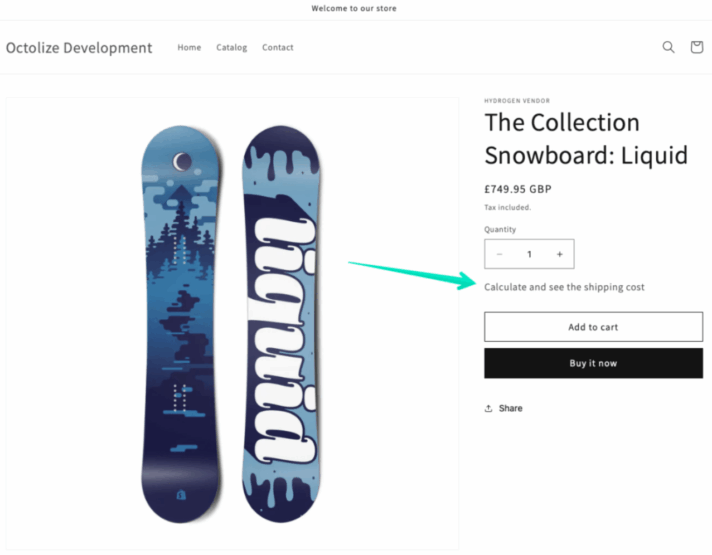
…and the calculator itself (opened):
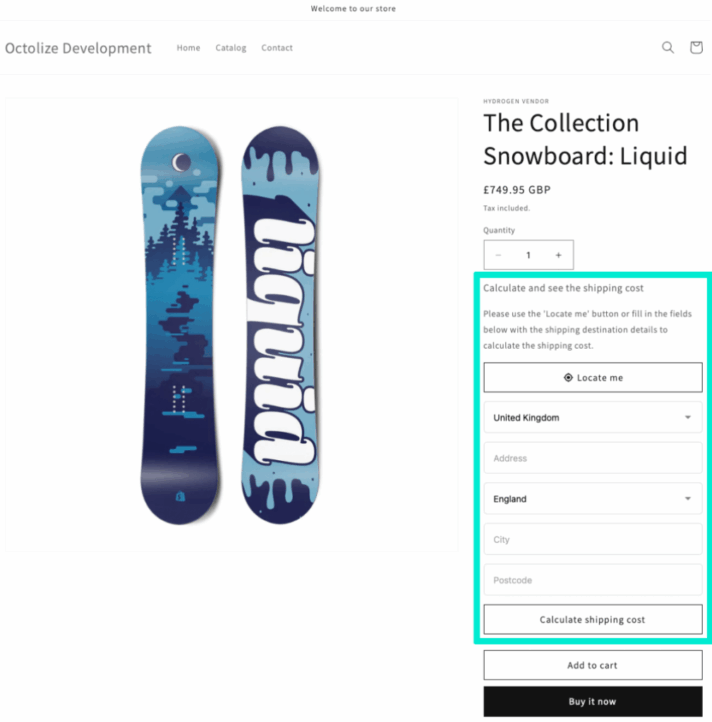
When enabled, the calculator can auto-populate the “Ship to” address based on browser geolocation (if the customer allows it):
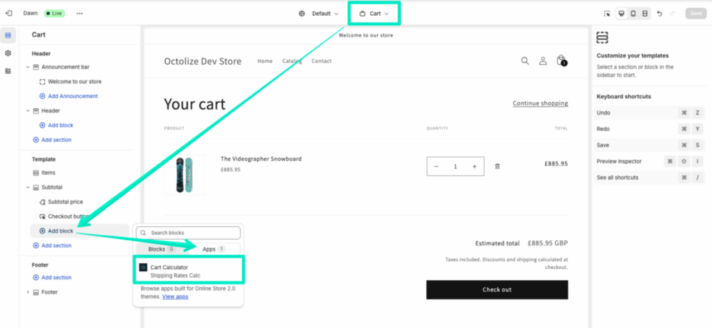
Customers can calculate shipping in the cart before going to checkout:
Why store owners like it: the app can display Shopify built-in methods, as well as methods coming from other third-party apps. This way, you keep one consistent “shipping preview” experience across your store.
1. Rates don’t show for some customers
2. You need city/postcode logic, but only have country/region zones
3. Local delivery pricing isn’t profitable
4. Customers complain about “surprise shipping costs”
Setting up shipping rates on Shopify is one of the most crucial foundations of your e-commerce business. If they are too low, you will end up paying out of your own pocket for every delivery. If they are too high, unexpected shipping costs will drive customers away. Both scenarios carry the same outcome: your business loses money.
In order to protect your margins and build customer loyalty, you need to carefully calculate the shipping rates and configure them correctly. The default Shopify settings are enough for small stores with simple shipping rules, but as your business grows, so will its shipping needs. In such cases, the standard Shopify options usually aren’t enough.
You can take full control of your Shopify shipping rates with additional tools:
In order to calculate your shipping rates on Shopify, you need to take into account several factors:
Once you decide on your shipping rates, you have various options at your disposal in Shopify:
For a tighter control of your shipping rates, for example, based on distance or other conditions (time of day, product/customer tag, item quantity), use third-party apps, such as Octolize Distance Based Shipping Rates or Shipping Rates Rules & Zones.
In order to set up different shipping rates on Shopify, you can create different shipping profiles and shipping zones. You may create multiple shipping zones within one shipping profile, and multiple shipping rates within one shipping zone.
You can also choose from different shipping rate settings: flat rate or conditional pricing (based on order total or order weight).
This granular division allows you to set up different shipping rates for various countries and products without sacrificing profit margins.
In order to adjust shipping rates on Shopify, all you need to do is go to Settings → Shipping & delivery → Shipping profile → Shipping zones
You will see a list of shipping rates for each shipping zone. Click on the 3 dots next to the shipping rate you want to adjust and choose Edit shipping option. There, you can adjust your shipping rates based on weight, order amount, or set up a flat rate.
Our team usually replies within a few hours. Ask away — we'll help you find the right solution for your store.

Lucyna Polok is an SEO and content specialist passionate about crafting effective strategies and creating engaging content. She has worked across a variety of industries, both in-house and as a freelancer. A strong believer in the power of storytelling, she believes that good content not only delivers business results, but also resonates with customers through an emotional connection with a brand.
At Octolize, she is responsible for aligning the content strategy with business goals and increasing visibility, trust, and authority of the brand via data-based SEO efforts. On the blog, she focuses mostly on topics for those only beginning their adventure with e-commerce, explaining scenarios and terms in an approachable way.


Learn how Octolize solutions helped WooCommerce store based in the United Kingdom set up shipping scenarios.
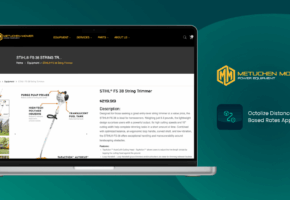
Learn how Octolize helped Shopify store based in the USA set up distance based rates with a usage of Octolize Distance Based Rates.

Learn how Octolize helped NGO set up their WooCommerce rates with a usage of Flexible Shipping PRO.