- Home
- WooCommerce
- What plugin are you looking for?
- Shopify
- What Do I Need?
- About us
- Blog
- Docs
- Contact us
- What can we help you with?

If you’re considering expanding your WooCommerce store and shipping packages internationally, learn how to set up international shipping for WooCommerce. In this article, I’ll show you the advantages of international shipping, how to set it up, and which shipping plugins to consider.
One of the biggest advantages of having a WooCommerce store and selling products online is that you don’t have to limit yourself to your region, country or continent. Entering new markets requires a lot of preparation, but it’s an opportunity to grow your business, and it can be a great way to deal with crises and reduced sales in local markets. How to prepare your WooCommerce shipping properly to enter a new market? You should learn about the specifics of specific markets, check restrictions and prepare shipping methods. And you will learn about this last element of preparing to enter new markets for WooCommerce stores in this article.
Let’s start with why you should ship internationally. It has immense potential for WooCommerce store owners seeking to expand their business globally. You can unlock new opportunities and drive sustainable growth by reaching more customers, boosting brand awareness, and selling a wider range of products. It can also be a great way to cope with uncertain market conditions. Providing accurate shipping costs to enhance customer experience and streamline the shipping process is crucial. Using plugins that allow for custom shipping rules based on various factors can simplify the shipping process while ensuring precise shipping calculations.
International shipping is a complex process that involves transporting goods from one country to another. It requires meticulous planning, execution, and adherence to various regulations and laws. With the rise of e-commerce, global shipping has become an indispensable aspect of online businesses, enabling them to reach customers worldwide. According to Statista, 56% of retailers using WooCommerce sells internationally. For online store owners, global shipping opens up a world of opportunities, allowing them to expand their market reach, increase sales, and build a global brand presence. By understanding and leveraging global shipping, online store owners can tap into new markets and drive sustainable growth.
International shipping opens the doors to a vast global customer base, providing WooCommerce store owners access to new markets. By extending their reach beyond local boundaries, businesses can find lucrative opportunities in emerging economies and regions hungry for unique products. With international shipping, you can transcend the limitations of a saturated local market and tap into a world of potential customers, ultimately increasing your revenue potential.
Expanding globally through international shipping enables WooCommerce store owners to enhance brand recognition on a global scale. Your brand gains exposure and visibility as your products reach customers in different countries. This increased brand awareness attracts more customers and fosters customer trust and loyalty. Positive customer experiences abroad can generate valuable word-of-mouth recommendations and referrals, further bolstering your reputation.
International shipping allows WooCommerce store owners to sell diverse products to customers worldwide. While certain products may have limited demand in local markets, they could be highly sought after in other regions. By offering unique products globally, you can differentiate yourself from local competitors and cater to customers’ specific needs and preferences in different countries. This expanded product range opens new revenue streams and boosts your competitive advantage.
Seasonal fluctuations can pose challenges for WooCommerce stores, especially during off-peak periods. However, international shipping can help mitigate these fluctuations by allowing you to balance demand across different regions. While it may be winter in one country, it could be summer in another, presenting an opportunity to target customers in areas with higher demand. By expanding your sales opportunities during slow seasons, you can maintain a steady revenue stream and improve cash flow throughout the year.
Now that you know why you should start international shipping in WooCommerce, it’s time to learn how to set it up.
Setting WooCommerce International Shipping involves four steps:
We’ll go through each of these elements, and I’ll explain step-by-step how you can set it up in your own WooCommerce store.
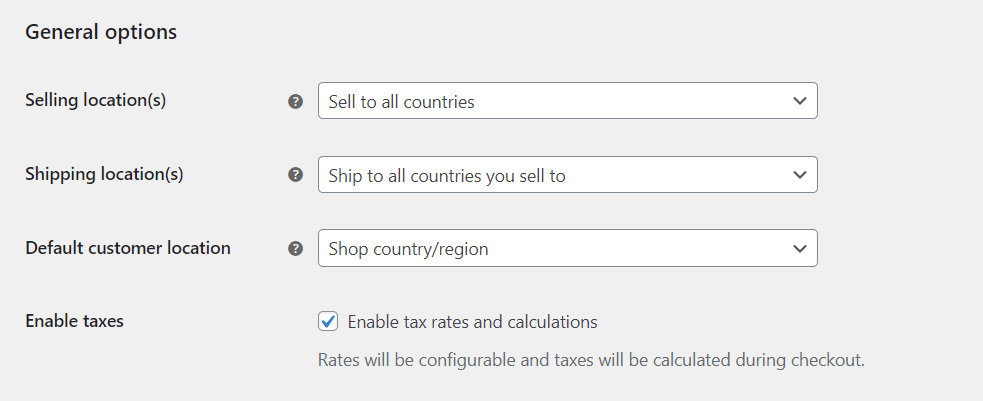
To set up WooCommerce International Shipping, you must first enable shipping to the countries of your choice. By default, this option is activated, and no restrictions are enabled. However, to proceed to the next steps, it is necessary to check these properties. To do this, go to WooCommerce → Settings and under the General tab, find the Selling Location(s) and Shipping Location(s) parameters.
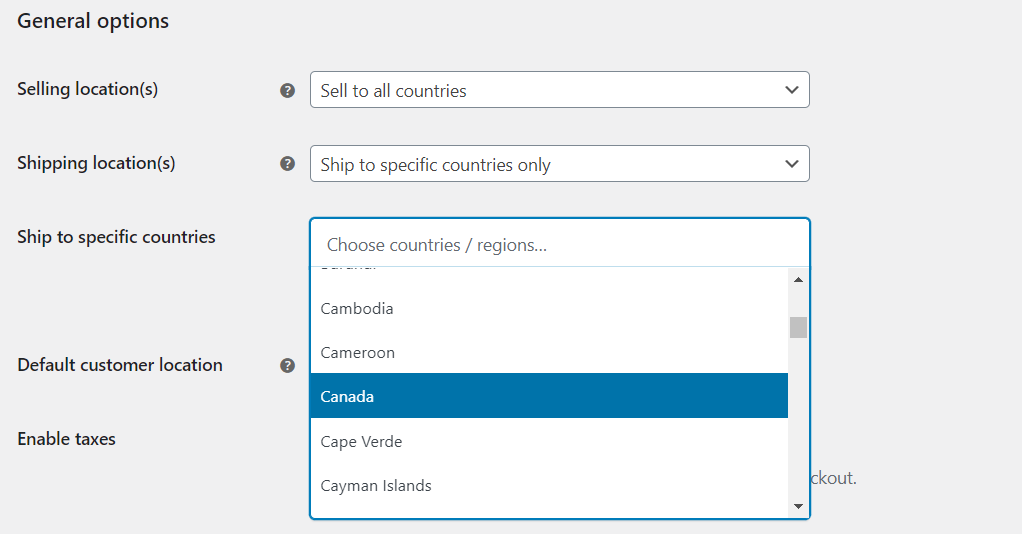
You can select specific countries you want to sell and ship goods in your store here. To do so, select Ship to specific countries only.
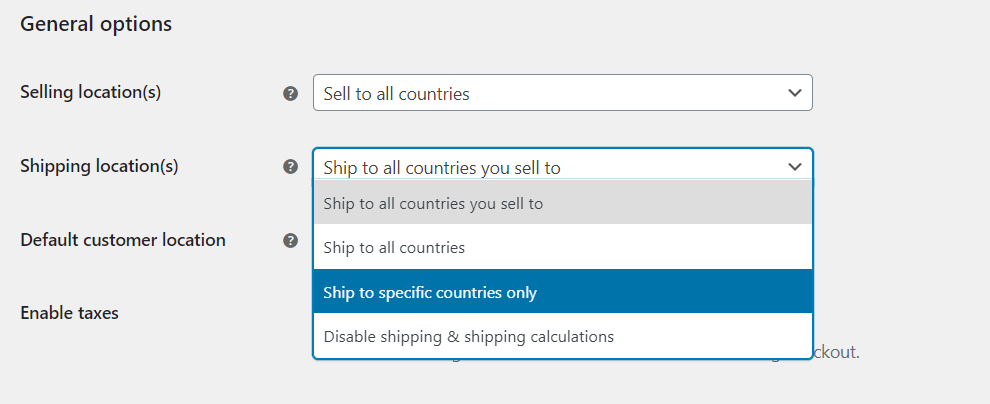
Then, select the countries from the list.
You can choose Ship to all countries if you would rather not configure any restrictions. These options will automatically enable international shipping in your WooCommerce store. Remember to save the changes after configuration.
An important element of international shipping is the proper configuration of product taxes and shipping. Tax rates can vary strongly from country to country, so setting this element is a necessity. Fortunately, this is simple in WooCommerce.
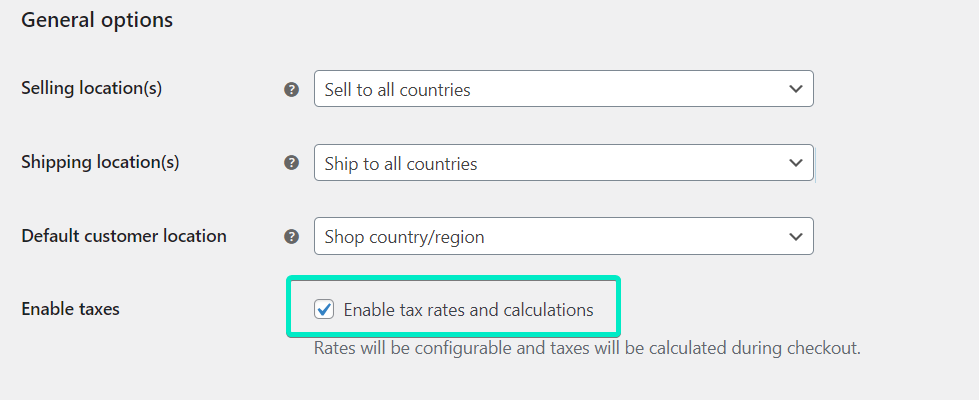
First of all, it is necessary to enable taxes for WooCommerce. You will find this option in the General WooCommerce settings under the Default customer location setting. To enable the tax rate calculation, check the Enable Tax Rates and Calculations checkbox and Save the changes.
Now, it’s time to set the tax rates. To do so, use the Tax tab from the top bar in the WooCommerce settings.
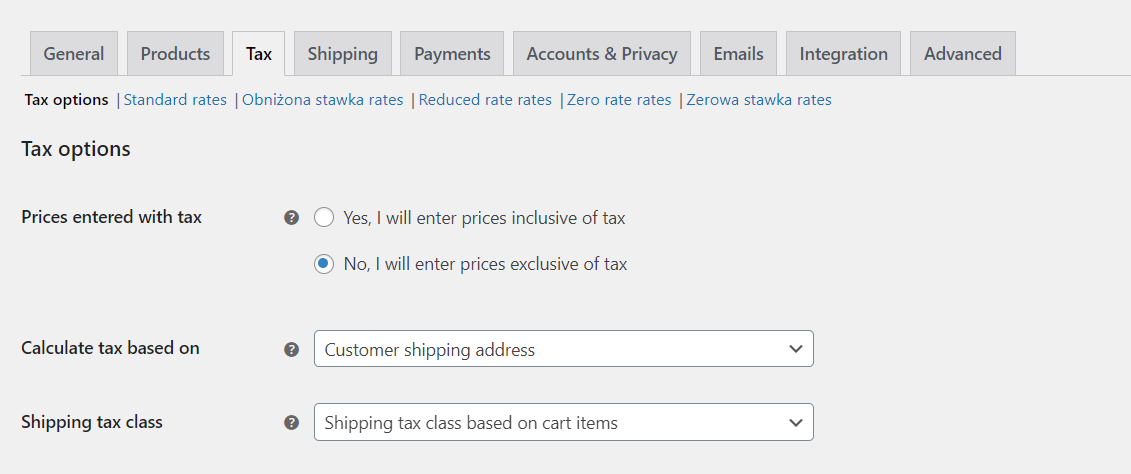
In the Tax options, you can specify how taxes are calculated and displayed in WooCommerce. To learn more, check out our detailed guide about WooCommerce Shipping Taxes.
To add taxes for shipping for specific countries, go to the Standard rates tab.
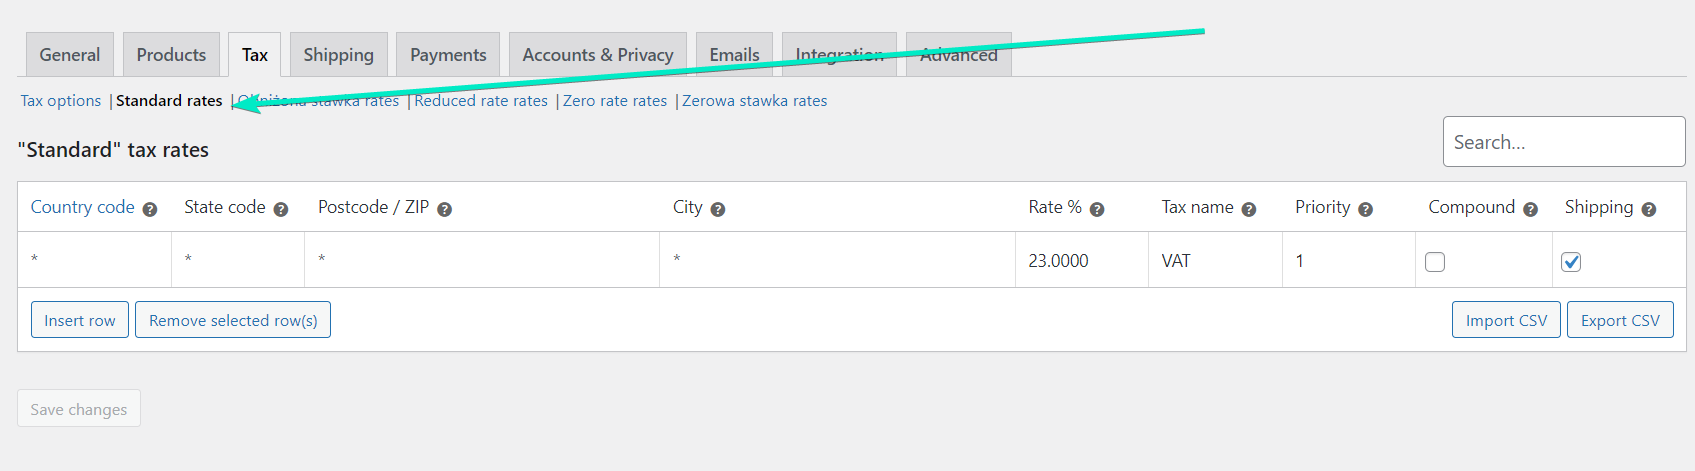
There you will find all configured tax rates in your store. To enter a new rate, click the Insert row button and proceed to configure the tax rate:
You can add several tax rates this way for specific countries. WooCommerce allows you to import tax rates from the CSV file. If you are looking for a ready-made file with EU tax rates and download a ready-to-import CSV file, you can find it in this article about WooCommerce EU tax rates.
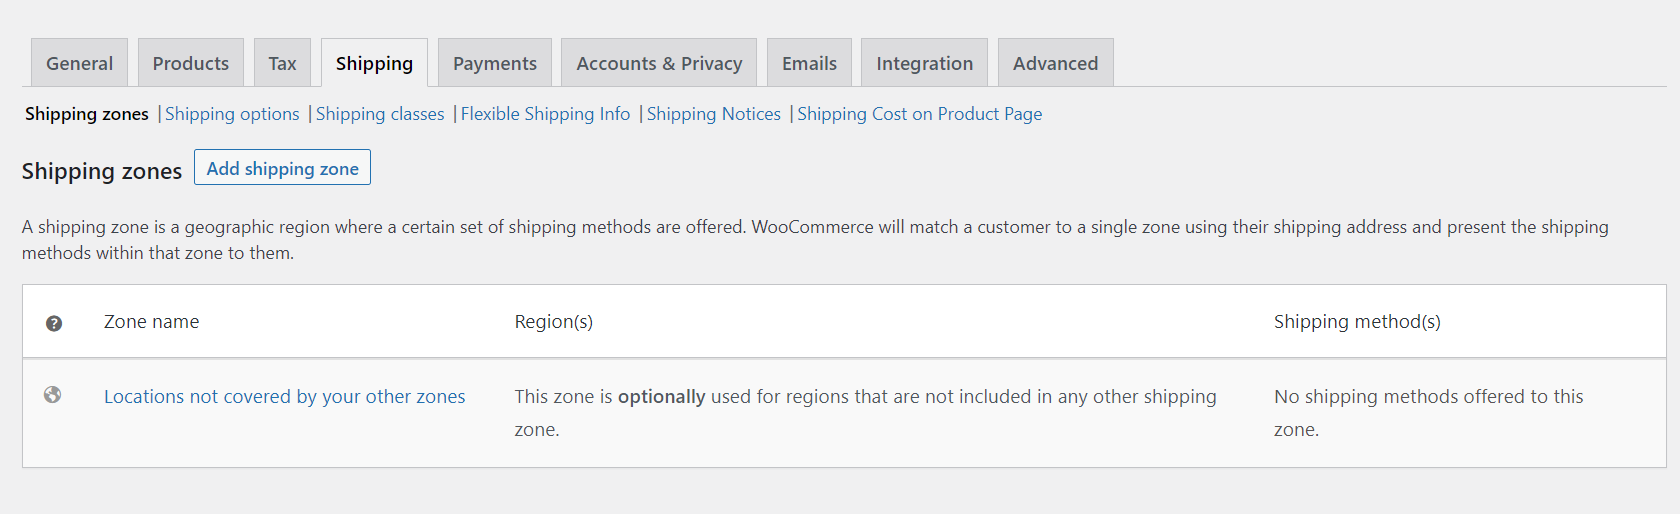
Having the shipping tax configured, it’s time to add shipping zones. Shipping Zones in WooCommerce are groups of locations to which you want to ship your products. You can easily group the continents, countries, states/provinces and even ZIP or postal codes. It allows you to set up the different shipping methods for each zone you’ve created. This way, your customers will see only the ones available for their area based on the entered address details.
Go to WooCommerce → Settings → Shipping → Shipping Zones. There, you will find all the shipping zones you have already configured. You can add a new shipping zone for the countries you want to start international shipping. To do so, click the Add shipping zone button.
You will be redirected to the new shipping zone settings:
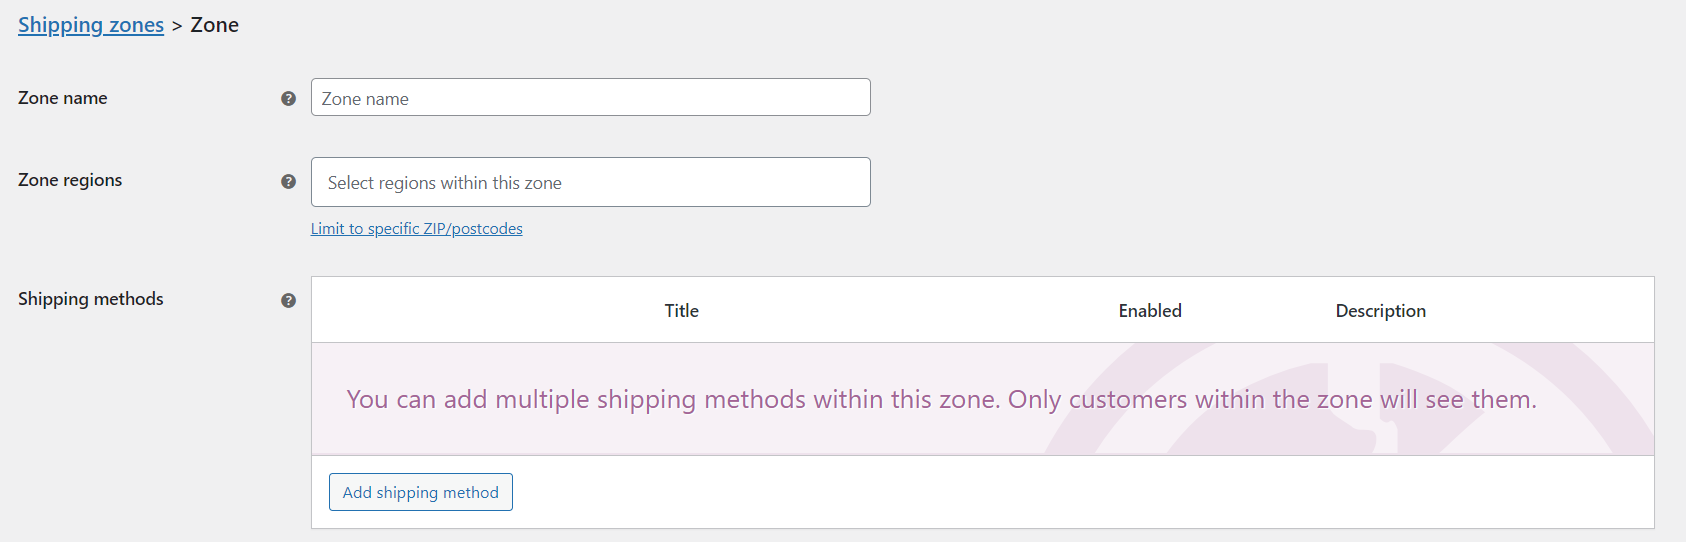
In the Zone Name field, enter the zone’s name that should be self-describing. In the Zone regions, select the region that it should cover.
You can set Zone regions as:
Once you create the shipping zone and set it up to fit your case, confirm the process with the Save changes button.
You can also watch our video tutorial about setting up shipping zones in WooCommerce. It’s a quick and easy way to understand how zones work and how to configure them properly:
Having the shipping zones configured, you can add shipping methods to them. To do so, click your configured Shipping Zone’s Add shipping method button.
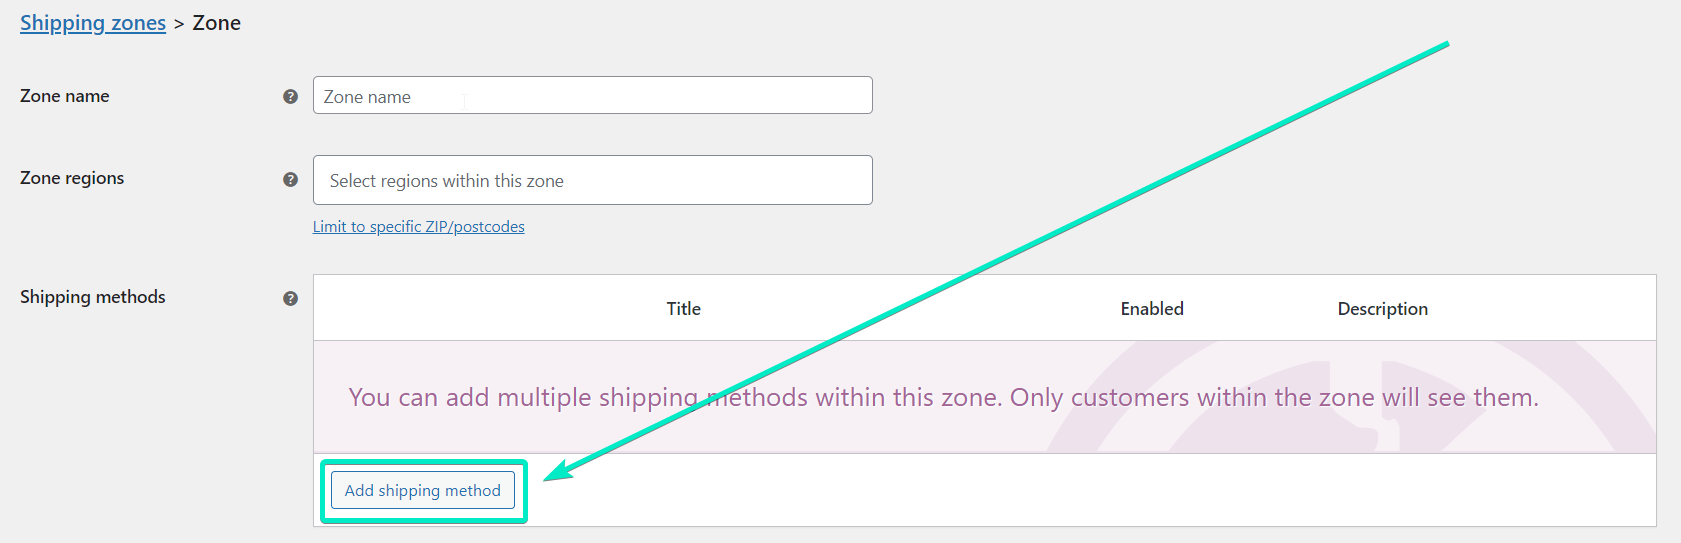
By default, you will have three shipping options: Flat Rate, Free Shipping and Local Pickup. If you want to use other shipping methods like table rates or live rates for USPS shipping method, you first need to install that shipping method’s plugin. You can find more about plugins for international shipping later in this article.
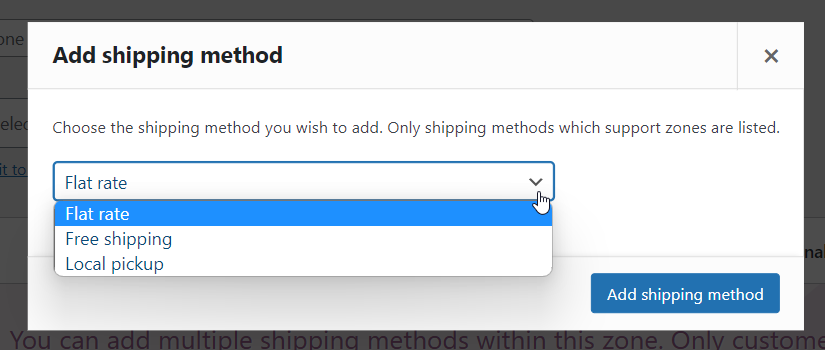
The easiest solution is to add a Flat Rate shipping method. This way, you can add the shipping cost that will appear for each order in this Shipping Zone.
The next step is to set the shipping rate in the method settings.
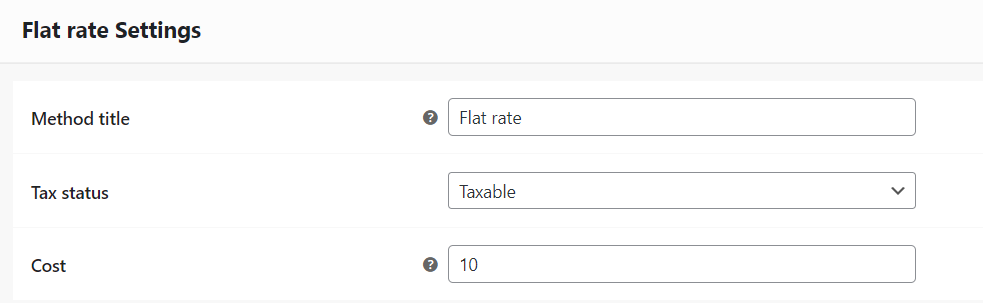
After configuring the shipping method, remember to save the changes.
The International shipping setup is complete, with shipping taxes set, and new shipping zones added along with shipping methods. This way, you can start entering your store into new markets.
Configuring international shipping with a Flat Rate shipping option may not be enough for many WooCommerce stores. A fixed shipping cost for all orders and a lack of integration with courier companies can significantly limit your store’s capabilities. In this case, it’s worth using third-party solutions that make it easier to configure international shipping costs and shipping processes. Let’s review the best shipping plugins for WooCommerce that might be useful for you.
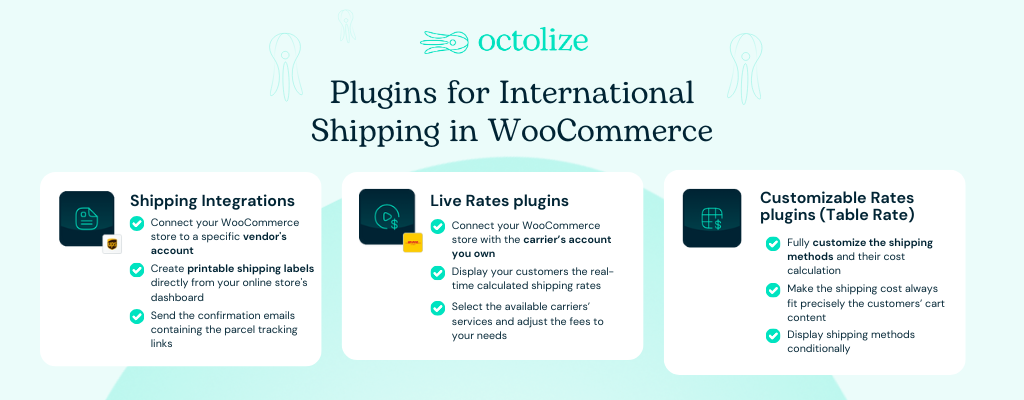
One of the best solutions for international shipping are shipping integrations for WooCommerce with specific courier companies. They allow you to connect your WooCommerce store to a specific vendor’s account and create printable shipping labels directly from your online store’s dashboard. They usually also offer other elements of shipping fulfillment, like shipment tracking and synchronization with courier companies’ systems.
Another handy solution is Live Rates plugins for WooCommerce. Similar to shipping integrations, they allow you to connect your online store with the account of specific courier companies, but they work in a slightly different area. Allows you to automatically get accurate shipping rates for your customers based on their cart and location, creating powerful service like FedEx Shipping Calculator for WooCommerce. What’s more, it works for different shipping services for WooCommerce.
This way, you don’t have to manually configure shipping costs for each region, but the plugin will do it for you. For WooCommerce international shipping, Live Rates plugins are a huge convenience and even a necessity!
Another way to calculate shipping costs in WooCommerce is Table Rate shipping. It allows you to manually enter shipping costs based on your chosen factors, like weight and price. Best of all, such a solution in its basic version is free. An example is the Flexible Shipping plugin – one of the most popular shipping plugins for WooCommerce in the WordPress repository. With it, you can easily configure conditional shipping scenarios like weight based shipping or shipping cost based on cart total.
For more advanced functionality, you can upgrade to Flexible Shipping PRO. This premium version unlocks features like complex conditional logic, the ability to hide certain shipping methods, and support for free shipping coupons. It’s a powerful way to fine-tune your WooCommerce shipping strategy and provide a better shopping experience for your customers.
The best and the most powerful Table Rate shipping plugin for WooCommerce. Define the shipping rules based on numerous conditions and configure even the most complex shipping scenarios with ease.
View DetailsorInstall pluginAs you can see, setting up international shipping in WooCommerce is not a complicated process. WooCommerce gives you quite a few options, and considering the additional plugins available on the market, the possibilities are really vast. Shipping internationally is a key strategy for expanding a business’s reach, providing potential growth opportunities and enhancing customer satisfaction.
I hope you will find this tutorial useful and that your store will thrive thanks to international shipping. Thorough planning and documentation in international shipping are crucial to ensure products reach their international destinations safely and efficiently.
Our team usually replies within a few hours. Ask away — we'll help you find the right solution for your store.

Content Writer at Octolize
Bartosz Gajewski is a content and marketing specialist with a solid background in SEO, WordPress content strategy, and technical documentation for digital products. With years of hands-on experience in both in-house and freelance roles, he supports tech companies – especially in the SaaS and e-commerce space – by creating content that informs, engages, and drives results.
His approach blends storytelling with data-driven SEO, and he’s been involved in projects ranging from rebranding and product marketing to growth experiments and copywriting for complex software tools. On the blog, he shares actionable insights from his work across marketing teams, product documentation, and online store optimization.


Learn how Octolize helped Shopify store based in the USA set up distance based rates with a usage of Octolize Distance Based Rates.

Learn how Octolize solutions helped WooCommerce store based in the United Kingdom set up shipping scenarios.
Learn how Octolize helped Shopify store based in the USA set up distance based rates with a usage of Octolize Distance Based Rates.