- Home
- WooCommerce
- What plugin are you looking for?
- Shopify
- Product Matcher
- About us
- Blog
- Docs
- Contact us
- What can we help you with?
🚀 Ready to optimize your WooCommerce & Shopify shipping setup? Get FREE early access to a new product →

In this article, I’ll show you how to register a UPS account and grant Client Credentials connection to integrate your UPS account with a WooCommerce store. We’ll start with the very basic things.
– How to register a UPS profile,
– How to grant a Client Credentials connection,
– How to configure UPS integration using UPS WooCommerce Live Rates and Access Points.
– UPS WooCommerce Live Rates and Access Points plugin
The plugin has free and paid versions. Generally, integration is the same in both plugins, therefore I’ll use the free version as an example.
Display automatically calculated UPS live rates and offer UPS Access Points support for your customers.
Go to WordPress.orgorDownload for free<br>– UPS account
If you don’t have a UPS account or a UPS Access Key and don’t know how to do it, relax, and let us go through it in this post. If you already have a UPS account configured, you can skip it and just go to Establishing Client Credentials connection part of this post.
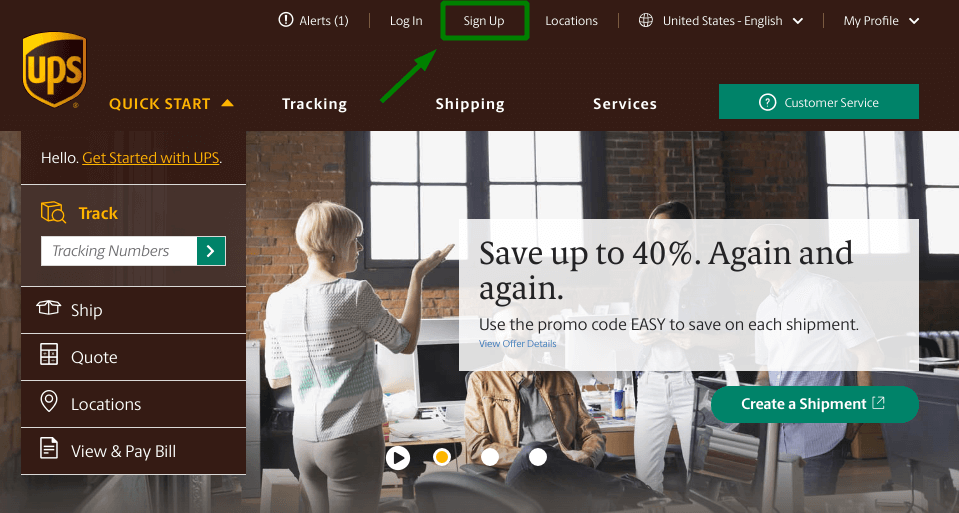
First, go to UPS.com and click the Sign Up link on the top bar.
You’ll see a sign-up screen. You can enter your own information or use one of your Facebook, Twitter, Google or Amazon accounts.
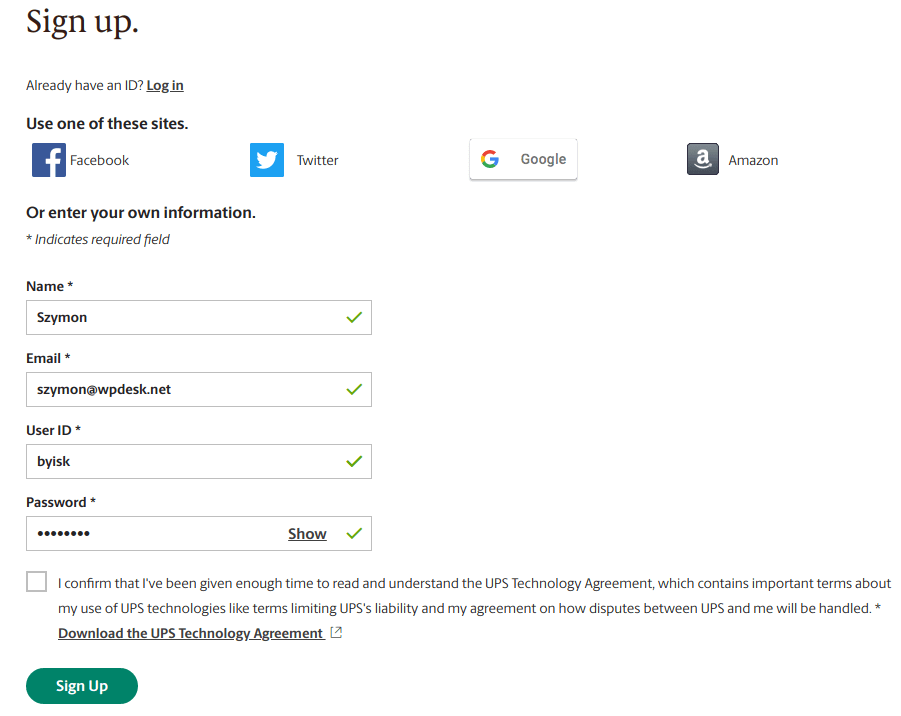
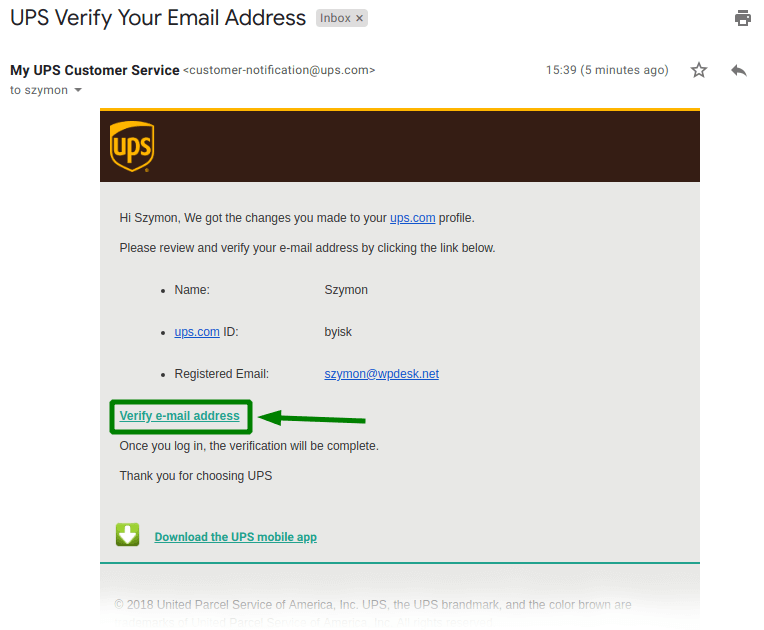
Click Sign Up button, and you’ll be redirected to the welcome screen. Finally, check your inbox to confirm your e-mail address and click the verification link.
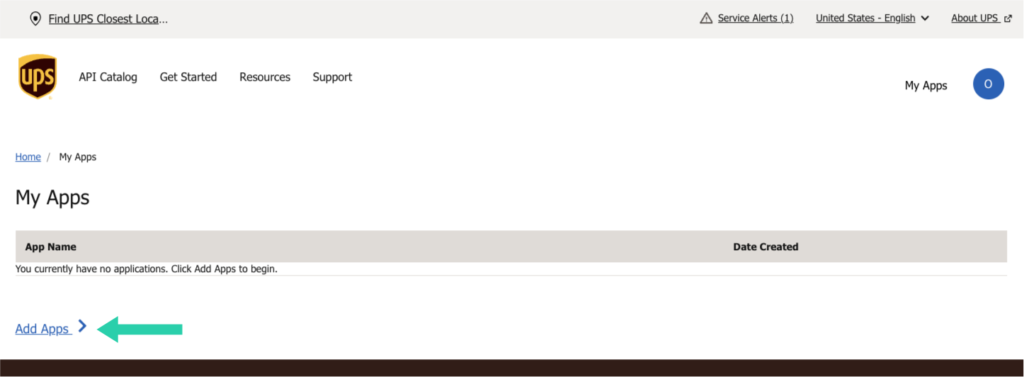
Great! You’ve got a UPS profile. Now you can configure it and grant a Client Credentials connection.
First, you have to log in. Then go to Developer portal and click Add Apps option.
Select „I want to integrate UPS technology into my business” from „I need API credentials because” field. Below, select your account number from the dropdown. However, if you don’t have one, you need to add it or create new one by choosing the appropriate option. Hit Next.
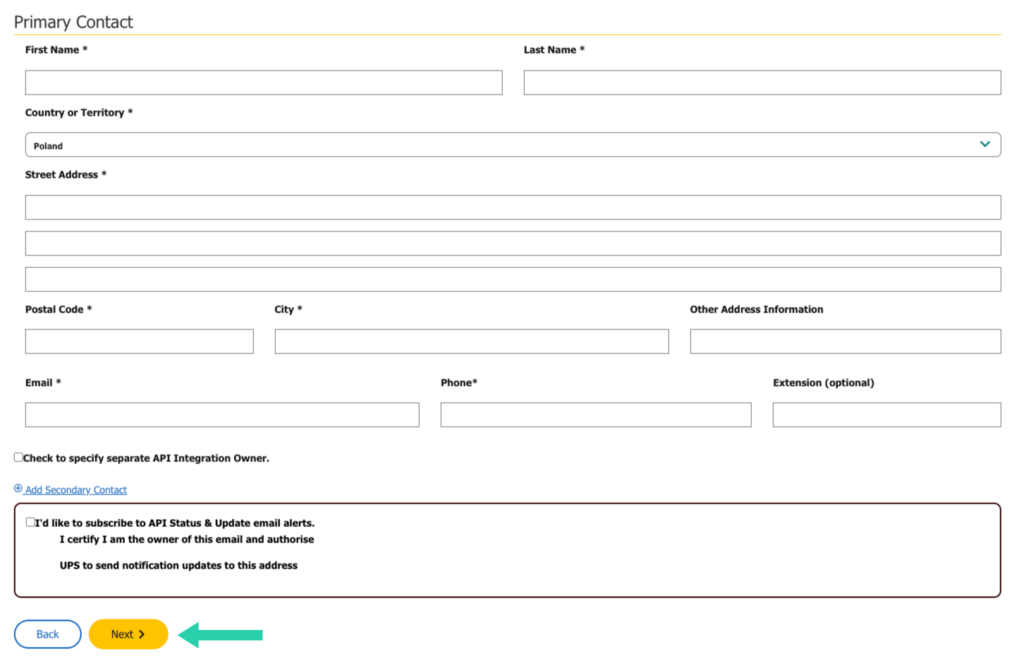
Next, you will see Primary Contact form. Fill-in required fields and proceed by clicking Next just below the form.
This step is very important. You need to define your App Name and select APIs (Add Products section) that your App will get access to. Select:
– Authorization (OAuth),
– Locator,
– Address Validation,
– Rating*.
*Important: If the ‘Products Included In This App’ section does not display certain options (e.g., Rating) during app creation, proceed by creating the app. Afterward, edit the created app to manually add the missing products.
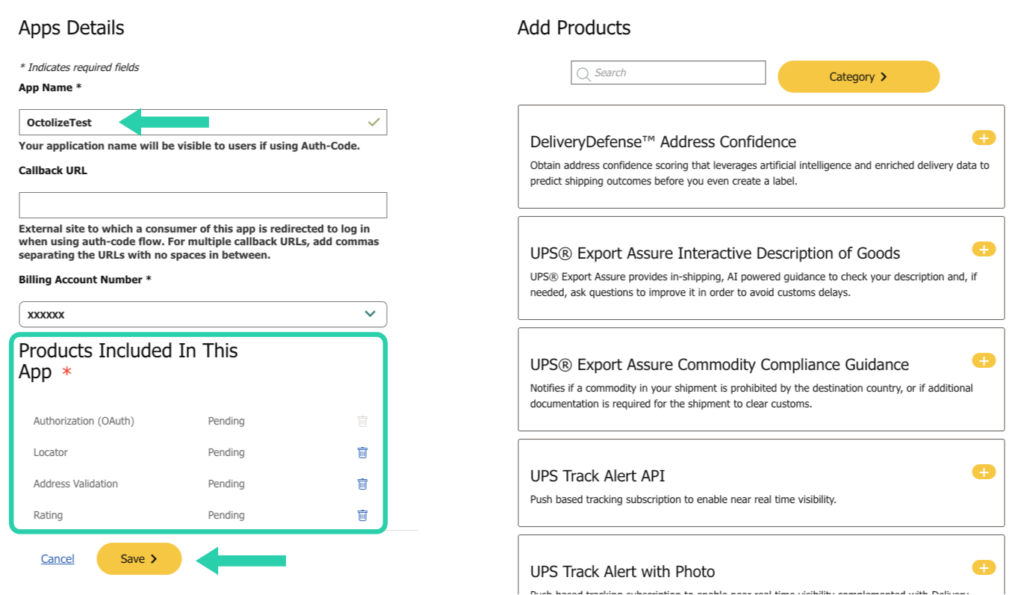
Please, bear in mind, that in a case of usage of UPS Shipping Labels and Tracking Plugin for WooCommerce, you would need to mark another API, which is the Shipping API.
Create the shipments, generate the printable UPS shipping labels for the placed orders and track the parcels directly from your WooCommerce shop.
View DetailsorAdd to cartTo proceed click Save.
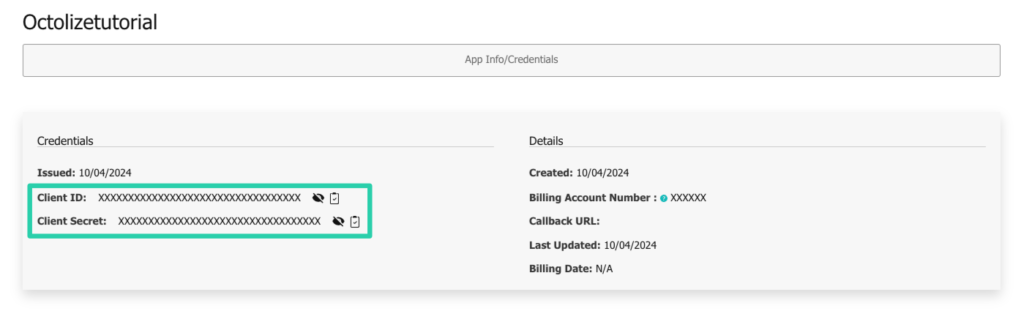
Congratulations! Now, copy Client ID and Client Secret.
Go to WooCommerce → Settings → Shipping → UPS. To sum up – enter your UPS account credentials.
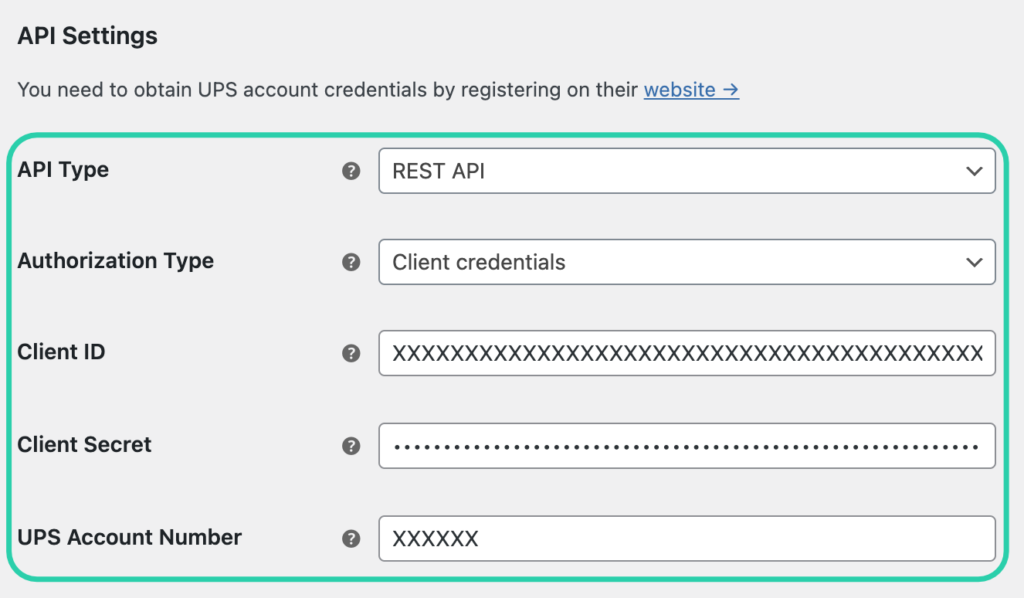
Click Save at the bottom of this screen, and the API Status should change to OK. Great! You’re connected!
You have just learned a lot about WooCommerce UPS integration. We hope that we made it as simple as it can be. Therefore, did this guide help you? Let us know in the comments section below.
Our team usually replies within a few hours. Ask away — we'll help you find the right solution for your store.

Content Writer at Octolize
Bartosz Gajewski is a content and marketing specialist with a solid background in SEO, WordPress content strategy, and technical documentation for digital products. With years of hands-on experience in both in-house and freelance roles, he supports tech companies – especially in the SaaS and e-commerce space – by creating content that informs, engages, and drives results.
His approach blends storytelling with data-driven SEO, and he’s been involved in projects ranging from rebranding and product marketing to growth experiments and copywriting for complex software tools. On the blog, he shares actionable insights from his work across marketing teams, product documentation, and online store optimization.


Learn how Octolize solutions helped WooCommerce store based in the United Kingdom set up shipping scenarios.
Learn how Octolize helped Shopify store based in the USA set up distance based rates with a usage of Octolize Distance Based Rates.
Learn how Octolize helped NGO set up their WooCommerce rates with a usage of Flexible Shipping PRO.
Hi Bartosz Gajewski, I’ve got an Issue: after “Choose your pickup type” step, I get “Add Payment Type” screen, when I enter valid or test Payment Card information I get an Error and can not get an Access Key. But here I do not see “Add Payment Type” step.
Hi Shushanna! Thanks for your comment. When I was writing this article, I didn’t have to add payment card. I just made a new account and updated the article. Unfortunately I didn’t get any problem that you are talking about. I think that you should contact UPS customer service. Good luck!