- Home
- WooCommerce
- What plugin are you looking for?
- Shopify
- About us
- Blog
- Docs
- Contact us
- What can we help you with?

Subscribe to our newsletter

Shipping plays a very important role in customer satisfaction and overall business efficiency for online stores. In WooCommerce shipping classes stand out as a powerful way to fine-tune your shipping strategy. In this article, I’ll go through everything you need to know about setting up shipping classes in WooCommerce, from understanding the basics to advanced tips for maximising efficiency.
It’s critical to understand the difference between shipping rates and shipping classes before beginning the setting up shipping in WooCommerce procedure because these concepts are sometimes used similarly but have different functions.
The price that clients pay for the delivery of their goods is referred to as the shipping rate. Numerous variables, including the delivery method, destination, weight, and total order value, might be taken into account when calculating these charges. In order to guarantee that consumers pay the correct shipping fee depending on their location, WooCommerce enables store owners to set up separate shipping rates for different delivery zones.
Shipping classes, on the other hand, are a way to group similar products together for shipping purposes. For example, if your store sells both lightweight items like t-shirts and heavier items like furniture, you can create separate shipping classes for these product types. Thanks to that, you can assign different shipping costs or methods based on the product category, size, or weight. Shipping classes are especially useful for stores that sell a wide range of products with varying shipping requirements.
If you value video instructions more: our full guide on WooCommerce Shipping Classes is now live on YouTube! Zero fluff, 100% practical knowledge. Click and check it out!
Now that you know what shipping classes are, it’s time to show you how to add them in your WooCommerce. Setting up Shipping Classes is one of the most important parts of how to set up shipping in WooCommerce. Everything can be done in just four steps:
Step 1: Access Shipping Settings
Step 2: Create a New Shipping Class
Step 3: Define Shipping Class Details
Step 4: Save the Shipping Class
Here’s a step-by-step guide:
To get started, navigate to your WooCommerce shipping setup. From the sidebar go to WooCommerce → Settings → Shipping → Shipping classes. Here, you will find a list of all shipping classes created to date, along with the number of products assigned to each shipping class. Here you can create a new shipping class or edit an existing one.
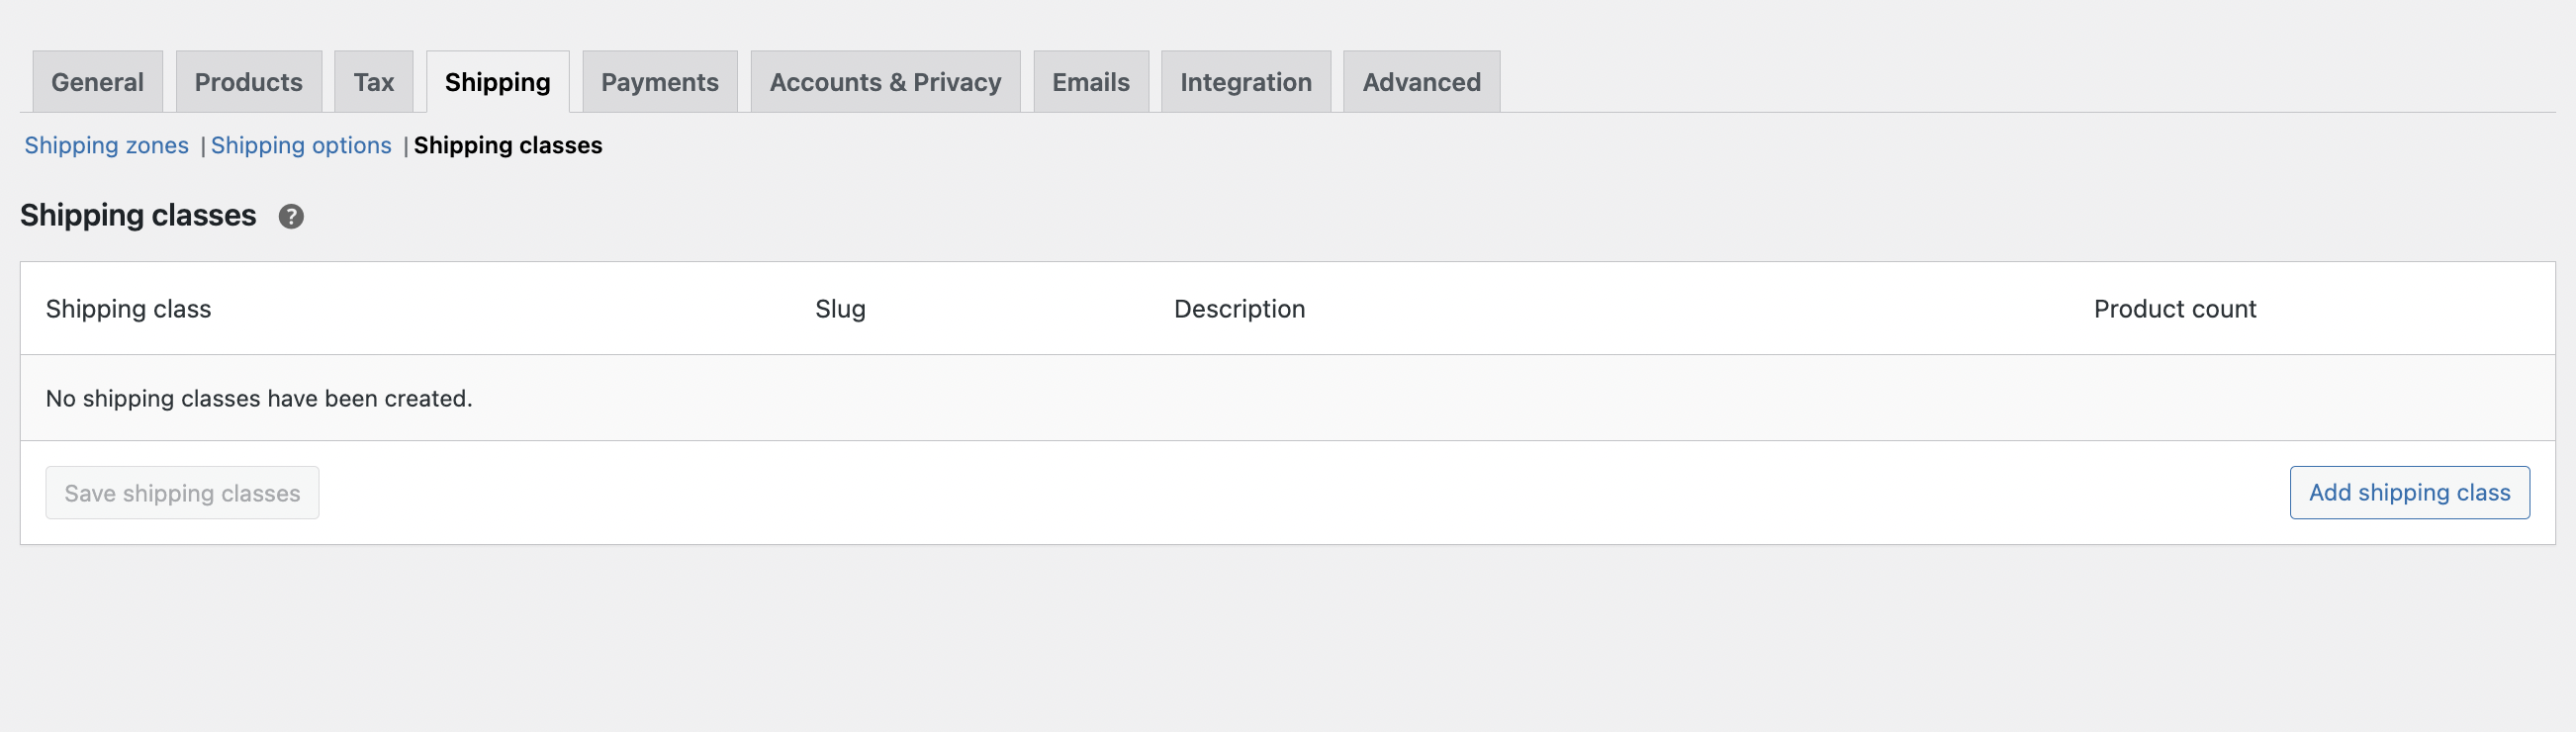
If you want to create a new shipping class, use the Add shipping class button.
You’ll need to fill in the details for your new shipping class:
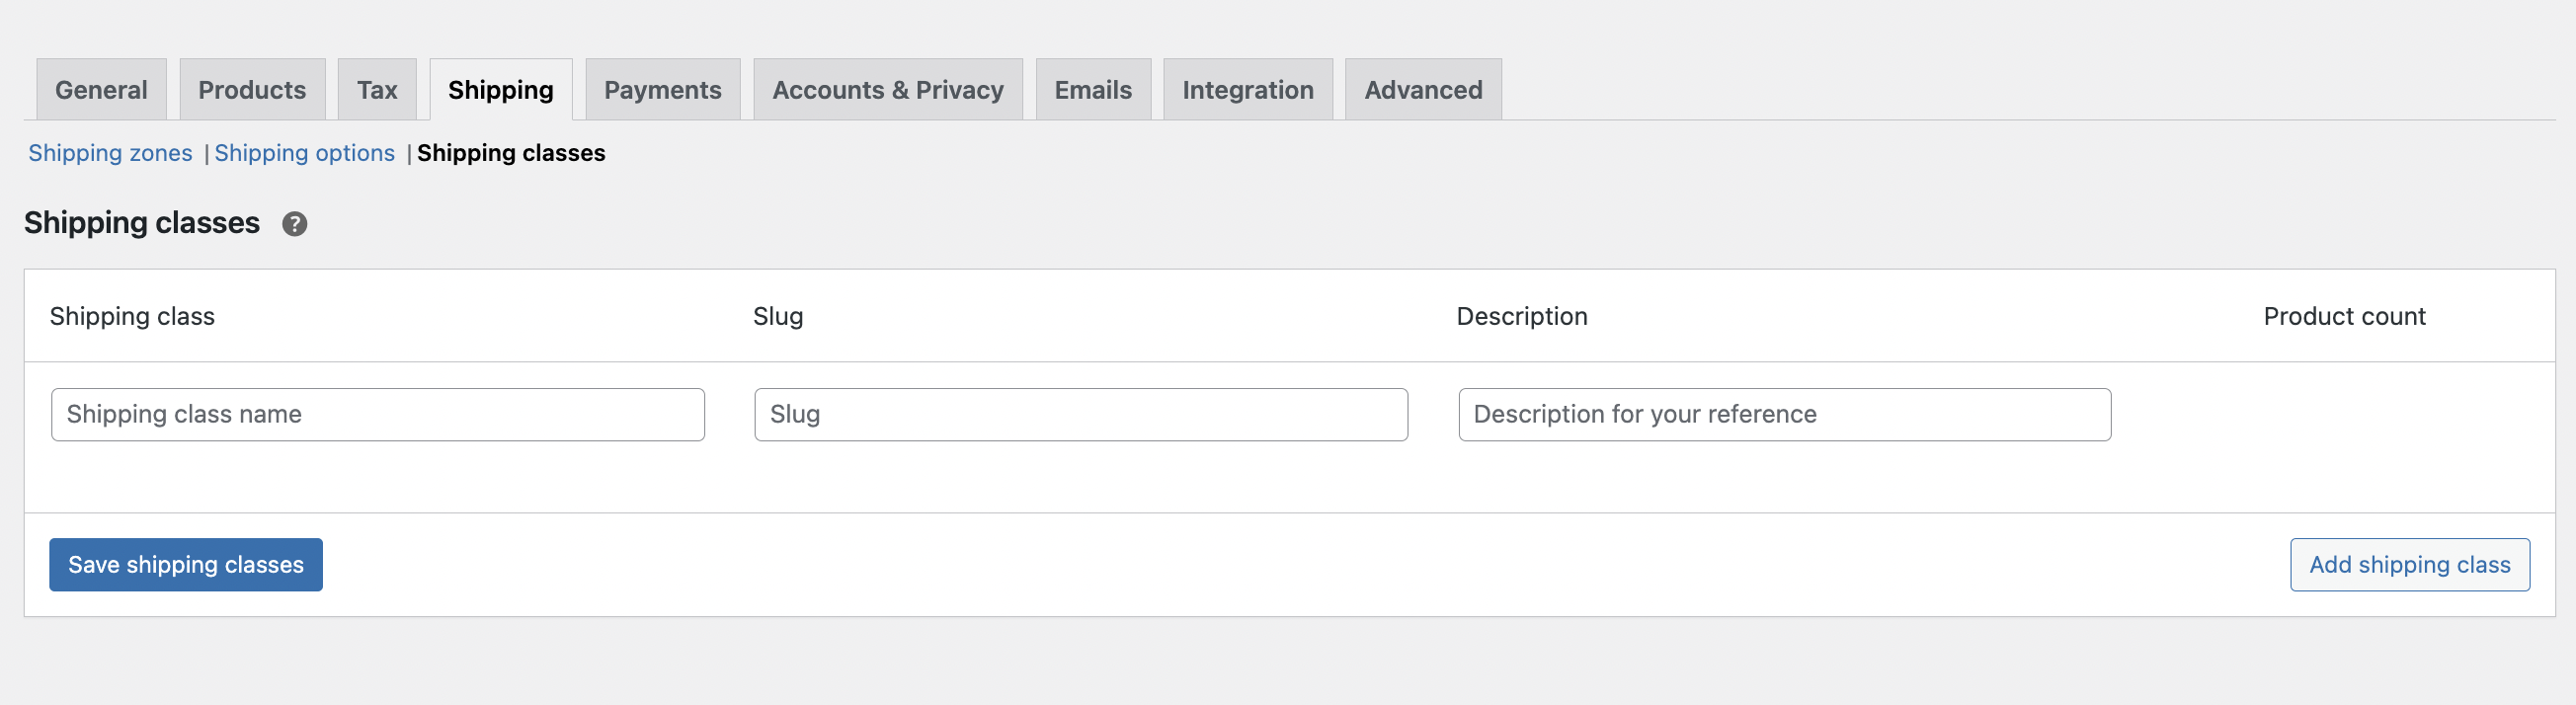
Once you’ve filled in the details, click the Save shipping classes button to add the new class to your WooCommerce store. You can repeat this process to create additional shipping classes as needed.
Once you’ve created your shipping classes, you can easily assign them to your products. Here’s how to do it:
Navigate to the Products section of your WooCommerce dashboard. It is exactly this tab:
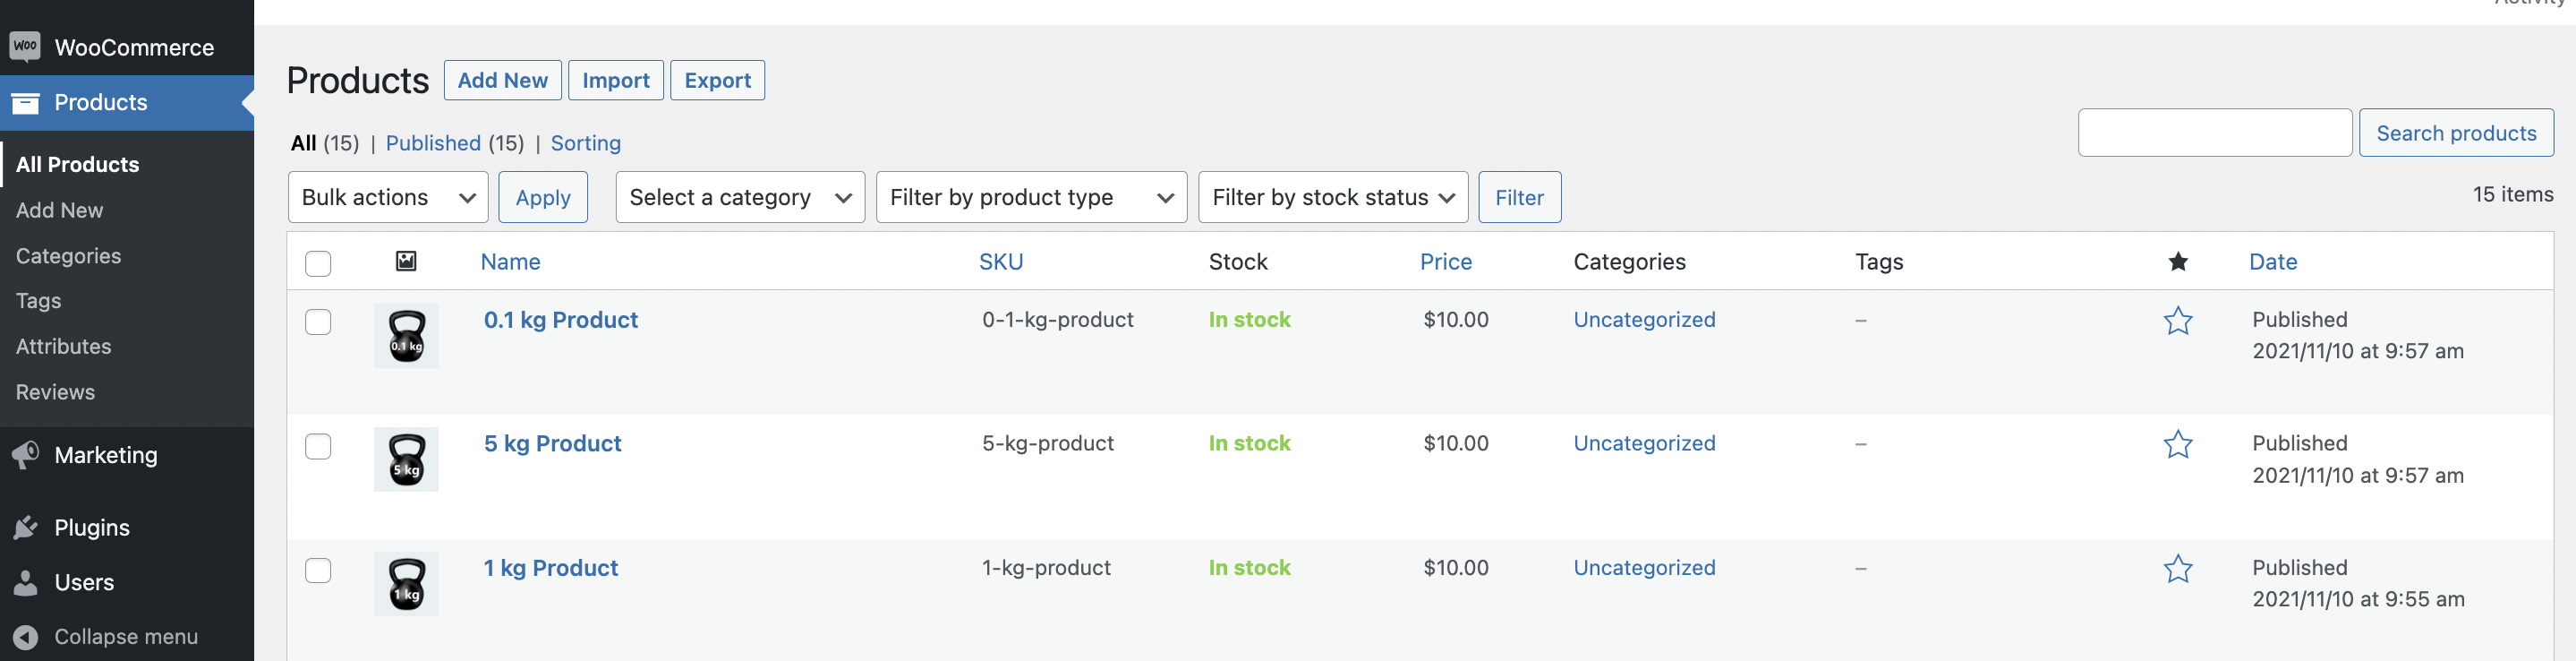
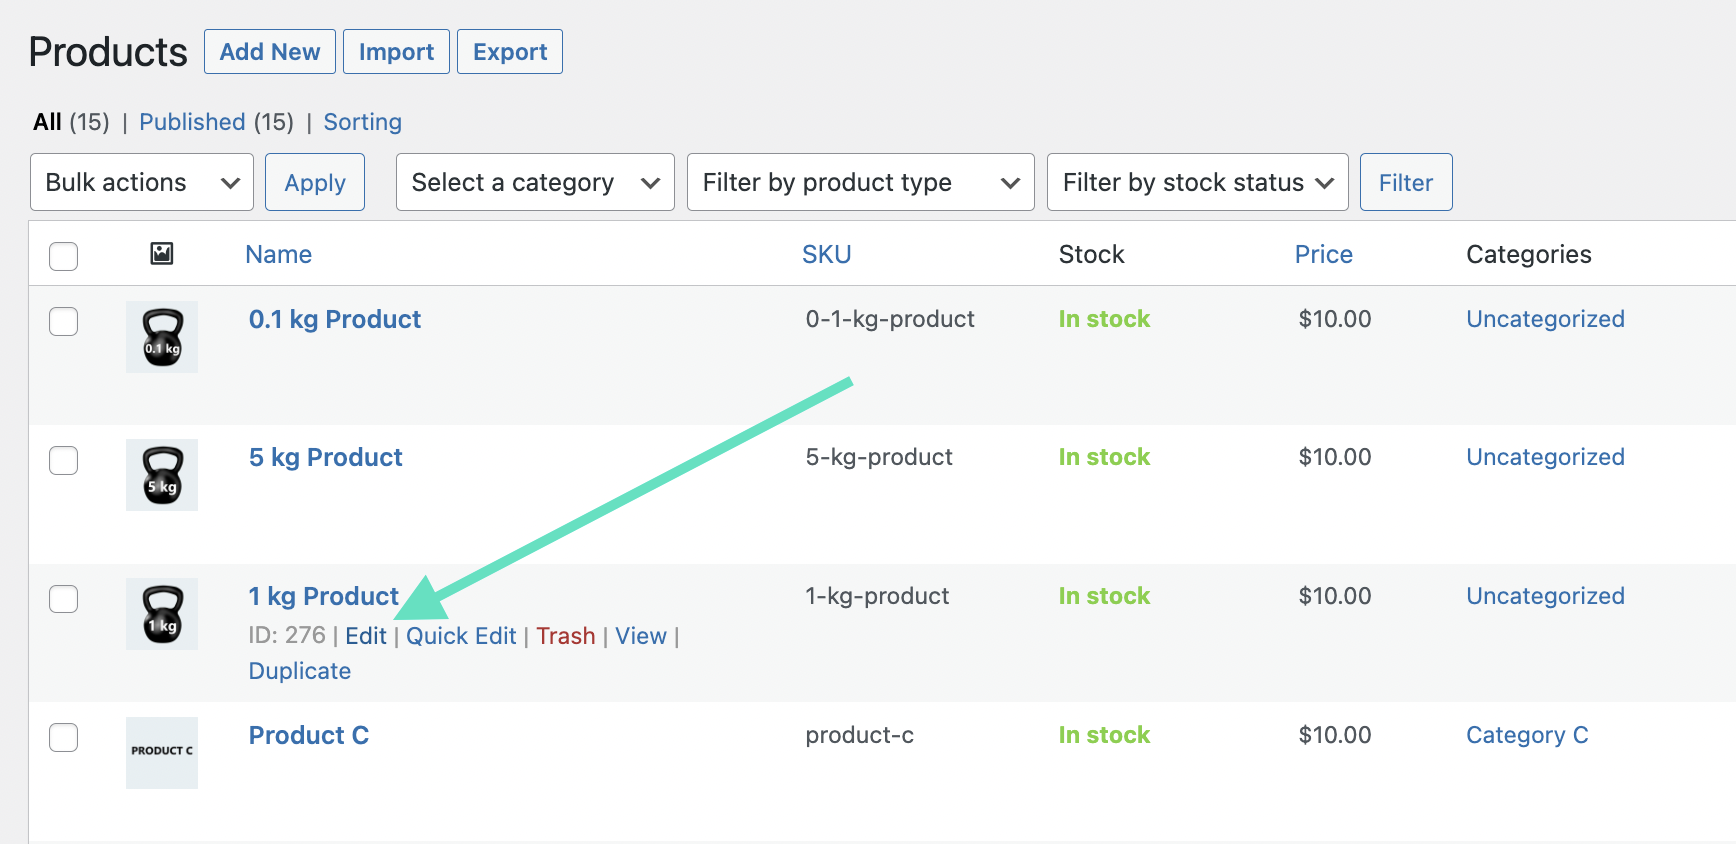
Don’t confuse it with the Products tab in the WooCommerce settings. Once you are in the right place, select a product you want to assign a shipping class to. Click Edit to open the product’s settings.
In the product’s settings page, scroll down to the Product Data section. Then, click on the Shipping tab.
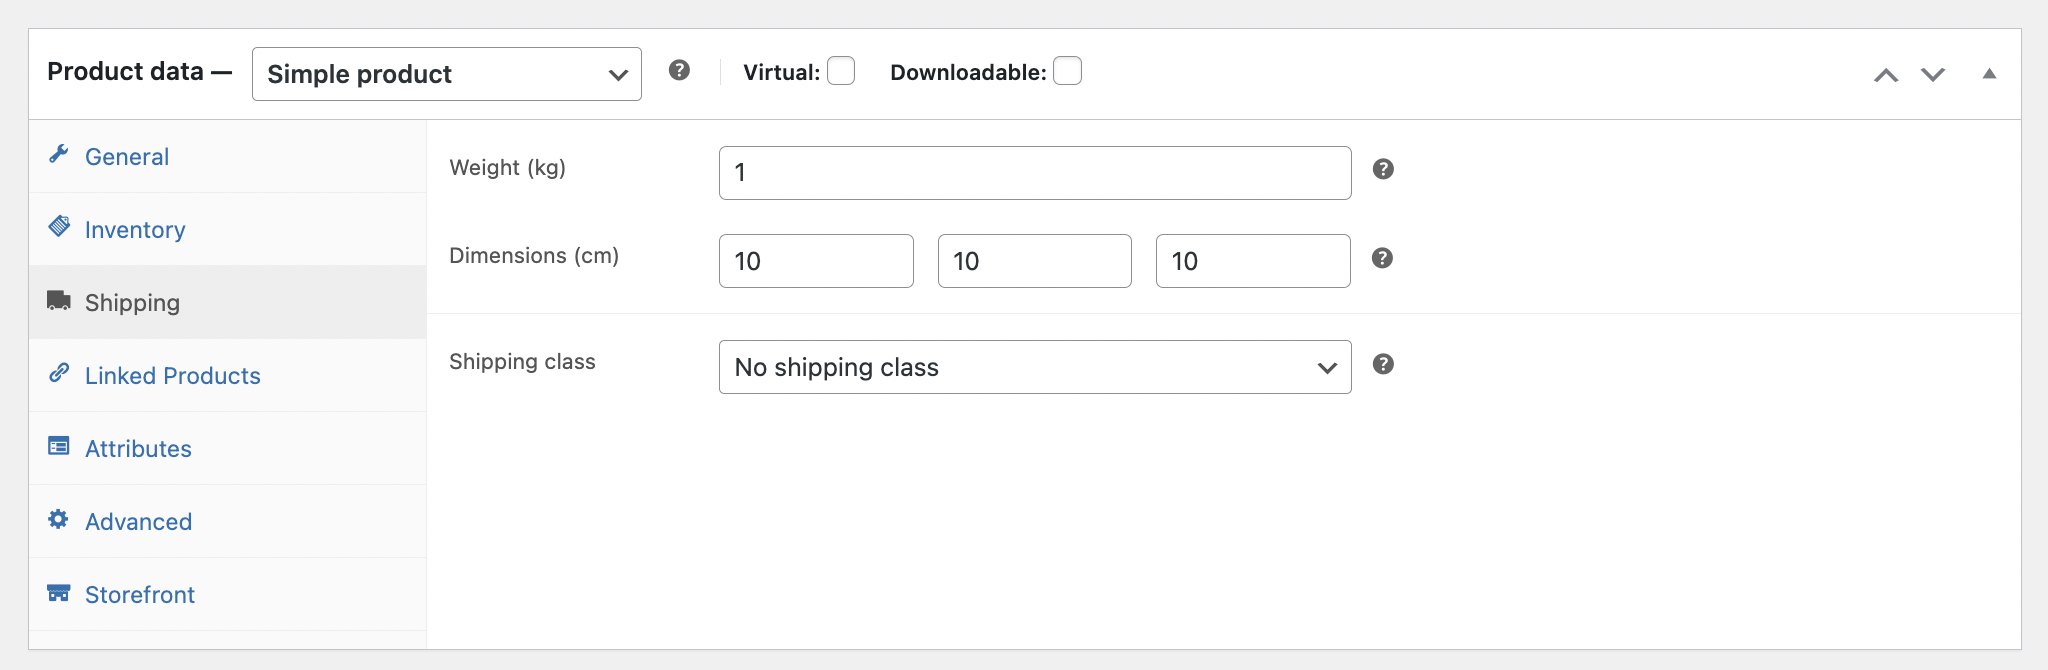
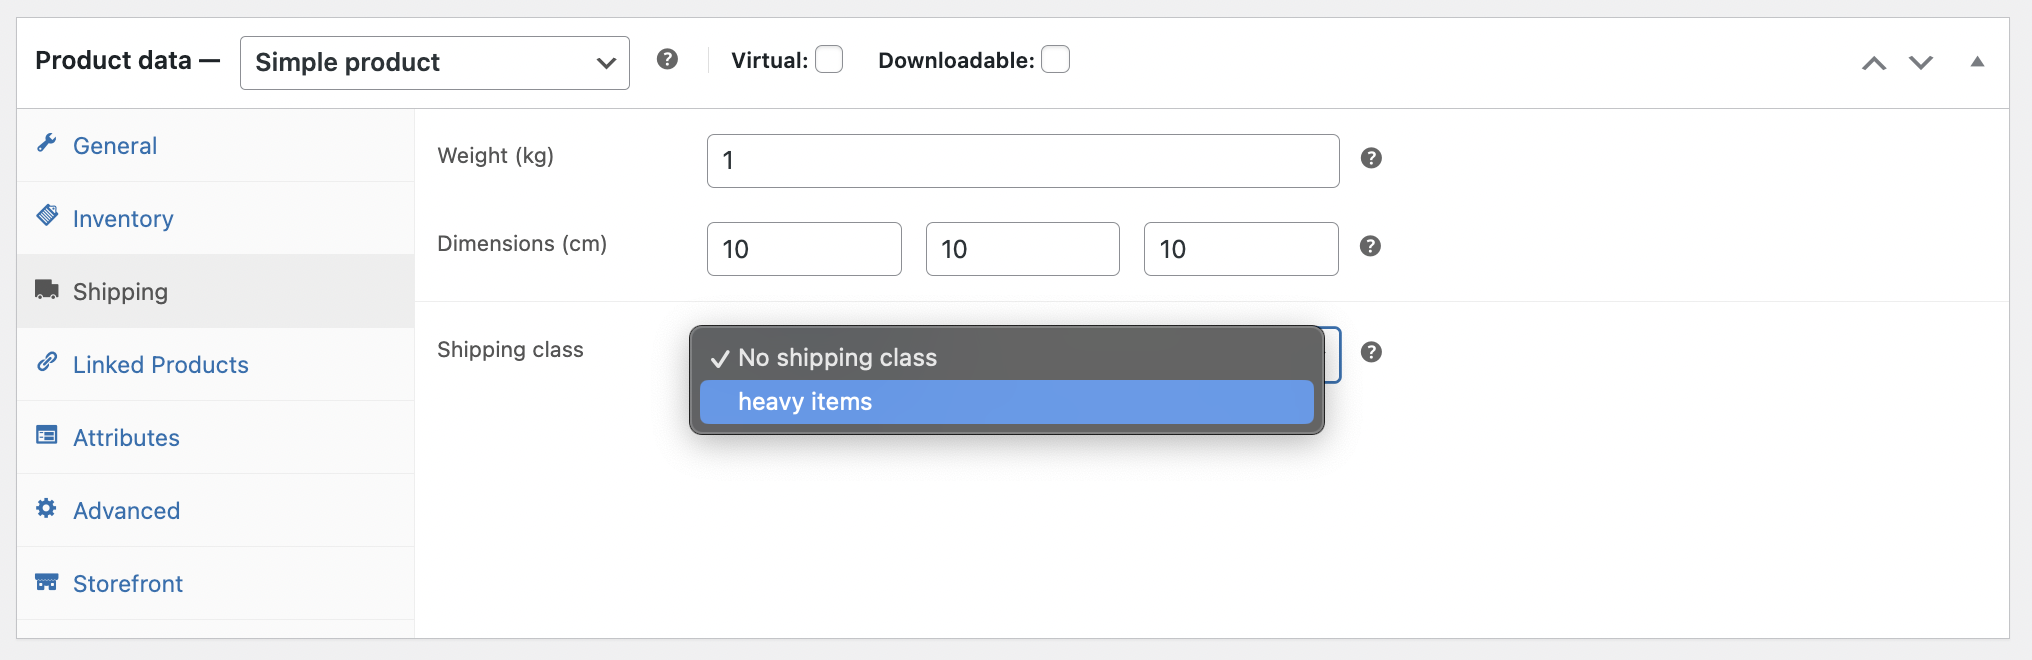
Here, you’ll see a drop-down menu labelled Shipping class. Select the shipping class for the product. If a product falls under multiple categories, choose the class that best fits its primary characteristics.
After selecting the shipping class, scroll down and click the Update button to save your changes. The product will now be assigned to the shipping class that you choose.
Bulk Assign Shipping Classes
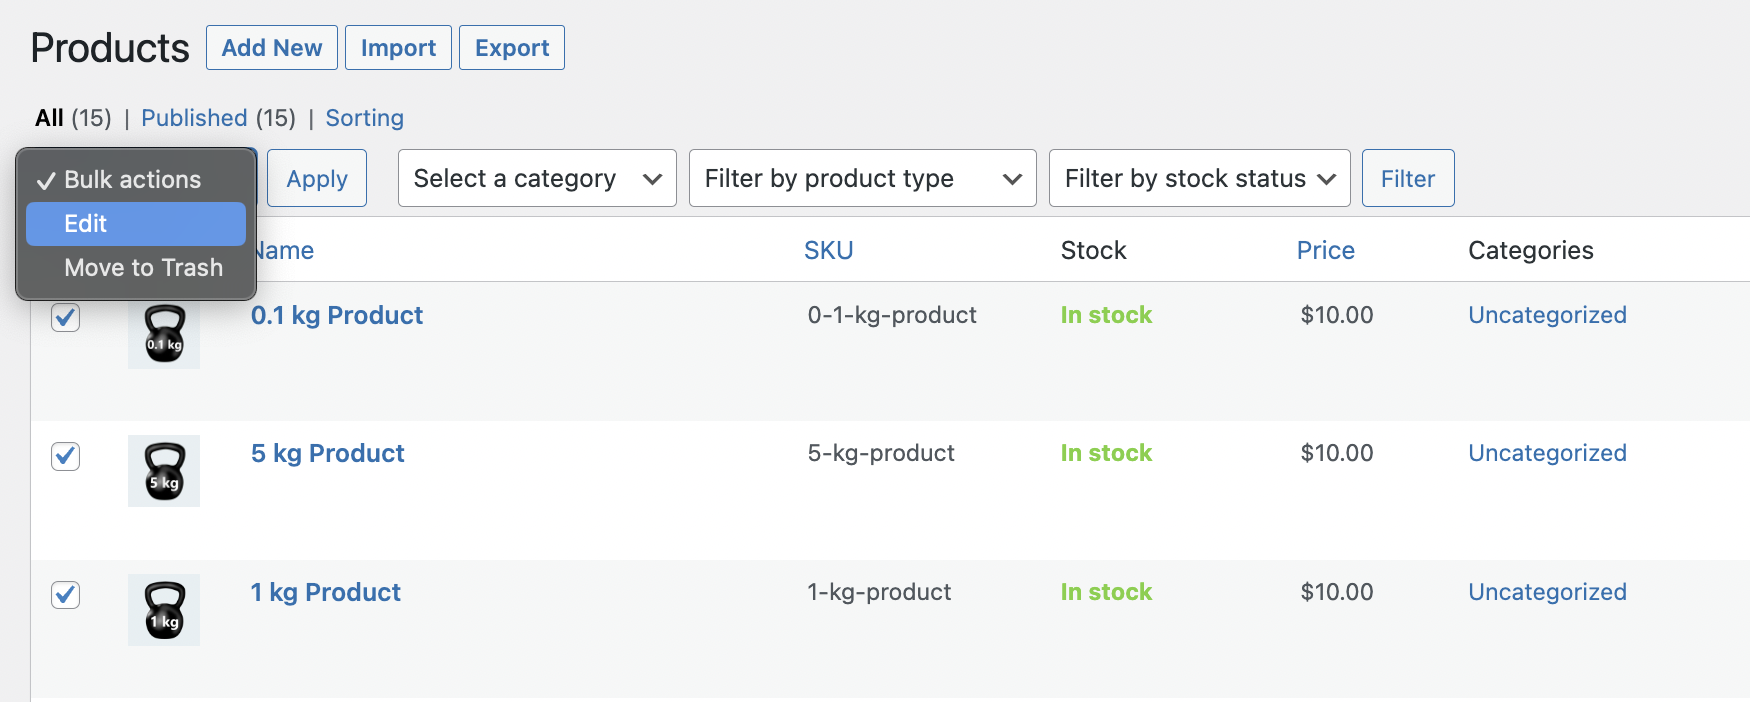
If you have many products to update, WooCommerce allows you to assign shipping classes in bulk. To do this, go to the Products section, select the products you want to update, choose Edit from the bulk actions menu and hit the Apply button.
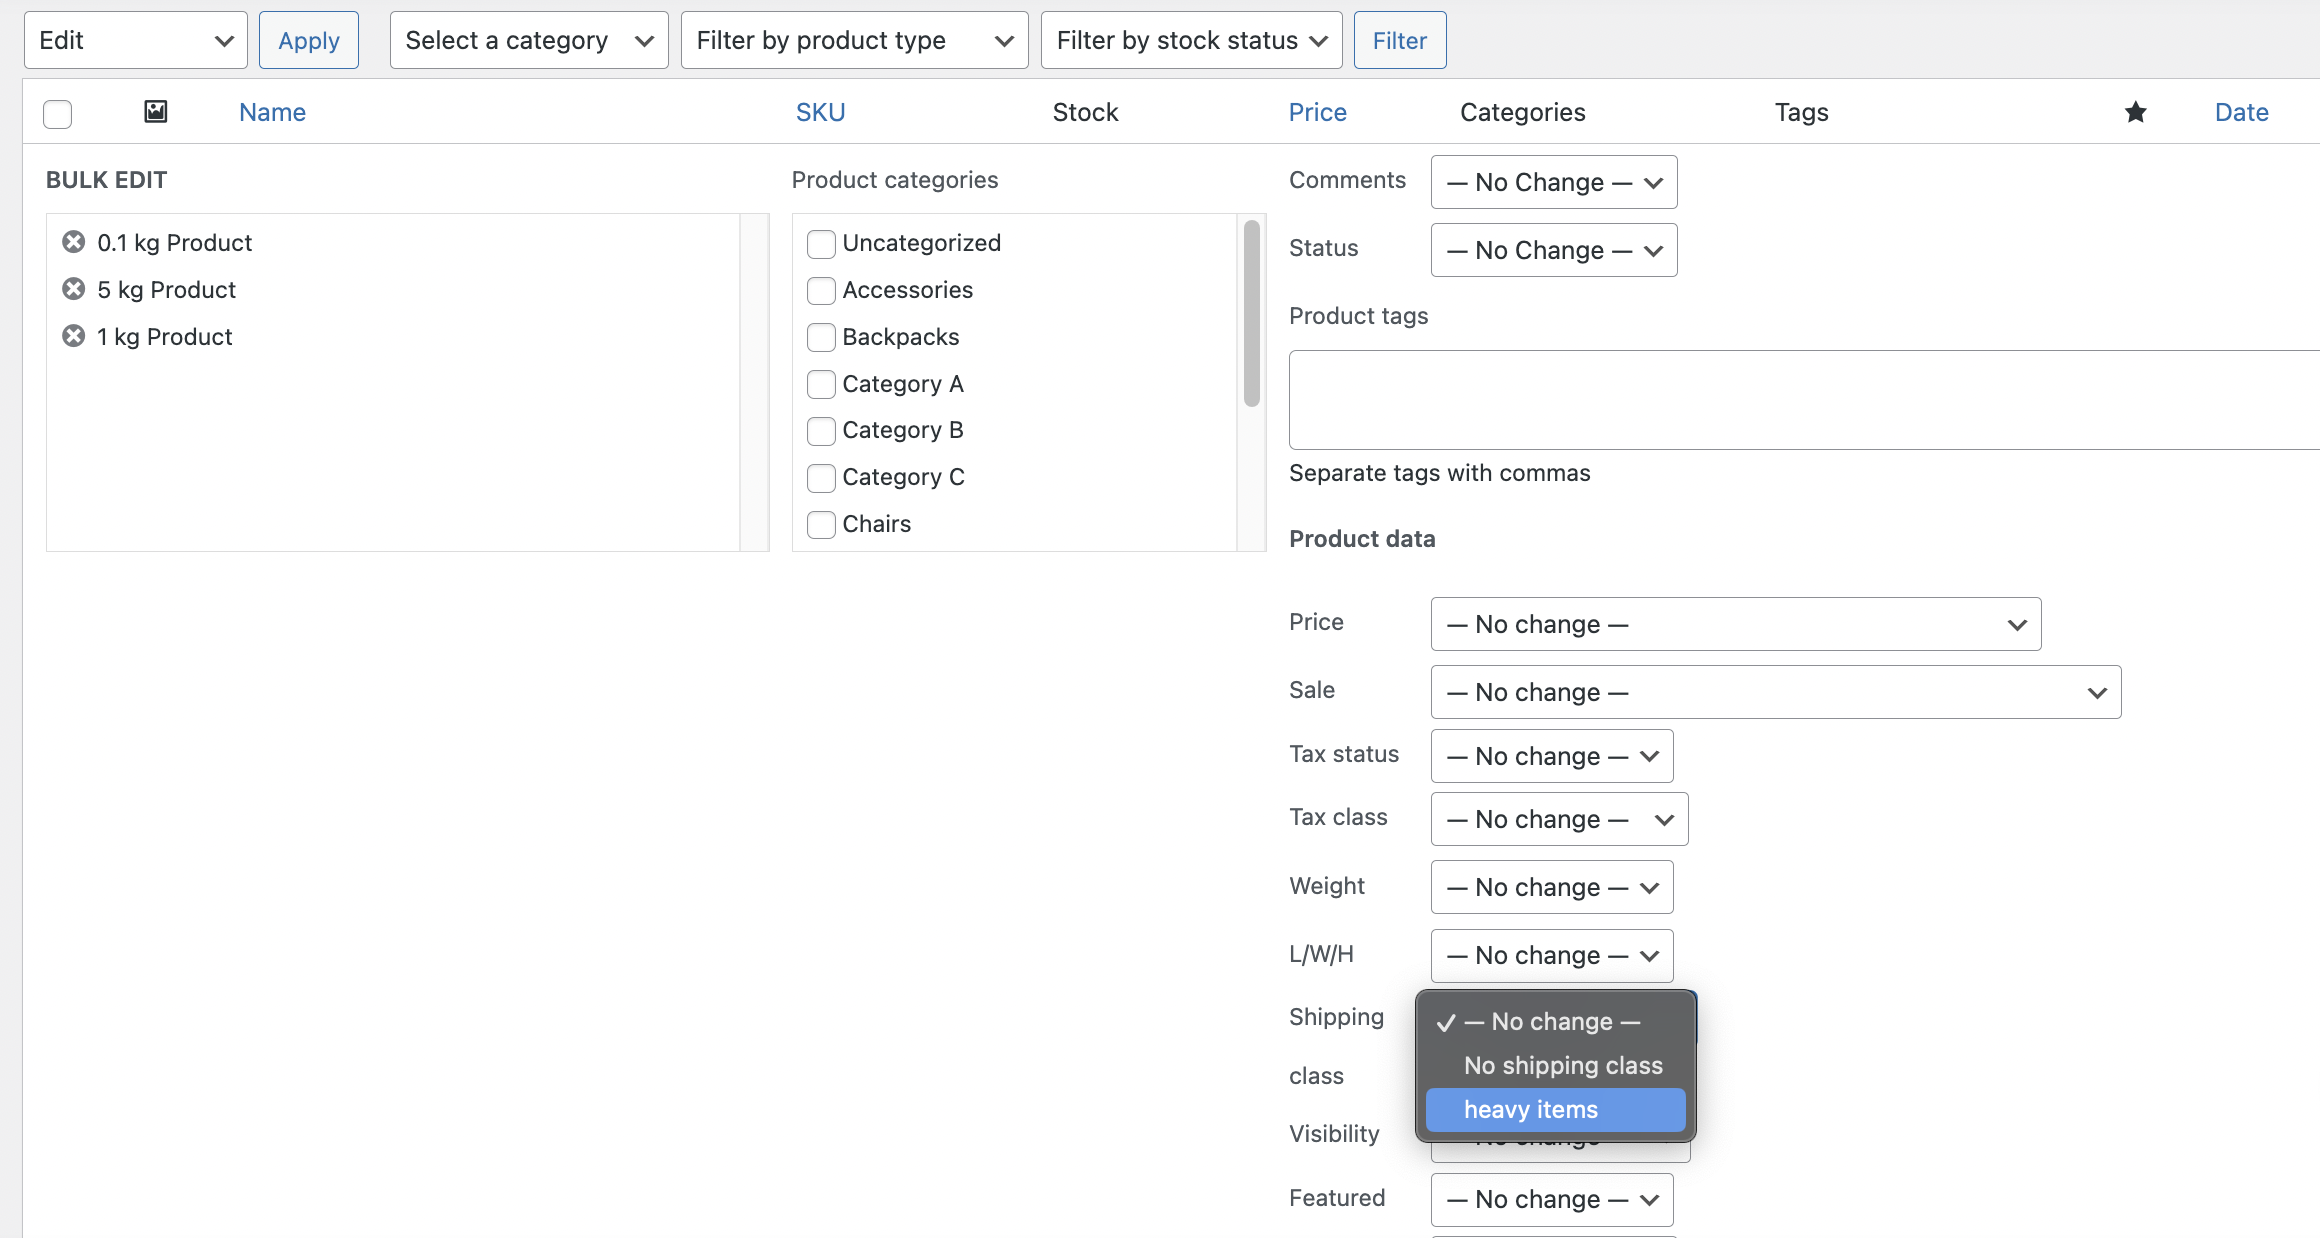
In the bulk edit screen, you can assign a shipping class to all selected products at once, saving time and ensuring consistency across your store.
Now that you know how to use shipping classes in WooCommerce, it’s time to learn why they are so important:
You may charge various product kinds for varying delivery charges by utilising shipping classes. This helps you prevent undercharging or overcharging your consumers by ensuring that your shipping costs appropriately represent the cost of sending each item. For example, it could be less expensive to send a tiny, light item than a huge, heavy piece of furniture. You can automatically account for these variances with shipping classes and easily offer WooCommerce shipping based on product category or shipping class.
Consumers value accuracy and openness when it comes to shipping charges. You may lower cart abandonment and foster confidence by offering transparent, precise shipping costs at checkout by setting up shipping classes. Accurate shipping prices are essential for sustaining sales because surprise delivery fees are a major reason why carts are abandoned.
By putting related items in one shipment class, you may simplify your operations. This facilitates the management of shipping processes, from packaging to picking the best shipping option. Because you can simply apply these promotions to certain shipping classes, it also makes it easier to provide free or reduced delivery for certain goods.
Even if creating shipping classes is not that difficult, there are several typical mistakes that might cause problems later on. Here are some mistakes to avoid:
To prevent misunderstanding later on, it is imperative that your shipping classes have names that are precise and informative. It can be challenging to efficiently control shipping prices and procedures when shipping classifications are unclear or overlap. This is particularly important with shops that have more people working at them. It is a good idea to add shipping class names as self-describing and, in addition, use class descriptions for maximum transparency.
It is important to remember to apply shipping classes to the appropriate items once you have created them. If this isn’t done, the wrong shipping charges may be applied at checkout, which may annoy customers and result in less sales.
Make that each shipping class’s price guidelines make sense and are consistent. Make sure your shipping class arrangement accurately reflects, for instance, that you charge for heavy products but offer free delivery for lightweight ones. Pricing that varies might be confusing to consumers and cause them to abandon their carts. To adjust your shipping costs as accurately as possible, use WooCommerce table rate shipping plugin.
Think about how shipping zones and shipping classes interact if your shop ships to several different nations or regions. Verify that each shipping class is set up appropriately to apply the relevant shipping charges according to the location of the consumer. Remember to use the shipping classes for WooCommerce shipping integrations.
Even if everything is configured correctly, there may occasionally be problems when the shipping class performs unexpectedly. Incorrect shipping zone setups, caching problems, or conflicts with other plugins might cause this. Test your shipping arrangement frequently to make sure everything functions as it should.
[Here’s our detailed guide on Why Shipping Options Might Not Be Showing in WooCommerce and How to Fix It.]
For those looking to optimise their shipping strategy further, here are a few advanced tips for setting up shipping classes in WooCommerce:
If your online business offers items in several categories, each with distinct shipping requirements, you might want to think about classifying your products using shipping classes. For instance, you may designate “Fragile Items” as the shipping class for all of the items in your “Glassware” category. This guarantees that these goods will be sent affordably and with the proper care.
If you want to offer free shipping on certain products, you can set up a shipping class specifically for those items. Then, configure your shipping zones to offer free shipping for that class. This is an effective way to run promotions or encourage the purchase of specific items. Here’s our detailed guide on how to offer free shipping for specific shipping classes using one of the most popular WooCommerce shipping plugin.
By assigning shipping classes based on the size, weight, or fragility of your products, you can ensure that each item is packaged appropriately, which not only reduces shipping costs but also minimises the risk of damage during transit. For example, you could create specific classes for “Small Items” that can be shipped in padded envelopes and “Large Items” that require sturdy boxes. By doing so, you streamline the fulfilment process and ensure that your WooCommerce shipping package materials are used efficiently.
To take this a step further, consider using plugins that allow you to split cart items based on shipping classes. This ensures that items with different packaging requirements are processed and shipped separately, further optimising your shipping strategy. If you are wondering how to do that, check our article on How to Split Cart Items Based on Shipping Class.
More than just a cost-control measure, WooCommerce shipping class configuration is a strategic tool that may increase customer happiness, streamline your shop, and increase revenue. It is possible to make sure that your shipping procedures are efficient and tailored to your company model by carefully designing and allocating shipping classes.
Remember, the secret to managing a profitable online company is having a well-thought-out delivery strategy. You can maintain the efficiency of your shop, provide competitive shipping prices, and improve the consumer experience by making the most of shipping classes.
If you encounter any issues, such as the WooCommerce shipping class not working as expected, make sure to troubleshoot by checking your shipping zone configurations and testing with different products. With the right setup, shipping classes can become one of the most valuable assets in your WooCommerce toolkit, helping you to deliver products efficiently and cost-effectively.

Content Writer at Octolize
Bartosz Gajewski is a content and marketing specialist with a solid background in SEO, WordPress content strategy, and technical documentation for digital products. With years of hands-on experience in both in-house and freelance roles, he supports tech companies – especially in the SaaS and e-commerce space – by creating content that informs, engages, and drives results.
His approach blends storytelling with data-driven SEO, and he’s been involved in projects ranging from rebranding and product marketing to growth experiments and copywriting for complex software tools. On the blog, he shares actionable insights from his work across marketing teams, product documentation, and online store optimization.


The Neurodivergence Project uses the ocean and the natural world to empower neurodivergent people to build confidence, lasting friendships and help them achieve their goals.

Dominican Liturgical Center is based in Cracow and focused on promoting the learning of traditional music and singing. They also run a smaller publishing house and a webshop that is focused on selling mainly books and CDs.

Established in 2017. SGL is focused on selling gas bottles and non-gas products. Formerly, the company offered payment by card on delivery. For now, the SGL started online payments and they launched a webstore.