- Home
- WooCommerce
- What plugin are you looking for?
- Shopify
- About us
- Blog
- Docs
- Contact us
- What can we help you with?

Subscribe to our newsletter

Entrepreneurs work hard to set and achieve their profit goals. Business is not a charity. That is why a lot of managers have a strong bias against offering anything for free. However, in this case, the expression is purely a marketing tool – used because it can significantly increase your sales. See how you can set up free shipping in your WooCommerce store and how to enhance shipping experience apart from standard shipping fees.
Prefer watching instead of reading?
It may sound bizarre, but customers actually prefer the shipping cost to be hidden in the price and love to receive free shipping. The research data does not lie. Let’s take a look at some interesting facts:
WooCommerce has a free shipping feature built-in. That’s great! It’s much easier to configure it when it’s supported, without the need for a plugin.
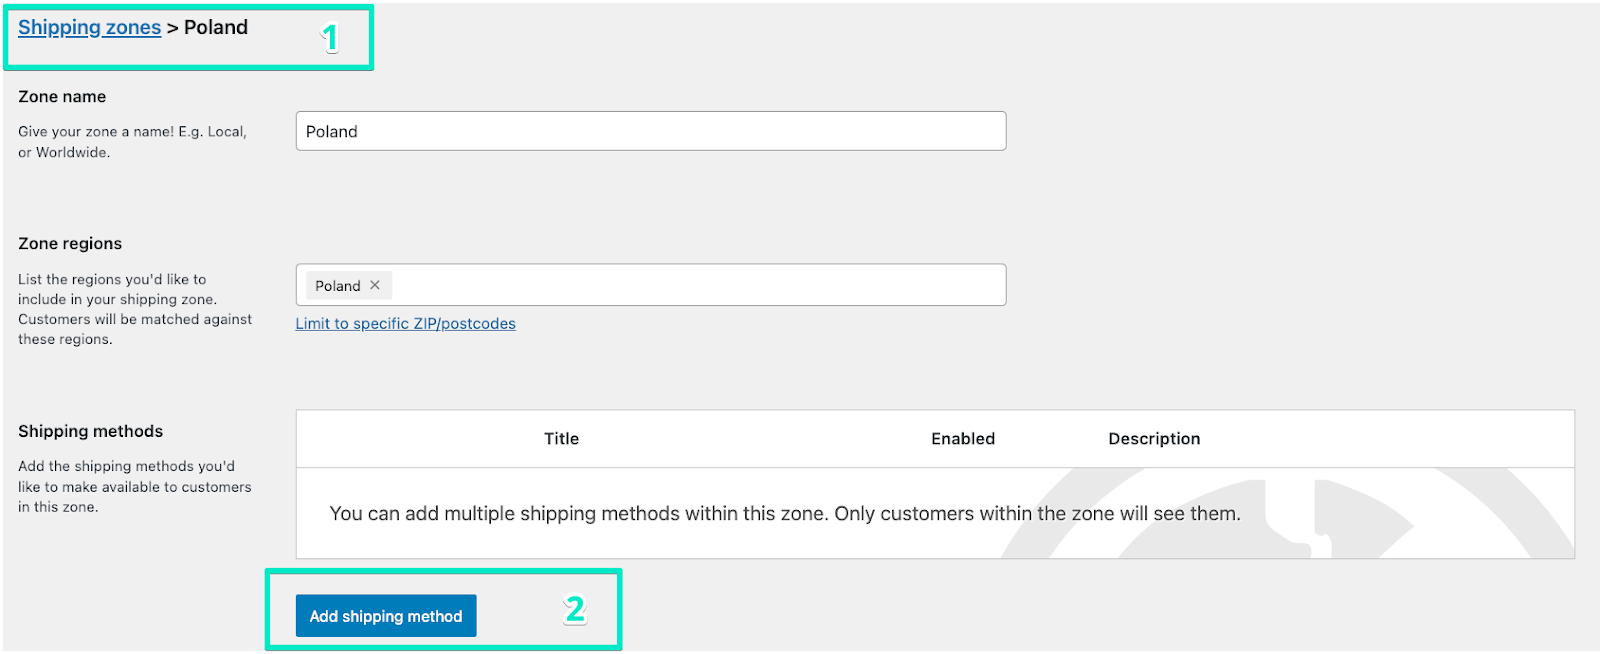
You need to go to the shipping zone to which you want to add your free shipping method (step 1). You’ll find it in WooCommerce → Settings → Shipping. Then you need to click on the Add shipping method button (step 2). Look at the screenshot:
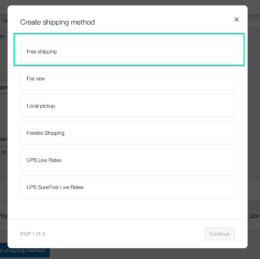
A new window will pop up. You should select Free shipping:
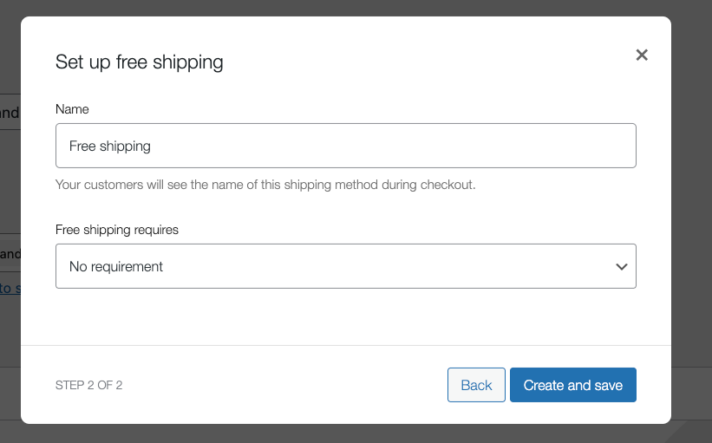
After that you need to provide a Name, and the name is used to display a shipping method name in the cart and checkout. Look at the screenshot below:
After the configuration, the customer should see the following shipping method in the cart and checkout:
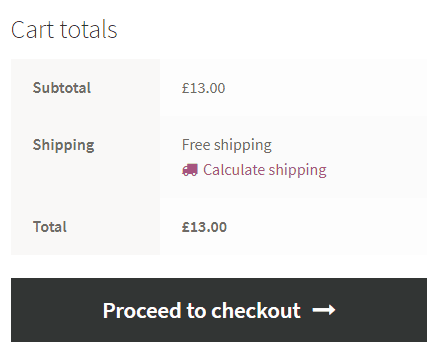
Enjoy free shipping!
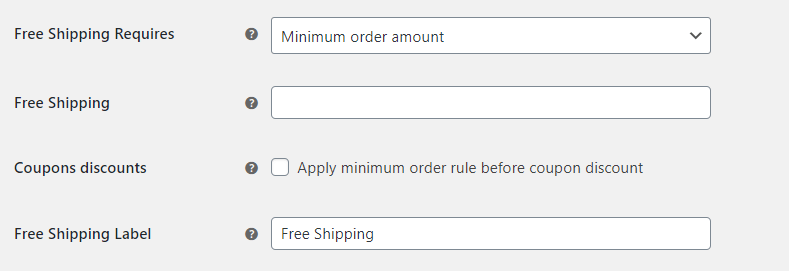
The key feature in the WooCommerce Free shipping settings is the Free shipping requires… option. It differentiates the free shipping method from other methods, as local pickup: Flat rate and Local pickup.
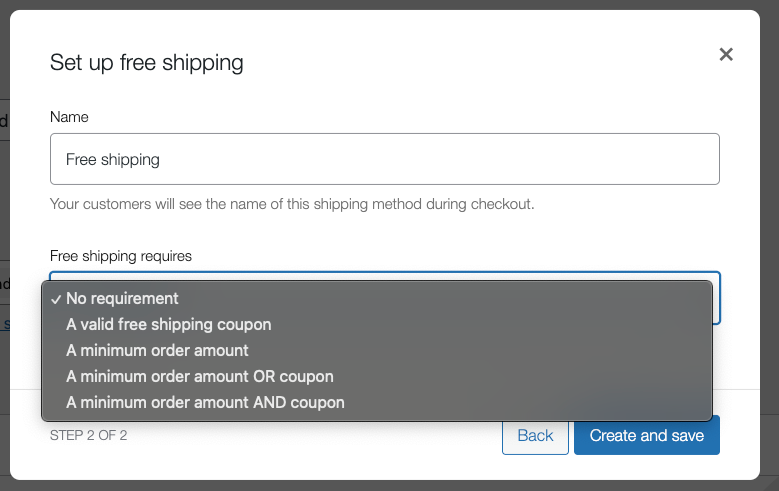
This feature gives us all the options we need:
By default, you configure two shipping methods: Flat Rate for the optimal condition with no coupons or minimum order value and Free Shipping for the second one. However, there is a problem with such configuration. In the default WooCommerce options both of the shipping methods will show up in the cart. In the default WooCommerce options both of the shipping methods will show up in the cart and checkout pages.

What you probably want to achieve is to show only one of the shipping methods. It is possible! You just need one free plugin to enable free shipping: Flexible Shipping! Read further and get to know more free shipping options for WooCommerce.
The best Table Rate Shipping for WooCommerce. Period. Create shipping rules based on weight, order totals, or item count.
Go to WordPress.org or Download for freeUse the Flexible Shipping plugin – it’s a free WooCommerce table rate shipping plugin that’s used daily by over 100,000 stores worldwide. This is probably the simplest solution to configure WooCommerce Free Shipping over amount. This plugin lets you create conditional shipping in your WooCommerce store, and it’s much more powerful than the regular flat rate shipping method. Learn how to install a plugin on WordPress.
Look:
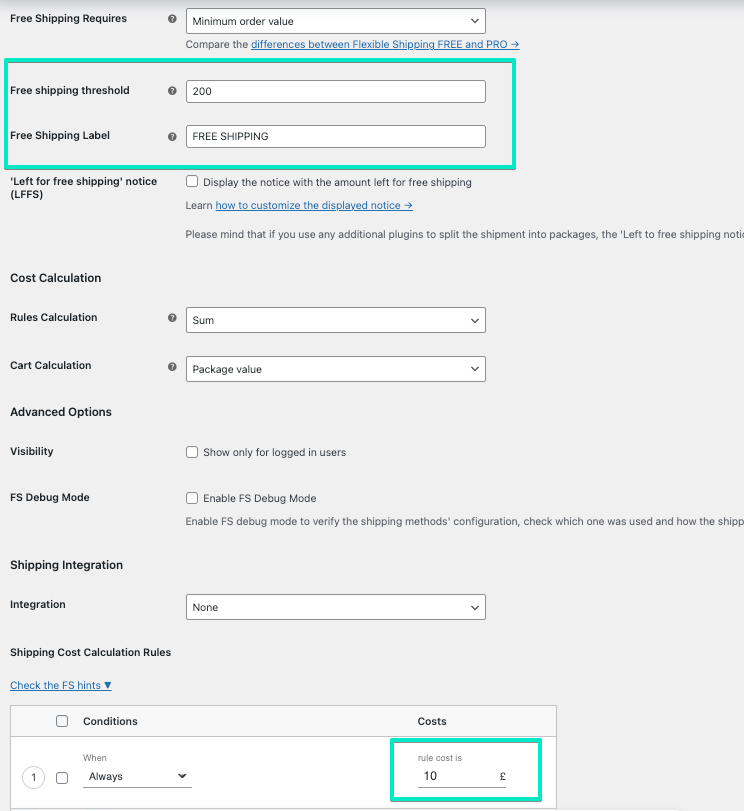
It will work the same way as the previous configuration, based on both Flat Rate and Free Shipping methods. However, it is definitely easier, because you will do the whole configuration in one shipping method. What’s more, the plugin has a built-in Free Shipping label option. If free shipping is applied, you can display additional information for your customer. It’s a small thing, but it works great as a UX touch, and it will also reduce abandoned shopping carts.
That’s it! Now, you can offer WooCommerce free shipping.
Offering free shipping in your online store is a great way to boost sales. However, for some products, it might be unprofitable. The solution for that is to disable free shipping for certain products.
To exclude a product from free shipping in WooCommerce you need Flexible Shipping plugin.

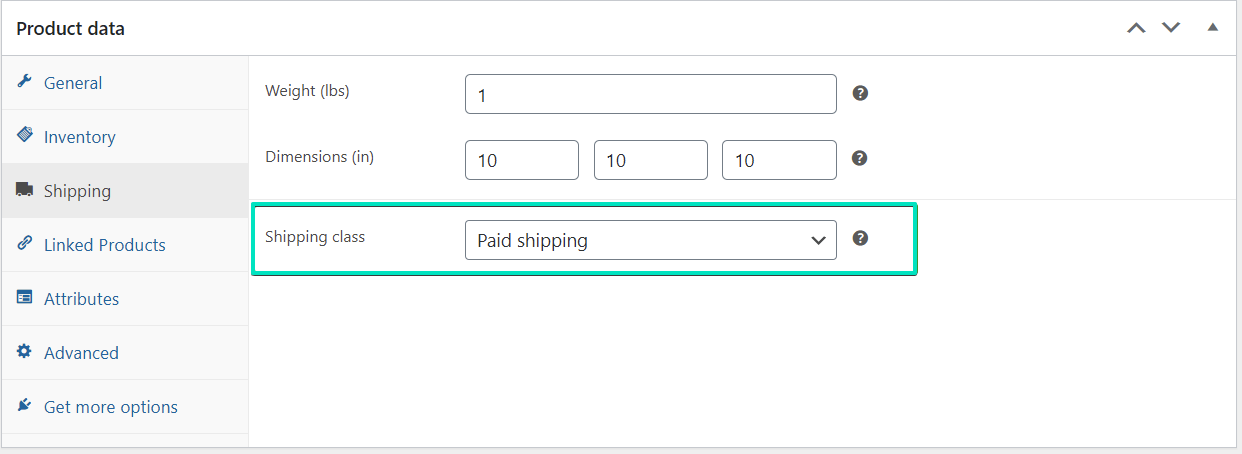
That’s it! Now, you have learned how to assign free shipping over a specific amount and how to exclude certain products from it.
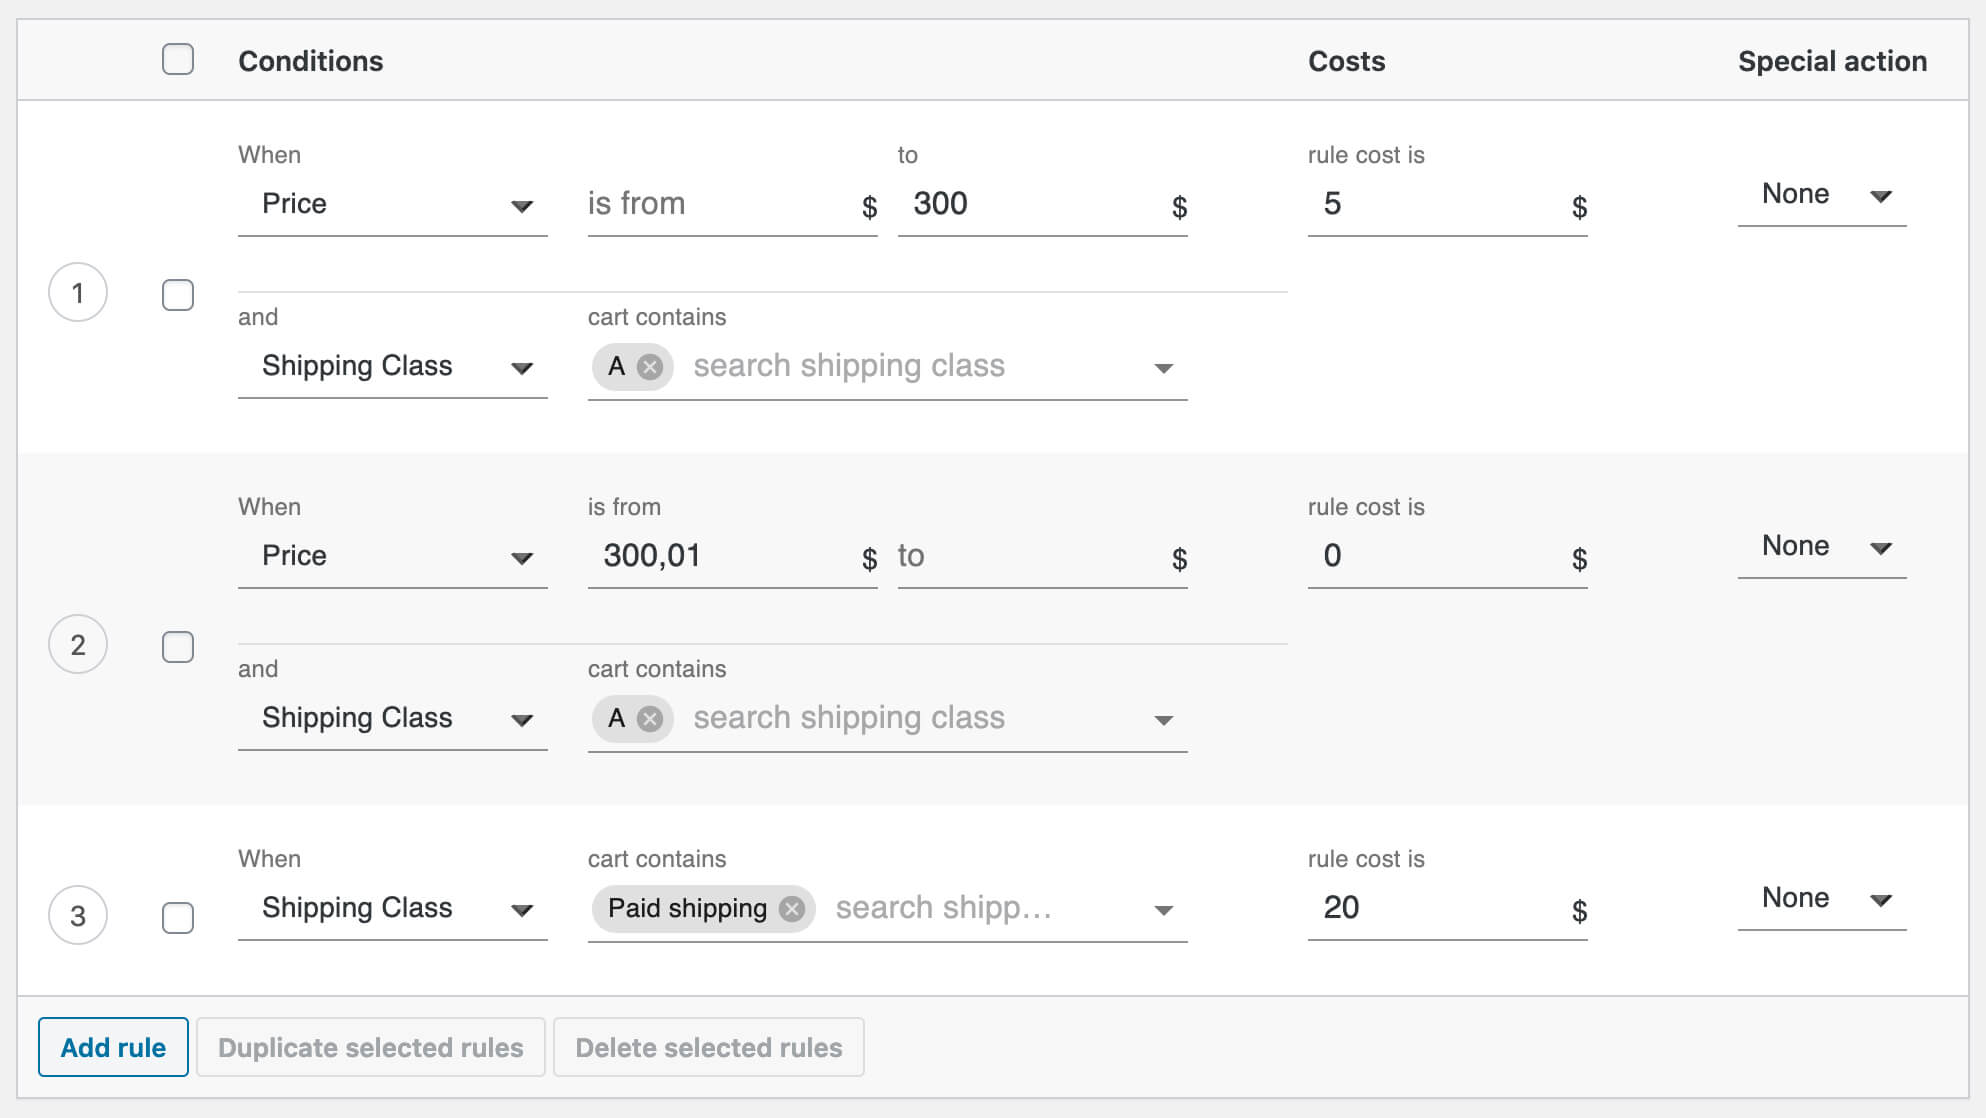
Of course, you can use more than one shipping class for that. Remember how to combine shipping classes in the Flexible Shipping plugin.
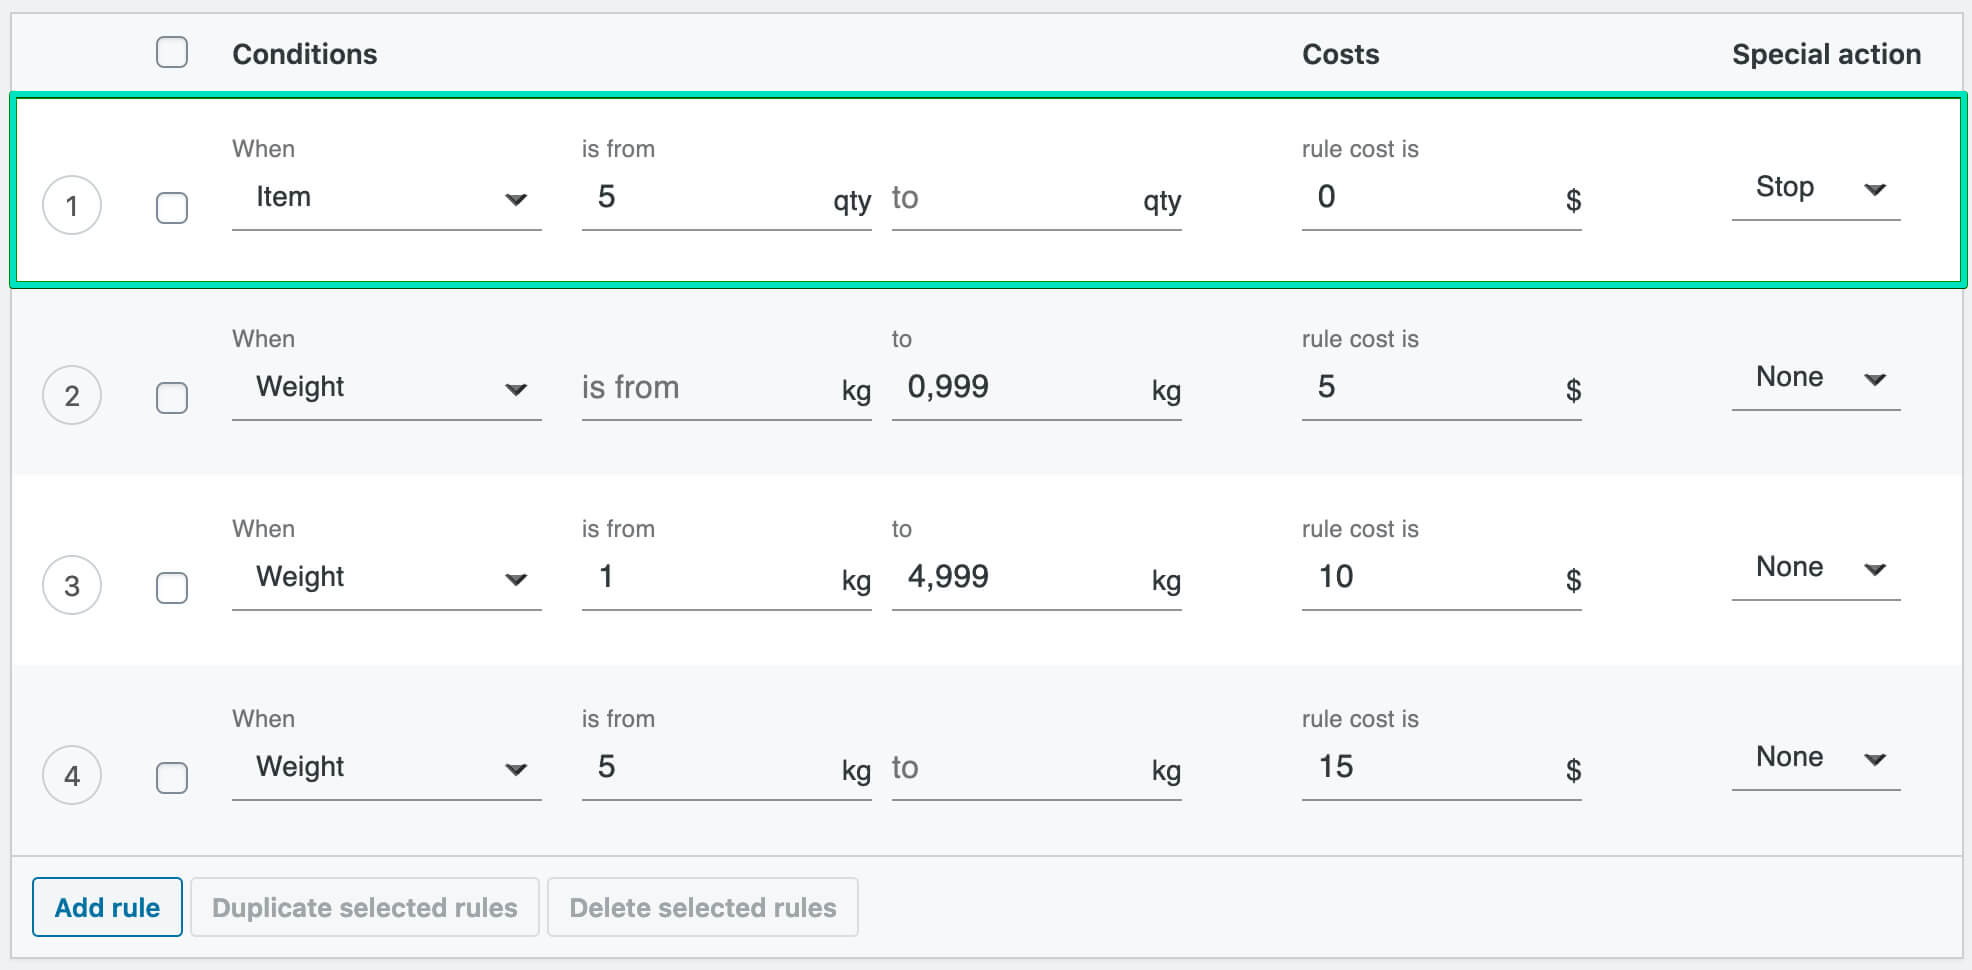
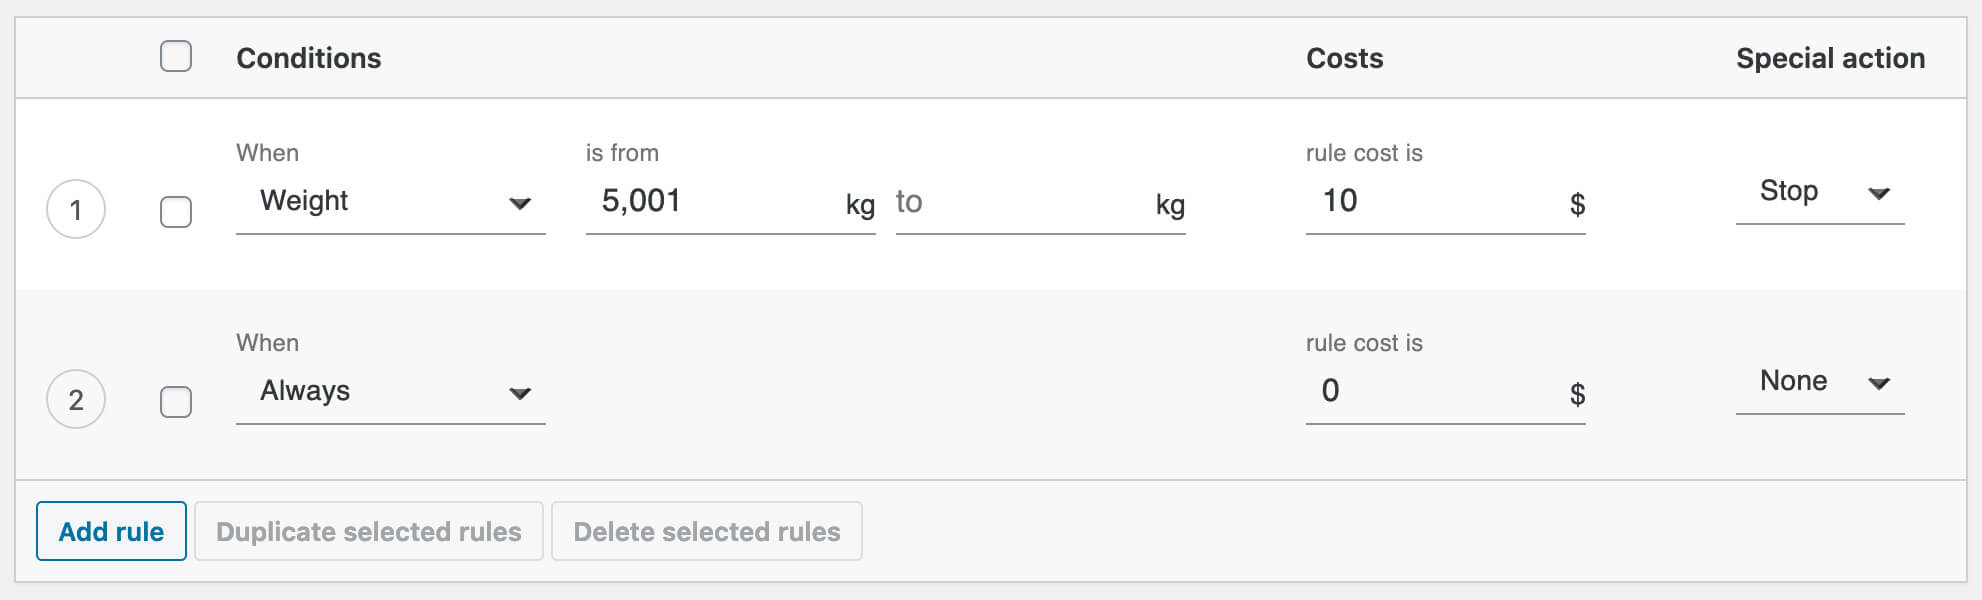
Once you have the free shipping option set in the Flexible Shipping PRO plugin, you can set quantity based free shipping in WooCommerce. To do that just add a new rule based on Item (When: Item), set is from as your free shipping quantity, and set rule cost is 0. The last but very important thing is to choose Special action: Stop. This way, all other rules won’t be calculated when the client reaches free shipping over quantity.
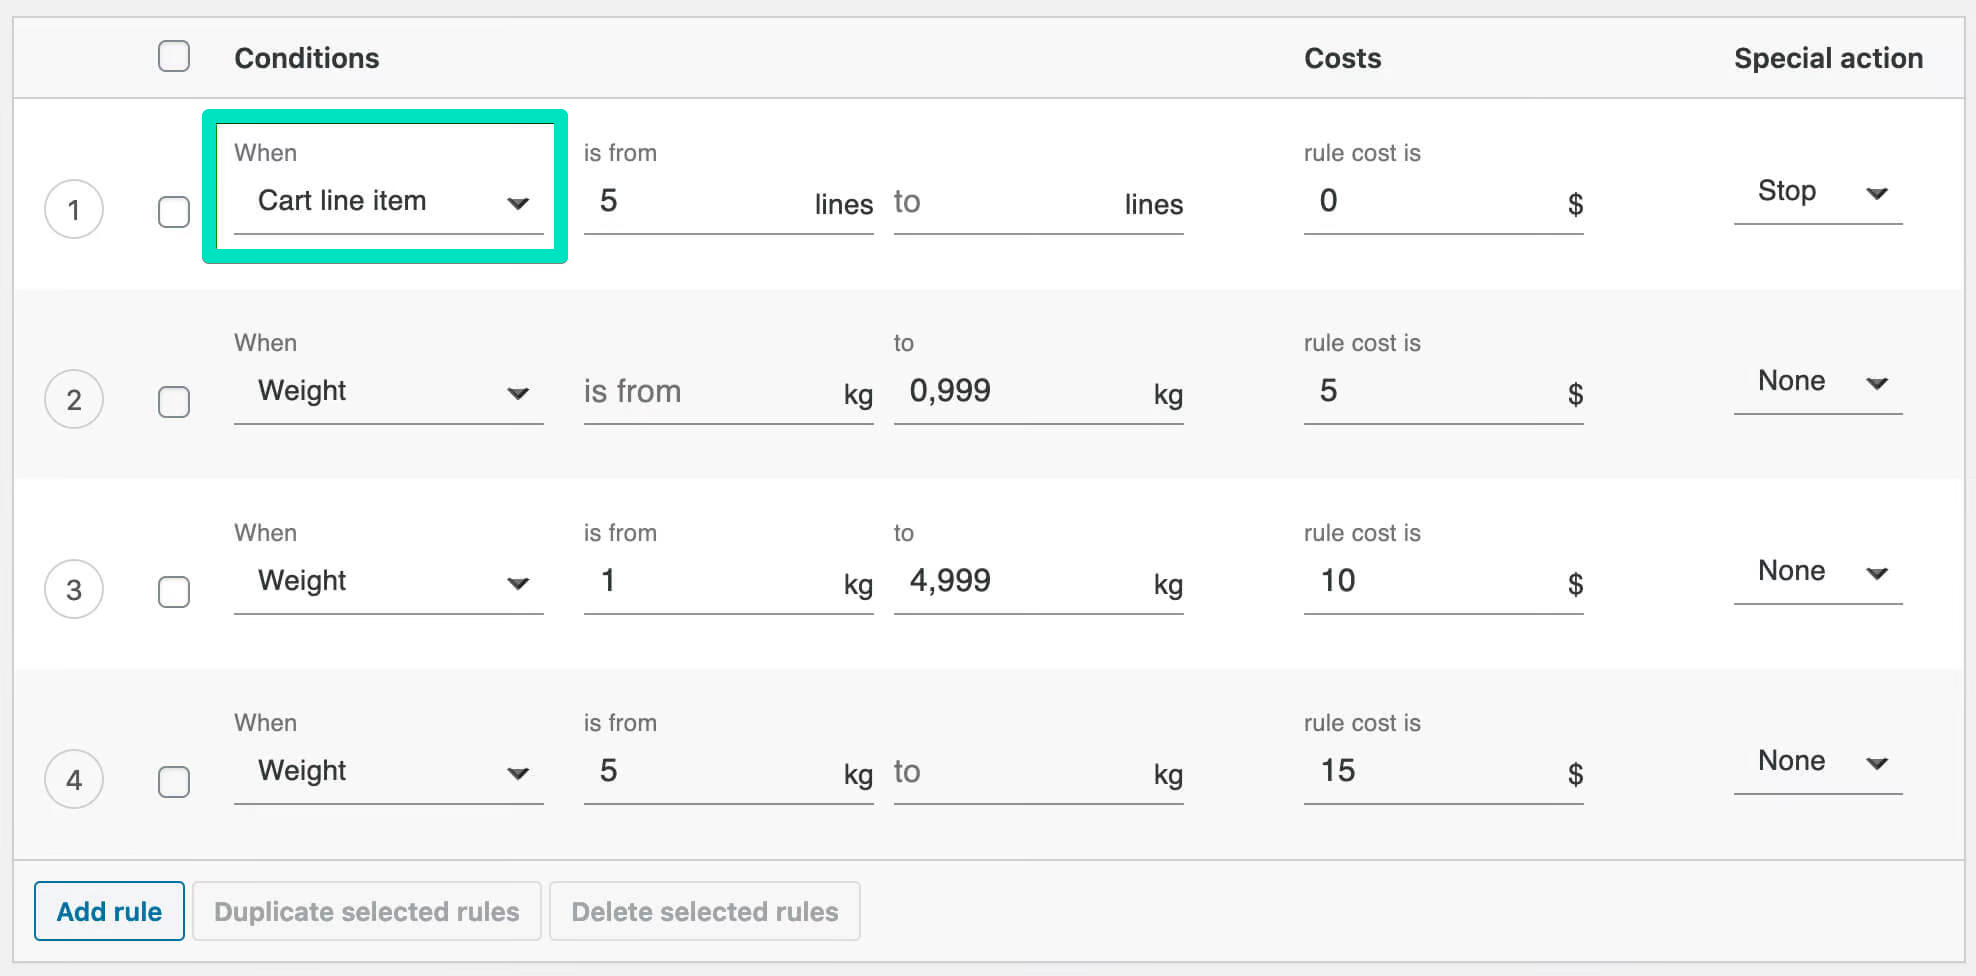
The method above will apply to the quantity of products in the cart no matter if they are different or the same. With Flexible Shipping PRO plugin, you can also set free shipping over different items in cart. Just change When to Cart line item and free shipping will work only with five different products.
To do so, just add two shipping rules.
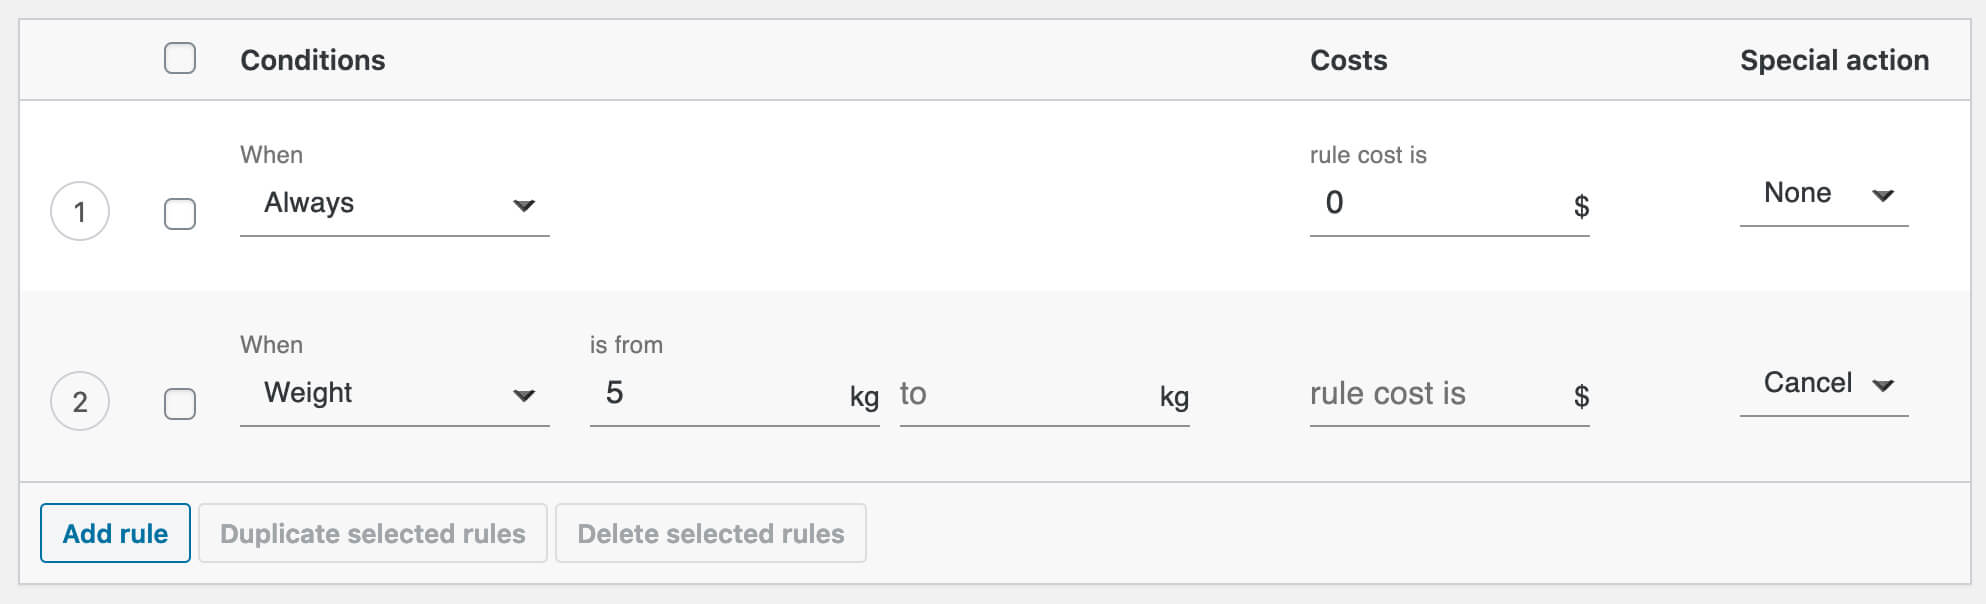
If the total weight of your customer’s cart will exceed 5 kg (or any other weight unit in WooCommerce), the free shipping method won’t display on the checkout page. To not leave your customer without any shipping method, you can add another shipping method using Flexible Shipping that will be available for orders above 5 kg. You can read how to do this with our weight based shipping tutorial.
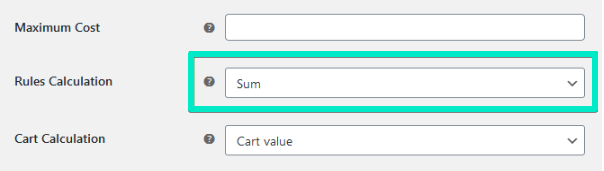
You can also set the shipping cost inside one shipping method. In this case, change the order of the rules, select Stop instead of Cancel and fill in the rule cost is field.
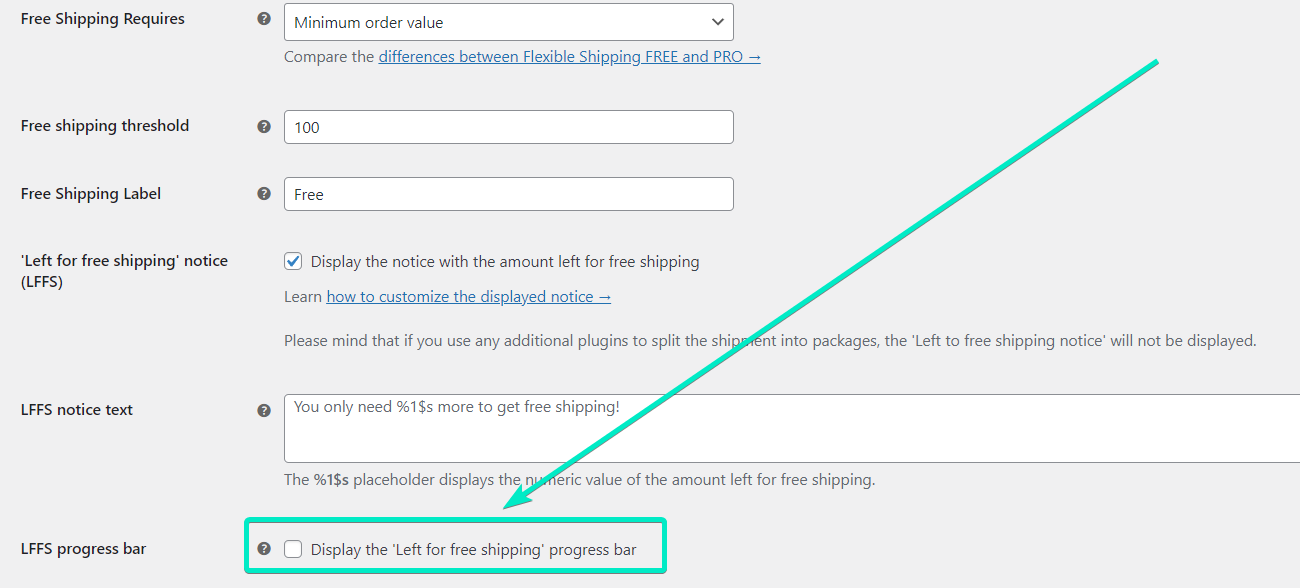
If you want to display additional label for free shipping, enter it in the Free Shipping Label field and leave the Free Shipping field empty.
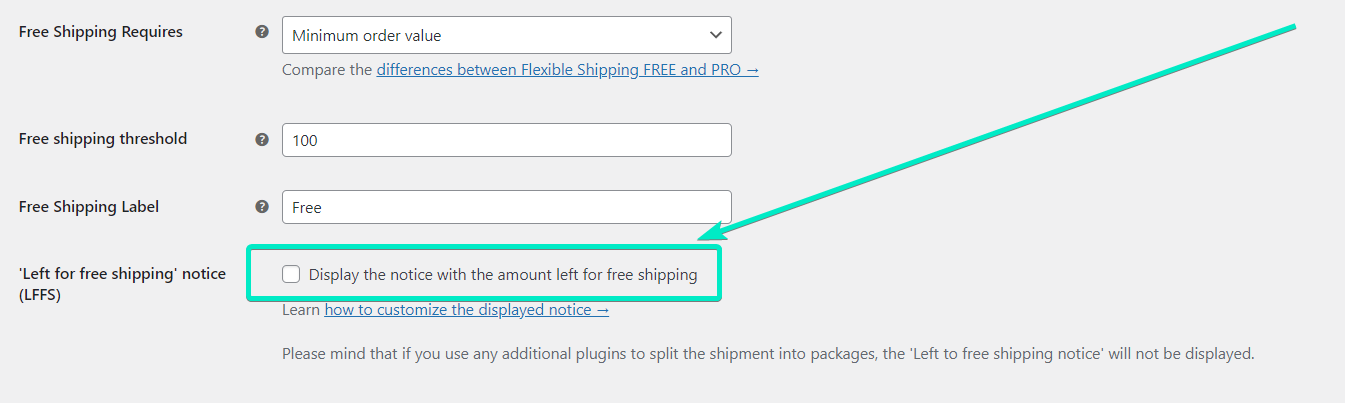
When setting up free shipping method, In the Free Shipping Threshold field enter the amount that will become the free shipping level. After filling in this field, you should be able to display the remaining amount for free shipping in WooCommerce. To do this, just check the ‘Left to free shipping’ notice box.
Having the “left to free shipping” notice enabled, it’s time to configure it. In the LFFS notice text field, you can change the free shipping bar message. Remember to use powerful Call To Action.
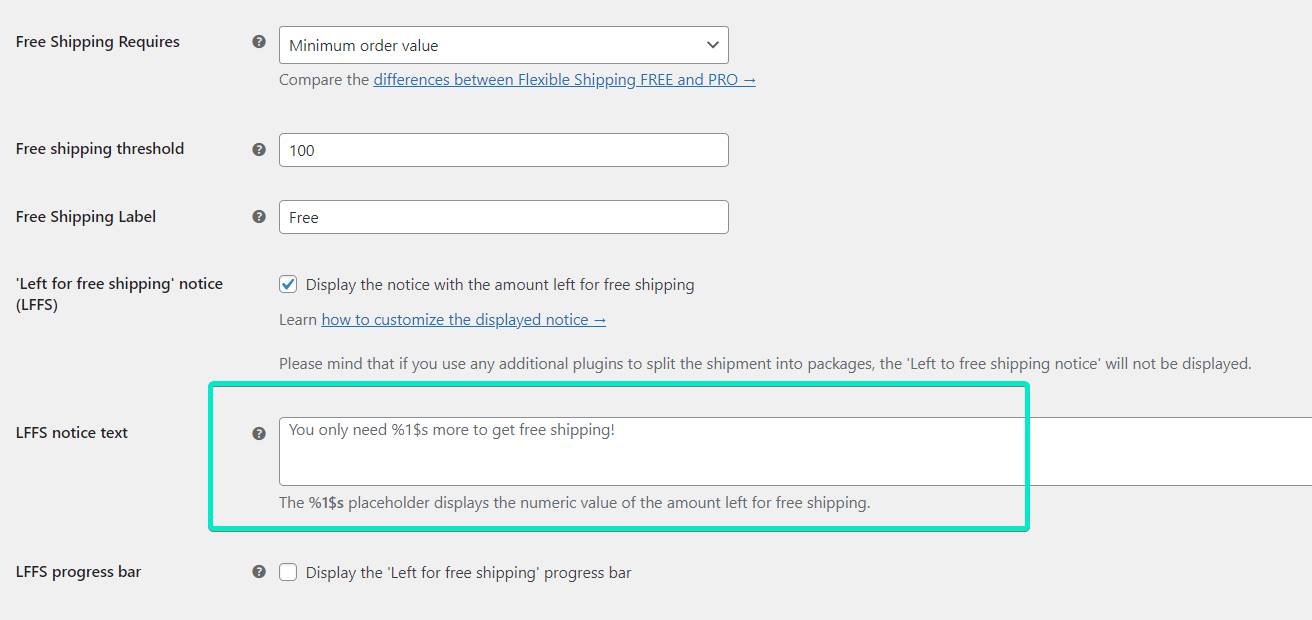
The final step is to turn on the free shipping progress bar itself. To do this, all you need to do is to enable the LFFS progress bar checkbox.
Remember to save the changes and that’s it! In addition to the free shipping itself, you can use other features of the Flexible Shipping plugin to configure your Shipping Scenario.
Having gone through the whole process, let’s check out how the free shipping progress bar looks in my test store using Storefront Theme.
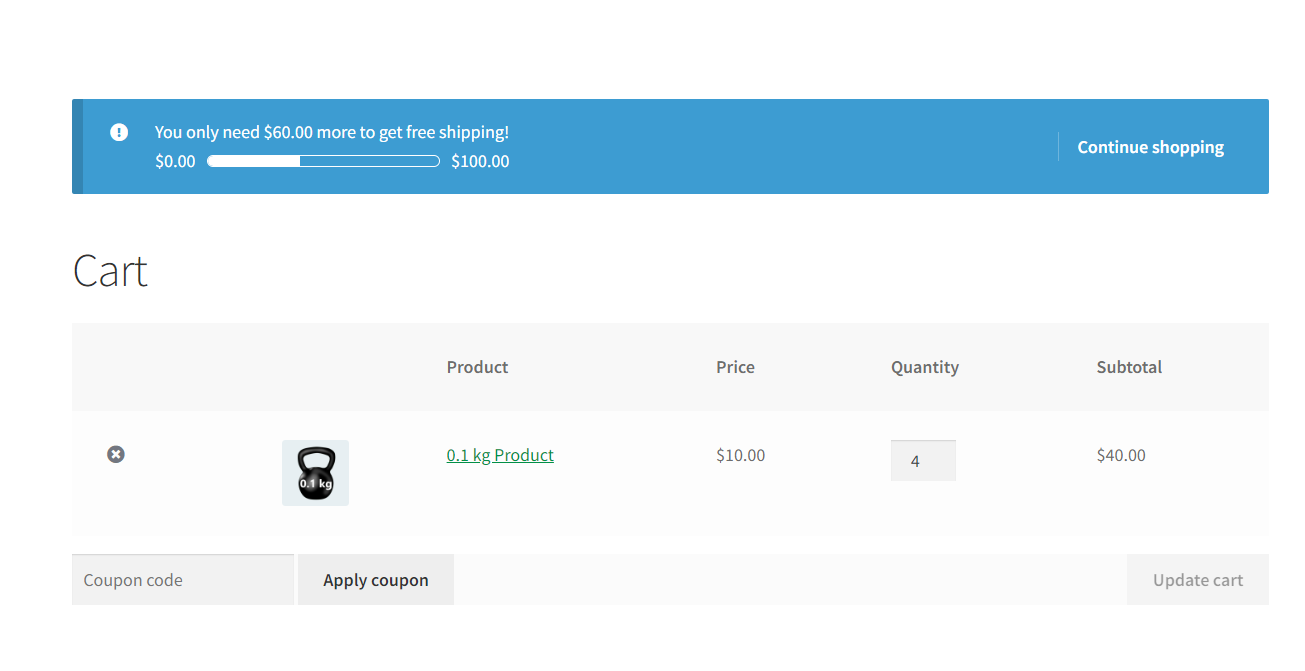
Half of customers abandon their carts because of additional shipping chages or high shipping costs. Offering a free shipping can help omitting such scenario. You can find more details about reasons of it in the article Cart abandoment.
In this article, you have learned how to set up free shipping both with a WooCommerce default shipping method and also with a usage of Flexible Shipping plugin. Thanks to these methods, you can enhance the shipping options. Additionally, you have learned that you can offer free shipping based on various factors. You can set the free shipping per product, based on the quantity and even with weight limit. It’s crucial to offer the customers various free shipping options as mentioned before in the article – the clients love receiving free shipping.

Content Writer at Octolize
Bartosz Gajewski is a content and marketing specialist with a solid background in SEO, WordPress content strategy, and technical documentation for digital products. With years of hands-on experience in both in-house and freelance roles, he supports tech companies – especially in the SaaS and e-commerce space – by creating content that informs, engages, and drives results.
His approach blends storytelling with data-driven SEO, and he’s been involved in projects ranging from rebranding and product marketing to growth experiments and copywriting for complex software tools. On the blog, he shares actionable insights from his work across marketing teams, product documentation, and online store optimization.


The Neurodivergence Project uses the ocean and the natural world to empower neurodivergent people to build confidence, lasting friendships and help them achieve their goals.

Dominican Liturgical Center is based in Cracow and focused on promoting the learning of traditional music and singing. They also run a smaller publishing house and a webshop that is focused on selling mainly books and CDs.

Established in 2017. SGL is focused on selling gas bottles and non-gas products. Formerly, the company offered payment by card on delivery. For now, the SGL started online payments and they launched a webstore.
only problem with this plugin is that I can not sign zones to the new shipping methods correct? I have different zones/countries that have different minimum spends in order to get free shipping. It dosnt seem that this plugin is compatible or works together with the standard woocommerce shipping zones/methods.
Hi Daniel, our Flexible Shipping/Flexible Shipping PRO plugins are fully compatible with the WooCommerce shipping zones. You can create the new shipping methods handled by Flexible Shipping and put them in these zones with ease.
Hi, Flexibmle Shipping is quite powerful bu I have an issue.
I can’t deal with Free Shipping : if I enter a coupon code in WooCommerce, the coupon code is accepted in the basket BUT… the shipping fee is still charged ;(
And honestly, I’m starting my shop so I don’t want to invest $89 in your PRO extension. Any idea ?
thanks!
Hello Fabrice. The support for the coupon is on the PRO version.
The code snippet for ‘Left to free shipping’ notice customizationis not working. It shows error in the function line:
Cannot redeclare function wpdesk_flexible_shipping_free_shipping_notice_text.
How to solve?
Hi Husain, have you checked if the snippet was added properly? I’ve just run a test and it seems that it works fine: