Subscribe to our newsletter

DPD UK and DPD Local are one of the best shipping options in the UK. They are cheap and, with DPD Local Pickup, can be very useful for WooCommerce clients. Let’s answer the question on how to integrate DPD Local and DPD UK with WooCommerce? All you need is the right plugin.
First of all, you need a proper plugin. I recommend DPD UK & DPD Local WooCommerce plugin, which was made especially for DPD UK and DPD Local. It offers all of DPD WooCommerce features like parcel tracking, automate shipping process and creating shipping labels. Long story short, it’s the best tool to integrate DPD with WooCommerce.
Ship your DPD orders faster. Automatically collect shipping details, download printable shipping labels, and track parcels.
View Details or Add to cartThe integration process is very similar for both DPD UK and DPD Local. I will show you the connection method for each.
First things first. You need an API access, and it has to be audited by the DPD staff before you go live. They need to test if everything works OK with your API account before they let you use it to create real shipments from your store. It’s quite complicated, but don’t worry, we made a complete guide about getting API access in DPD.
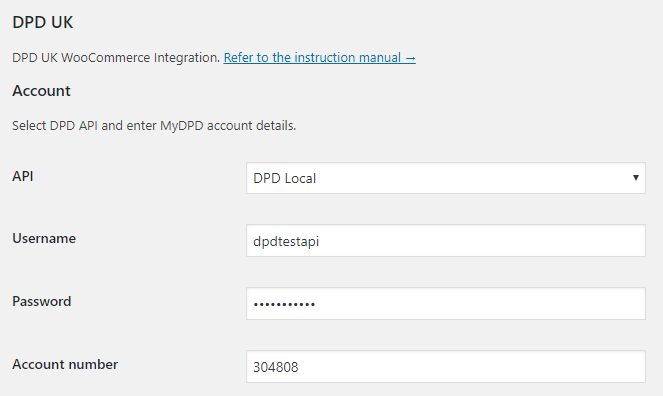
Having the DPD UK & DPD Local WooCommerce plugin installed and activated, you can finally integrate DPD Local with WooCommerce. Go to WooCommerce → Settings → Shipping → DPD UK.

In API field choose DPD Local, and enter your Username and Password from the DPD Local account. Click on Save changes and if everything is correct, the connection status should change to a green OK.
It’s very similar to integrate DPD UK with WooCommerce. Go to WooCommerce → Settings → Shipping → DPD UK.
In API field choose DPD, and enter your Username and Password from the DPD account. Click on Save changes and if everything is correct, the connection status should change to a green OK.
When you are connected, other options will display on the same page.
Let’s outline them one by one.
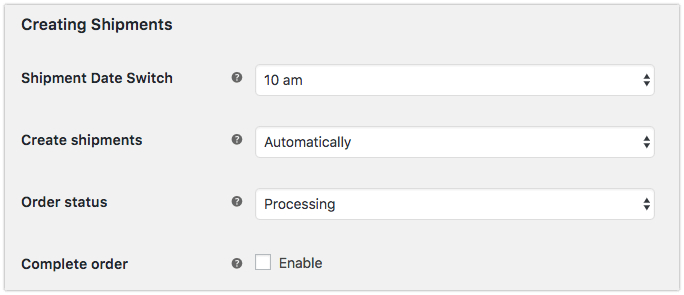
In Creating shipments section you can decide if the plugin creates shipments automatically based on the order status.

While on Shipment Date Switch field, you can select the hour after which the date of shipment will be set for the next day. So, if you send your orders at 2 pm, select that hour to offer the right shipment. In Create shipments field you can choose between automatic or manual shipping. If you decide to make it Automatically you have to select Order status for automatic shipment creation. Enable Complete order field if you want to automatically change the order status to completed after creating a shipment.

In Printing options you can set Label format in which the label will be generated. You can choose between HTML, CLP, and EPL. Here you can also add Tracking number link to customer emails.
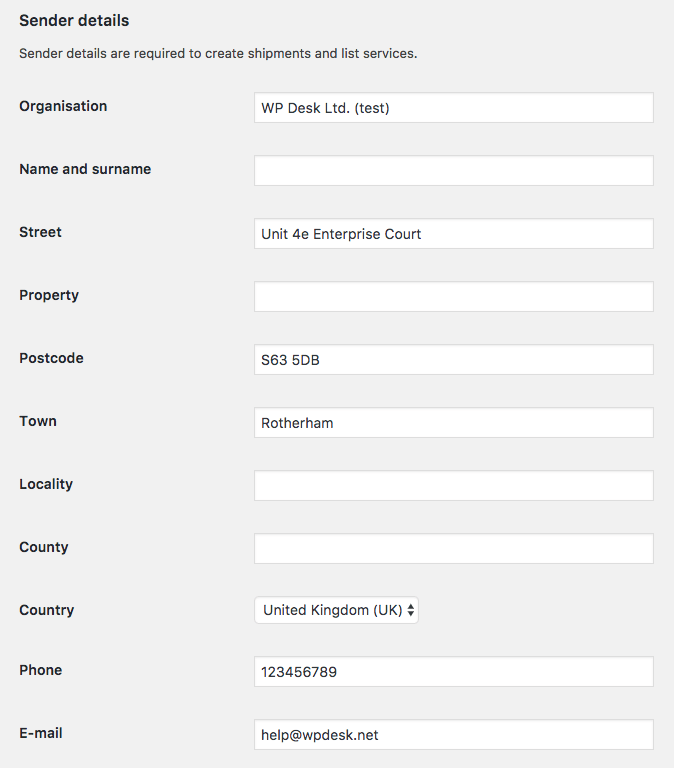
To create shipments and list services you have to fill the sender details.

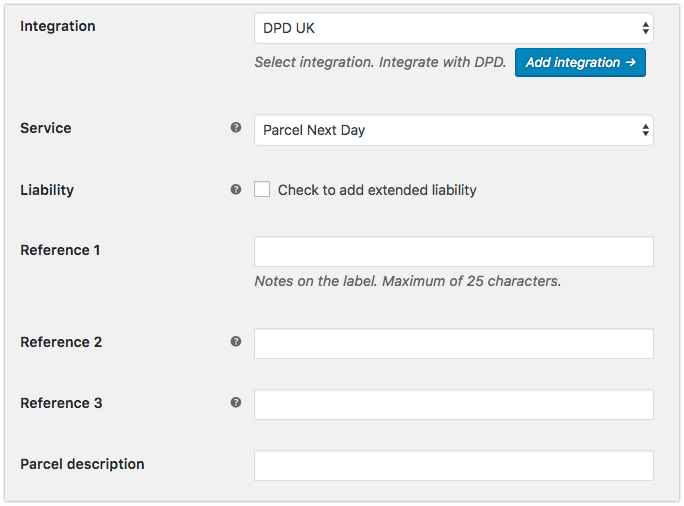
Now, it’s time to use Flexible Shipping to configure the shipping method. To integrate DPD Local with WooCommerce choose the shipping method in which you want to add DPD Local or make a new one. It has to be a Flexible Shipping method, in other cases, it won’t work. When you have your shipping method edit it and in the Integration field choose DPD UK.

Next, choose one of the available DPD Service. You can also add Liability, References and Parcel description.
Save the changes, and that’s it! You completed integration DPD Local or DPD UK with WooCommerce.
Now you know all about how to integrate DPD UK or DPD Local with WooCommerce. It’s not that easy, but I hope that our plugins and this article will be helpful. Good luck!
Where should we set the HF Code?
Hi Ben, you should define the Commodity Codes as the product attributes the way we described it here at the very bottom of this doc – https://docs.flexibleshipping.com/article/58-woocommerce-dpd-uk-configuration