- Home
- WooCommerce
- What plugin are you looking for?
- Shopify
- What Do I Need?
- About us
- Blog
- Docs
- Contact us
- What can we help you with?

If you run an online store with international shipping, you’ve likely encountered the term Remote Area used by DHL Express. These are specific regions DHL identifies as difficult or expensive to service logistically. They typically include poorly connected locations or areas where delivery is especially costly or requires extra resources, resulting in Remote Area Surcharge.
DHL Express charges a special fee known as the Remote Area Surcharge (RAS) for deliveries to these remote regions. This matters significantly because the list of such locations is extensive, covering thousands of postal codes globally, and is regularly updated by DHL. This surcharge substantially impacts overall shipping costs and can surprise both customers and store owners if not accounted for in advance.
From working with various shipping setups in e-commerce, I have observed that DHL Remote Area Surcharge can be tricky to handle and, if left unaddressed, may lead to unexpected costs or poor customer experience.
In both support forums and my own work with merchants, I’ve seen the same types of challenges emerge when dealing with DHL Remote Area Surcharge. On the WordPress.org support forum, one user asks:
“I want to add extra shipping fee in cart and checkout only for remote areas, with postal code as a set condition.”
In another thread, a merchant explains they received a file containing more than 200,000 remote-area ZIP codes and points out:
“WooCommerce itself doesn’t offer a built-in way to bulk import ZIP codes… adding them manually isn’t feasible.”
Finally, in a support topic about checkout errors, a merchant discovers just how fragile Remote Area setups can be: only an exact ZIP-code match triggers the “Remote Area Delivery” method and its surcharge, while even a single-digit typo makes WooCommerce fall back to the regular (often cheaper) shipping option. It’s a small detail that can quietly wipe out your Remote Area fee and leave you covering the extra DHL cost.
These kinds of questions reflect several recurring pain points:
Next, I’ll show how I handle this specifically in WooCommerce, using proven tools that make the whole process easier.
In WooCommerce, you have two practical methods for managing Remote Areas when using DHL Express. One gives you full control using shipping zones and conditional rules. The other relies on DHL’s API and handles surcharges automatically. Each method has its pros and limitations. Your choice depends on how flexible your setup needs to be and how much manual configuration you’re comfortable with.
Let’s take a closer look at both.
This method gives you full control over when and where to apply the Remote Area Surcharge. It’s based on WooCommerce shipping zones and the Flexible Shipping plugin.
Start by creating a new shipping zone and assigning it only to postcodes considered “remote” by DHL. You can base this on country-specific ZIP codes / postcodes ranges. For example, you might target remote regions in the USA, Australia, or Canada.
In WooCommerce, you’ll find postcode-based shipping zones under WooCommerce → Settings → Shipping → Shipping zones.
To create a new zone for DHL Remote Areas:
Here’s how that setup looks in the WooCommerce Shipping Zones settings:
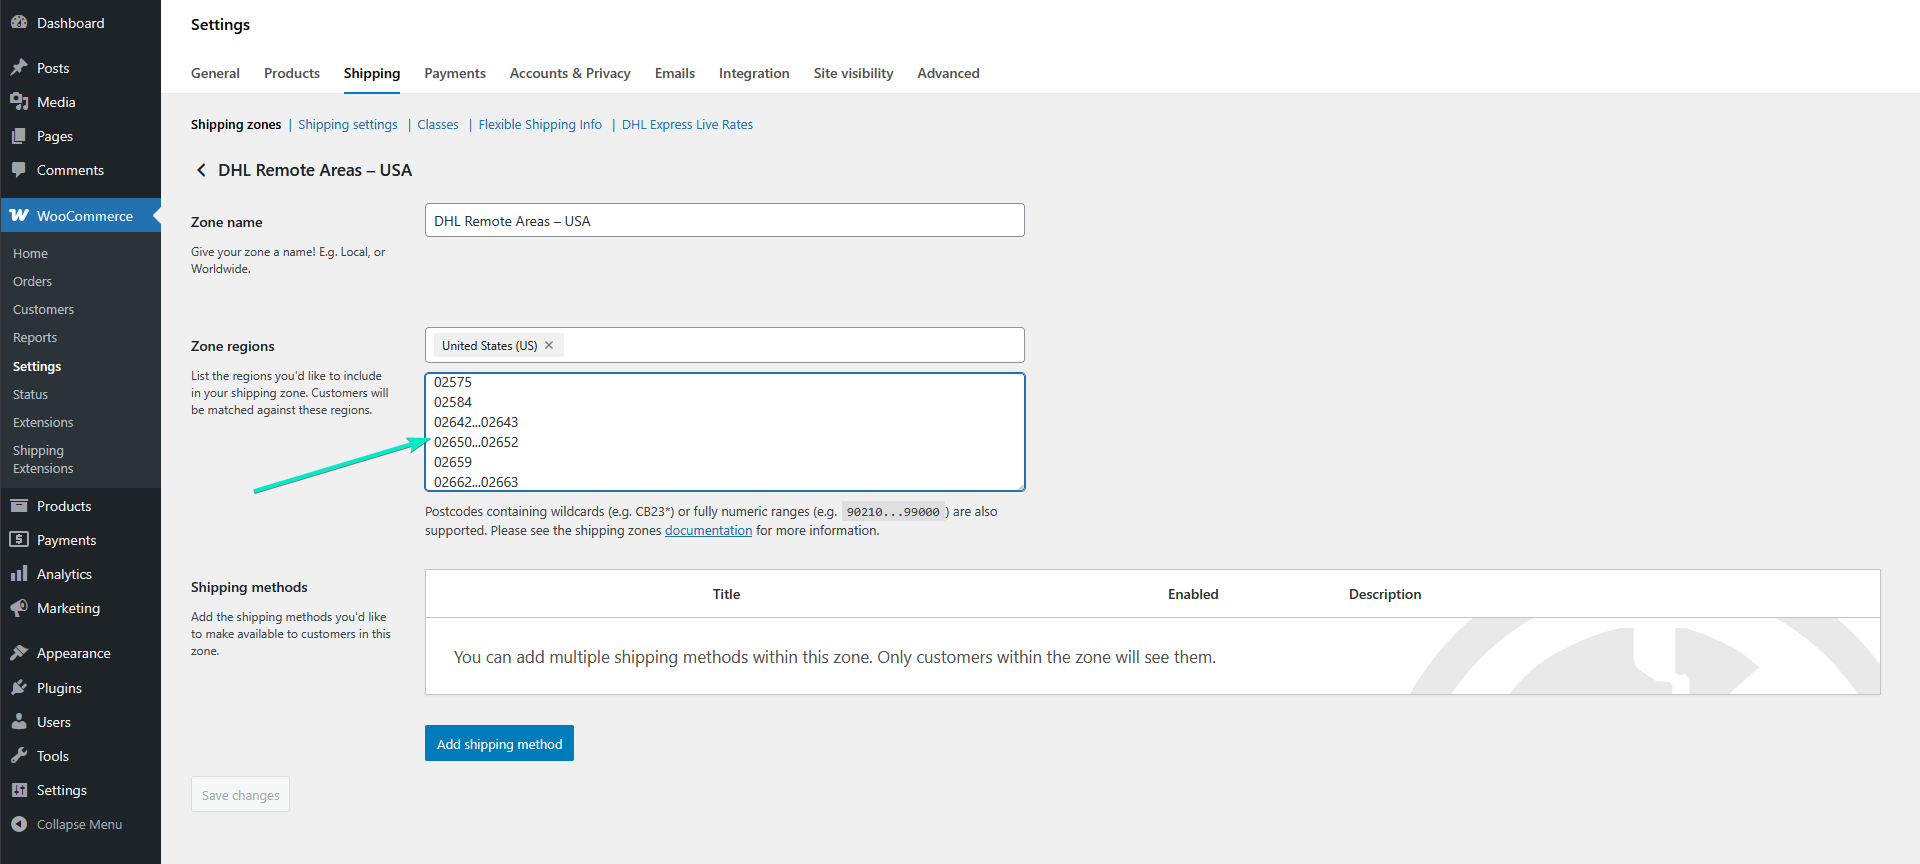
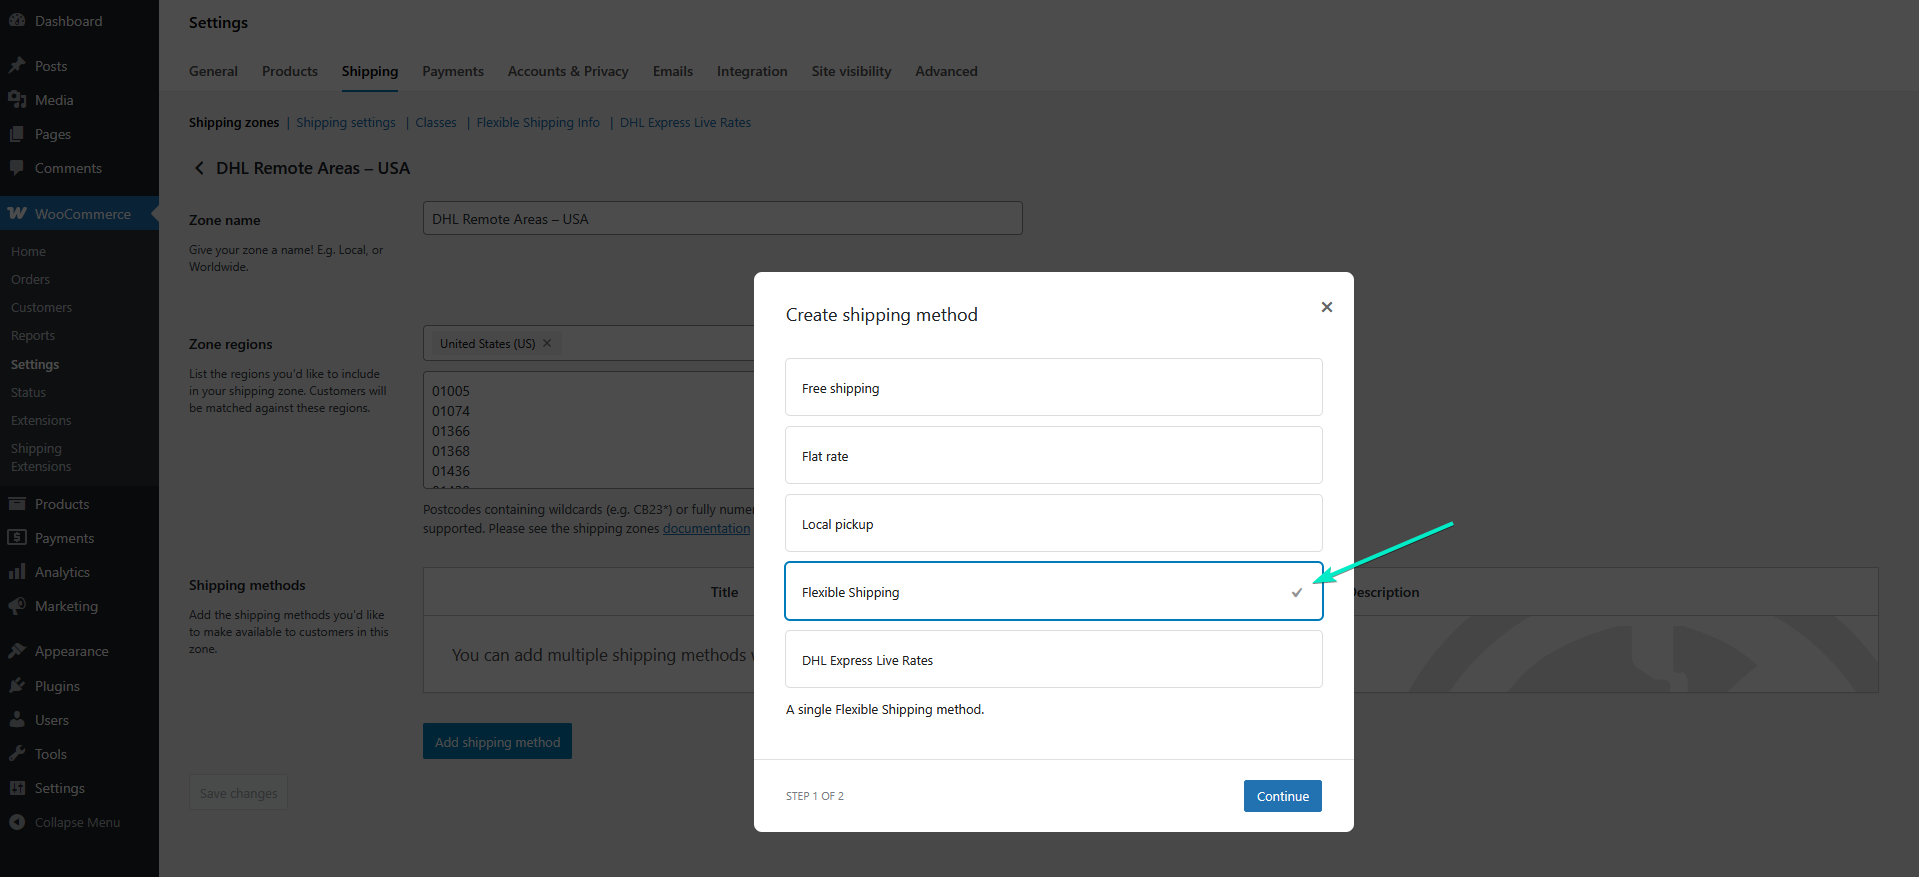
Once you’ve added the postcodes, click “Add shipping method”, choose Flexible Shipping, and configure the surcharge you want to apply for that zone.
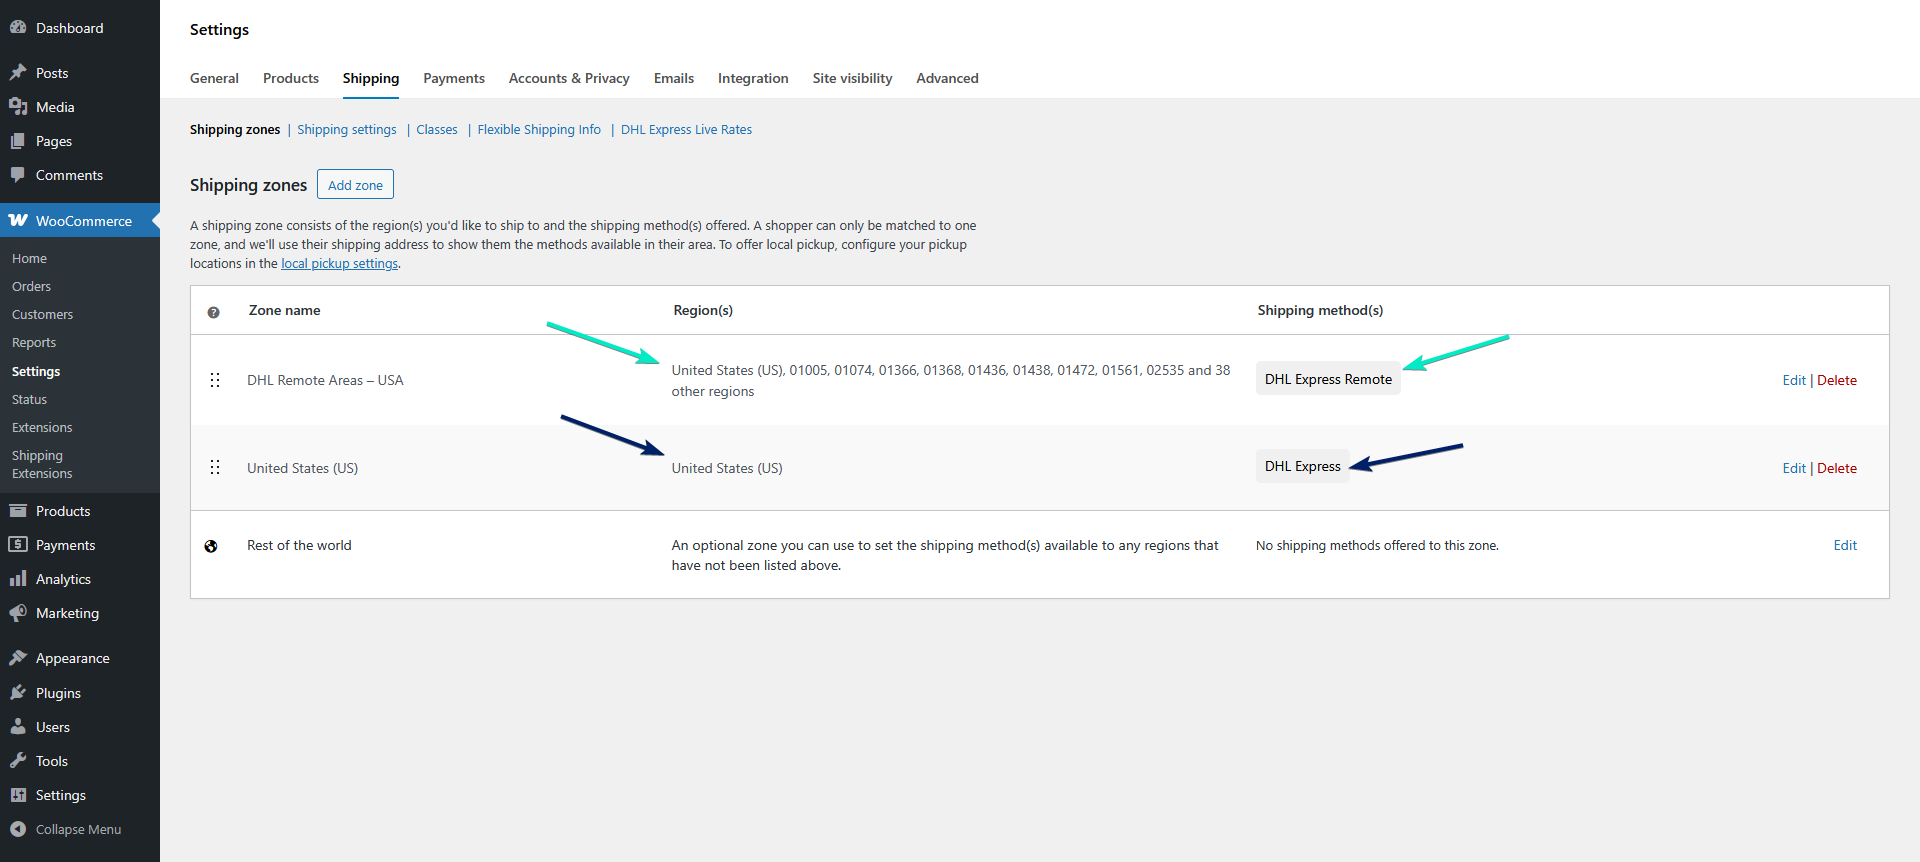
Before we move on, it’s important to highlight one key element of the setup — the order of the shipping zones in WooCommerce.
WooCommerce always matches shipping zones from top to bottom. That means the most specific zones (like those with selected ZIP codes / postcodes for remote areas) should go first. If you reverse the order and place the general United States zone above the remote one, WooCommerce will never reach the narrower match.
In a real store, you’d likely see more zones for specific states or regions, each with its own shipping methods. For the sake of clarity, the screenshot below shows a simplified setup with just two zones:
Both use Flexible Shipping, and I’ve added descriptive method names to clearly communicate the available option to the customer. This should help avoid confusion and unexpected charges at checkout, which, as described above, is one of the key challenges when dealing with Remote Area Surcharge.
The table rate method described above gives you precise control over shipping charges and works great for stores that need specific pricing rules. If you’d rather display DHL Express live rates with Remote Area Surcharge automatically calculated through DHL’s API, consider using the DHL Express Live Rates PRO plugin instead. Below, I’ll show you how this solution works in practice.
Start by creating or editing a general shipping zone, for example, “United States”. Unlike the table rate method, you don’t need to specify ZIP codes / postcodes here. DHL will return available shipping services dynamically based on the customer’s full shipping address.
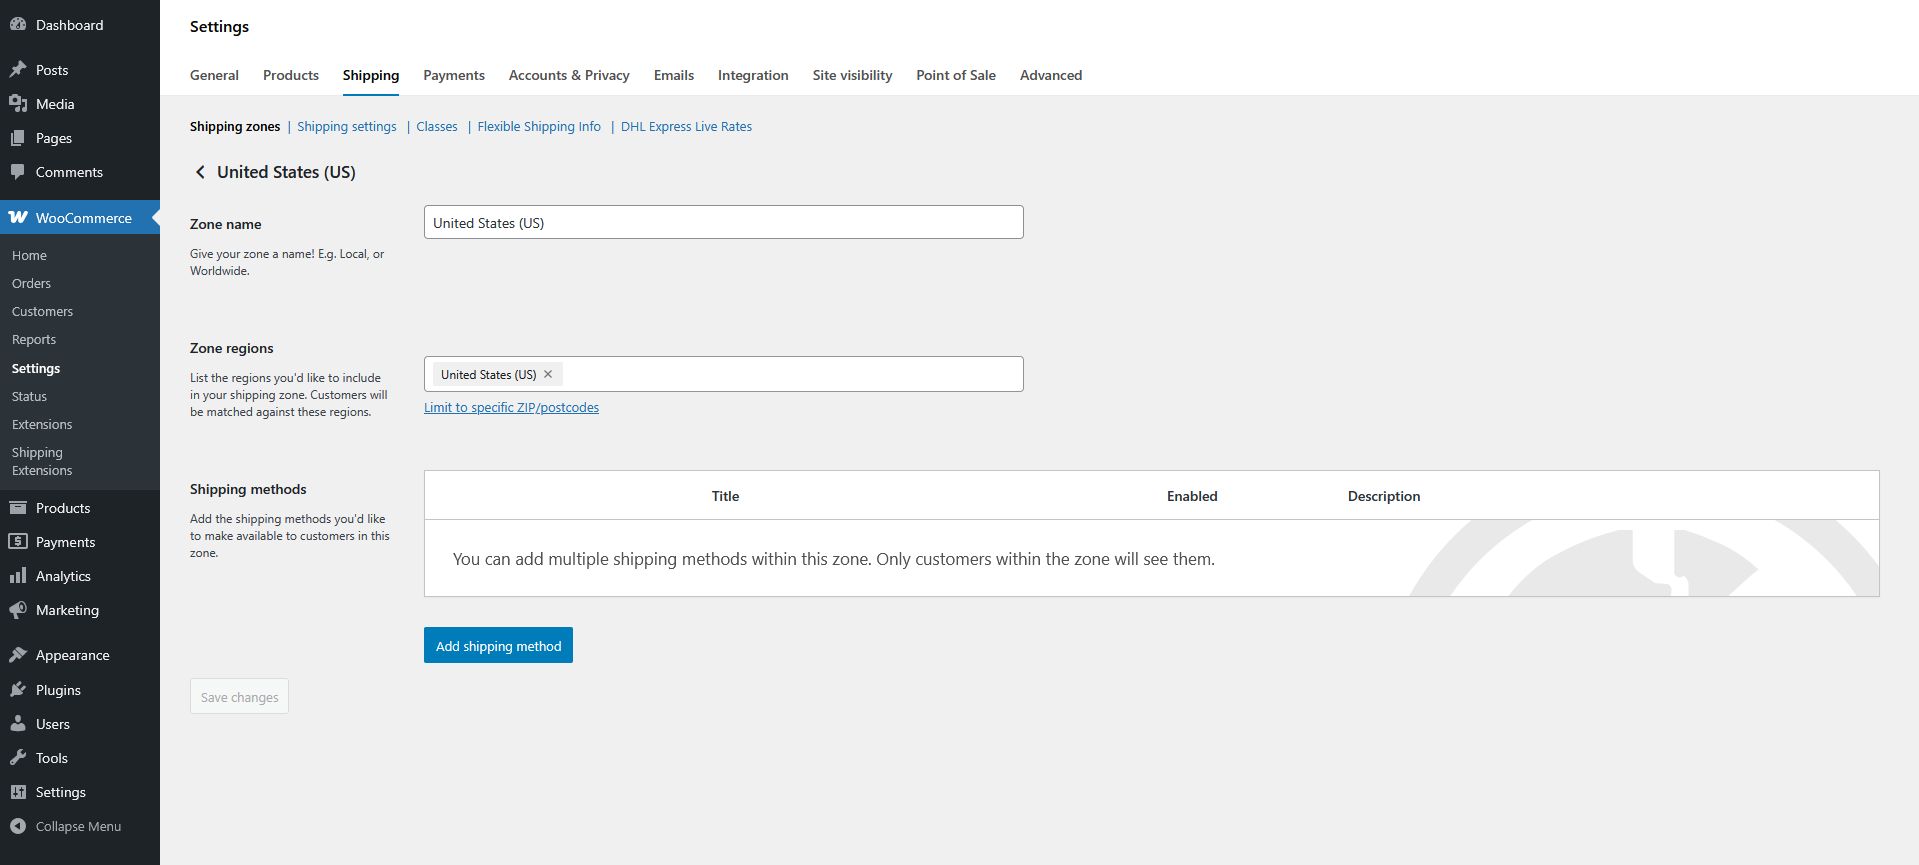
Once the zone is ready, click “Add shipping method” and select DHL Express Live Rates from the list. The plugin will use DHL’s API to fetch available services based on the customer’s shipping address and automatically include any Remote Area Surcharge if applicable.
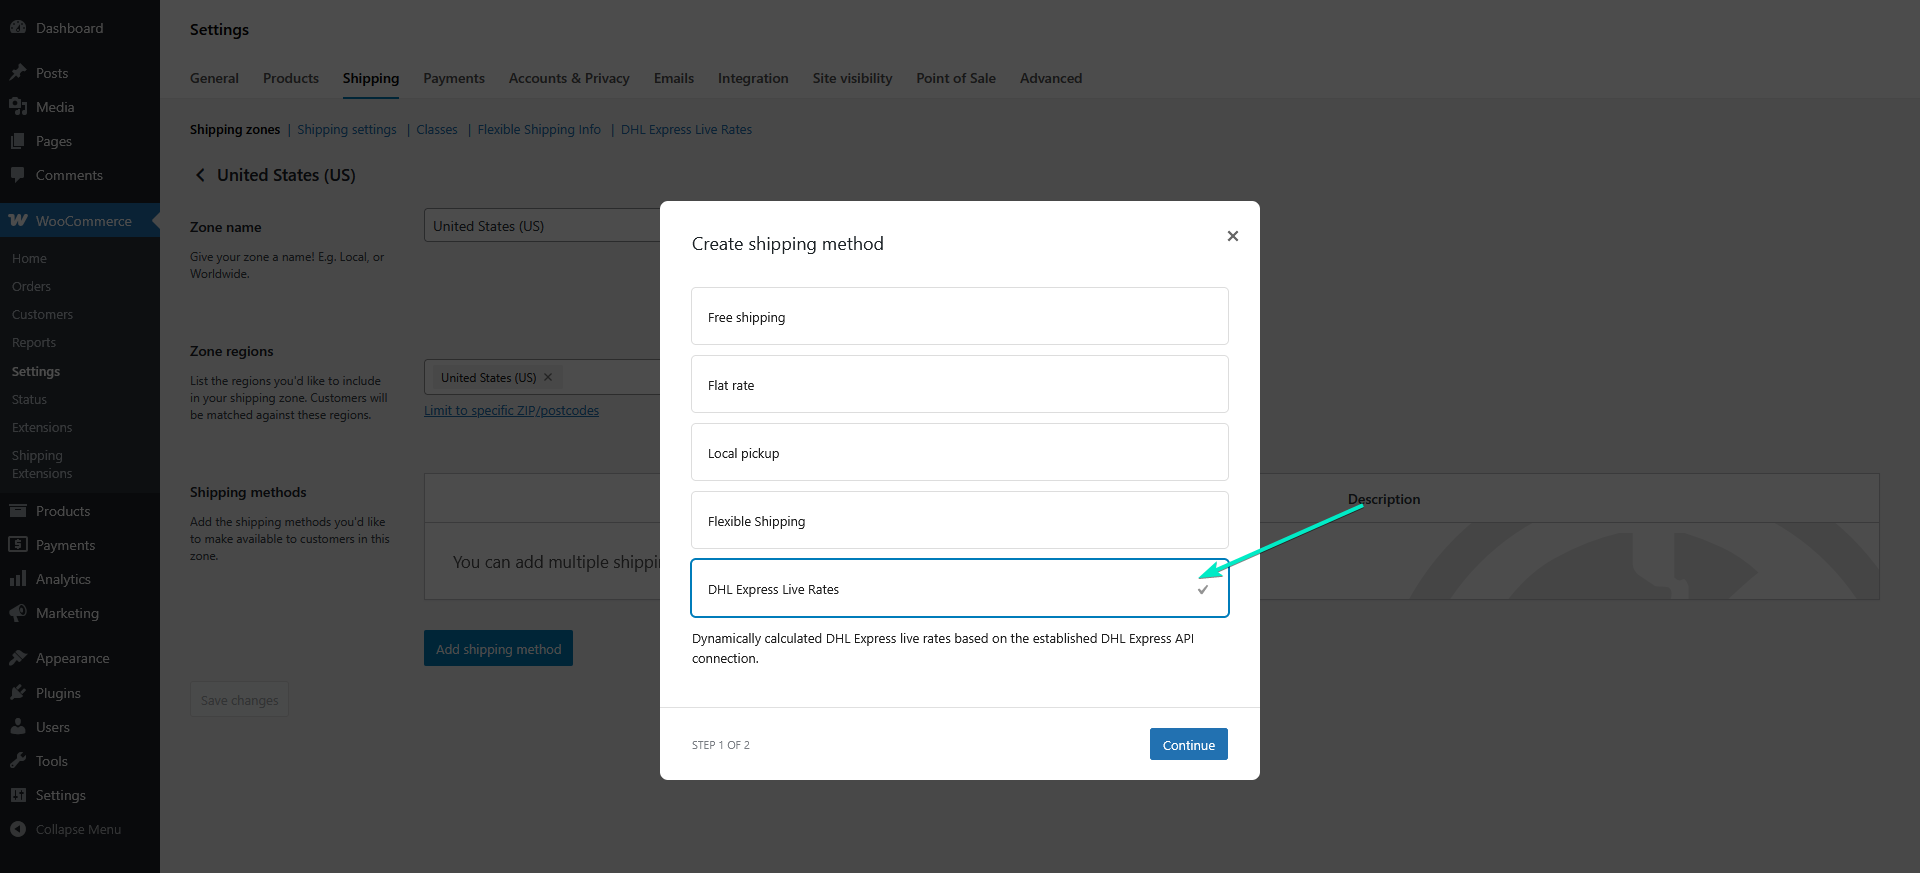
Serve your customers the automatically calculated DHL Express shipping live rates. Add the handling fees, insurance and more.
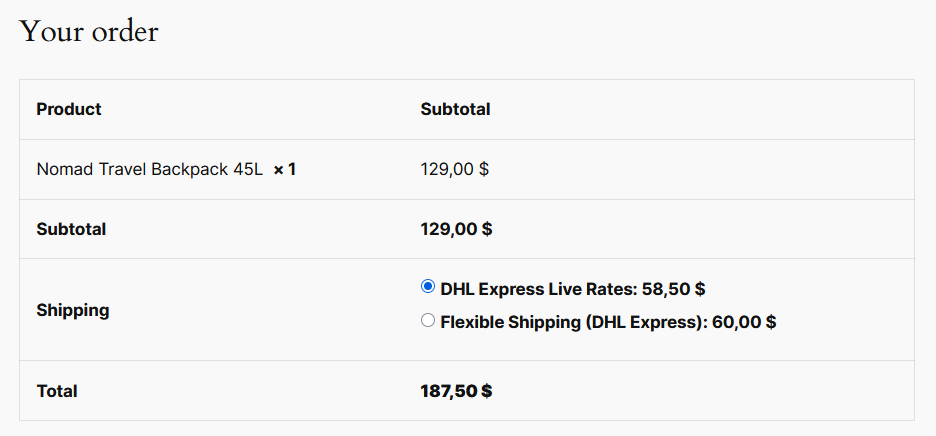
View DetailsorAdd to cartWhether you choose to manage surcharges manually using table rate rules or rely on live DHL Express rates via API, the end result at checkout can look the same to the customer. Flexible Shipping lets you define surcharge logic based on ZIP codes / postcodes, while the DHL Express plugin handles it automatically using DHL’s data.
In the example below, both methods are configured to produce equivalent shipping options — one based on predefined table rates, the other using live rates with Remote Area Surcharge included.
DHL Remote Areas can quietly turn into a major cost or source of confusion in your checkout — especially if you don’t handle them proactively. Whether you prefer full manual control using table rate shipping rules, or you want a simpler and automated way through live DHL Express rates, our plugins give you the flexibility to choose.
Both approaches described in this article let you display accurate shipping costs that reflect the true delivery price, including the often-overlooked Remote Area Surcharge. The first method works best if you need detailed logic and want to define custom pricing rules. The second is ideal if you’d rather rely on DHL’s API and keep the maintenance minimal.
Either way, you’re in control, and your customers will appreciate the clarity and transparency at checkout.
I have already linked to the Remote Area ZIP code / postcode list earlier in this article, but I’m including it again below for easy access — no need to scroll back up.
To make things easier, we have prepared free, downloadable ZIP code / postcode lists for the most commonly affected countries. These files are already formatted for WooCommerce shipping zones, so you can import them without extra work.
You can download all the lists here →
Need ZIP code / postcode lists for other countries? Leave a comment below and let us know — we’re happy to prepare and share additional lists based on demand.
New to the Plugin? See our detailed video tutorial for a quick overview of the configuration process. It’s the easiest way to get everything set up properly:
Our team usually replies within a few hours. Ask away — we'll help you find the right solution for your store.

Tomek makes sure Octolize focuses on improvements that actually help e-commerce stores. His day-to-day includes digging into data, talking to customers, and connecting insights from different sources to make informed decisions.
He’s all about solving real problems and making an impact in products used by hundreds of thousands of e-commerce stores worldwide. With a mix of intuition and solid data, he focuses on meaningful, well-validated improvements – not features for the sake of features.


Learn how Octolize helped Kurzgesagt, the online shop behind one of YouTube’s most popular science channels, set up conditional courier rules using the Shopify Shipping Rates Rules & Zones app.
Learn how Octolize solutions helped WooCommerce store based in the United Kingdom set up shipping scenarios.
Learn how Octolize helped Shopify store based in the USA set up distance based rates with a usage of Octolize Distance Based Rates.