
Subscribe to our newsletter

In this guide, we’ll walk you through the steps to enable the “Click and Collect” feature in your WooCommerce store. This addition not only enhances the shopping experience for your customers but also boosts your store’s efficiency and profitability. With click and collect, you empower your customers with the convenience of ordering online and picking up their purchases at your physical store location.
Click and Collect, also known as “Buy Online, Pick Up In Store” (BOPIS), is a retail fulfillment method that bridges the gap between online shopping and in-store purchases. It allows customers to browse and shop for products on your e-commerce website and then select a convenient pickup location from your physical stores. This feature has gained immense popularity due to its convenience and time-saving benefits.
Enabling click and collect in your WooCommerce store provides your customers with a convenient shopping experience. They can shop from the comfort of their homes or while on the go and pick up their orders at a time that suits them.
By offering click and collect, you can significantly reduce shipping costs. Customers who opt for in-store pickup won’t require shipping, which lowers your overhead expenses and increases your profit margins.
Click and collect ensures faster delivery as customers can pick up their orders as soon as they are ready, eliminating the wait associated with traditional shipping methods.
Implementing click and collect can also boost foot traffic to your physical stores. When customers visit your store for order pickups, they may make additional purchases, further increasing your sales.
Enabling click and collect in your WooCommerce store involves a series of steps. Follow these guidelines to ensure a seamless setup:
Step 1. Add a Flexible Shipping method to your WooCommerce Shipping Zone
Step 2. Configure the Click and Collect WooCommerce Shipping Method
Step 3. Allow your customers to pick the collect date
Step 4. Configure the Delivery Date Picker
In this tutorial, I’ll show you how to add a Click and Collect option to your WooCommerce store using the free version of the Flexible Shipping plugin instead of the default Local Pickup option. Why? The Local Pickup option is available in WooCommerce without the need to install any plugins, but on its own, it is pretty archaic and insufficient for modern online stores.
By choosing the free Flexible Shipping plugin, you can add an equally functional shipping method with additional elements that will enhance the User Experience of your WooCommerce store.
This way, your click and collect method instead of looking like this:
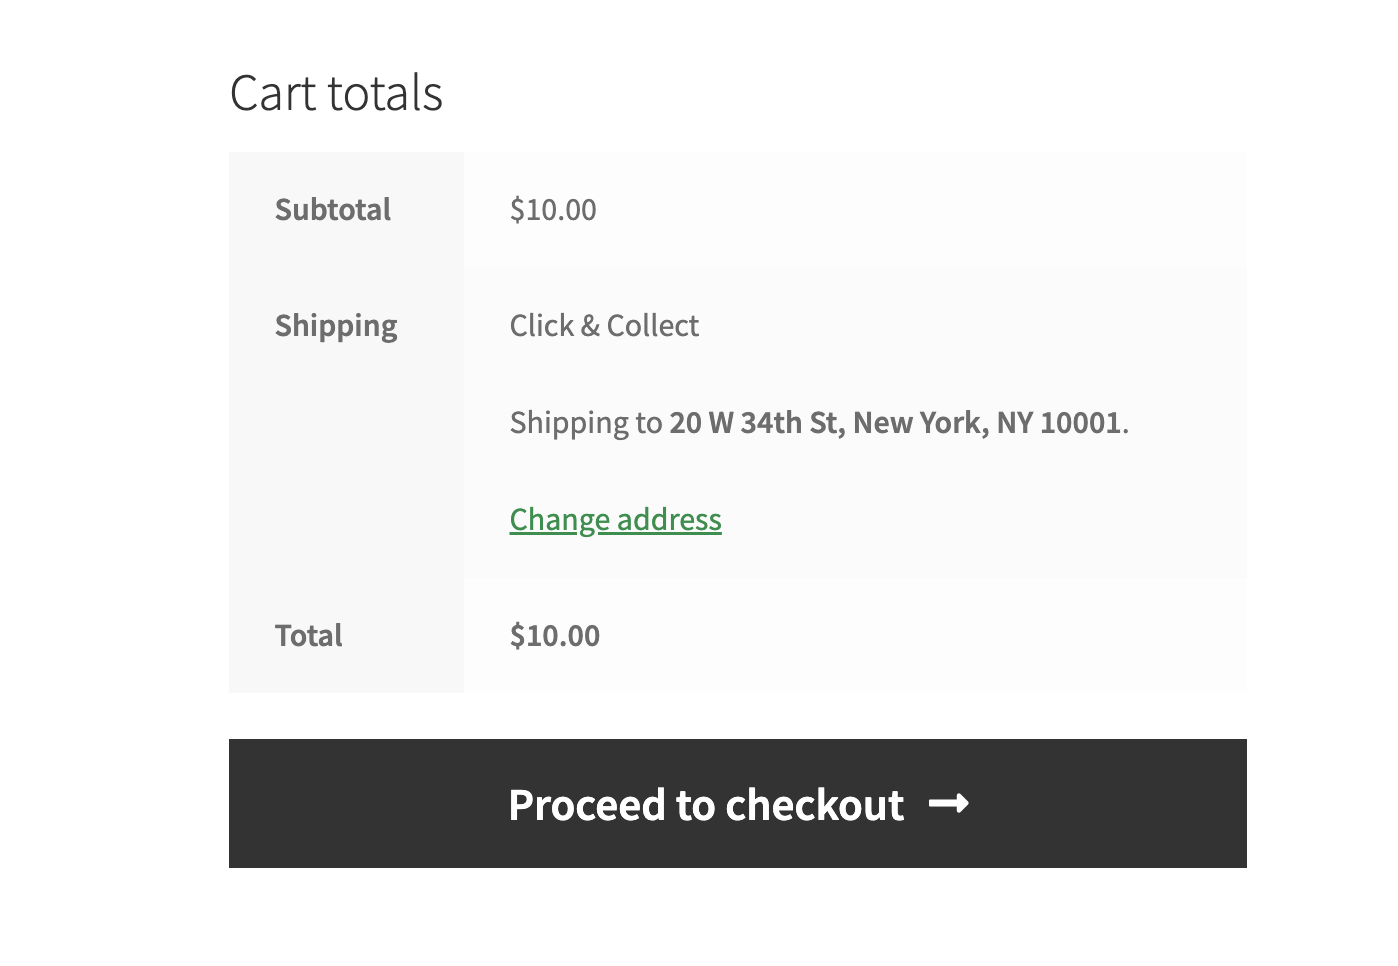
It can be much more User-Friendly:
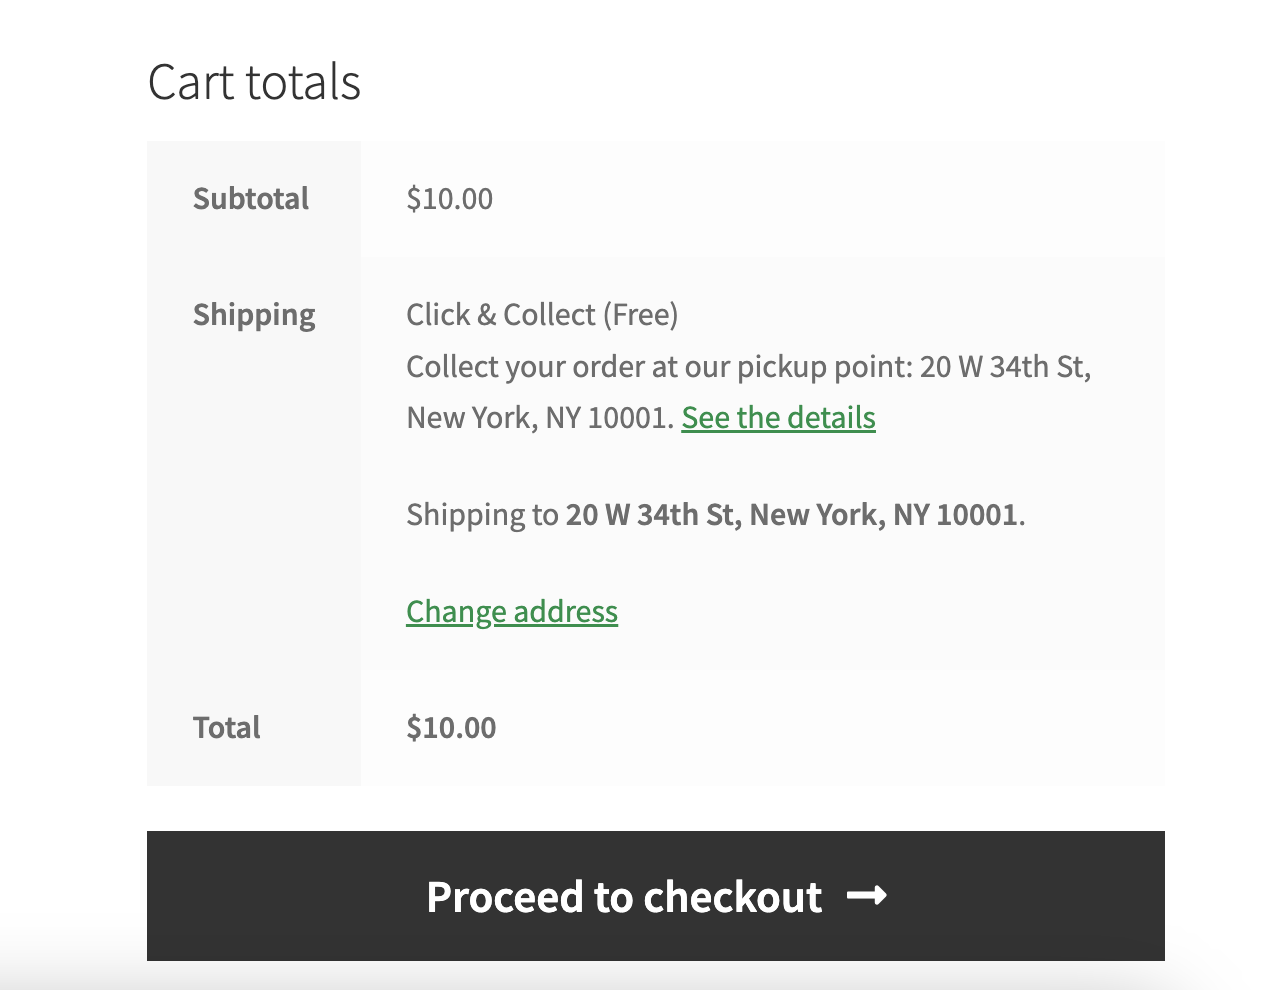
The ability to add a description to the shipping method will allow you to provide customers with basic information about the shipping method. The support of links in the description will allow you to redirect the customer to a dedicated Landing Page, where you will explain the advantages of the shipping method with all the details. In this way, you will dispel the doubts of the potential customer and reduce the chances of abandoning the shopping cart on the last but very important element – shipping.
The best Table Rate Shipping for WooCommerce. Period. Create shipping rules based on weight, order totals, or item count.
Go to WordPress.org or Download for freeFlexible Shipping is a very popular table rate shipping plugin with more than 235,670 stores using it on a daily basis. In the free version, you can set shipping rates based on price and weight. It also gives you an option to adjust free shipping for your customers.
Now it’s time to configure your Click and Collect shipping option in your WooCommerce store.
With the Flexible Shipping PRO plugin installed and activated, you can cut to step one, adding a shipping method in WooCommerce. Go to WooCommerce → Settings → Shipping. There, edit the shipping zone in which you want to free shipping bar. Next, click on Add shipping method button.
Then, select the type of your shipping method. Pick the Flexible Shipping.
Having the added, it’s time to .
Having the Flexible Shipping method, you can proceed to its configuration.
First, go to the main method settings and complete the Method Title and Description fields.
In the Method Title, add your shipping method’s name.
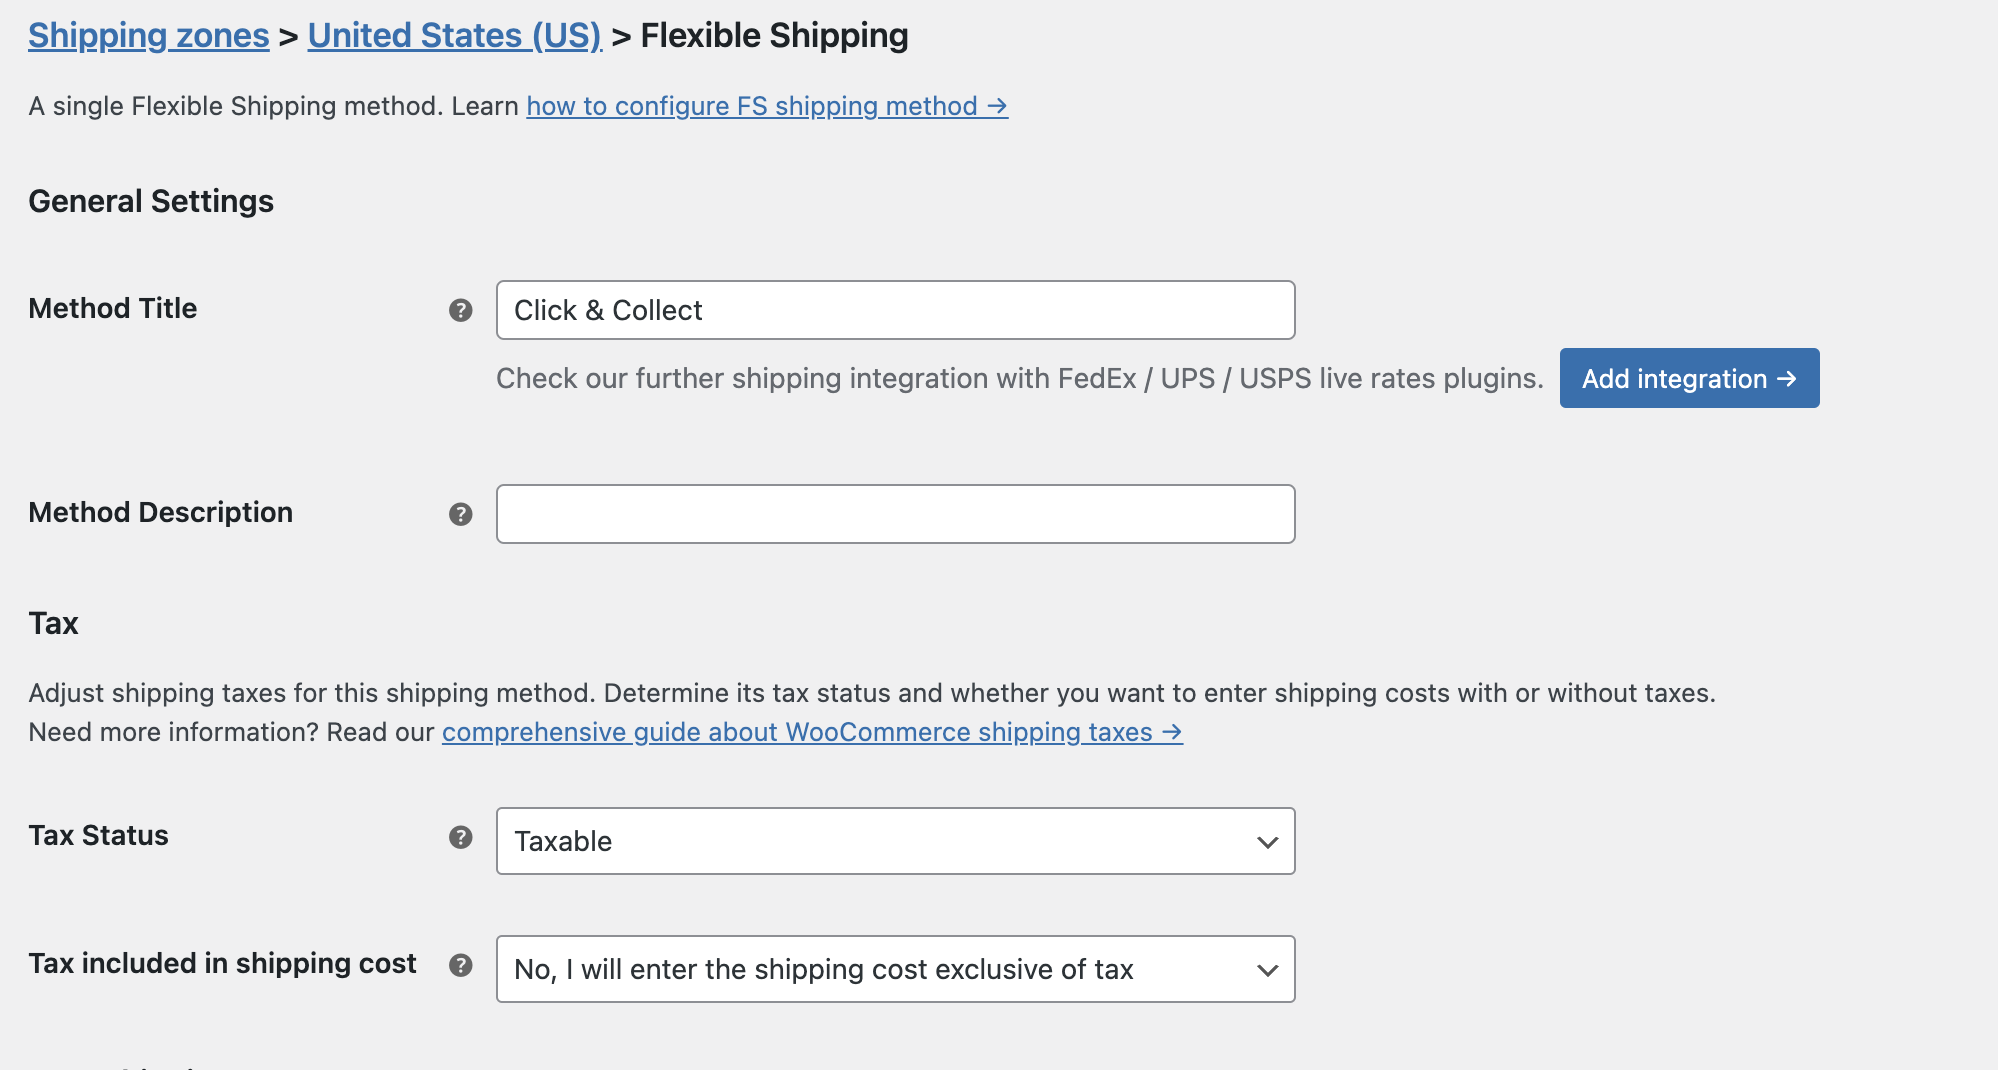
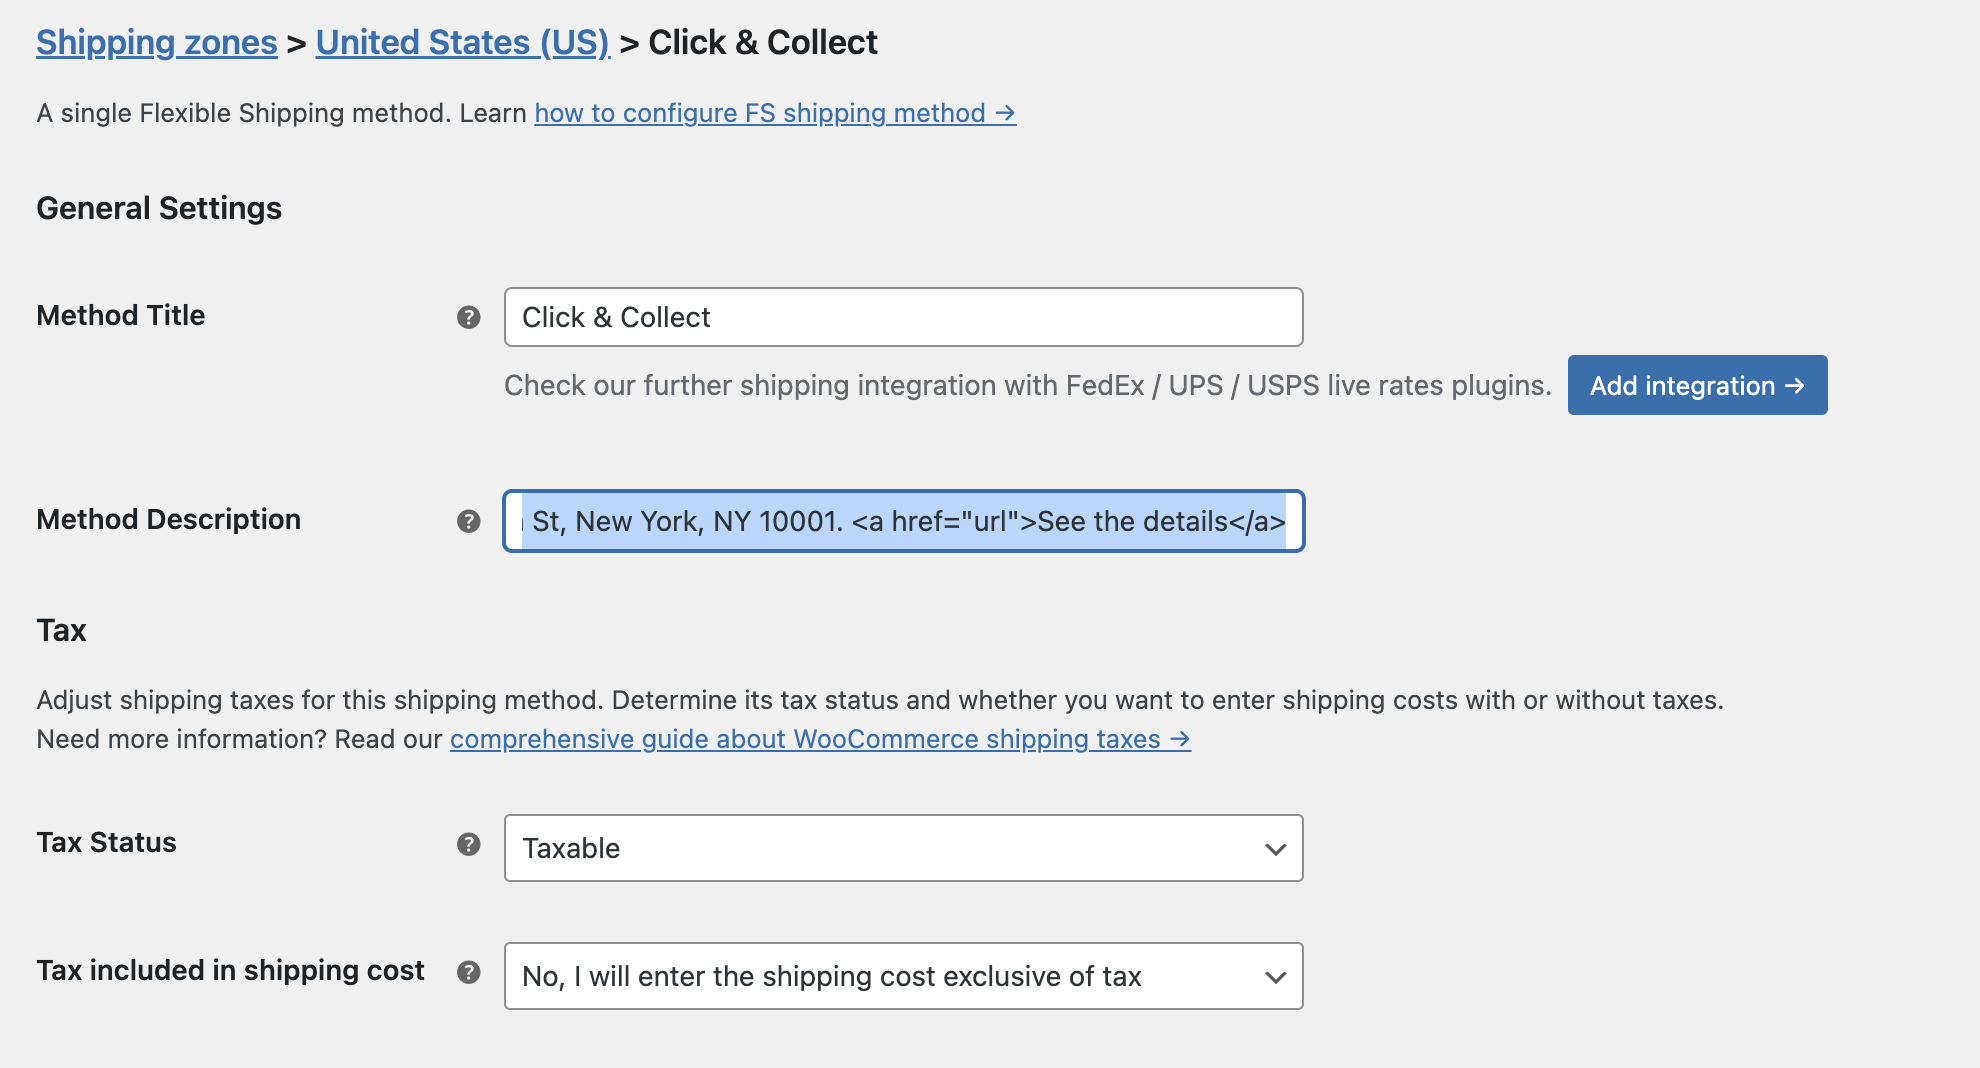
In the Method Description add your description with basic information about the shipping method. The description field supports the HTML tags, so you can add the detailed price list overview link using the <a></a> tags.
After this configuration, go to Shipping Cost Calculation Rules and set the cost for Click and Collect option. In most cases, this option is free, but you can select the shipping cost here based on the weight or cost of the order. Free Click and Collect should look like this:
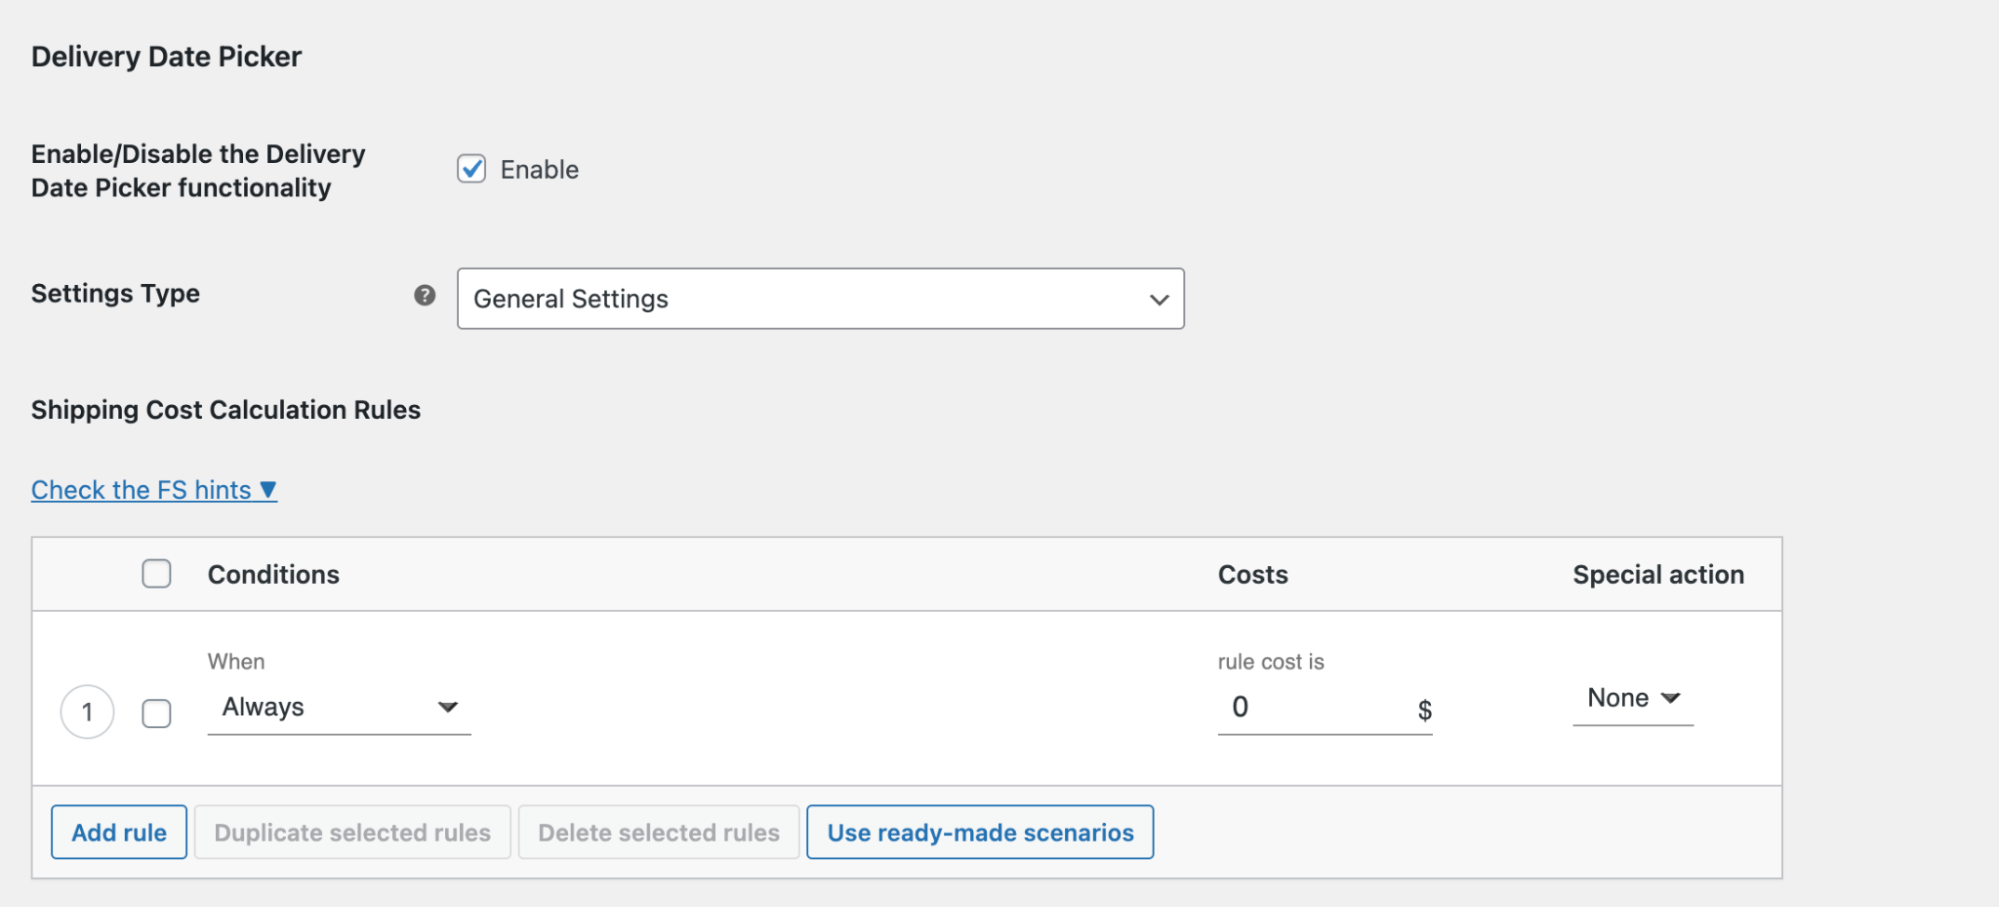
Once the configuration is complete, be sure to save your changes.
If you want to further enhance the User Experience of your Click and Collect method, it’s a good idea to add an option to select the order pickup date. You can achieve this very easily using the Flexible Shipping plugin add-on, the WooCommerce Delivery Date Picker.
Let your customers pick a convenient delivery date for the ordered products and make the shipping cost dependent on the chosen date.
View Details or Add to cartFirst, make sure the Delivery Date Picker plugin is installed and active.
Then go to edit your Click and Collect method that you configured earlier and Enable the Delivery Date Picker functionality.
In this way, you will add the option to select a pickup date for this particular shipping method.
Save the changes and proceed to the plugin configuration. To do so, use the link in the Shipping Settings.
Configuration of the plugin is very simple.
WooCommerce Delivery Date Picker allows you to adjust the available days in the calendar. You can determine how many days are required to prepare an order for shipment in the Lead Time field. The calendar will have the nearest available delivery date delayed by the amount of days entered here. This means that if the Lead Time is set to 2 and the customer places an order on Monday, the first available delivery date to choose will be Wednesday.
If you have specific hours in your store when you ship orders, you can also use Cutoff Time. In the Cutoff Time field, you can select the hour after which the date of preparing the shipment will be set for the next day. This setting connects to Lead Time, so if the Cutoff Time is set to 1 PM, the Lead Time as 1 and the customer places an order today at 2 PM, the nearest available to choose delivery date will be postponed to day after tomorrow.
Another very useful setting is the ability to select the days of the week which should be available to pick by the customer when choosing a delivery date. That means, that you can set only certain days as available for shipping. The most popular configuration is however to set weekends as non delivery days. You can do it by unmarking them in the Available delivery days field.
The last option in the WooCommerce Delivery Date plugin’s settings is the Delivery days’ time frame that allows you to limit the amount of available delivery days your customer can pick from the calendar. This way you won’t get orders with delivery date set too far into the future.
After setting up Flexible Shipping and Delivery Date Picker, your Click and Collect method is not only added to your WooCommerce store, but also optimized to best enhance the User Experience of your store.
Enabling click and collect in your WooCommerce store can significantly enhance the shopping experience for your customers while also increasing your store’s efficiency and profitability. By following the steps outlined in this guide you can successfully implement this feature with high User Experience.
So, take the leap and offer click and collect today to stay ahead of the competition and meet the evolving needs of your customers.

Dominican Liturgical Center is based in Cracow and focused on promoting the learning of traditional music and singing. They also run a smaller publishing house and a webshop that is focused on selling mainly books and CDs.

Established in 2017. SGL is focused on selling gas bottles and non-gas products. Formerly, the company offered payment by card on delivery. For now, the SGL started online payments and they launched a webstore.