In this article, I will show you how to set up . You’ll learn how to set for each and how to hide methods for certain user groups. I will use the PRO plugin to carry out this tutorial.
The first step to setting the based on is to understand and learn about the roles available in WooCommerce. WordPress has few user roles available by default, and WooCommerce cause two additional roles. Let’s get through all of them:
Administrator: The highest level of user with access to every option in both WordPress and WooCommerce. This should be limited and available only to the owners of a particular website or . If you have a multisite, you can also add Super Admin that can manage settings for all sites on the multisite.
Editor: In most cases, it is someone creating and managing content on the site. Editors can add, edit, and delete any posts and media. This user also has the opportunity to manage comments – moderate, edit or even delete them.
Author: A user with slightly fewer capabilities than editor. It can create all kinds of content and publish it. However, he cannot change or delete other authors’ posts, or manage comments.
Contributor: The contributor can create content, but cannot publish it himself. This allows an Editor or Administrator to review and have final control over any content created by a Contributor.
Subscriber: This has the least number of permissions – users can only read content on your site and comment your posts. These are all users who have registered on your store. They can also edit their account with check all the orders they made.
: As the name suggests, such a user has the ability to manage a . It has access to all WooCommerce settings and reports. So, he can edit products and change product prices.
As is usual with WordPress, you can freely edit the capabilities of individual roles, but also add new custom user roles.
Of course, it all depends on the type of store you run, but you might consider offering different methods to different customers based on their . I’ll show some examples where such a solution is even a necessity.
Logged-in users: The most popular eCommerce solution involves logged-in users. This usually relies on non-logged-in users getting a worse deal, including higher rates. They may also have fewer choices of available methods like .
Member Only Sites: Many stores offer various types of loyalty programs or customer categorization. In this way, customers can become members of internal clubs, which entails additional benefits in the store. Typically, members get access to discounted or even free options.
-based can be a great way to reward regular customers, or convince customers to become members. In either case, you gain as an online store owner. So, it’s worth having such a tool on hand.
When it comes to in WooCommerce and setting the based on the user’s , I recommend the PRO plugin. It’s one of the best on the market. It allows you to set by numerous conditions like weight, size, or . Not only that, but it also allows you to based on that conditions.
of is one of the new features of that plugin, and I’ll show you how to configure it step-by-step. This way, you can easily based on .
The best Table Rate Shipping for WooCommerce. Period. Create shipping rules based on weight, order totals or item count.
View Details or Add to cartFirst, install and activate the PRO plugin. After that, go to WooCommerce → Settings → . Then, click on the which to you want to add the feature. I have the ‘UK’ :
Next, click the Add shipping method button:
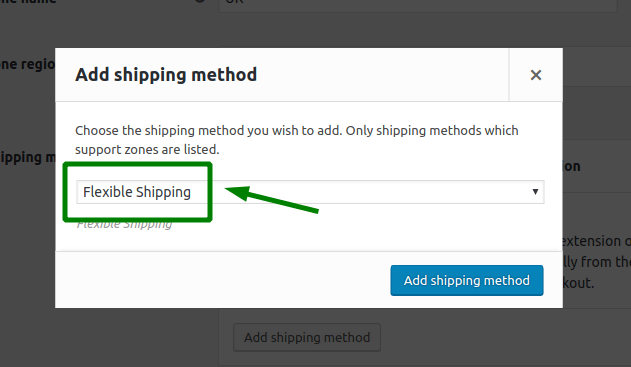
Choose the and confirm with Add button again.

Having the added, it’s time to .
In General Settings section, you can set Title and Description. Below you can also change the tax settings for and .
The most important part of the setup, however, is the rules table. The is basically a solution, so all the and calculations happens in the table.
To set based on , choose from the available conditions:
Then, you can choose from the user roles available in your WordPress. You can add more than one here. As you can see, there is also a special option – Guest, which will be applied to all not logged in users visiting your store.
Finally, determine the for chosen , and that’s basically it.
Let me show you this with an example. Let’s assume that for non-logged-in users, the is $20. Logged-in users get a 50% discount, so they only pay $10. You can set the whole thing up using two rules:
In a similar way, you can add other methods or add different costs for different user groups.
An additional option that can be useful for your is hiding methods for specific user groups. I’ll show you how to do it with the example of non-logged-in users, but you can do it the same way for any .
In my example, the regular is $10. It’s defined by the first rule that is basically a . The second rule hides that for all non-logged-in users. The special action Hide added to this rule is responsible for this.
I hope my guide on how to set up will be helpful. Good luck!