- Home
- WooCommerce
- What plugin are you looking for?
- Shopify
- About us
- Blog
- Docs
- Contact us
- What can we help you with?

Subscribe to our newsletter

In Shopify, shipping zones let you decide which rates are shown to which customers based on geography. This allows you tighter control over the shipping costs, ensuring that neither you nor your customers have to incur unexpected charges.
In this guide, you will learn what shipping zones are, how to set them up step‑by‑step, and how to build powerful, rule‑based rates per zone with the Octolize Shipping Rates Rules & Zones.
You will also see what Carrier‑Calculated Shipping (CCS) is, when it is required, and how to avoid common pitfalls when setting up shipping zones on Shopify.
A shipping zone is a geographic area where a specific set of shipping methods and prices applies. They can be as broad as entire countries or as targeted as specific regions in the default Shopify settings. It’s also possible to narrow them down to cities or even postal codes when using custom zones in apps.
Why shipping zones matter:
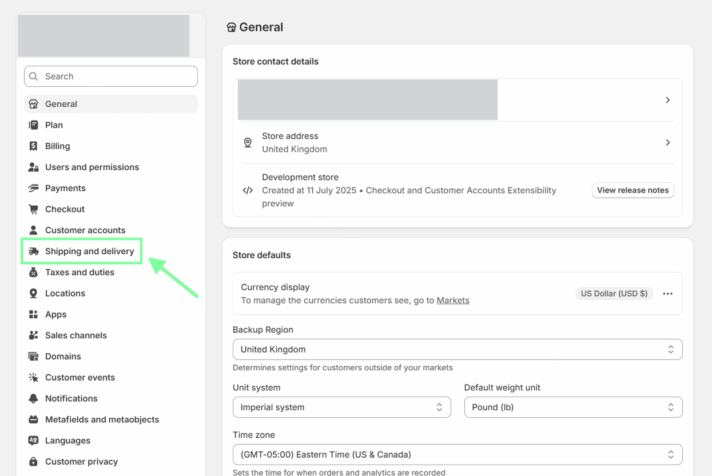
1. Open Shopify admin and go to Settings → Shipping and delivery
2. In the Shipping section, choose the profile you want to configure (or create a new one)
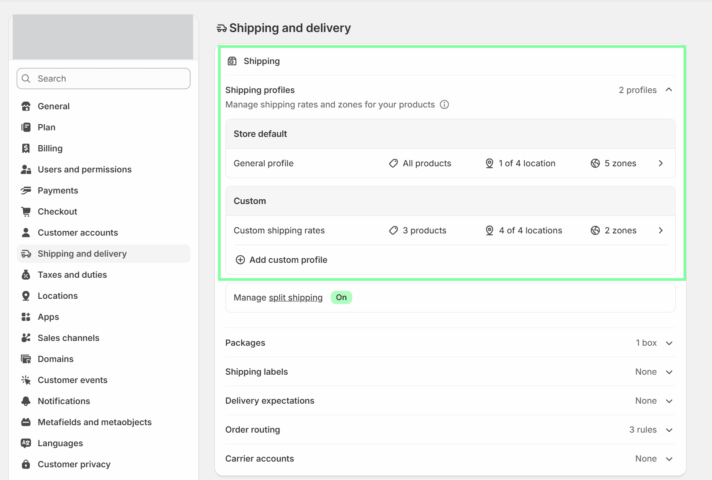
3. Scroll to Shipping zones and click “Add zone”
4. Name your zone and select the countries/regions it should include
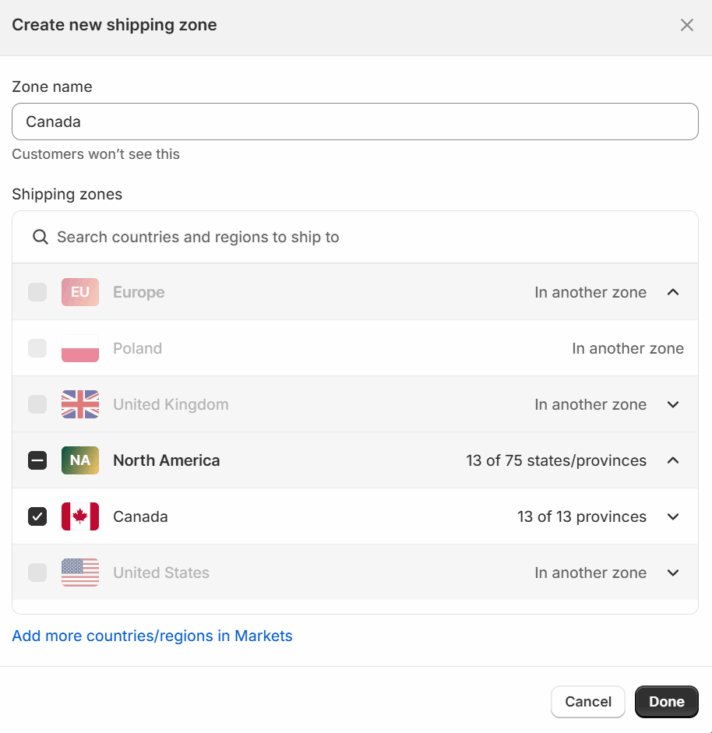
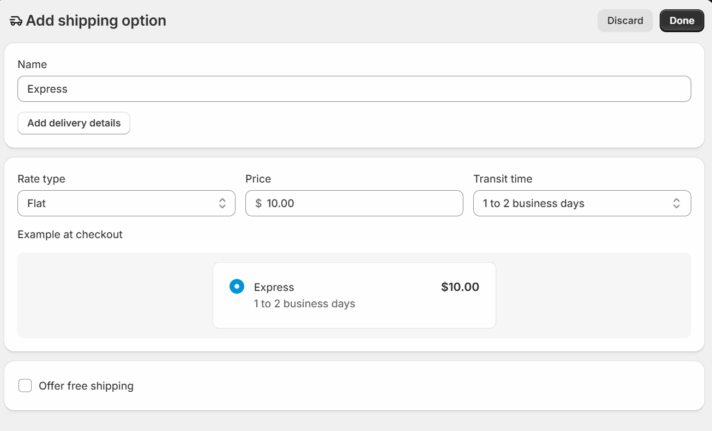
5. Click Done, then Add shipping option to add your shipping cost (flat, price‑based, or weight‑based)
6. Don’t forget to save!
Limitations to be aware of:
You can achieve both with the Octolize Shipping Rates Rules & Zones app.
Shopify’s built‑in zones are a good start. They are a helpful stepping stone towards tailoring your shipping rates for individual customer groups.
However, you may find that you need more precise rules for full control over the shipping costs. For example, as your store grows, you might want to limit a zone to city names or postcode patterns, or apply rules per SKU/tag/time/day/item quantity.
If any of those requirements sound familiar, then the Octolize Shipping Rates Rules & Zones app is your go-to solution.
The app extends the built-in Shopify functionalities by:
CCS (Carrier-Calculated Shipping) is Shopify’s built-in feature that allows you to display rates from sources other than Shopify (for example, a third-party app) directly at checkout.
The Octolize Shipping Rates Rules & Zones app displays its own methods in checkout using Shopify’s Carrier‑Calculated Shipping. CCS is:
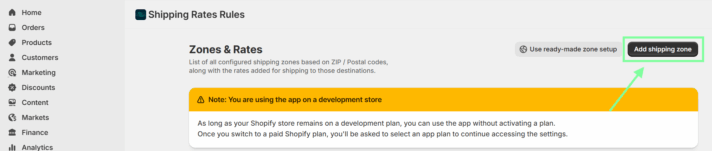
After installing the app, go to the OCT Shipping Rates Rules & Zones app and click “Add shipping zone”.
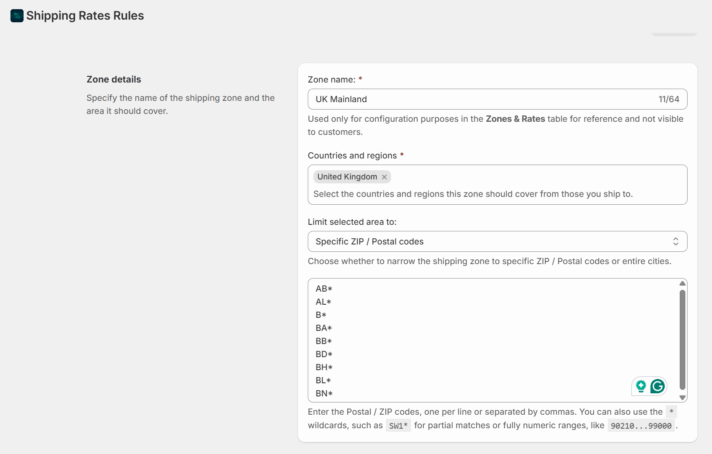
Example: UK Mainland by postal codes
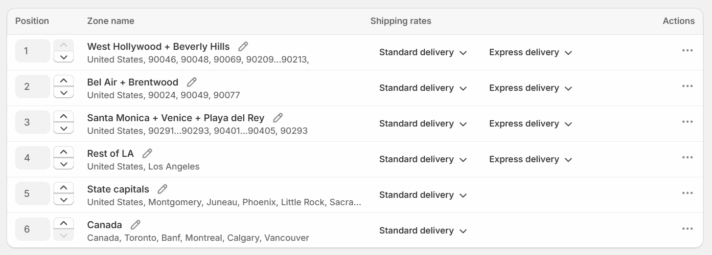
Zone list view:
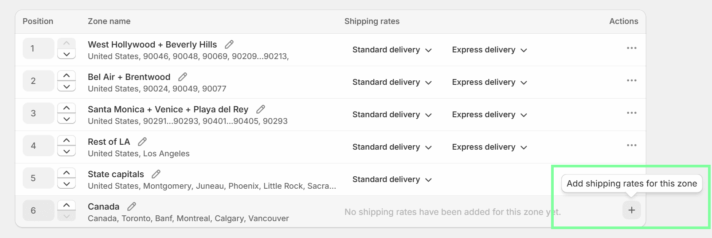
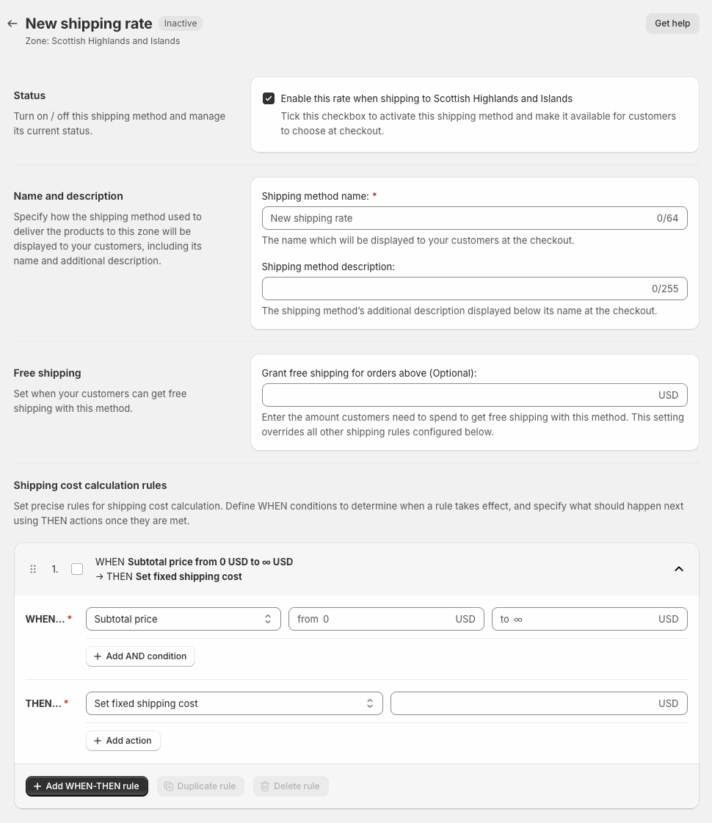
With your zone created, click + (Add shipping rates) in the Actions column.
You will see:
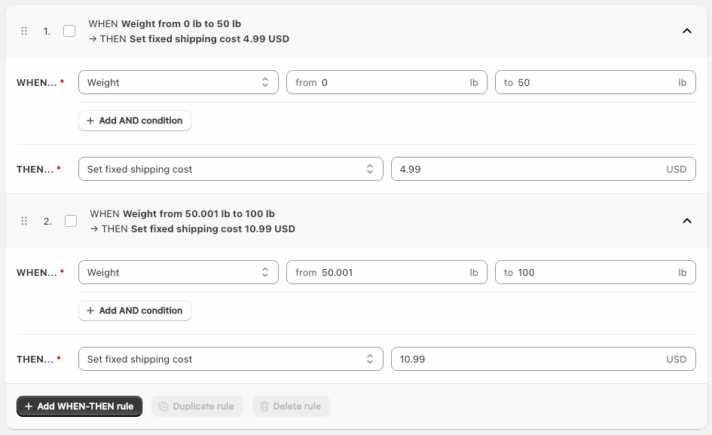
Example rule ideas:
You can reorder, duplicate, or delete rules as needed:
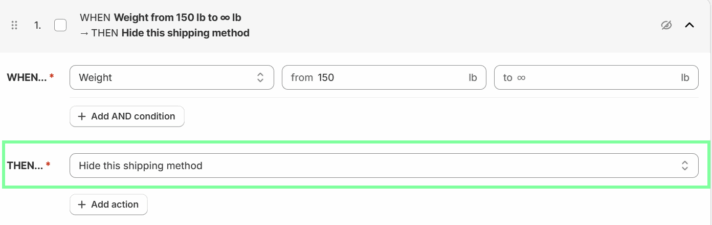
Hiding a method conditionally (e.g., above weight limit):
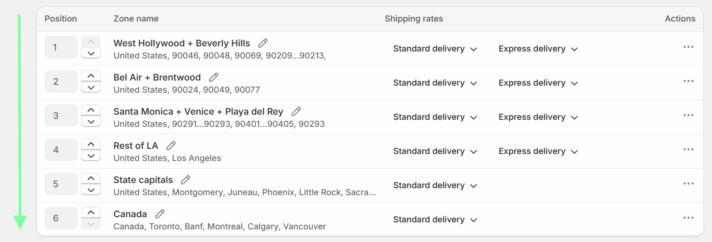
At checkout, the app evaluates the customer’s destination against your custom zones from top to bottom and applies the first match:
If a zone has no active rates, customers in that area will see Shopify’s standard “Shipping not available” notice – handy when you want to exclude locations:

1. Not seeing Octolize rates at checkout?
Ensure CCS/Carrier Service API is enabled for your plan:
2. No match found
3. Overlapping ranges
4. Uncovered gaps in the ranges
Customers convert better when they know the shipping costs before checkout. Use Octolize Shipping Rates Calculator to display the same methods and prices right on product or cart pages (supports Shopify and 3rd‑party app methods).
There are a few possible reasons why you can’t create a new shipping zone on Shopify:
An example of a shipping zone can be a country (Italy, Australia), state (Arizona), or a specific area (Europe, UK mainland) in native Shopify settings. With an app such as Shopify Rates Rules & Zones, you can further narrow down the shipping zones to cities or postcodes.
How you configure shipping zones depends on your pricing deal with carriers. Delivery to certain areas will be more expensive than to others. Therefore, your shipping zones have to reflect that pricing so that you don’t lose money, and your customers don’t overpay.
In order to edit a shipping zone on Shopify, go to Settings → Shipping and delivery → choose the right shipping profile → scroll down to Shipping zones → click on the 3 dots in the top right corner → click “Edit zone.
To set up Shopify shipping zones by city or postal code, we recommend using the Octolize Shipping Rates Rules & Zones app.

Lucyna Polok is an SEO and content specialist passionate about crafting effective strategies and creating engaging content. She has worked across a variety of industries, both in-house and as a freelancer. A strong believer in the power of storytelling, she believes that good content not only delivers business results, but also resonates with customers through an emotional connection with a brand.
At Octolize, she is responsible for aligning the content strategy with business goals and increasing visibility, trust, and authority of the brand via data-based SEO efforts. On the blog, she focuses mostly on topics for those only beginning their adventure with e-commerce, explaining scenarios and terms in an approachable way.


The Neurodivergence Project uses the ocean and the natural world to empower neurodivergent people to build confidence, lasting friendships and help them achieve their goals.

Dominican Liturgical Center is based in Cracow and focused on promoting the learning of traditional music and singing. They also run a smaller publishing house and a webshop that is focused on selling mainly books and CDs.

Established in 2017. SGL is focused on selling gas bottles and non-gas products. Formerly, the company offered payment by card on delivery. For now, the SGL started online payments and they launched a webstore.