- Home
- WooCommerce
- What plugin are you looking for?
- Shopify
- What Do I Need?
- About us
- Blog
- Docs
- Contact us
- What can we help you with?

When you have already installed your WordPress, your next step will be installing plugins. What is a plugin on a website? It’s like an app on your phone. You can download or purchase it to extend the functionality of your WordPress website. Whether you need to add a contact form, open a store, improve SEO, or increase site speed, that can be done with plugins. In this article, I will describe in detail 3 methods on how to install WordPress plugin. When you finish reading, you will have the necessary knowledge to install and activate both types of plugins – free and paid versions.
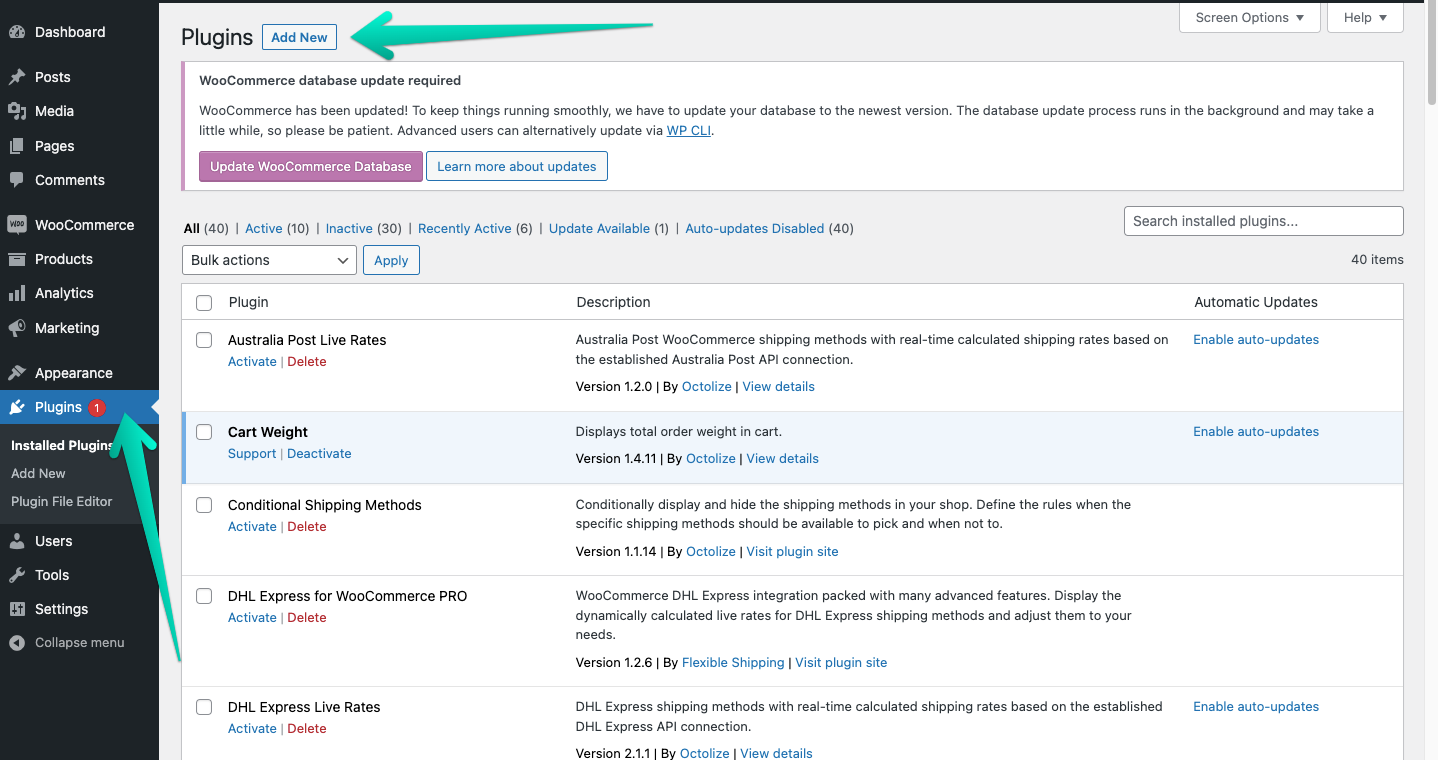
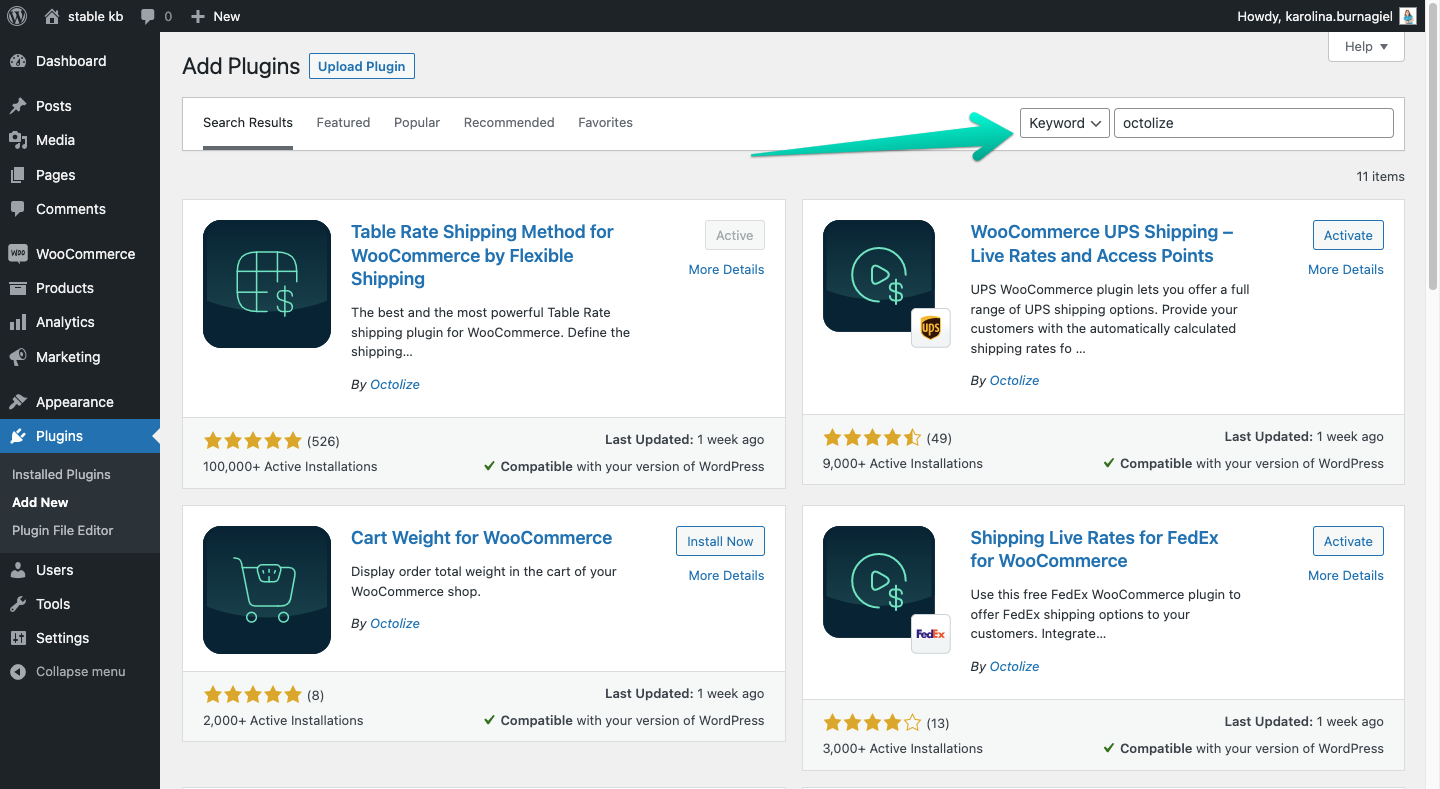
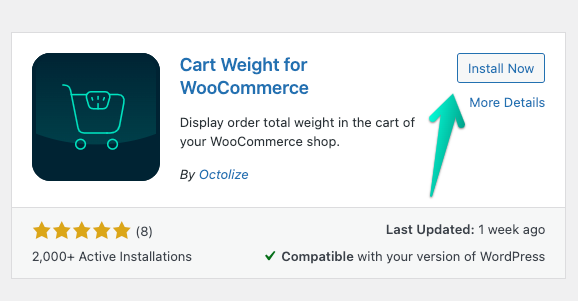
In order to add free plugins that are available in WordPress Repository you need to:
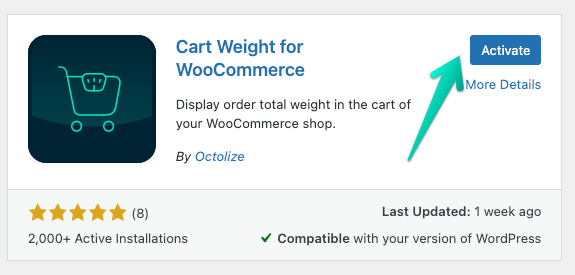
It’s done! You have successfully installed WordPress plugin.
If you prefer, we also have a video tutorial that guides you step-by-step through the installation and activation process. Additionally, it features a dedicated troubleshooting section to help resolve any issues
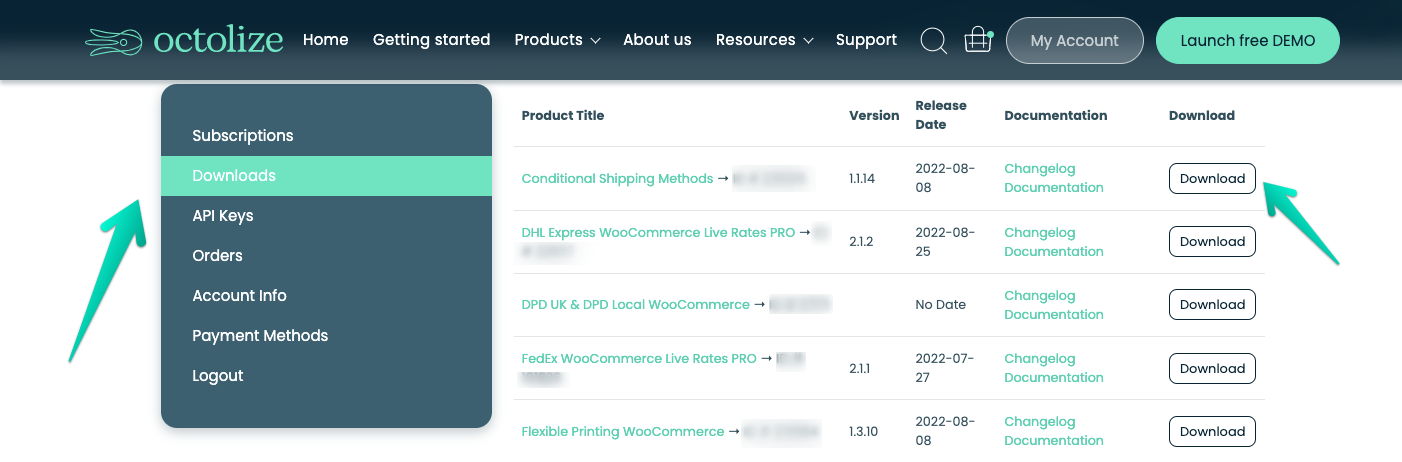
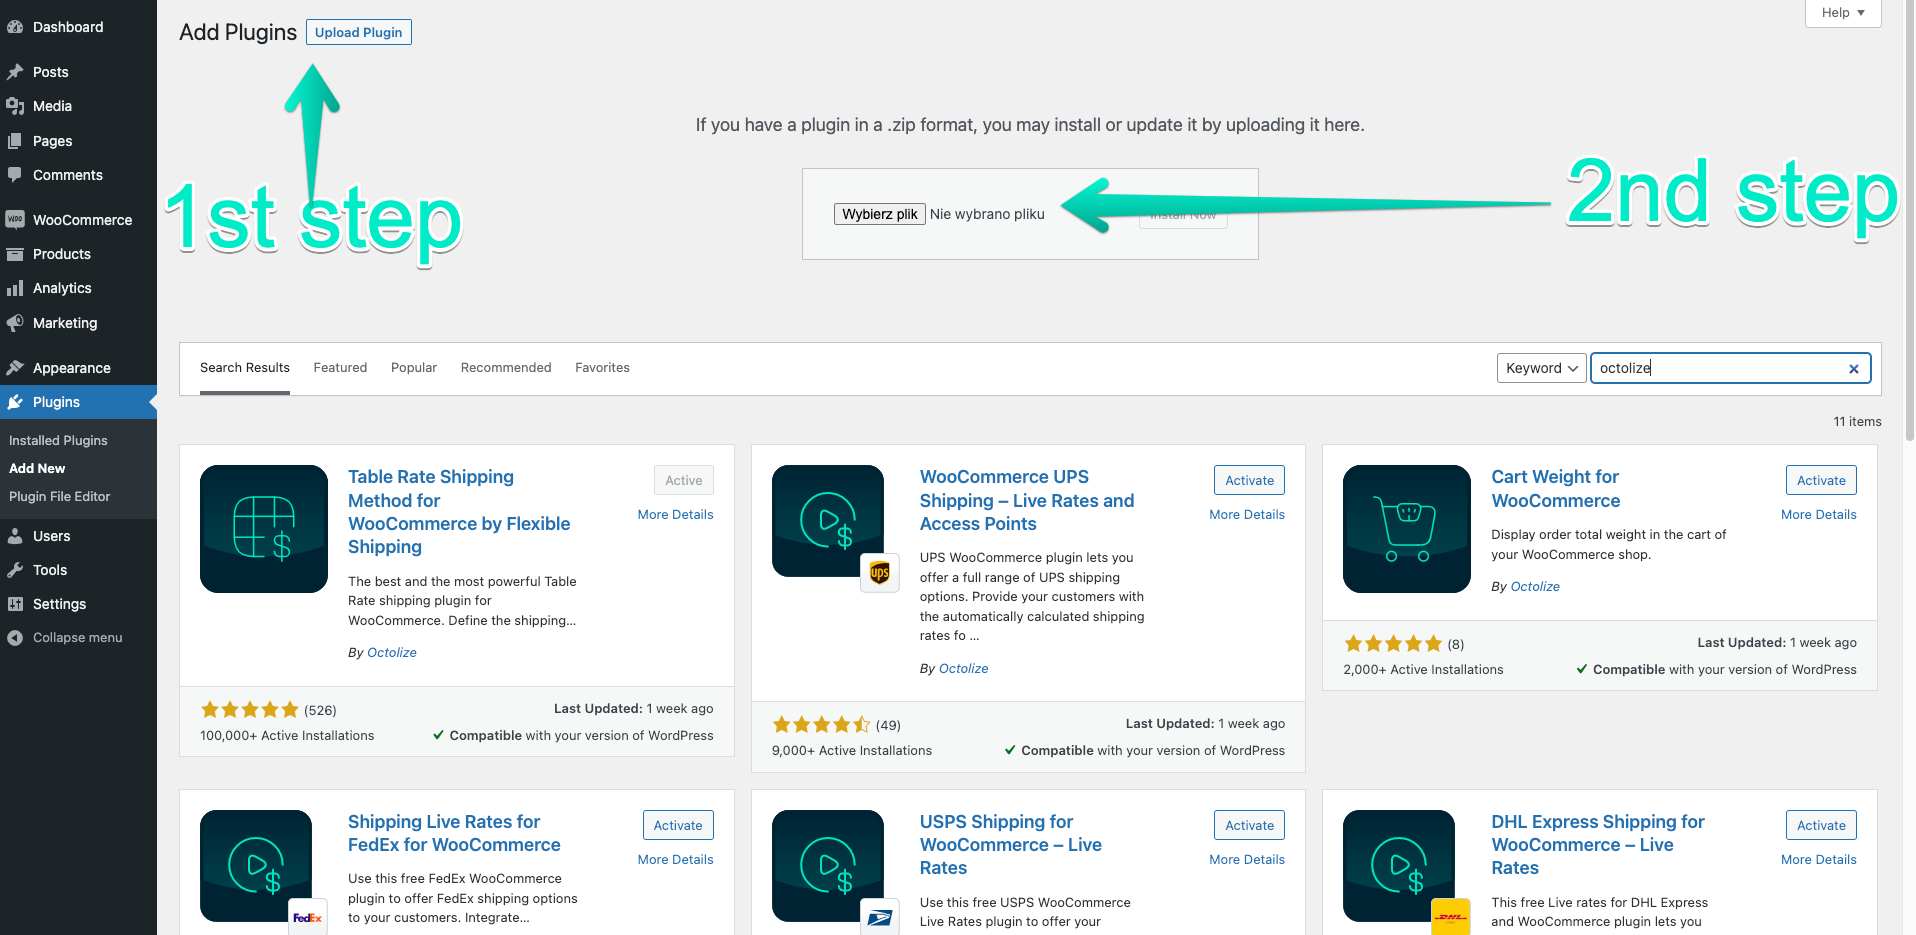
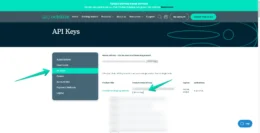
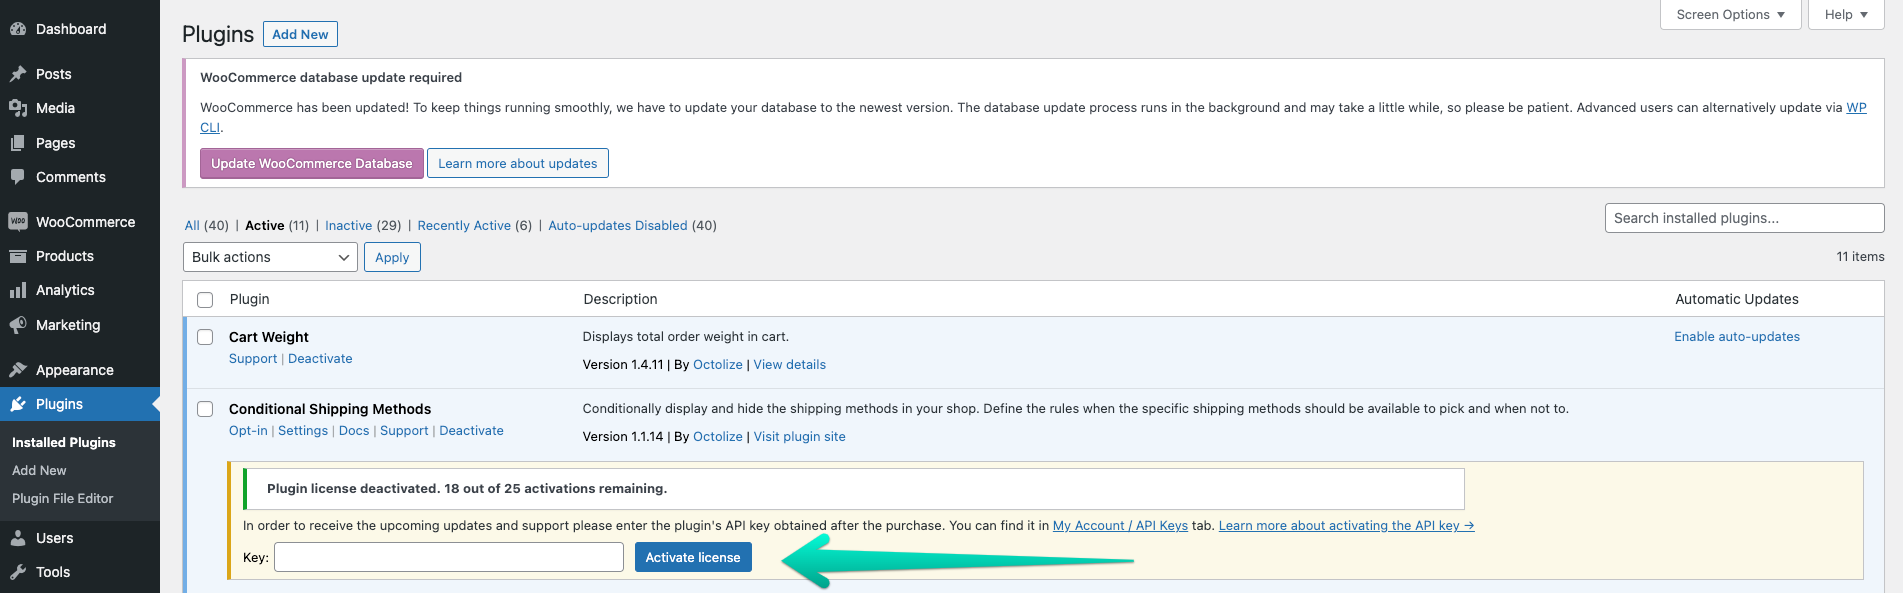
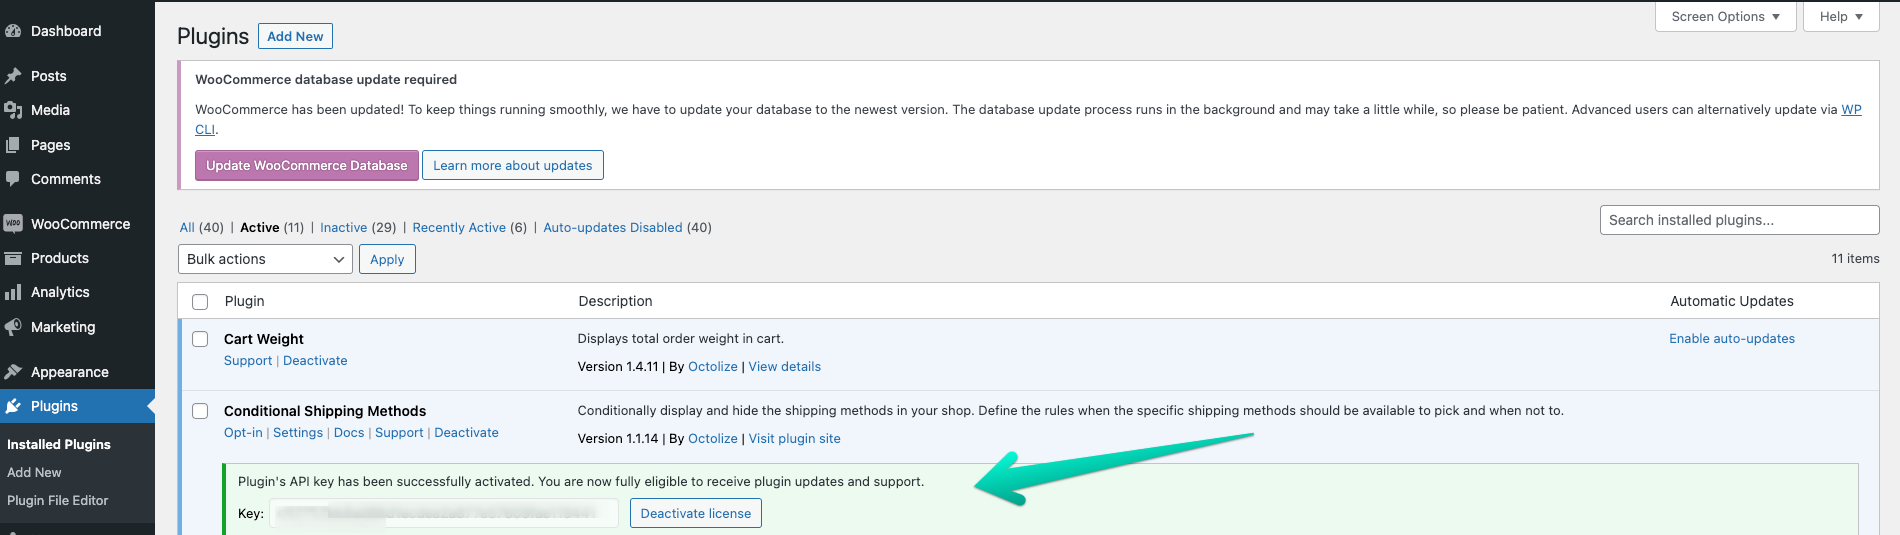
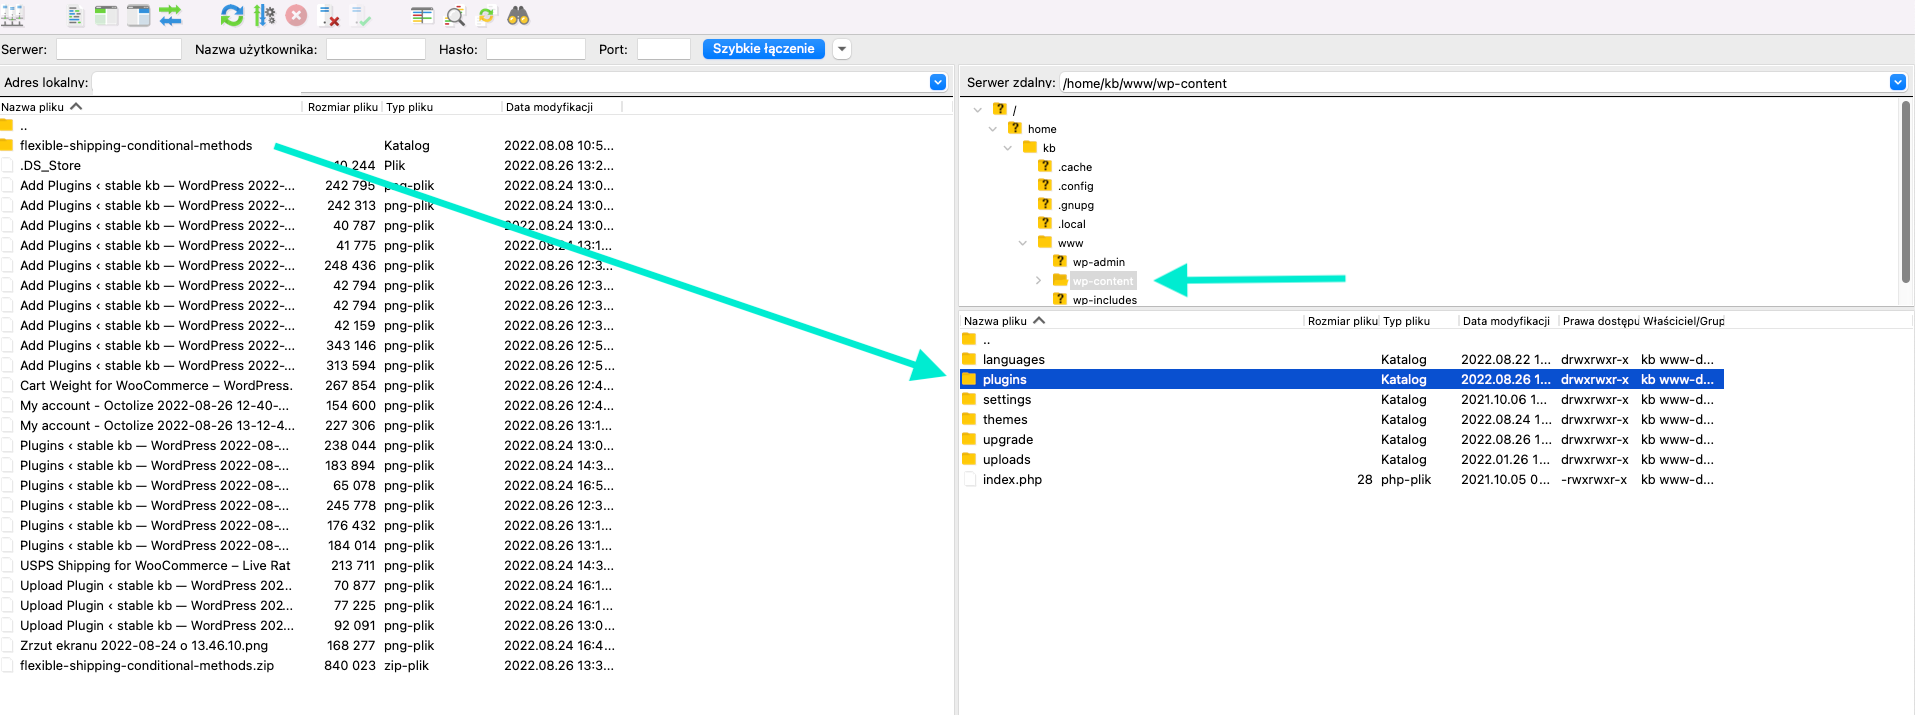
To install the plugin from .zip, you need to download it. In case of the free versions of plugins, you can download them from their site in WordPress Repository. If you have one of the Octolize plugins for shipment facilitation, you need to log in to My account (you will receive login credentials to your e-mail address after the purchase) and go to the tab “Downloads”. There you will find a list of plugins that you own in our store. On the right side is the button “Download”. Click on it, and a package with the plugin will be downloaded to your computer.

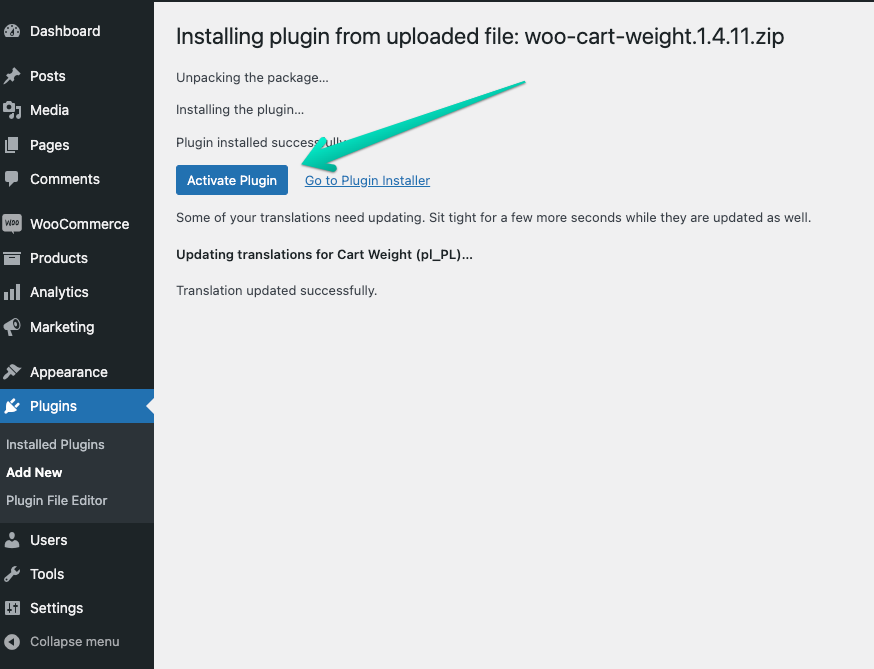
That was the last step of the plugin activation in case of free plugins.
While installing plugins is usually a straightforward process, you may encounter some challenges along the way. Among the most common ones are:
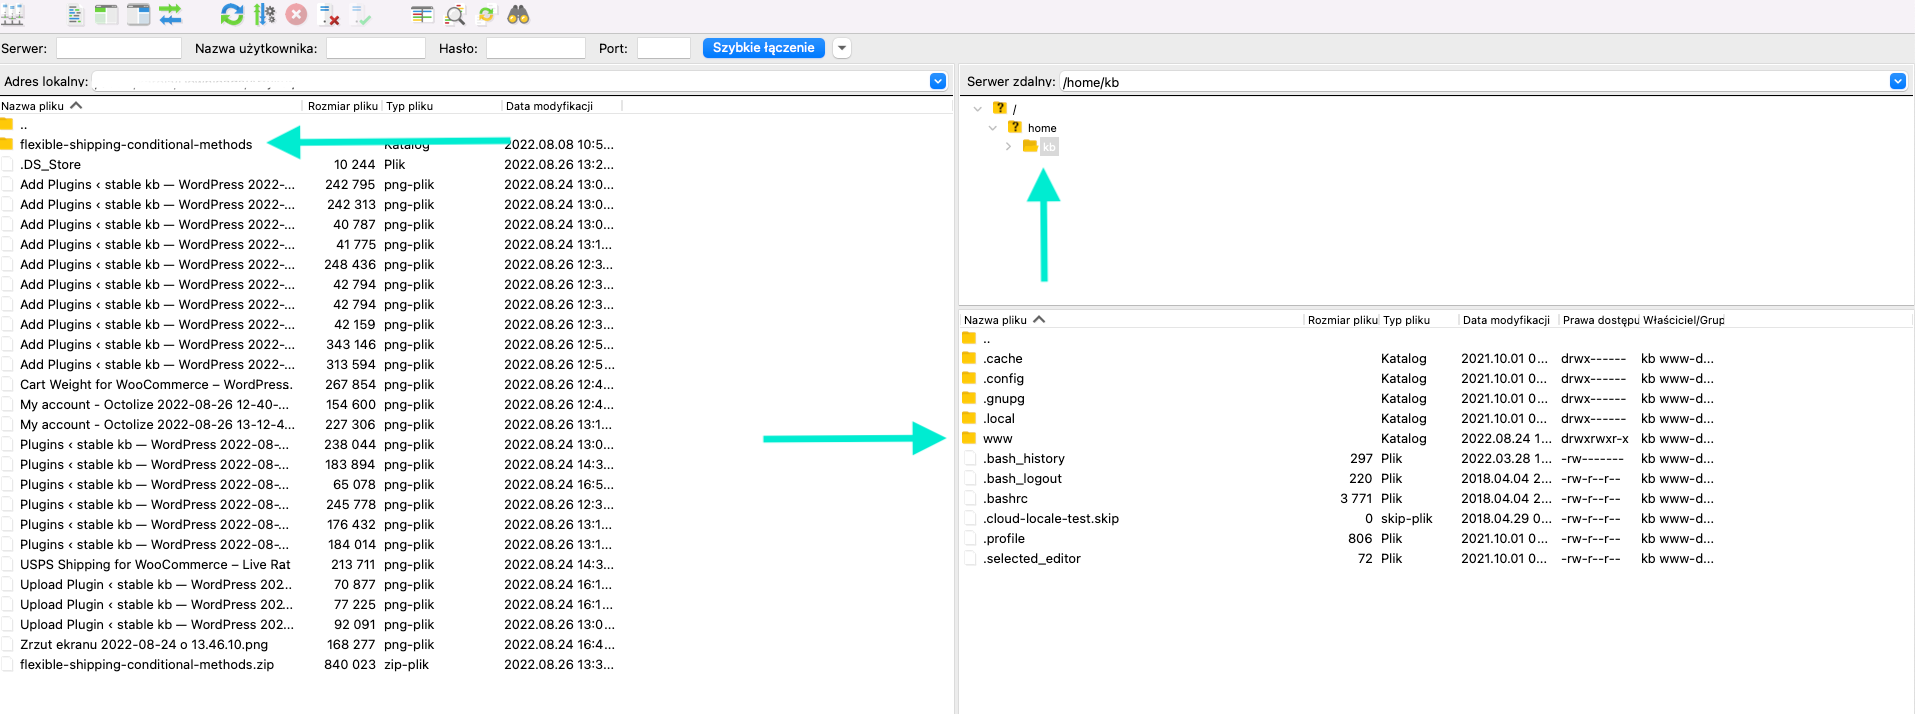
These problems are usually related to installations via the WordPress dashboard. If you encounter these problems, try installing the plugin manually using FTP.
We also have a video on our YouTube channel about common issues during plugin installation. Check it out!
In conclusion, this article provides a beginner’s guide to installing WordPress plugins, which are tools that enhance the functionality of a WordPress website. It outlines three methods for plugin installation: Installing from the WordPress Repository, Installing from a .zip File, and Manual Installation via SFTP. Furthermore, it also addresses common installation issues, such as permission errors, PHP memory limits, and directory creation problems, and encourages using FTP for troubleshooting.
Our team usually replies within a few hours. Ask away — we'll help you find the right solution for your store.

Content Writer at Octolize
Bartosz Gajewski is a content and marketing specialist with a solid background in SEO, WordPress content strategy, and technical documentation for digital products. With years of hands-on experience in both in-house and freelance roles, he supports tech companies – especially in the SaaS and e-commerce space – by creating content that informs, engages, and drives results.
His approach blends storytelling with data-driven SEO, and he’s been involved in projects ranging from rebranding and product marketing to growth experiments and copywriting for complex software tools. On the blog, he shares actionable insights from his work across marketing teams, product documentation, and online store optimization.


Learn how Octolize solutions helped WooCommerce store based in the United Kingdom set up shipping scenarios.
Learn how Octolize helped Shopify store based in the USA set up distance based rates with a usage of Octolize Distance Based Rates.

Learn how Octolize helped NGO set up their WooCommerce rates with a usage of Flexible Shipping PRO.