- Home
- WooCommerce
- What plugin are you looking for?
- Shopify
- What Do I Need?
- About us
- Blog
- Docs
- Contact us
- What can we help you with?

3In this article, we will guide you through the process of setting up box packing in WooCommerce. You’ll learn how to create a box packaging profile, configure box sizes, and set up shipping rates based on box packing. By the end of this article, you will have all the information needed to set up shipping rates based on box packing and optimize your shipping process.
Shipping costs in WooCommerce can be determined based on many factors, including weight, number of products, and product size. Regardless of the calculation method, all products eventually go into packages that are priced by courier companies. Therefore, one of the best ways to charge shipping in WooCommerce is by box-based calculation.
You can set WooCommerce shipping rates based on boxes in four steps:
I will go through all the steps indicated to describe each of them in as much detail as possible.
Parcel-based shipping cost calculation is not one of WooCommerce’s default features. It offers only a flat rate shipping method, which will not be sufficient in this case. As usual, it is recommended to use a reliable plugin that will offer exactly what you need. In this case, I recommend the Flexible Shipping Box Packing for WooCommerce plugin. It’s a new Add-on to the most popular WooCommerce table rate shipping plugin – Flexible Shipping.
Fit products into your shipping boxes the most optimal way and assign shipping rates to box types.
View DetailsorAdd to cartFlexible Shipping Box Packing for WooCommerce plugin allows you to use the advanced box packing algorithm to fit the ordered products into your shipping boxes. Additionally, you can use it to configure the shipping cost based on the type and number of the used shipping boxes.
Please have in mind that it’s not a stand-alone plugin. To work properly, it requires the free version of Flexible Shipping plugin to be installed and active. It also integrates flawlessly with the Flexible Shipping PRO to configure more advanced shipping scenarios.
Having the plugins installed and activated, it’s time to add the first shipping box in your WooCommerce store. To do so, go to WooCommerce shipping settings (WooCommerce → Settings → Shipping), and then click on Flexible Shipping Box Packing.
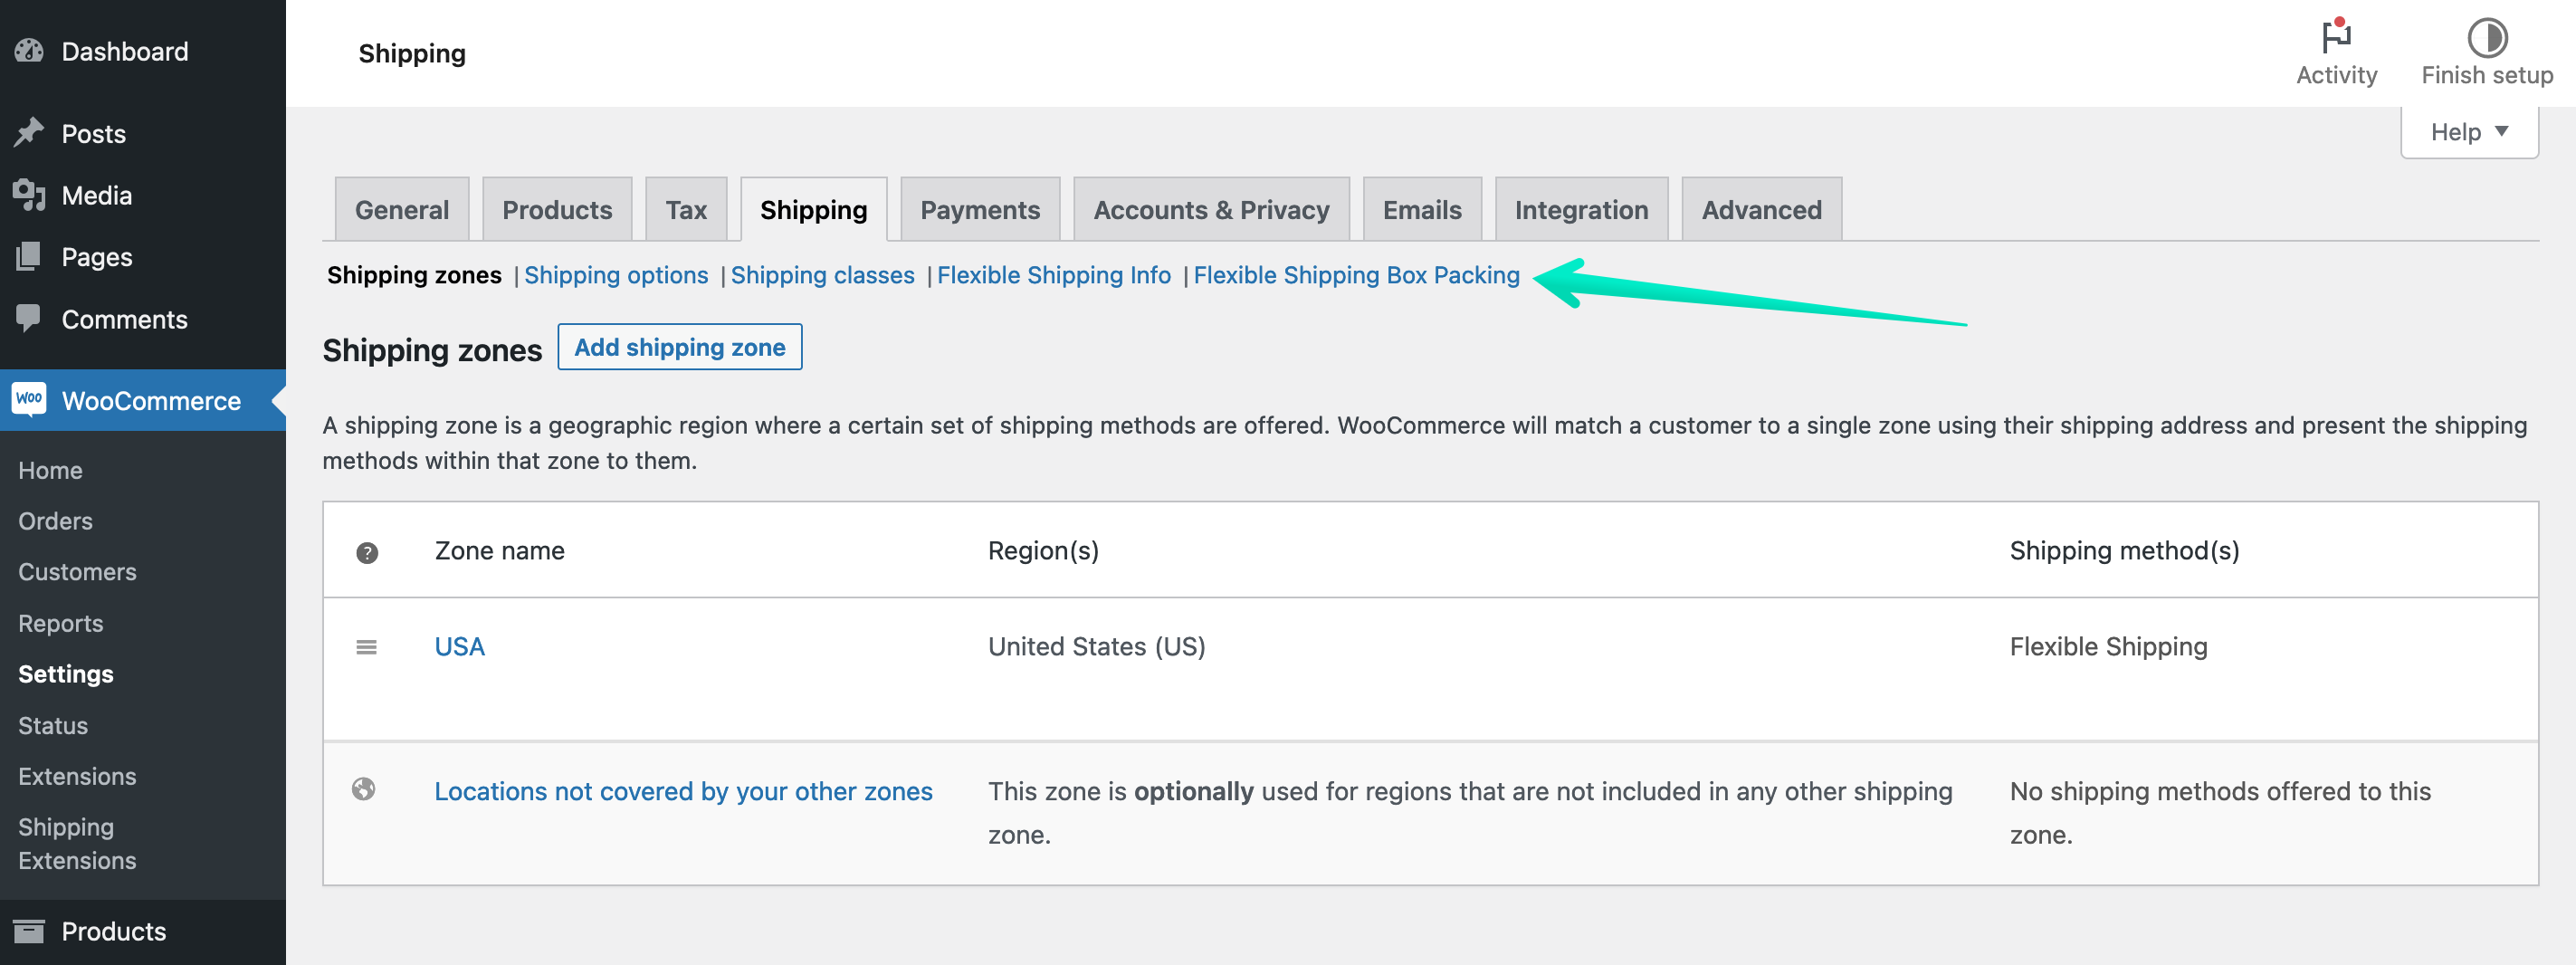
You’ll be redirected to the General Settings screen with the shipping boxes table:
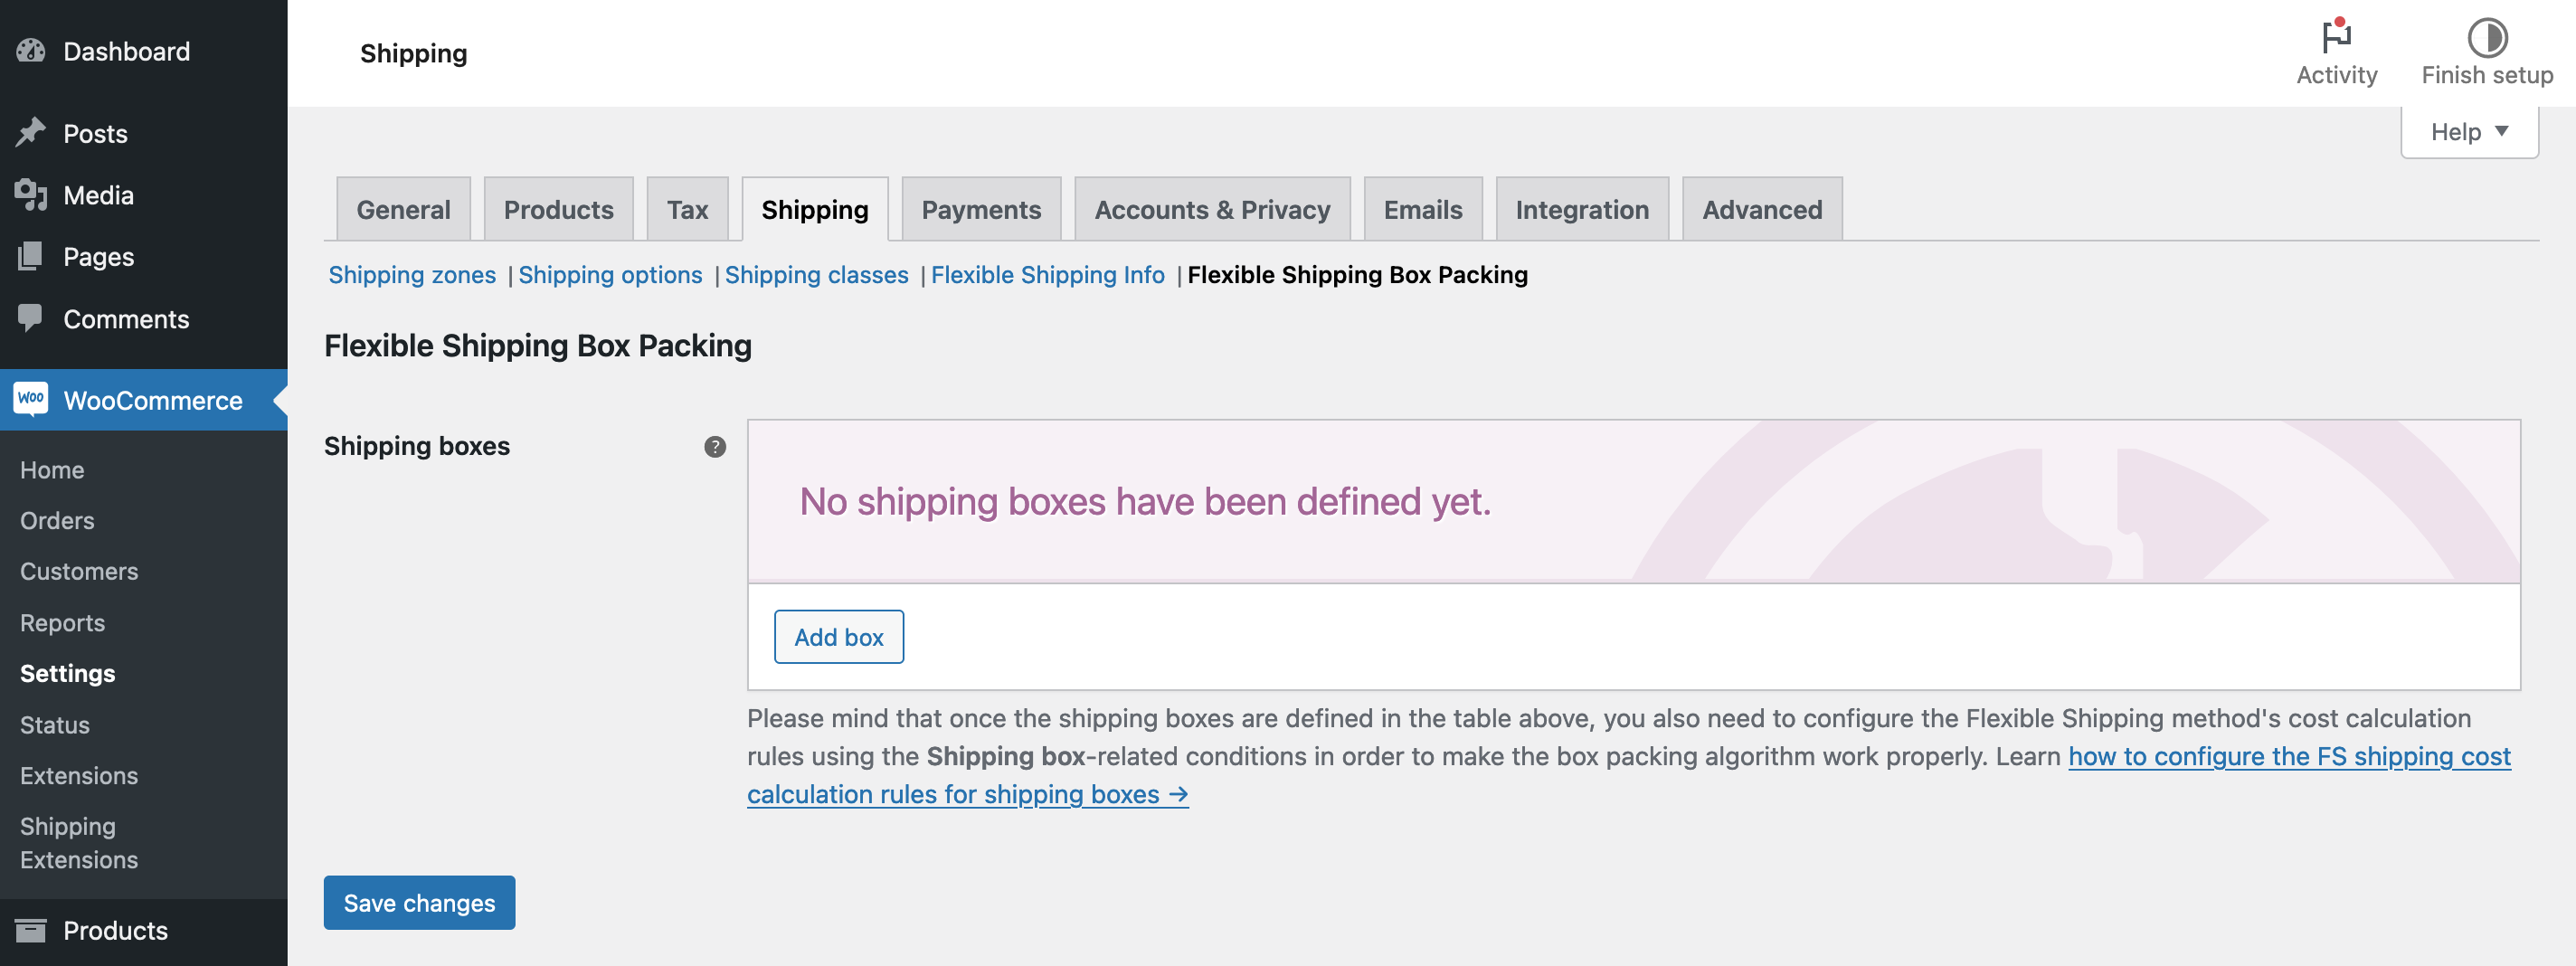
As you can see, there’s no shipping boxes yet. Use the Add box button to configure the first shipping box.
You will be redirected to the individual shipping box configuration screen with all the available options.
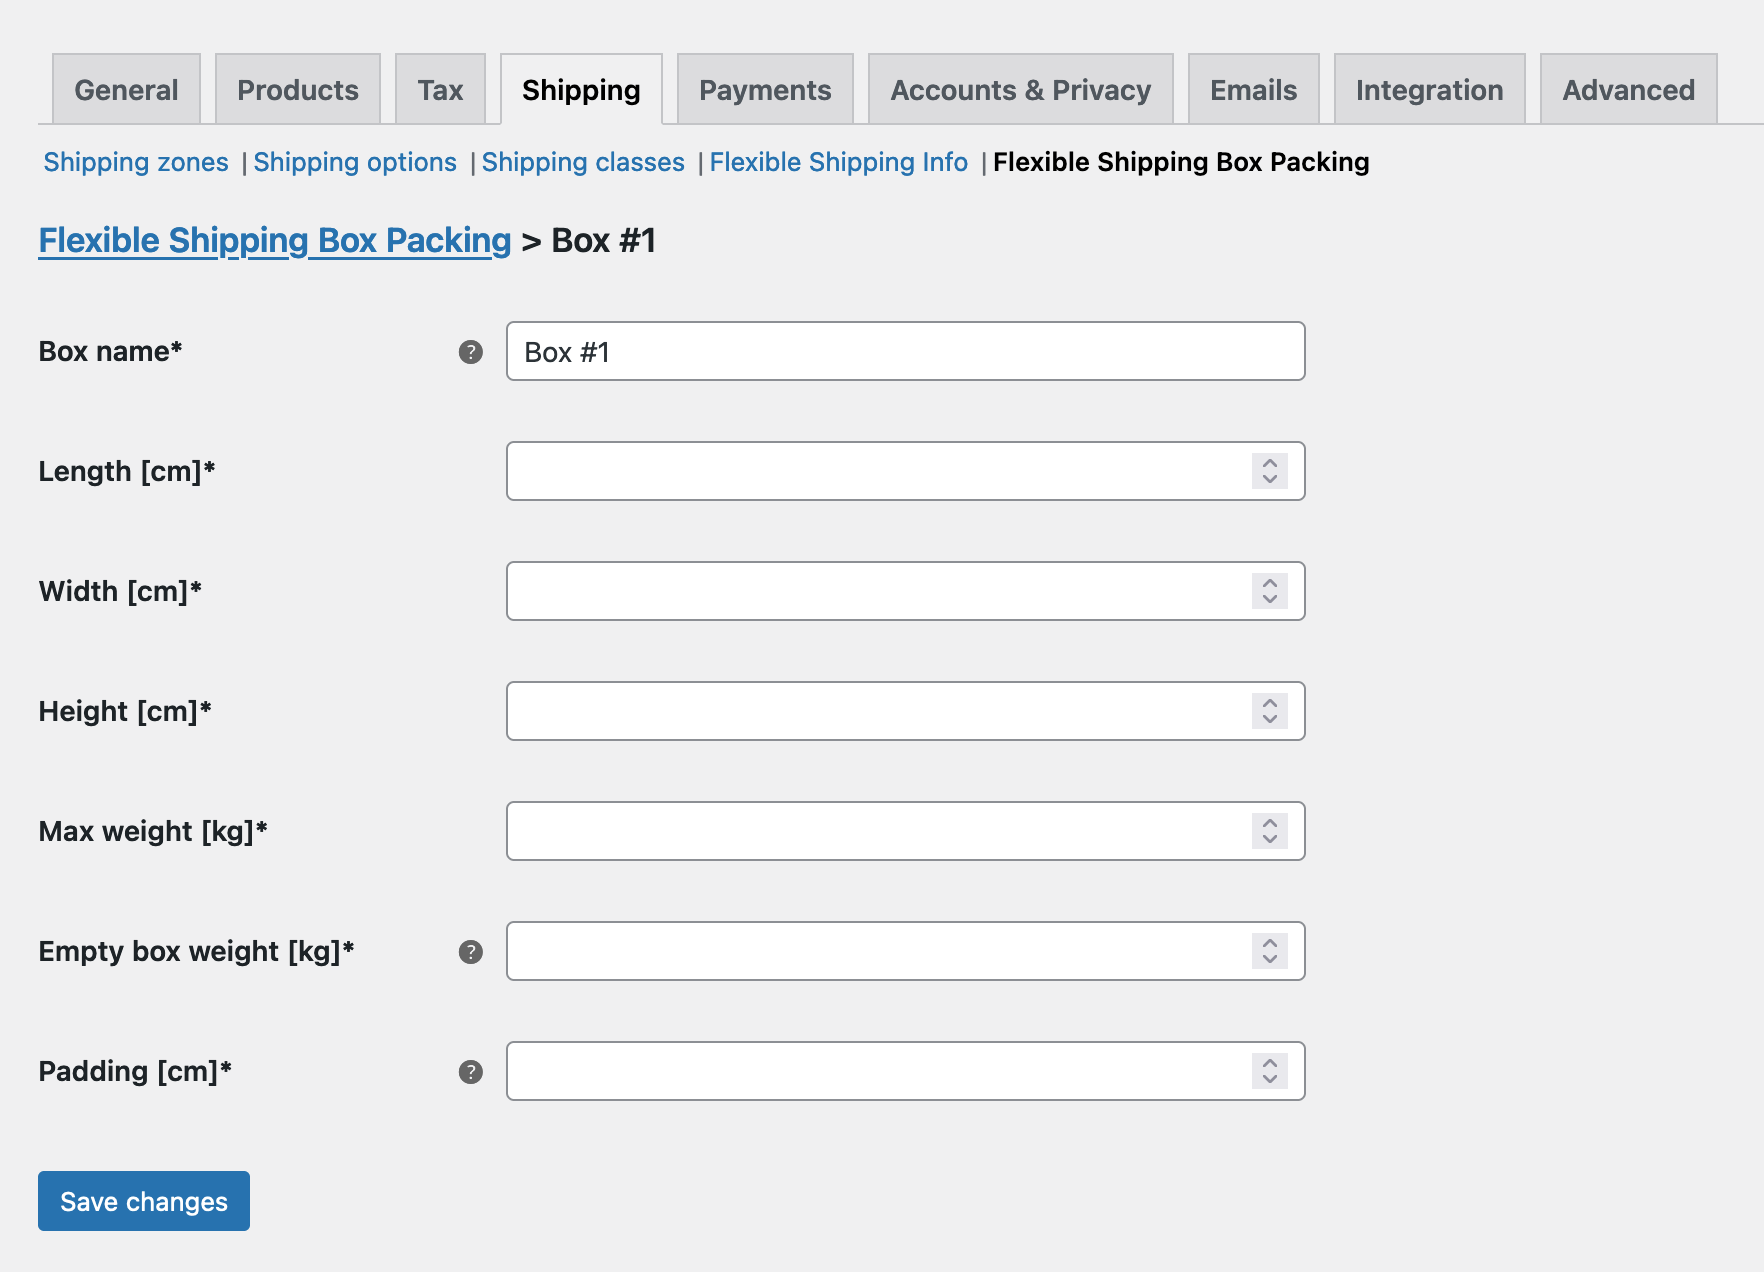
To properly configure a shipping box in WooCommerce, you need to provide a set of information about the particular box. It is based on this information that the box packing algorithm will match the products in the shopping cart with the right boxes.
Be aware that your current WooCommerce settings affect the measurement units shown in the box configuration fields. You can change them at WooCommerce → Settings → Products → General → Measurements.
Once you completed all the fields, click the Save changes button to confirm the addition of a new shipping box.
To configure the remaining shipping boxes in your shop, use the same instructions. The best way is to set up all the boxes you use in your store’s warehouse. It is also a good idea to double-check all the dimensions you have entered to avoid box packing errors.
All boxes with their dimensions will be visible on the Flexible Shipping Box Packing plugin settings page.

It’s time to move to the next step.
To do so, you need to configure your shipping options. Simply navigate to WooCommerce → Settings → Shipping. Then, choose the particular shipping zone you wish to include the feature in. If you don’t have them, you can just create shipping zones according to your geographic region using our advanced tutorial.
Then, in the shipping zone where you want to define shipping based on boxes, add a new WooCommerce shipping method. To add a shipping method, click the Add shipping method button:
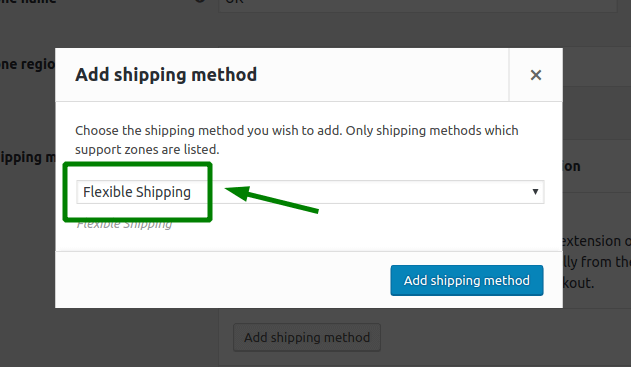
Pick the Flexible Shipping and again click the Add shipping method button.
Your shipping method should now be added and active. You need to configure it now.

You can customize method title, description, and any other feature that the plugin offers, such as free shipping over a certain amount or setting shipping tax status.
Scroll down to the Shipping Cost Calculation Rules table after you’ve configured that.
The Flexible Shipping Box Packing for WooCommerce plugin offers two shipping conditions:
Box type – this calculation type enables setting up shipping costs to depend on the kind of boxes used to package and send the requested goods.
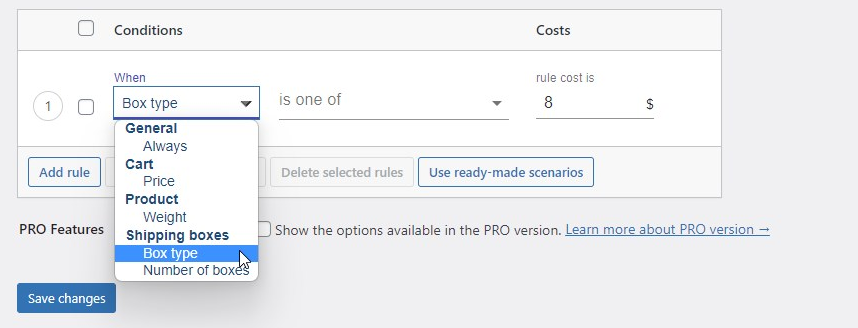
Number of boxes – this calculation type enables the shipping cost to be based on the quantity of boxes used to ship the goods.

With both options, you can configure the Flexible Shipping cost calculation rules according to your shipping requirements. Suppose you have two types of packaging in your store. It costs $10 to ship the smaller one and $15 to ship the larger one. You can easily set up such a scenario with one method like this:
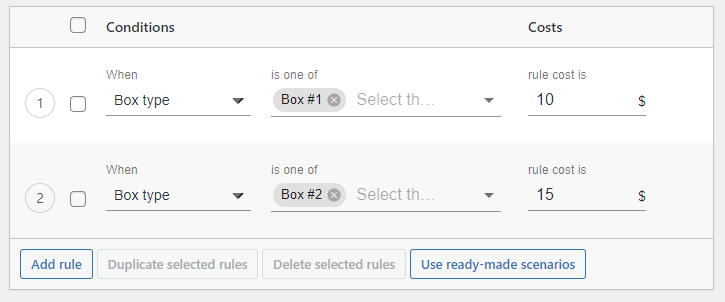
With this configuration, the packing and shipping rate algorithm will work as follows:
If all the products in the shopping cart fit into Box #1, the total shipping cost will be $10. However, if for some reason (the size of the products or their total weight) they do not fit into it, but fit into Box #2, the shipping price will be $15. The box packing algorithm allows you to accurately determine the shipping cost depending on the products in your shopping cart.
You can configure shipping fees in the same way for other shipping methods and all of your WooCommerce shipping zones.
One of the most common cases in which a store owner overpays for shipping is when the products in the shopping cart do not fit in one package, and he has to pay for another package. To avoid such a situation, you can use the additional cost option available in the Flexible Shipping Box plugin.
Let’s say you have a single universal package configured to ship most of the products in your WooCommerce store. You can easily configure additional fee per each box like that:
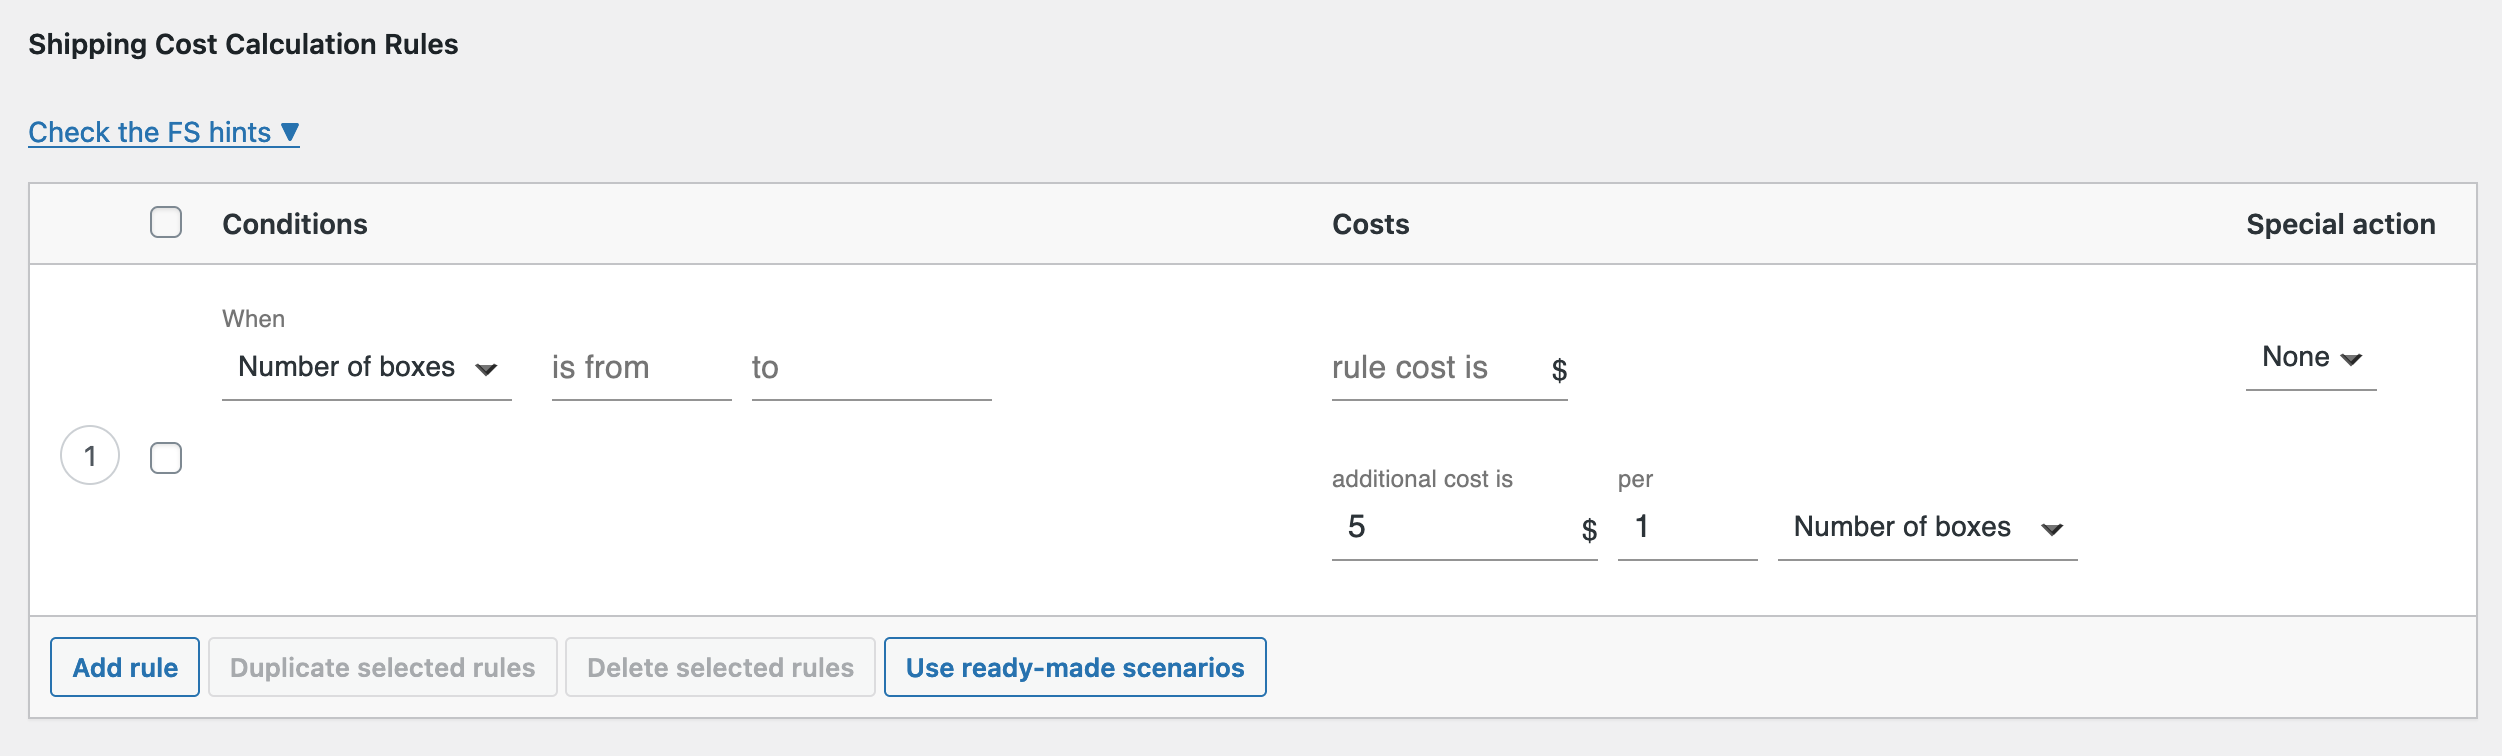
With this configuration, every time the packaging algorithm places products in the shopping cart for more than one package, $5 will be added to the total shipping cost.
You can find more details about Flexible Shipping Box Packing plugin in our video:
The Flexible Shipping Box Packing plugin allows you to set shipping rates in the situation when box packing algorithm fails to match products to any of the packages configured in your store. To do so, in the Box type condition, choose No matching boxes.

This way, you can simply configure fallback for no matching shipping boxes, or use it to offer Local pickup shipping method for the orders that won’t fit into any of your boxes.
With the PRO version of the Flexible Shipping plugin, you can combine shipping calculations based on boxes with all others available in this plugin, such as shipping classes, line item or item cost.
The best Table Rate Shipping for WooCommerce. Period. Create shipping rules based on weight, order totals, or item count.
View DetailsorAdd to cartBox packing is a shipping strategy that optimizes the use of space in shipping boxes. It involves measuring the dimensions of the products that you ship and arrange in the most efficient way to minimize space. By optimizing the use of space in shipping boxes, you can reduce the number of boxes needed to ship products, which in turn reduces shipping costs.
In WooCommerce shop, box packing is a feature that allows you to optimize your shipping process by configuring box sizes, assigning products to boxes, and calculating shipping rates based on box packing. By using box packing, you can ensure that you optimize your shipping process, and you’re not overpaying for shipping.
To optimize your packing process, follow these best practices:
By following these best practices, you can optimize your box packing process and reduce shipping costs for your WooCommerce store.
In this article, I have shown you how to set up WooCommerce shipping rates based on boxes. As you can see, with the right tool like the Flexible Shipping Box Packing plugin, it’s not a demanding project. Properly setting shipping fees on a per-box basis can allow you to save on shipping by offering customers the most accurate shipping rates possible, so that neither you nor your customers overpay for shipping.
Our team usually replies within a few hours. Ask away — we'll help you find the right solution for your store.

Content Writer at Octolize
Bartosz Gajewski is a content and marketing specialist with a solid background in SEO, WordPress content strategy, and technical documentation for digital products. With years of hands-on experience in both in-house and freelance roles, he supports tech companies – especially in the SaaS and e-commerce space – by creating content that informs, engages, and drives results.
His approach blends storytelling with data-driven SEO, and he’s been involved in projects ranging from rebranding and product marketing to growth experiments and copywriting for complex software tools. On the blog, he shares actionable insights from his work across marketing teams, product documentation, and online store optimization.


Learn how Octolize solutions helped WooCommerce store based in the United Kingdom set up shipping scenarios.
Learn how Octolize helped Shopify store based in the USA set up distance based rates with a usage of Octolize Distance Based Rates.

Learn how Octolize helped NGO set up their WooCommerce rates with a usage of Flexible Shipping PRO.