If you run a WooCommerce store and want to offer more accurate, location-specific shipping, setting up delivery rates based on zip codes (also known as postcodes or postal codes) is a powerful solution for WooCommerce store owners looking for how to set shipping rates by postcode in WooCommerce. Instead of relying on broad shipping zones, you can define precise rules by area and ensure that your customers see only the options that actually apply to them.
Whether you’re offering local delivery, pickup within city limits, or adjusting rates based on distance, configuring WooCommerce shipping by zip code allows you to tailor the checkout experience, reduce errors, and improve customer satisfaction. This guide will show you step by step how to configure WooCommerce shipping methods based on zip/postal codes. I’ll show you native settings and plugins that support advanced shipping logic.
Setting up shipping rules based on zip codes (or postcodes) is one of the most effective ways to offer accurate and location-specific delivery options in your WooCommerce store. Instead of relying on broad shipping zones like countries or entire regions, zip code-based shipping lets you tailor costs, services, and availability down to a precise area. It can be a city block, rural town, or specific delivery district.
This is especially useful for local businesses, stores with warehouse-based fulfillment, or retailers offering in-person delivery. For example, a bakery in Berlin might want to offer same-day delivery only within the 10115, 10117, and 10119 postcodes, while charging a higher fee for surrounding areas. Similarly, stores shipping large or heavy items (like furniture) can use zip codes to apply distance-based surcharges, avoiding profit loss from long-haul deliveries.
From a business perspective, postcode-based shipping improves both cost control and customer satisfaction. You avoid undercharging or overcharging for certain destinations, while giving shoppers realistic options that match their expectations.
In short, setting up zip/postcode shipping in WooCommerce gives you:
Want to see how to set this up in your store? Keep reading or skip ahead to our step-by-step tutorial below.
Let’s start with a bit of theory. You can’t talk about WooCommerce shipping based on zip code without mentioning WooCommerce shipping zones… To cut the story short the shipping zones are groups of locations where you want to ship your products to. You can easily group the continents, countries, states/provinces and even Zip or postal codes. WooCommerce will match a customer to a single zone using their shipping address and present the shipping methods within that zone to them. In other words, you can use them to:
These are just a few use cases. Shipping zones in WooCommerce are highly flexible, making them ideal for both simple and advanced shipping setups. It’s all up to you how you configure them and which setup suits your business best.
WooCommerce allows you to group shipping rates by ZIP/postal codes for more accurate and localized delivery options. In this section, you’ll learn step-by-step how to set up shipping zones based on ZIP codes in WooCommerce, using the built-in features.

To enable WooCommerce shipping by ZIP/postcode, start by creating a shipping zone. Even if you already have zones configured, it’s important to understand how to use them specifically for postcode-based shipping rules. For adding shipping zones, go to WooCommece -> Settings -> Shipping -> Shipping Zones. Then click the Add Shipping Zone button.
You will be redirected to the new shipping zone settings page.
Define its name by filling in the Zone name field and select below the Zone regions which it should cover.
As I mentioned before you can set the shipping zone to cover the entire continent, country, region or even postcodes. To create ZIP/postcode-specific shipping zones, click the “Limit to specific ZIP/postcodes” link when defining the region. This lets you target precise delivery areas with WooCommerce shipping methods.
Once the Limit to specific ZIP/postcodes link is clicked the additional text-area field will appear below where you can put all the postcodes you want the shipping zone to be narrowed to. You can enter ZIP/postcodes in three flexible formats, which gives you full control over your WooCommerce shipping setup:

When you have your WooCommerce shipping zones by postcode configured, you can add a shipping method that will be displayed for your customers using their shipping address. To do that, just click on Add shipping method button and select the type of your shipping method.

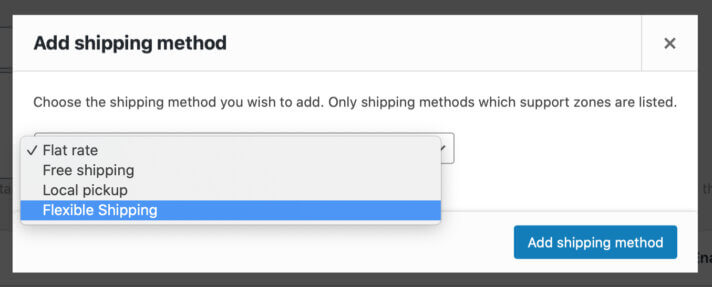
In the popup window, which should appear, choose Flat rate, Free shipping, Local pickup or Flexible Shipping method if you have the Flexible Shipping plugin installed. Then, configure it according to your needs. You can add as many ZIP code-specific shipping methods within a shipping zone as you want.
Remember to save changes, and your shipping zone based on postcodes will be ready to use. This method works well for simple setups, but it can become inefficient if you want to assign different shipping rates to many individual zip codes or postcode groups. In that case, you’d need to create a separate shipping zone for each location. It can quickly become time-consuming and hard to manage as your WooCommerce store grows. But what if I told you there’s a more flexible and scalable way to handle postcode-based shipping?
Creating separate shipping zones for every zip code or postcode can work, but it’s not ideal for stores with many local delivery areas or varying rates per location. As your shipping setup grows, managing dozens of individual zones becomes messy and time-consuming. Instead of creating a separate shipping zone for each zip code, you can set up the same thing in one shipping zone. How? The answer, as usual with WordPress, is the right WooCommerce shipping plugin.
The Flexible Shipping Locations plugin (an extension to the free Flexible Shipping plugin) allows you to set the shipping cost for specific locations. You can create custom locations based on zip code, and set delivery cost for them inside one shipping zone.
Extend Flexible Shipping with custom locations and create shipping costs based on weight, order totals or item count.
View Details or Add to cartI’ll show you step-by-step how to set WooCommerce shipping based on zip code/postcode.
First, please make sure you have installed and activated the Flexible Shipping and Flexible Shipping Locations plugins. Then, go to WooCommerce → Settings → Shipping → Flexible Shipping Locations.
You can create unlimited custom locations by clicking Add location button.
As you can see, it’s very similar to the shipping zones configuration. But in that case, it’s much faster and easier to configure.
Each location requires:
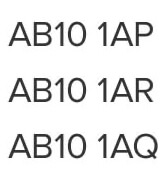
90210)90000…90999)AB10* to match all codes starting with AB10)You can add as many locations as needed. Just remember to use clear, recognizable names for easier management later. Once configured, you’ll be able to assign different shipping costs to each custom location directly from the Flexible Shipping method settings.
Now, it’s time to add a shipping method. Go to the shipping zone that will match with all the custom locations you have just created and click on Add shipping method button. In the popup window, choose Flexible Shipping method if you have the Flexible Shipping plugin installed. The new Flexible Shipping method will be available to edit. Click on it to set the WooCommerce shipping based on postcode.
You can set that method title and description, change its tax setting and all the additional features that are included in the Flexible Shipping plugin. After you set that up, scroll down to the Shipping Cost Calculation Rules table.
In the conditions field, select Location.
Then, select your custom location and set it’s cost. You should add a new rule for each of your custom locations.
This way, that shipping method will be displayed only when one of your custom locations will match the customer’s address. As you can see, you can also set different shipping cost based on location. As usual, remember to Save changes, and you are good to go.
Setting up shipping by zip/postal code using the Flexible Shipping Locations plugin opens up a wide range of possibilities for WooCommerce store owners. Instead of juggling multiple shipping zones, you can manage all local shipping logic in one place.
Here are a few real-world examples showing how this plugin solves common ecommerce delivery challenges:
An independent grocery store based in East London wants to offer local delivery with varying rates depending on proximity. They define three custom locations:
They apply lower delivery fees (£2.50) for customers in Central London and gradually increase it to £5.00 for Zone 3. This setup works inside one shipping zone using only the Flexible Shipping Locations plugin.
An outdoor gear shop based in Leeds ships UK-wide but faces increased courier charges when delivering to Scottish Highlands. Instead of setting up a separate shipping zone, they create a custom location called “Highlands Surcharge”, covering:
Postcodes like: IV*, KW1–KW14, PA20–PA78, PH17–PH50
They apply a £10 surcharge when this location matches the customer’s postcode — all within a single Flexible Shipping method.
A sustainable home goods store offers free delivery to customers in Bristol, but charges a standard shipping rate elsewhere in the UK. They define a custom location “Bristol Free Delivery” with postcodes starting with BS1 to BS16. Customers within this location automatically get free shipping, while others see the regular £4.99 fee.
In this guide, you’ve learned how to set up WooCommerce shipping rates based on zip codes or postcodes using built-in shipping zones and the Flexible Shipping Locations plugin. This method allows you to create location-based delivery rules specific to certain areas. It’s ideal for local delivery, regional surcharges, or postcode-specific shipping rates. Instead of relying on broad zones, you can define accurate shipping costs for each zip code or group of postcodes. It’s a flexible and scalable solution to improve your WooCommerce checkout experience and reduce delivery errors. Ready to simplify your shipping setup? Start configuring it today!
Thank you for the nice explanation about the use of wildcards.
Thank you!
Hello, I did as you asked using wildcards, but the problem is the payment method is still shown even if we dont deliver in that area, if the delivery is off then there should be no delivery option
Hi Sakina, just to make sure if I got everything right – the payment method is being displayed in your shop’s checkout even when there are no shipping methods available to pick – is that correct?