
Subscribe to our newsletter

Your online store’s organisation and searchability may be greatly improved by learning and using WooCommerce product tags. This post will explain what product tags are, how to use them, and the advantages they provide for SEO. We’ll also get into more complex applications, such as configuring WooCommerce shipping charges depending on product tags.
In WooCommerce, product tags are descriptive labels that are used to arrange and classify items according to particular attributes. Product tags are a non-hierarchical means of associating items with specific characteristics or traits.
Similar to keywords, tags in WooCommerce specify certain characteristics of the items. For instance, you may use tags like “summer,” “cotton,” or “formal” if you own a clothes business. Tags are more focused than categories, which are usually more general. You can use tags in addition to categories to further filter product search results or for advanced WooCommerce shipping.
Why use product tags in WooCommerce?
Prefer watching instead of reading? Watch our detailed video guide here:
Product categories and tags are both necessary in WooCommerce for product organisation, although they have different functions. Product categories are arranged hierarchically, facilitating broad product groups and parent-child relationships (clothing > t-shirts > men’s t-shirts, for example). They are prominently featured in shop navigation menus and serve as the main means of organising items into categories that are easy to navigate. Each product needs to be placed into a minimum of one category, each of which may have thumbnails or pictures linked to it. Product tags, on the other hand, are non-hierarchical and provide a flexible means of linking similar items by defining certain features (e.g., colour, style, material).
Tags are optional and typically displayed as clickable links on product pages, enhancing internal linking and SEO. The key differences between categories and tags include their structure (hierarchical vs. flat), purpose (broad grouping vs. specific attributes), navigation roles (main menus vs. supplementary links), and necessity (required vs. optional). Best practices involve using categories for main product types, tags sparingly for key attributes, avoiding overlap, and considering SEO impacts when naming categories and tags. By effectively using both, you can create an intuitive navigation structure and provide flexible ways for customers to find related products.
Tags are non-hierarchical and act as keywords or descriptors for products, helping customers find items with similar characteristics (e.g., “summer,” “discount,” “casual”). They provide a flexible way to associate products without a rigid structure and are optional, enhancing SEO and internal linking by making it easier for customers to find related products. In contrast, attributes define specific characteristics of a product, such as size, colour, or material, and can have multiple hierarchical terms (e.g., “Size” with “S,” “M,” “L”).
Attributes are essential for creating variable products and are crucial for product filtering and selection, allowing customers to find products that meet specific criteria. Attributes can be global or custom, used across multiple products or specific to a single product. The key differences include their structure (tags are flat, attributes can be hierarchical), purpose (tags for general keywords, attributes for specific characteristics), usage (tags for flexible association, attributes for managing variable products), and role in filtering (attributes enhance filtering tools).
In order to fully understand how to use product tags in WooCommerce, it is worth understanding how to create, add and manage them to relevant products first. Let’s go through each of these elements one by one.
From the left-hand menu, go to Products > Tags. In the new view you will see the fields for adding new tags on the left, and a list of all tags on the right. To add a new tag, fill the following fields:
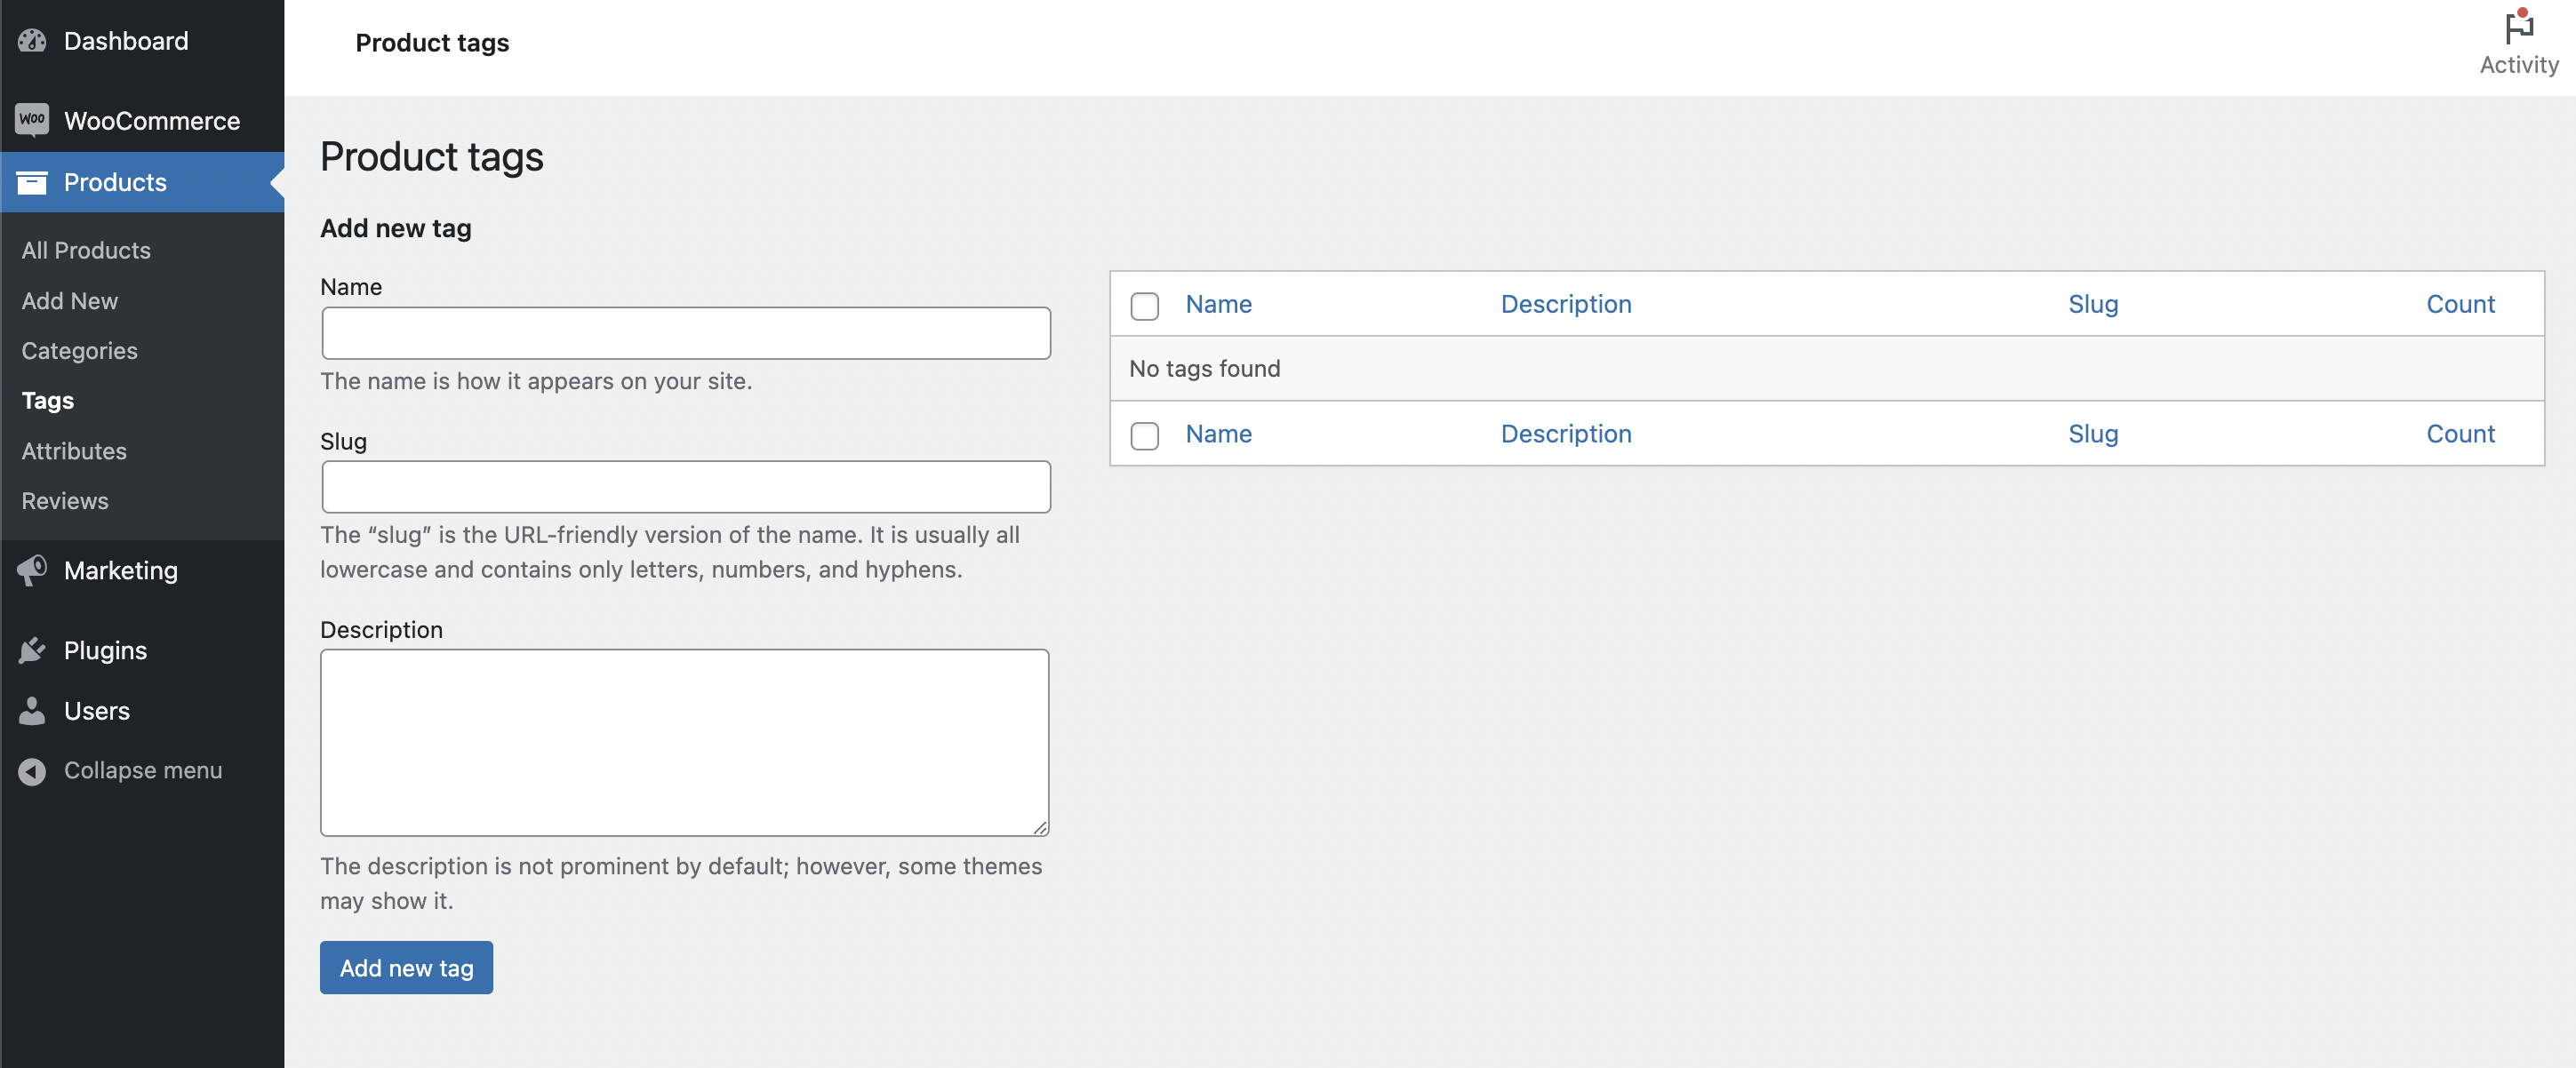
Confirm with the Add new tag button and you are done. You have created a new product tag in your WooCommerce store.
You can also add a tag (without description) when selecting tags for a product on the edit screen and when using the Quick Edit or Mass Edit options for products.
Navigate to your WordPress admin dashboard and go to Products > All Products, then click on the product you wish to edit. Locate the “Product tags” section, which is usually found in the right sidebar of the product edit screen.
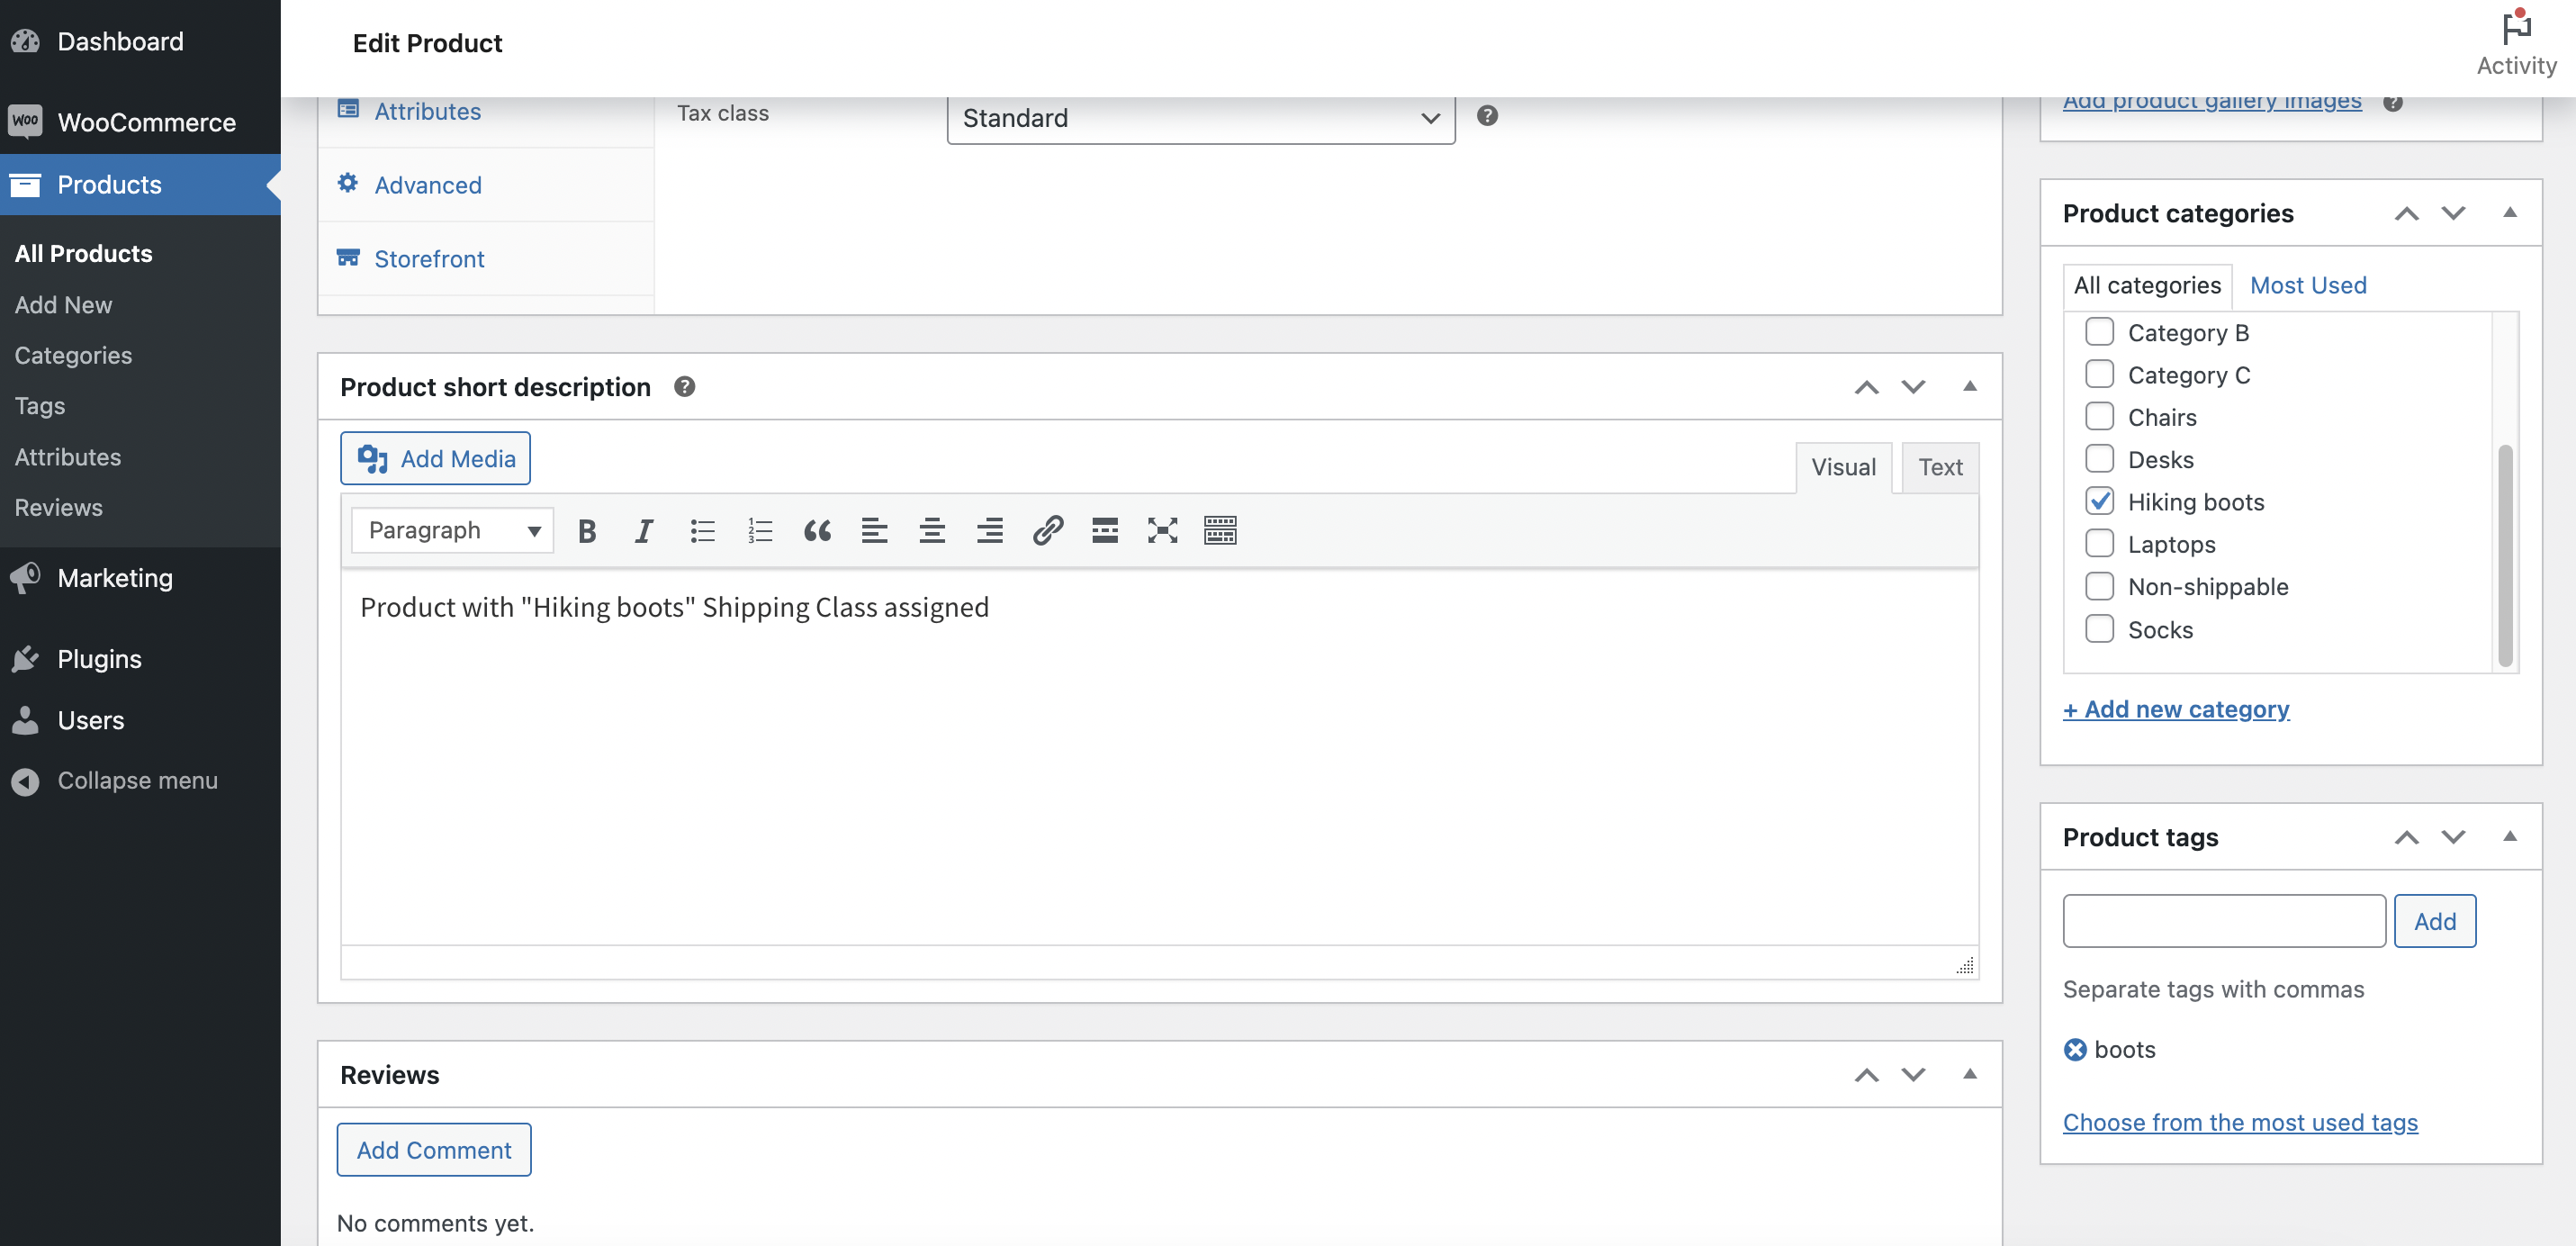
Once you find the section, you can add tags to the product by typing the tag name in the text field. If it’s an existing tag, it will autocomplete as you type. If it’s a new tag, simply type the full name and press Enter. You can add multiple tags by separating them with commas. After adding the tags, ensure you save your changes by clicking the Update button to save the product with the new tags.
You can also add tags quickly when viewing your product list. Go to Products > All Products, hover over a product, and click “Quick Edit.” In the Quick Edit panel, you’ll see a “Product Tags” field where you can add or edit tags. Then click “Update.” For bulk tagging, on the All Products page, select multiple products. After that, choose “Edit” from the Bulk Actions dropdown, and in the bulk edit panel, you can add tags to all selected products at once. Remember, tags are a flexible way to group related products without a strict hierarchy. Use them to highlight attributes like colour, style, or any other relevant characteristics that can help customers find products more easily.
The easiest way to display product tags in WooCommerce is by using the “Product Tags” widget provided by WooCommerce. You can add it to your sidebar or other widget areas. Go to Appearance > Widgets and drag the “Product Tags” widget to your desired location. To customise the display, you might need to edit your theme’s template files or use a plugin that enhances the display options for product tags.
Product tags in WooCommerce can significantly enhance your store’s SEO in several ways:
Now that you know what is a product tag in WooCommerce, let’s use it in your WooCommerce store. To set WooCommerce shipping cost based on a product tag, you’ll need the Flexible Shipping PRO. It is an advanced WooCommerce table rate shipping plugin. It offers powerful, but easy-to-use shipping calculations based on weight, cart total, product count and much more. One of its many features is of course product based shipping.
The best Table Rate Shipping for WooCommerce. Period. Create shipping rules based on weight, order totals, or item count.
View Details or Add to cartIt’s basically a table rate shipping plugin, which is a great solution to replace limited WooCommerce flat rate shipping method.
If you prefer to use product categories instead of shipping tags, check out our guide on WooCommerce Shipping Based on Product Category.
Once you install and activate the Flexible Shipping, you can configure it. To do that, just simply go to WooCommerce → Settings → Shipping. There, select the WooCommerce shipping zone which you want to add the feature to.
Then, add a new WooCommerce shipping method in the shipping zone. Click the Add shipping method button:
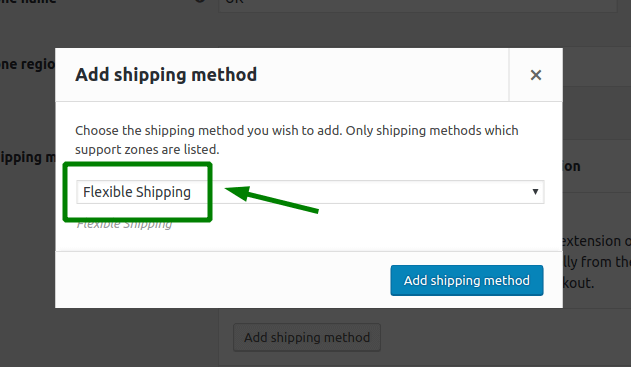
Choose the Flexible Shipping and confirm with the Add shipping method button.
Now, you should have your shipping method added and activated. It’s time to configure it.

You can set it’s Title and Description and any other available feature like WooCommerce advanced free shipping over amount. After you set that up, scroll down to the Shipping Cost Calculation Rules table.
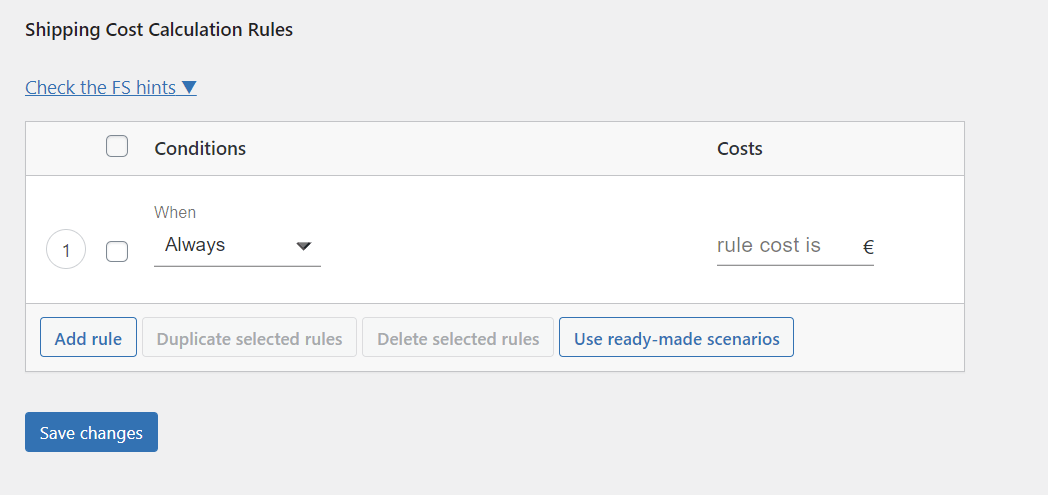
In the conditions field, select Product Tag.
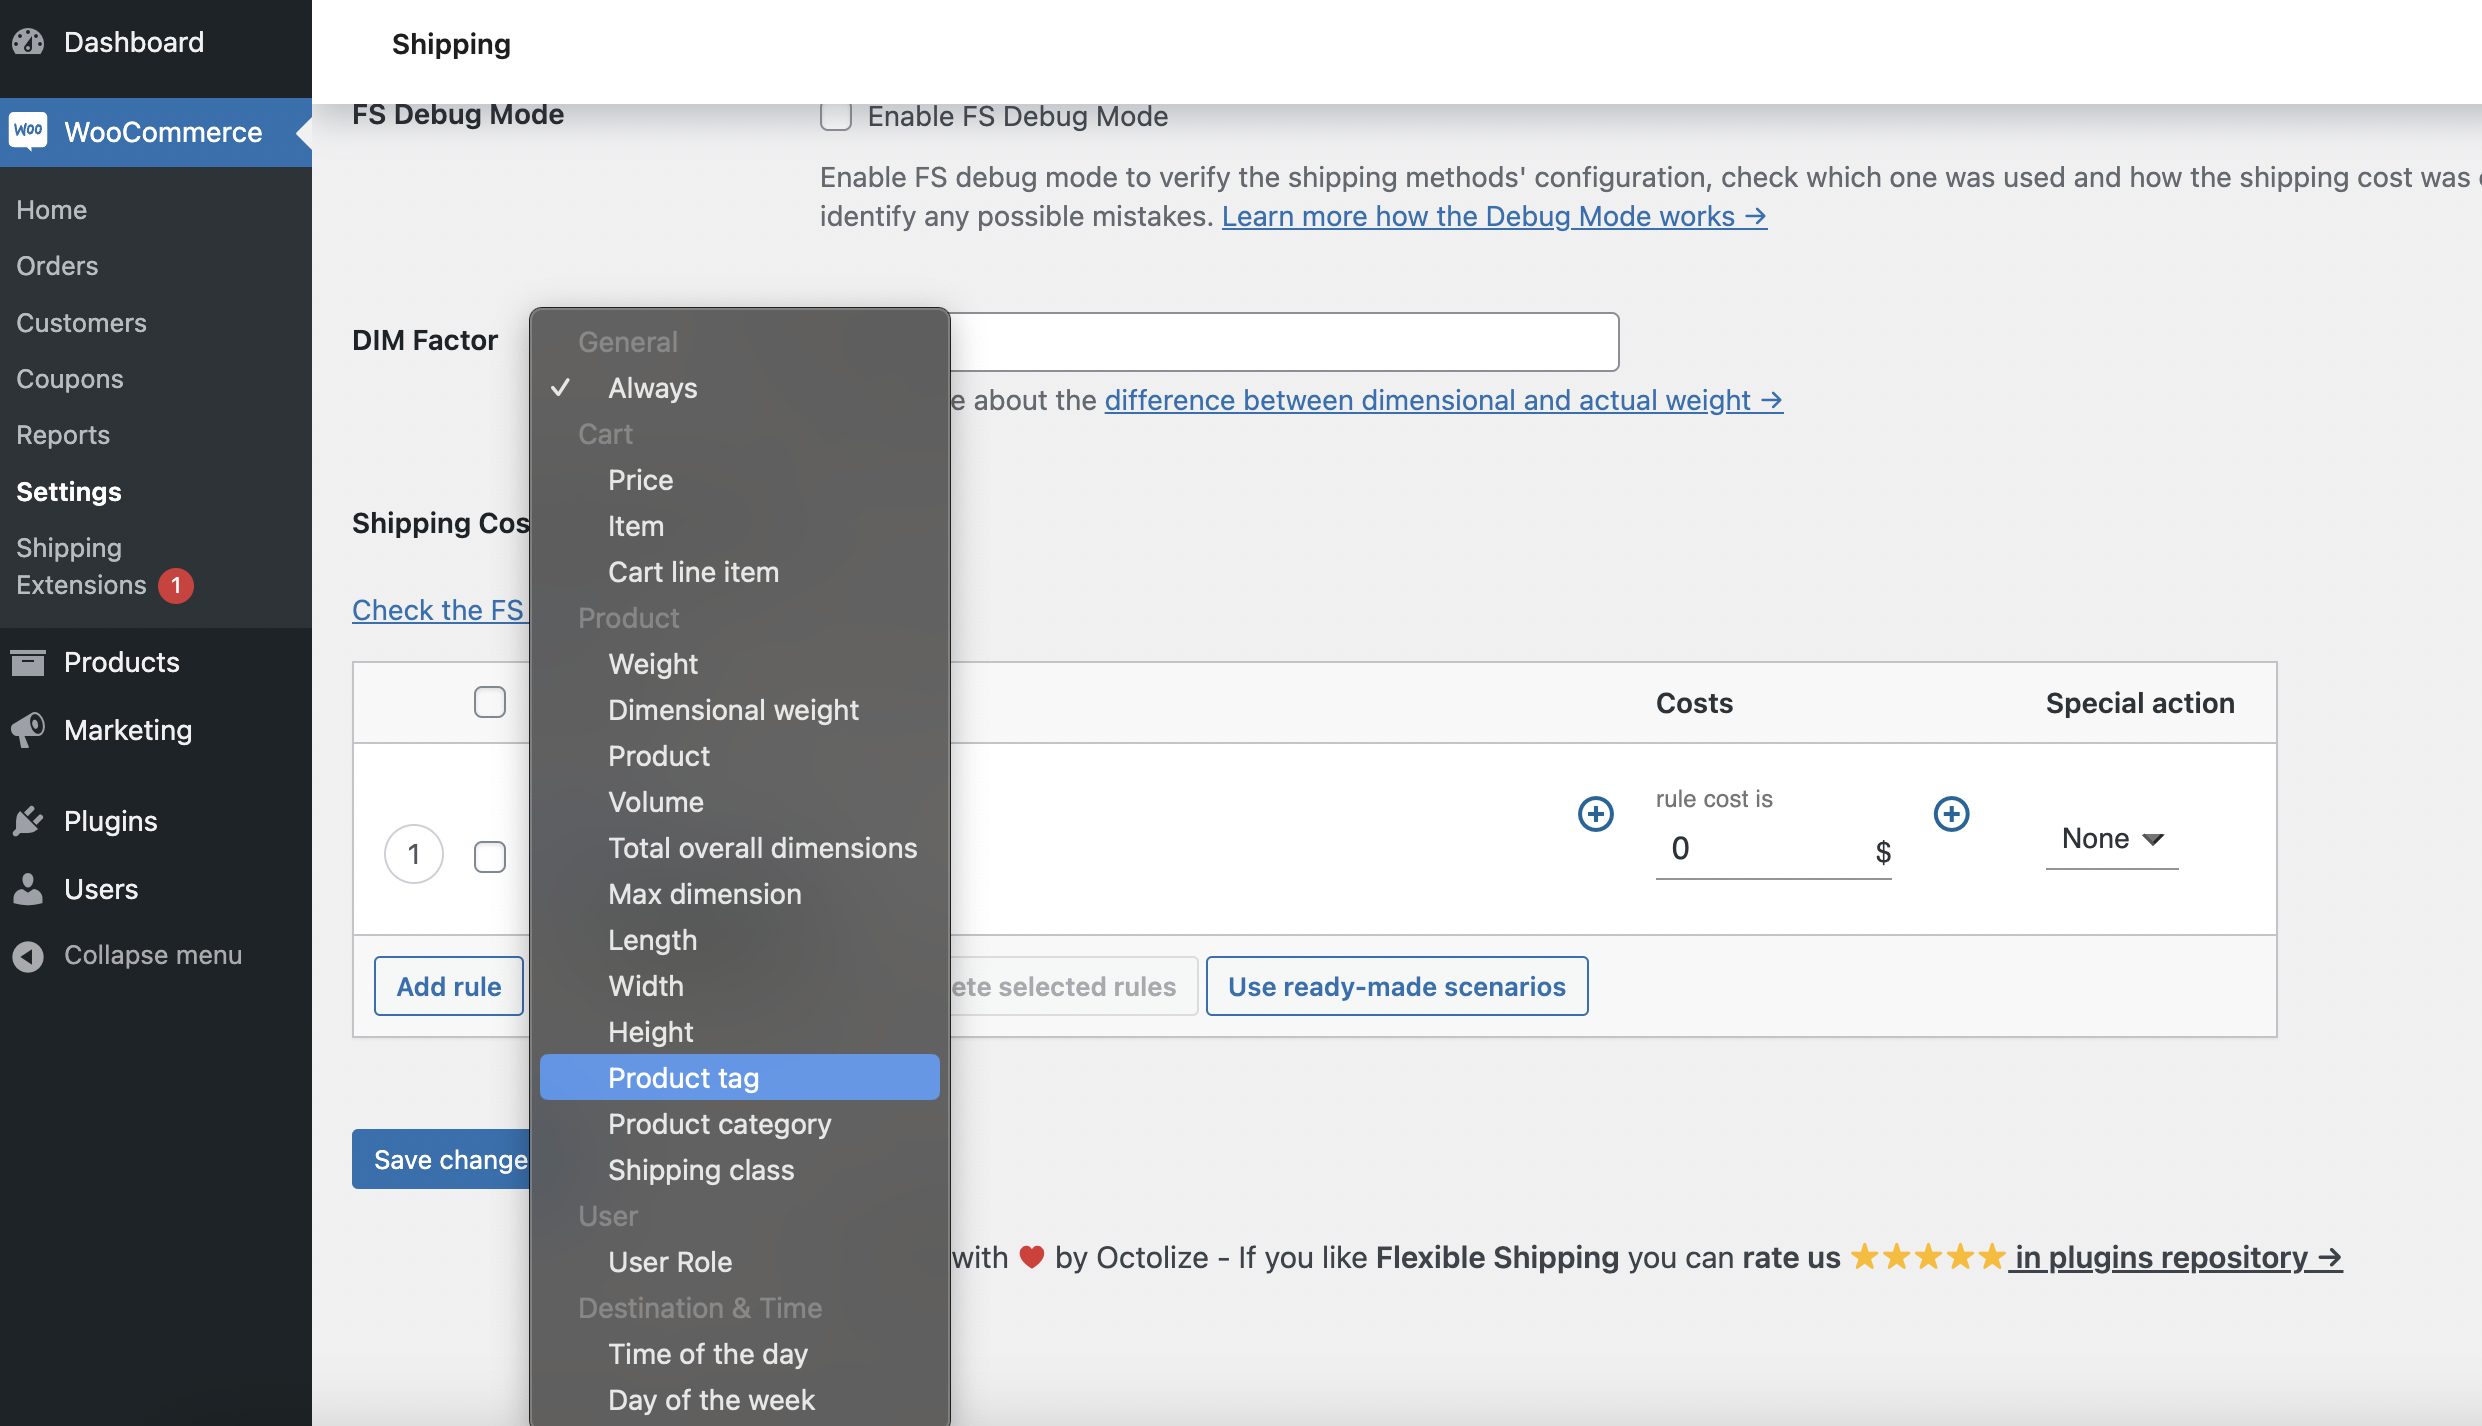
Then, select one of your product tags and set cost.
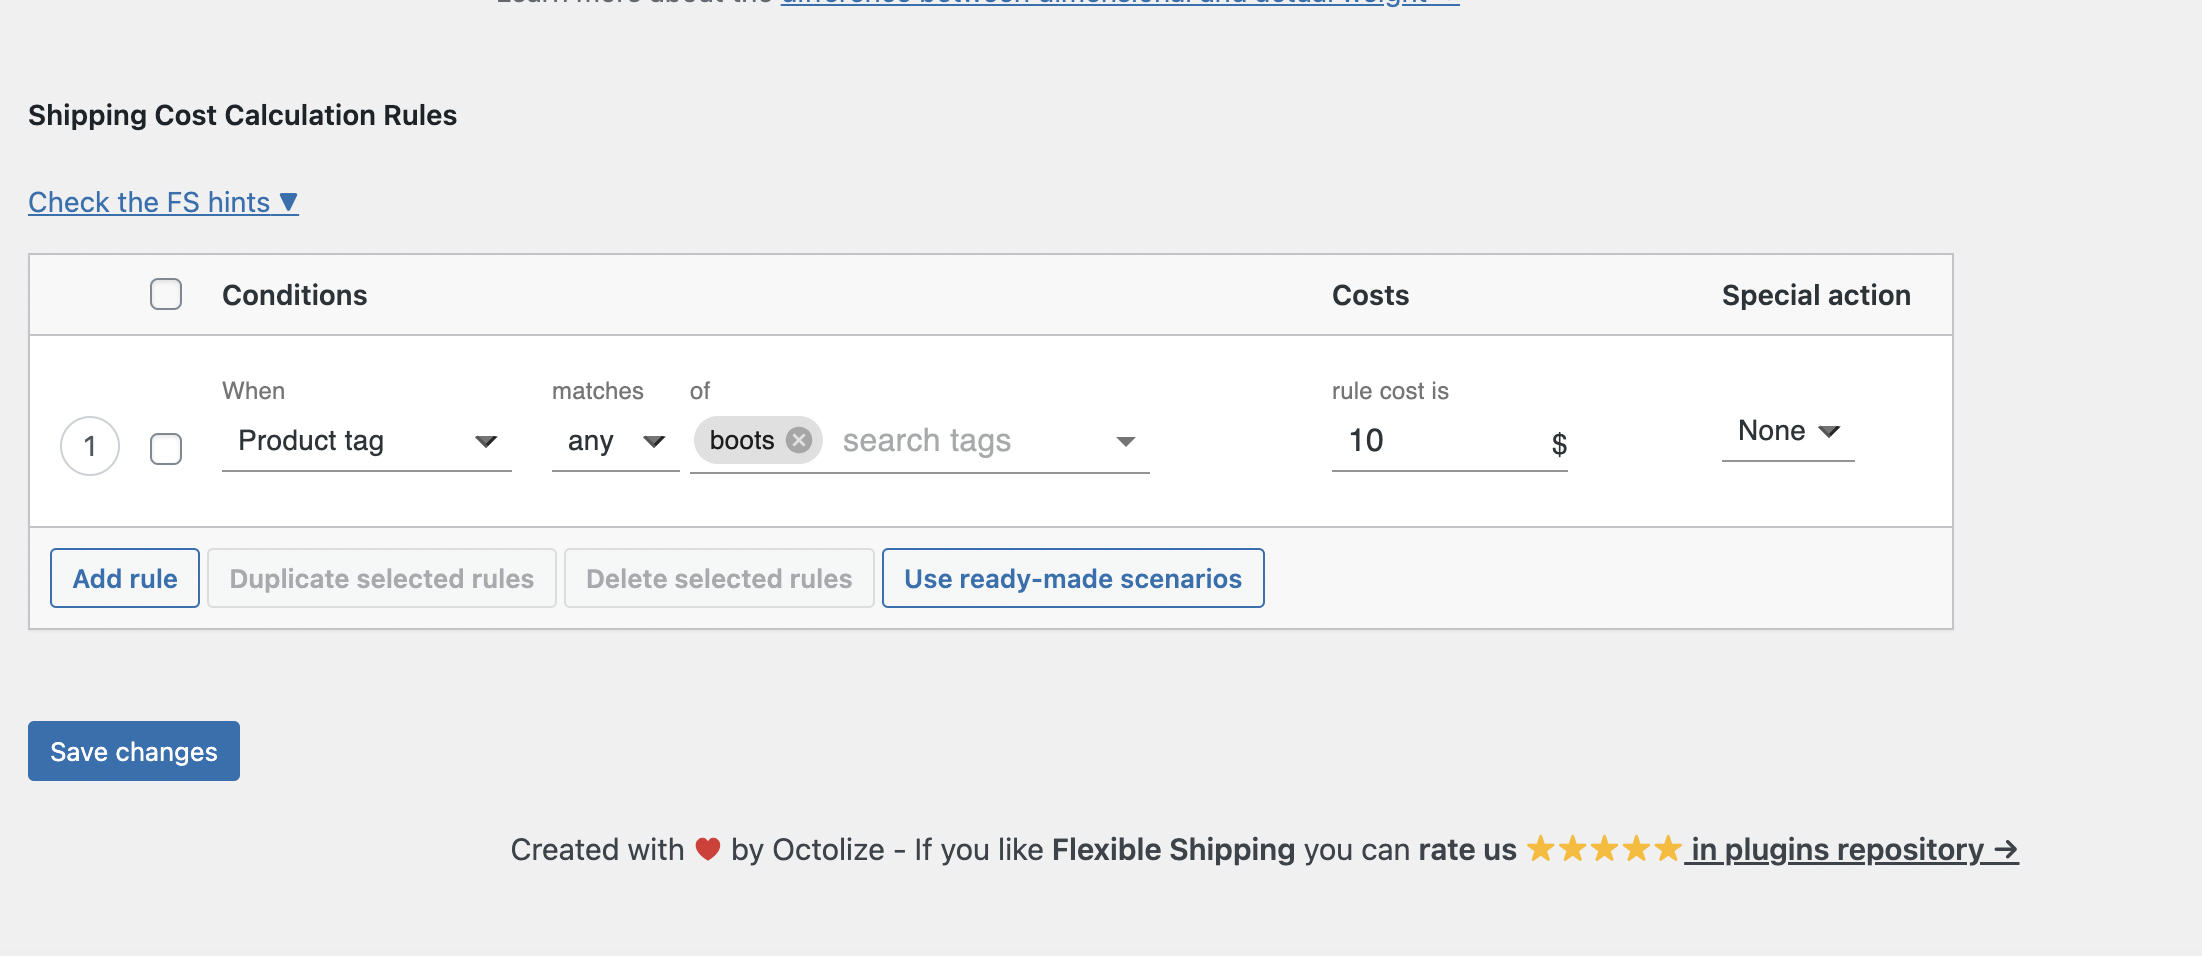
You can set the same shipping fee for multiple tags. When you configure all the shipping rules based on your shipping charges, Save changes.
This way, the shipping cost will be applied where products from certain product tags will appear in the shopping cart in your WooCommerce store.
Product tags in WooCommerce are a powerful tool for organising products, improving navigation, and enhancing SEO. By understanding and utilising tags effectively, you can create a more user-friendly and search engine optimised online store. I hope you find the information in this article useful. Good luck!

Content Writer at Octolize
Bartosz Gajewski is a content and marketing specialist with a solid background in SEO, WordPress content strategy, and technical documentation for digital products. With years of hands-on experience in both in-house and freelance roles, he supports tech companies – especially in the SaaS and e-commerce space – by creating content that informs, engages, and drives results.
His approach blends storytelling with data-driven SEO, and he’s been involved in projects ranging from rebranding and product marketing to growth experiments and copywriting for complex software tools. On the blog, he shares actionable insights from his work across marketing teams, product documentation, and online store optimization.


The Neurodivergence Project uses the ocean and the natural world to empower neurodivergent people to build confidence, lasting friendships and help them achieve their goals.

Dominican Liturgical Center is based in Cracow and focused on promoting the learning of traditional music and singing. They also run a smaller publishing house and a webshop that is focused on selling mainly books and CDs.

Established in 2017. SGL is focused on selling gas bottles and non-gas products. Formerly, the company offered payment by card on delivery. For now, the SGL started online payments and they launched a webstore.