- Home
- WooCommerce
- What plugin are you looking for?
- Shopify
- What Do I Need?
- About us
- Blog
- Docs
- Contact us
- What can we help you with?

Shipping can make or break the online shopping experience. One of the most powerful yet often misunderstood tools within WooCommerce is the shipping class combined with conditional formulas. Used correctly, these formulas can help you control shipping costs. In this article, we’ll walk through how shipping classes in WooCommerce formulas work, how to use them effectively, and why they matter for your store’s logistics and profitability.
Before going on to explain the WooCommerce shipping classes formula configuration, I have to explain these two terms: WooCommerce shipping class and shipping formula.
Tired of walls of text? Switch to video! We cover WooCommerce Shipping Classes on our YouTube channel.

At its core, a shipping class in WooCommerce is a way to group similar products for shipping purposes. Think of it as a tag you assign to products, allowing you to charge different shipping costs based on the products in a customer’s cart. Shipping classes are one of the basic settings for combining products in your store with shipping costs. Instead of setting individual shipping costs for each product, you can assign them to a shipping class—like “Heavy Items,” “Free Shipping Products,” or “Express Delivery.” These classes serve as labels that inform WooCommerce shipping plugins and WooCommerce itself about which rules to use at checkout.
WooCommerce shipping formulas are dynamic computations that employ variables like product quantity, weight, cart total, or shipping class to determine the final shipping cost. Shipping formula lets you specify criteria like “charge $5 per item,” “$1 per kilogram,” or “minimum $10 unless the cart subtotal exceeds $50” in place of flat prices. This allows your shipping charges to match the actual cost of fulfillment and provides you more control over your pricing structure.
Formulas are typically used in combination with advanced shipping plugins like Flexible Shipping. It provides a calculation engine where you can insert expressions based on quantity, weight, or any other condition. These formulas help WooCommerce adjust shipping prices in real-time based on what’s in the customer’s cart. Whether you want to offer bulk shipping discounts, charge extra for heavy products, or create tiered delivery pricing, shipping formulas turn WooCommerce into a flexible logistics system that can adapt to your business model and optimize the customer experience at checkout.
A few prerequisites need to be met before you can begin using shipping classes WooCommerce formulae efficiently. First, make sure your WooCommerce shipping classes are set up correctly. This involves creating unique, descriptive classes (such as “fragile,” “heavy items,” and “bulk products”) and allocating them to the appropriate items in your catalog.
Second, you’ll need a shipping plugin that supports formulas and conditional logic, such as Flexible Shipping for WooCommerce. This tool allows you to use mathematical formulas and variables like quantity, weight, and cart value to calculate shipping costs dynamically. It also supports min/max logic or even multi-level conditions depending on what’s in the customer’s cart.
Finally, to apply these formulas effectively, you need a clear understanding of the shipping scenarios you want to implement. Are you looking to add a fixed fee per item? Apply discounts for bulk orders? Increase the shipping cost when a product from a specific class is in the cart? Or maybe you want to disable certain shipping methods when specific classes are detected?
With all the above-mentioned elements prepared, it’s time to move on to configuration. To do that, just simply go to WooCommerce → Settings → Shipping. There, select the WooCommerce shipping zone which you want to add shipping classes formula.
Then, add a new WooCommerce shipping method in the shipping zone where you want to set shipping based on shipping class. Click the Add shipping method button:
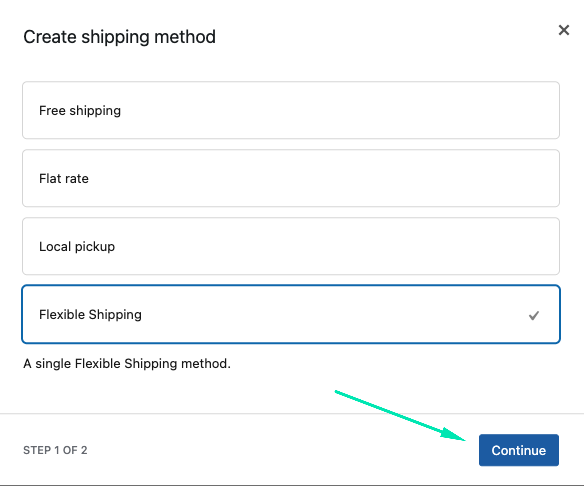
Choose the Flexible Shipping and click the Continue button.
Want to learn more about Flexible Shipping? Check out our video guide to see how it works:
Now, you should have your shipping method added and activated. It’s time to configure it.

You can set it’s Title and Description and any other available feature like WooCommerce advanced free shipping over amount.
After you set that up, scroll down to the Shipping Cost Calculation Rules table.
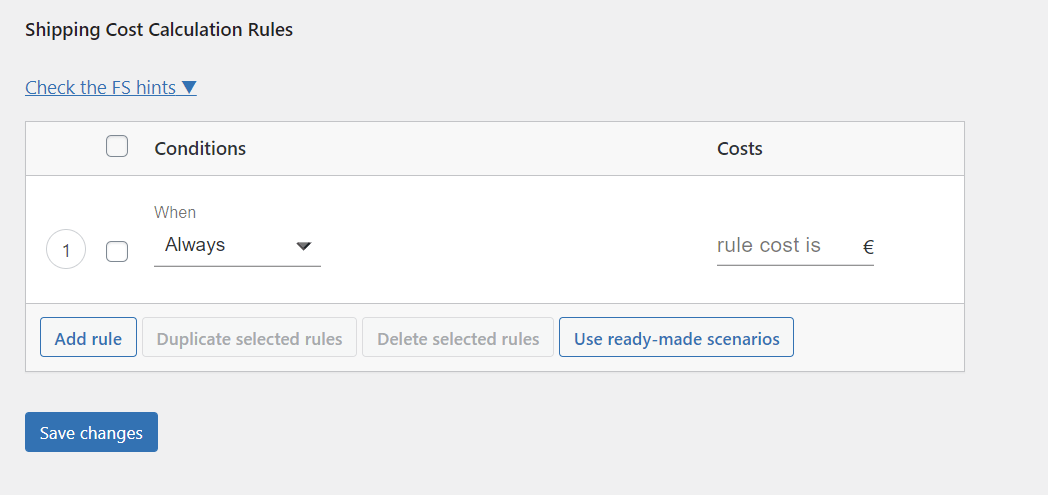
In the conditions field, select Shipping Class.
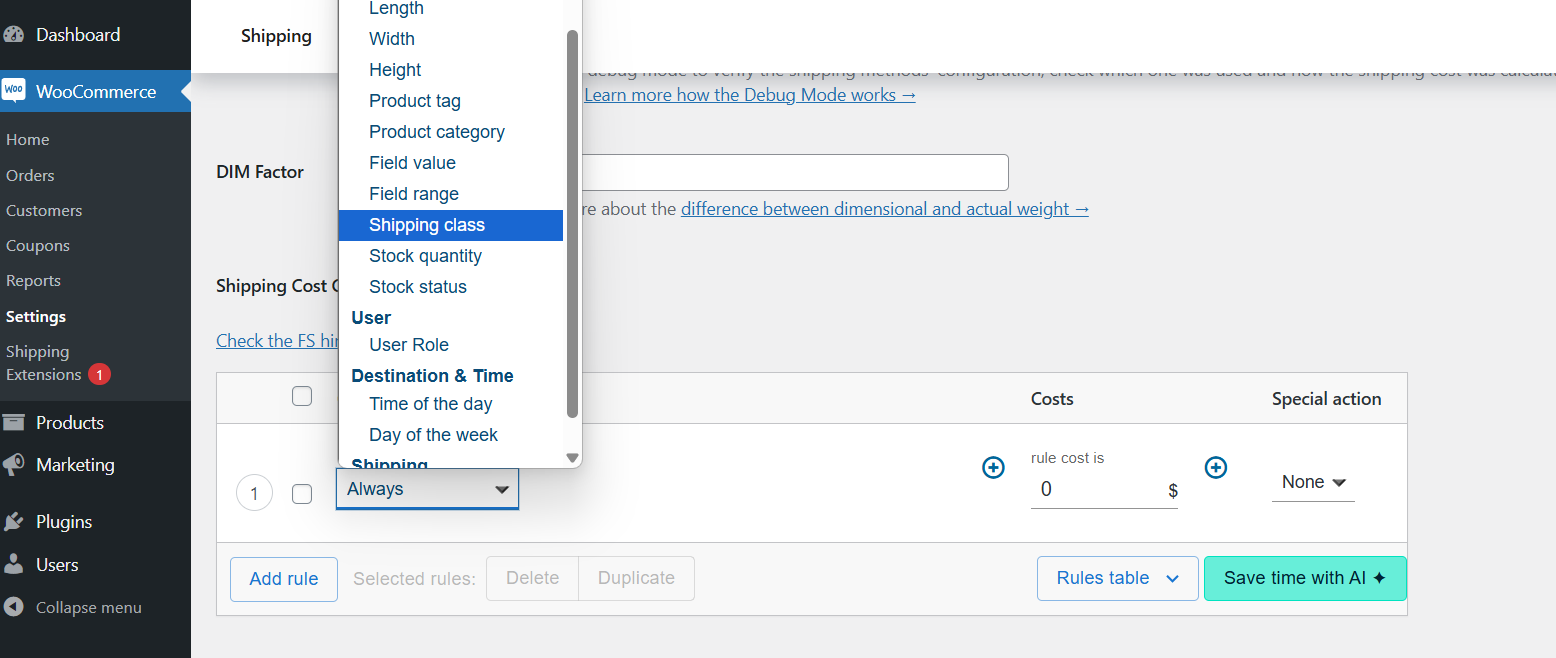
Then, select one of the shipping classes from your store and set it’s cost.
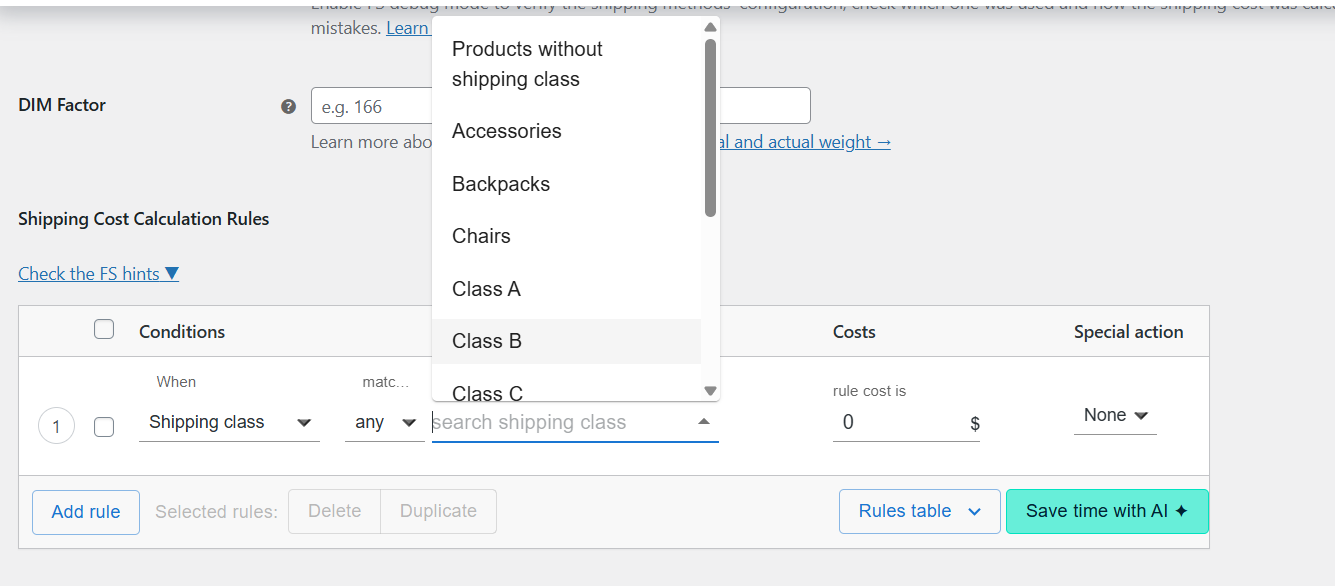
In my case, I set a $15 shipping cost for the backpacks shipping class.
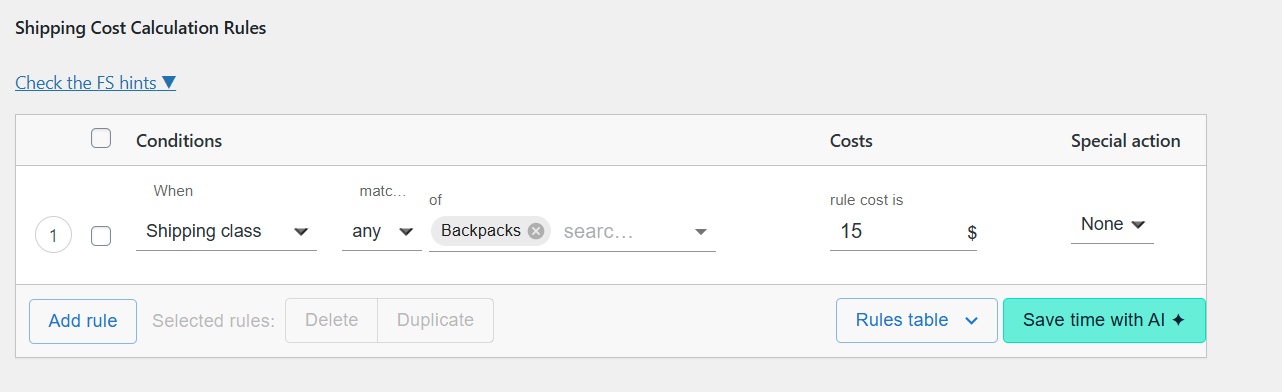
Thus, if the shopping cart shows a product with the assigned shipping class “backpacks”, the shipping cost will be $15. You can repeat the process to apply different formulas to multiple shipping classes. Once done, click Save changes to apply the rules.
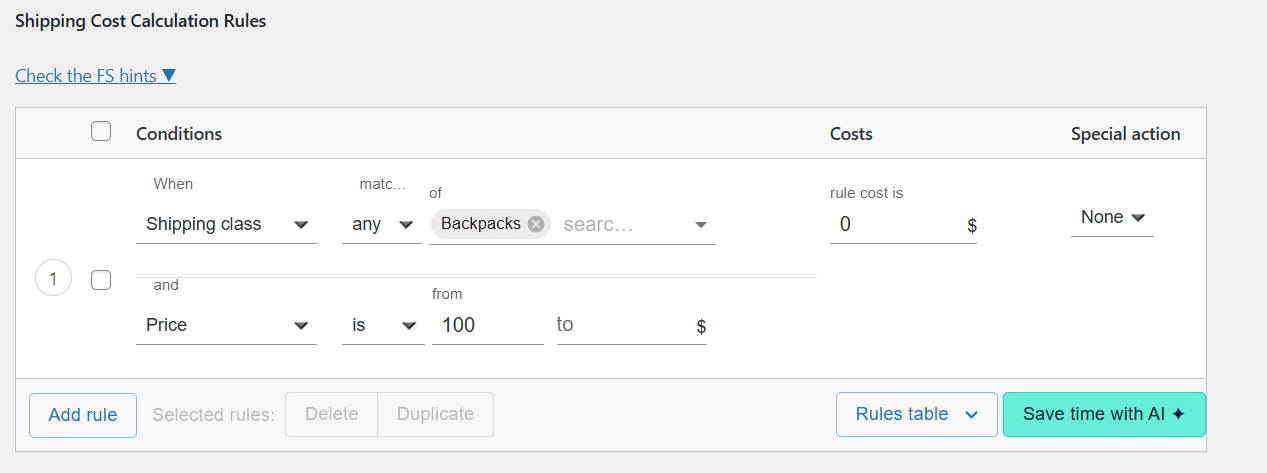
This is a foundational setup, but it’s only the beginning of what’s possible with shipping classes in WooCommerce. By combining shipping classes with additional conditions, you can create highly customized shipping logic. Examples? Here you are:
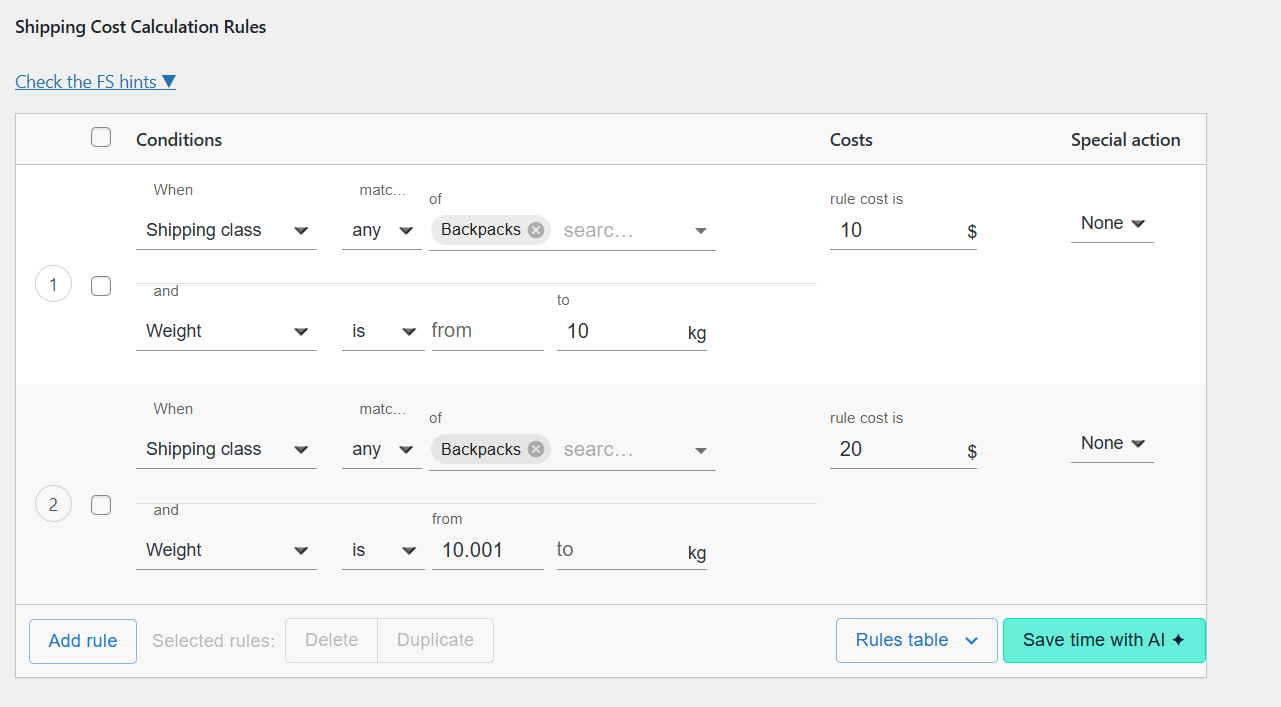
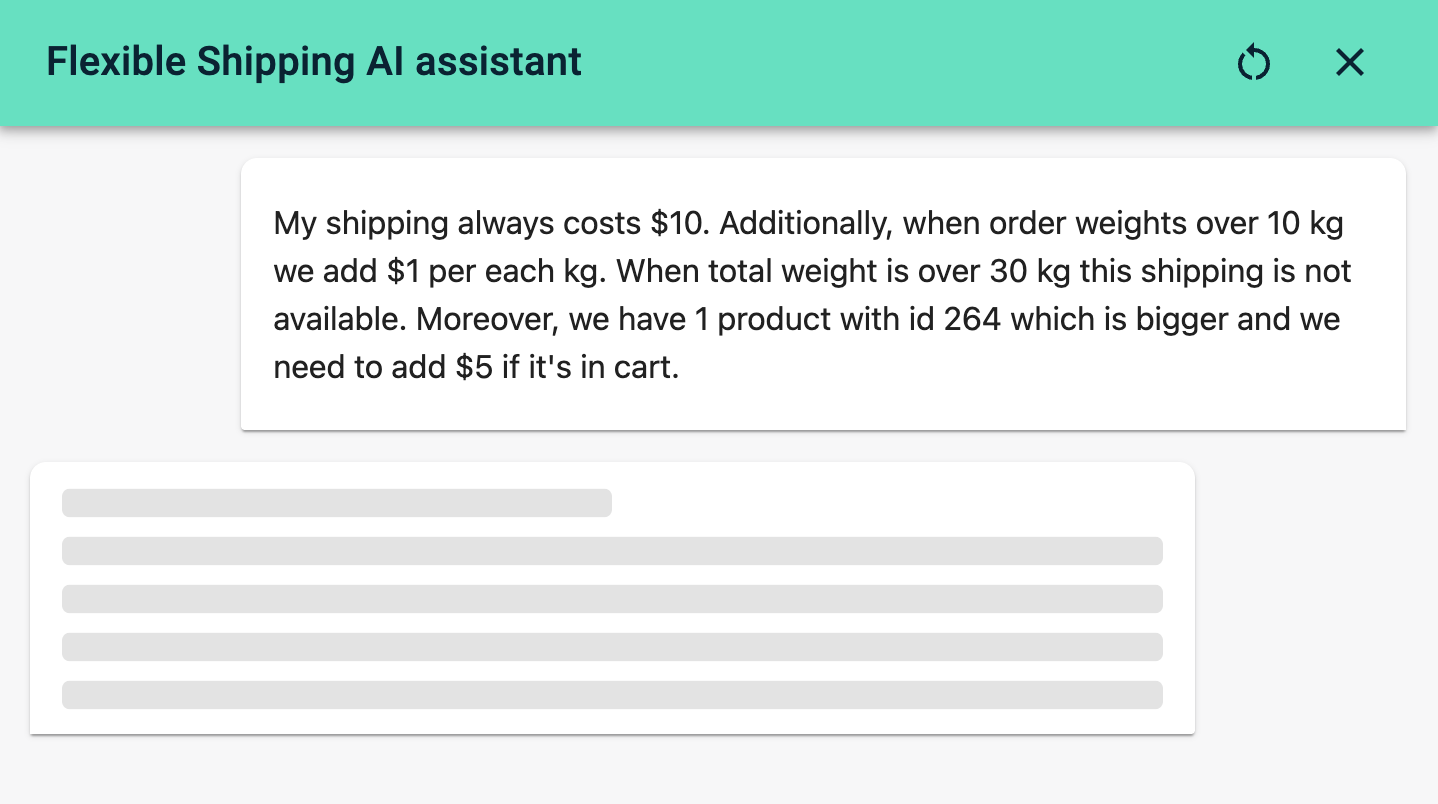
Each of these scenarios is quite complicated. If you don’t know how to set up your scenario, you can use the AI assistant that is built into the Flexible Shipping PRO plugin.
The effective use of shipping classes WooCommerce formulas can dramatically impact your e-commerce store‘s success in several ways:
By investing the time to understand and implement shipping classes WooCommerce formulas, you’re setting up a more robust, profitable, and customer-friendly e-commerce operation. This is a crucial step in optimizing your overall WooCommerce shipping strategy.
Our team usually replies within a few hours. Ask away — we'll help you find the right solution for your store.

Content Writer at Octolize
Bartosz Gajewski is a content and marketing specialist with a solid background in SEO, WordPress content strategy, and technical documentation for digital products. With years of hands-on experience in both in-house and freelance roles, he supports tech companies – especially in the SaaS and e-commerce space – by creating content that informs, engages, and drives results.
His approach blends storytelling with data-driven SEO, and he’s been involved in projects ranging from rebranding and product marketing to growth experiments and copywriting for complex software tools. On the blog, he shares actionable insights from his work across marketing teams, product documentation, and online store optimization.


Learn how Octolize solutions helped WooCommerce store based in the United Kingdom set up shipping scenarios.

Learn how Octolize helped Shopify store based in the USA set up distance based rates with a usage of Octolize Distance Based Rates.

Learn how Octolize helped NGO set up their WooCommerce rates with a usage of Flexible Shipping PRO.