- Home
- WooCommerce
- What plugin are you looking for?
- Shopify
- What Do I Need?
- About us
- Blog
- Docs
- Contact us
- What can we help you with?

Running a shop and willing to offer free shipping for some products and the paid one for others? Wondering how to combine them when they are both in the cart? Check our guide and learn how to configure properly the shipping cost.
Putting together these two groups of products might turn out to be essential in many scenarios. No matter what kind of products you are selling. According to the latest research, the shipping cost is still considered one of the most important factors when it comes to user experience. The right way to combine the free and paid shipping classes is certainly something our support team, is often dealing with. That’s why we decided to bring it closer and provide you with the ready solution below.
The configuration of the scenario where the free and paid shipping are combined should be done similarly to assigning the free shipping to the specific products I described in the previous article. It requires using the shipping classes as well, and this time I will also use the…
Probably the only Table Rate Shipping plugin for WooCommerce you will ever need. Use the shipping classes, create many shipping methods in different shipping zones and simply define the shipping rules based on weight, order totals or item quantity.
View DetailsorAdd to cartFirst, choose WooCommerce → Settings → Shipping → Shipping Classes → Add Shipping Class from the sidebar and create two new shipping classes. Let’s call them Free shipping and Paid shipping for the purpose of this guide:

If you need a quick reminder on how they work, please check our guide: How to use the shipping classes? →
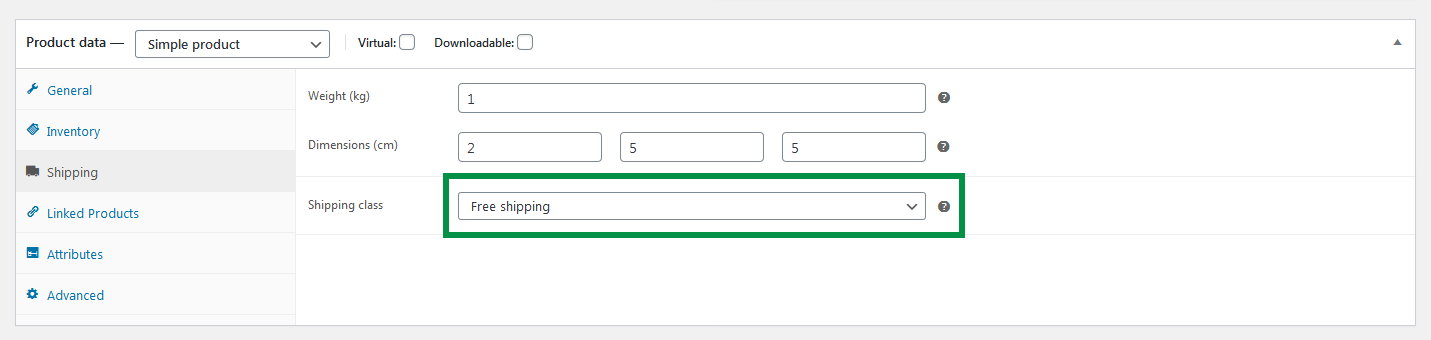
After that, assign them properly to the products you want to be shipped for free and for which the customer should be charged for shipping. At the product edit screen, scroll down to the Product Data section. In the Shipping tab, choose from the dropdown list the right Shipping class using one of the two you’ve previously created (Free shipping or Paid shipping):
Repeat this step for all the products you want the free and paid shipping combined calculation rules to be applied. If you’ve already set the correct shipping classes for all the products, proceed to the next step.
Remember to save the changes you’ve made every time with Update button.
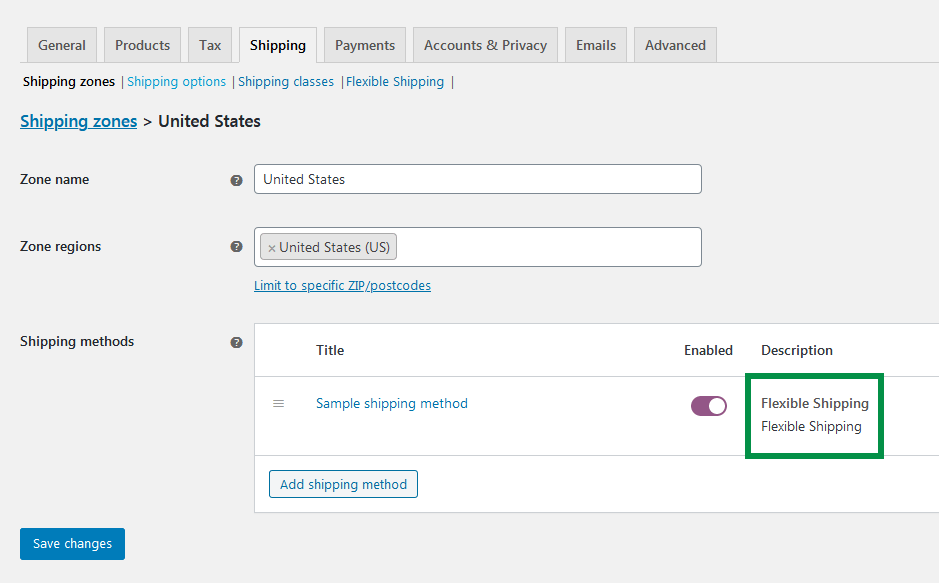
Now, when the shipping classes are already created and assigned to the products, let’s move to defining the shipping cost rules. Start with creating a new shipping method handled by Flexible Shipping:
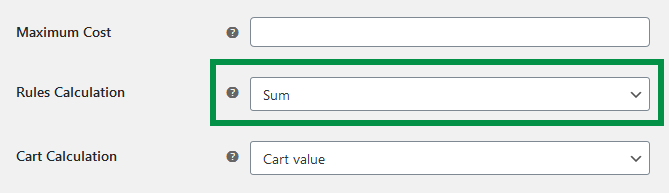
Hit the Edit link, which will appear after moving the mouse over the shipping method’s title, and go to the shipping method configuration screen. Make sure the Rules calculation is set to Sum:
Fill the rest of the required fields above. Next, scroll down to the Shipping Cost Calculation Rules table. Add the following rule for the products with the Free shipping class:
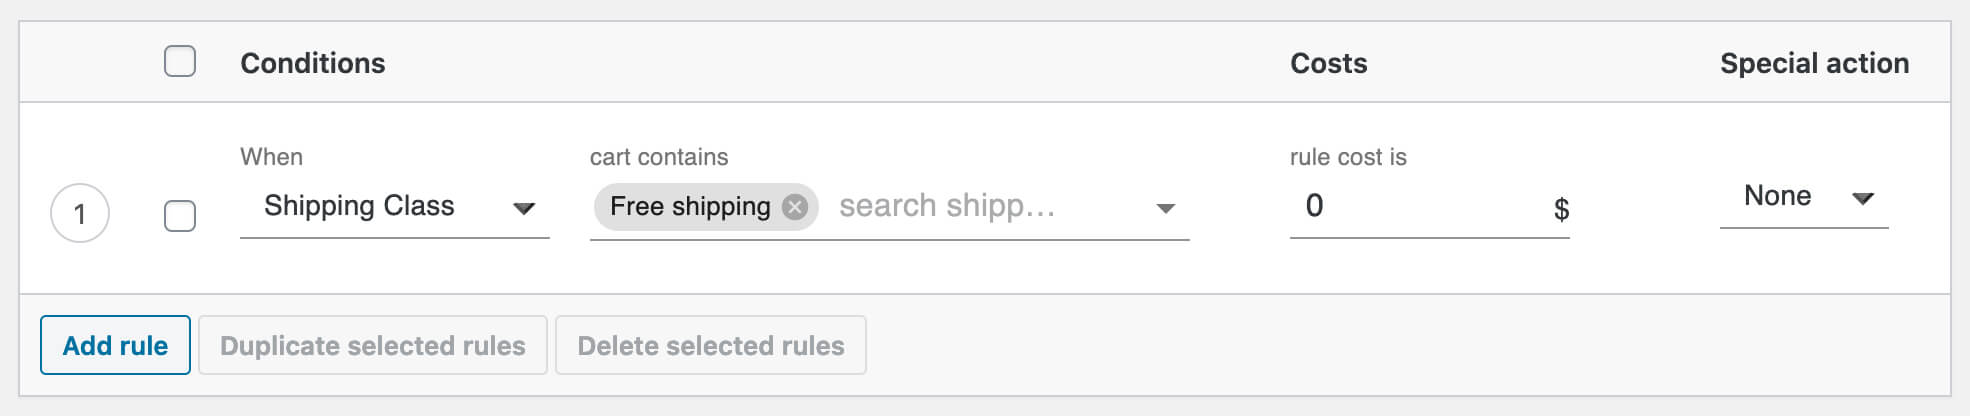
If set this way, shipping the products with the Free shipping shipping class will always be free, no matter how many of them are in the cart.
Finally, let’s define the rules for the products with Paid shipping shipping class. Create the additional rules using the data below to create 3 weight ranges:
Apply the changes using the Save changes button below.
Your current shipping cost rules setup should look like this:

Interested in Flexible Shipping PRO? Want to learn more about its features? Check out our videos:
Setting up the shipping cost rules the way described above will cause to not charge the customer for shipping the products with Free shipping class. It will calculate shipping for the products with Paid shipping class based on the previously defined weight ranges. Moreover, if customers place products with both shipping classes in the cart, their shipping cost will sum up. In other words, they will add the cost-free shipping to the weight-based and paid shipping. That will work on the same basis as if they were considering only the paid shipping.
Our team usually replies within a few hours. Ask away — we'll help you find the right solution for your store.


Learn how Octolize solutions helped WooCommerce store based in the United Kingdom set up shipping scenarios.
Learn how Octolize helped Shopify store based in the USA set up distance based rates with a usage of Octolize Distance Based Rates.

Learn how Octolize helped NGO set up their WooCommerce rates with a usage of Flexible Shipping PRO.